Page 25 of 148

REAR WINDOW WIPER
Rotate the end of the lever up one position for
intermittent, or two positions for continuous
operation.
When the lever in is the intermittent position,
the wiper operates at intervals corresponding
with vehicle speed. When you move the select
lever to the “R” position, the wiper will switch
to continuous operation. It will return to
intermittent operation when you move the
select lever out of “R”.
Rotate the dial up from the continuous operation position or down from the off position to
spray washer fluid. The washer sprays and wiper operates until you release the dial, and
then returns to the previous position.
ONE-TOUCH INTERIOR LIGHTING(if equipped)
When your interior lights are set to
the “DOOR” position in the
overhead console, pressing the
One-Touch Interior Lighting
Switch conveniently turns on all
the map lights and reading lights
at once. Pressing the switch again
turns all the map and reading
lights off. Once the lights are
turned on using the switch, you
can also turn them off by locking
the doors using the key
fob/transmitter, door handle, or
Power Rear Gate Lock Switch.
CONTROLS
23
Page 26 of 148

OVERHEAD CONSOLE
1SOS Emergency
Assistance:Press the
“SOS” button to connect
with a SUBARU STARLINK
®
Customer Care Advisor.
(Subscription required.)
Press and hold the button for
about two seconds to cancel
the call.
For more information,
please refer to page 81 in
this Getting Started Guide or
"Introduction" in your
SUBARU STARLINK
®Safety
and Security Owner’s Manual.
2Enhanced Roadside Assistance:Press the “i” button to connect with a SUBARU
STARLINK
®Roadside Assistance Provider. (Subscription required.) Press and hold
the button for about two seconds to cancel the call.
For more information, please refer to page 81 in this Getting Started Guide or
"Introduction" in your SUBARU STARLINK®Safety and Security Owner’s Manual.
3Lane Departure Warning OFF switch:Press and hold this switch for two seconds to
turn off Lane Departure Warning and Lane Sway Warning functions. Press and hold
the switch again for two seconds to turn the functions back on.
For more information, please refer to page 100 in this Getting Started Guide or
"Lane Departure Warning" in your EyeSight®Owner’s Manual.
4Power Sunshade/Moonroof Switches:Operate these switches to open and close
the sunshade or tilt and slide the moonroof.
For more information, please refer to page 33 in this Getting Started Guide or
"Keys and Doors" in your Owner’s Manual.
5Pre-Collision Braking System OFF switch:Press and hold this switch for two
seconds to turn off the Pre-Collision Braking System (including Pre-Collision Brake
Assist) and Pre-Collision Throttle Management. Press and hold the switch again for
two seconds to turn the systems back on.
For more information, please refer to page 100 in this Getting Started Guide or
"Pre-Collision Braking System" in your EyeSight®Owner’s Manual.
CONTROLS
24
Page 27 of 148
6Automatic Illumination:When the switch is in the “DOOR” position, the map lights
illuminate when any door is opened, the doors are unlocked using the remote keyless
entry system or keyless access function, or the ignition is turned from “ON” or “ACC”
to “LOCK”/“OFF”.
7Map Lights:Press a map light to turn it on or off.
CONTROLS
25
Page 33 of 148
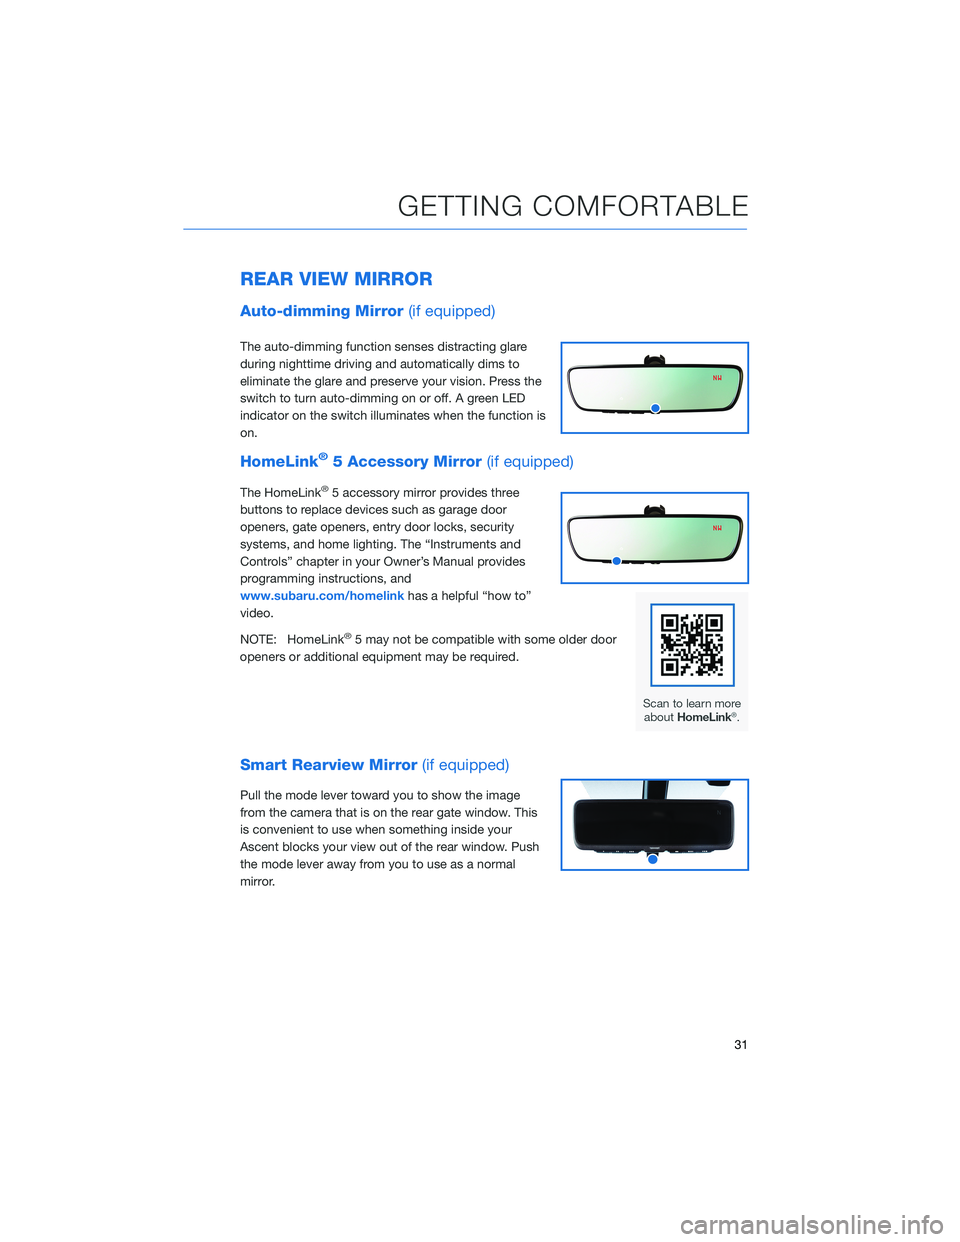
REAR VIEW MIRROR
Auto-dimming Mirror(if equipped)
The auto-dimming function senses distracting glare
during nighttime driving and automatically dims to
eliminate the glare and preserve your vision. Press the
switch to turn auto-dimming on or off. A green LED
indicator on the switch illuminates when the function is
on.
HomeLink®5 Accessory Mirror(if equipped)
The HomeLink®5 accessory mirror provides three
buttons to replace devices such as garage door
openers, gate openers, entry door locks, security
systems, and home lighting. The “Instruments and
Controls” chapter in your Owner’s Manual provides
programming instructions, and
www.subaru.com/homelinkhas a helpful “how to”
video.
NOTE: HomeLink
®5 may not be compatible with some older door
openers or additional equipment may be required.
Smart Rearview Mirror(if equipped)
Pull the mode lever toward you to show the image
from the camera that is on the rear gate window. This
is convenient to use when something inside your
Ascent blocks your view out of the rear window. Push
the mode lever away from you to use as a normal
mirror.
GETTING COMFORTABLE
31
Page 38 of 148

8Recirculated/Outside Air Button:Press this button to prevent outside air from
entering your Subaru. Press the button again to allow outside air into your Subaru.
NOTE: To prevent windshield fogging, do not remain in the recirculated mode for an
extended period of time.
9Defroster Button:Press this button to defrost or dehumidify the windshield and front
door windows.
NOTE: The air conditioning compressor operates automatically to defrost the
windshield more quickly. However, the indicator on the air conditioner button may not
illuminate.
10Rear Window Defogger Button:Press this button to turn on the defogger. It will
automatically turn off after about 15 minutes. If the window clears before then, press
the button again to turn it off. If equipped, the outside mirror defogger and windshield
wiper de-icer will also activate. You can customize this function for continuous
operation through the Combination Meter Display (CMD) or the SUBARU STARLINK
®
touch screen.
11Rear Climate Control Button:Press this button to operate the rear climate control
with the front climate control panel. Press the button while the rear climate control is
on. Press and hold to lock the rear climate control. The lock indicator will illuminate
on the front and rear climate control panels.
12Rear Climate On and Off Button:Press this button to turn the rear climate control
system on or off.
GETTING COMFORTABLE
36
Page 45 of 148
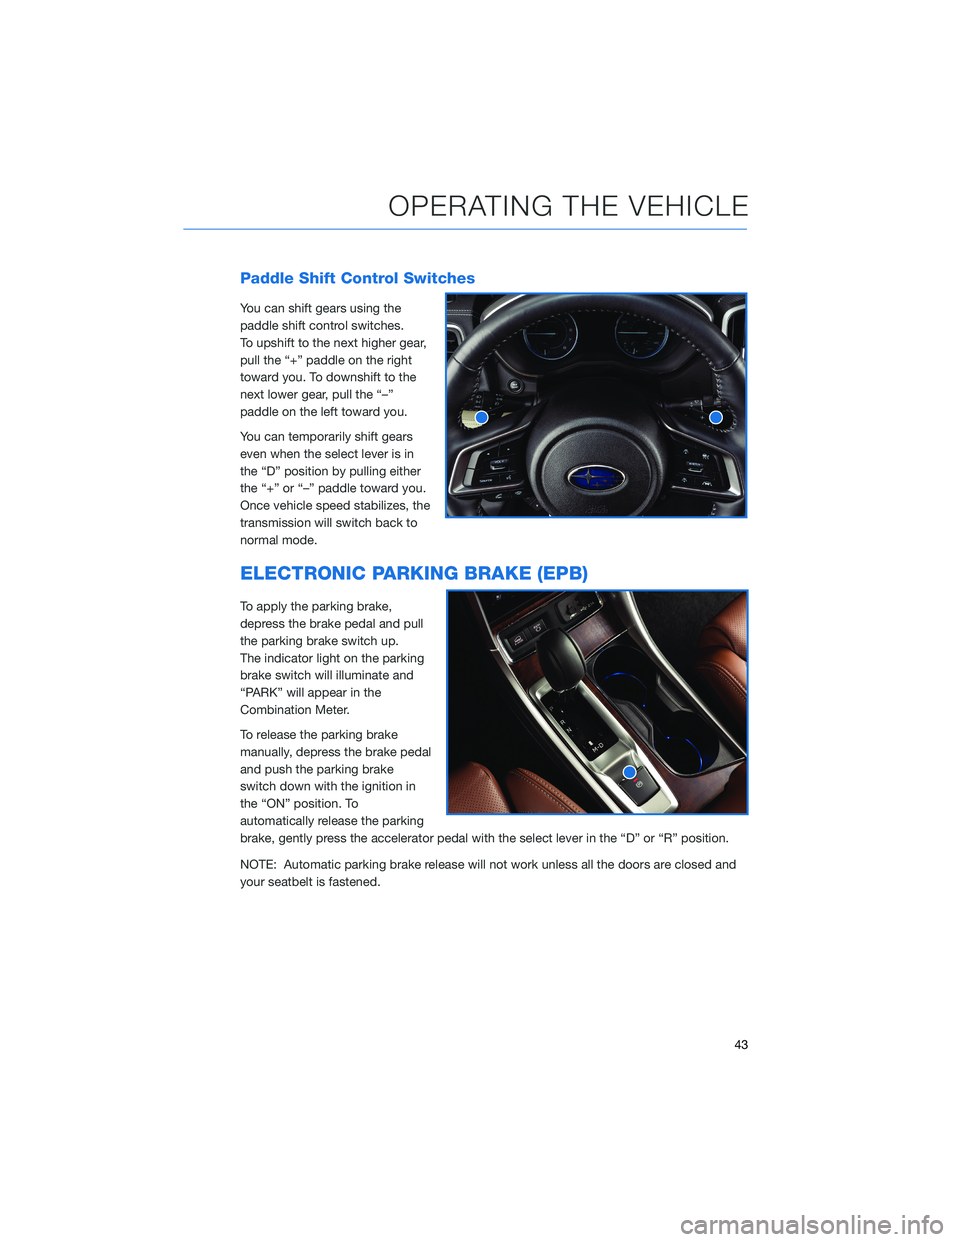
Paddle Shift Control Switches
You can shift gears using the
paddle shift control switches.
To upshift to the next higher gear,
pull the “+” paddle on the right
toward you. To downshift to the
next lower gear, pull the “–”
paddle on the left toward you.
You can temporarily shift gears
even when the select lever is in
the “D” position by pulling either
the “+” or “–” paddle toward you.
Once vehicle speed stabilizes, the
transmission will switch back to
normal mode.
ELECTRONIC PARKING BRAKE (EPB)
To apply the parking brake,
depress the brake pedal and pull
the parking brake switch up.
The indicator light on the parking
brake switch will illuminate and
“PARK” will appear in the
Combination Meter.
To release the parking brake
manually, depress the brake pedal
and push the parking brake
switch down with the ignition in
the “ON” position. To
automatically release the parking
brake, gently press the accelerator pedal with the select lever in the “D” or “R” position.
NOTE: Automatic parking brake release will not work unless all the doors are closed and
your seatbelt is fastened.
OPERATING THE VEHICLE
43
Page 48 of 148
TURNING OFF THE VEHICLE
Without Push-button Ignition
To stop the engine:
1. Stop your Subaru completely.
2. Move the select lever to the “P” position.
3. Turn the ignition switch to LOCK/OFF.
NOTE: If equipped, the windows will remain active for about 40 seconds or until a front
door is opened, whichever occurs first
With Push-button Ignition
To stop the engine:
1. Stop your Subaru completely.
2. Move the select lever to the “P” position.
3. Press the ignition switch to stop the engine.
NOTE: If equipped, the windows will remain active for about 40 seconds or until a front
door is opened, whichever occurs first
OPERATING THE VEHICLE
46
Page 49 of 148

FUEL FILLER LID
The fuel filler lid is located toward the rear of the
passenger side. To open the lid:
1. Make sure your Subaru is stopped and the select
lever is placed in the “P” position. Then, turn the
ignition to the "LOCK"/ "OFF" position.
2. The fuel filler lid is unlocked by using the unlock
switch in the door, access key fob, or door handles.
3. Push the rear side of the lid.
4. When the lid opens slightly, open it further by hand.
While refueling, place the fuel filler cap on the cap
holder inside the lid.
After refueling, put the cap back on and turn it
clockwise until you hear a clicking noise. Be certain
not to catch the tether under the cap while tightening.
To close the lid, press it until you hear it latch.
NOTE: The Check Engine warning light may illuminate if the fuel filler cap is not tightened
properly.
FUEL SPECIFICATIONS AND CAPACITY
2.4L Engine Fuel Specifications and Capacity
Fuel Octane Rating
87 AKI or higher
Ethanol Content Limit
No more than 15%
Fuel Tank Capacity
19.3 US Gallons
Low Fuel Warning Light
2.6 US Gallons
Fuel Filler Lid and Cap
REFUELING
47

