2022 RAM PROMASTER CITY fuel
[x] Cancel search: fuelPage 51 of 260

GETTING TO KNOW YOUR INSTRUMENT PANEL49
Electronic Stability Control (ESC) Warning
Light — If Equipped
The ESC Indicator Light in the
instrument cluster will come on when
the ignition is placed in the ON/RUN or
MAR/ON/RUN position, and when ESC
is activated. It should go out with the engine
running. If the ESC Indicator Light comes on continuously with the engine running, a
malfunction has been detected in the ESC system.
If this light remains on after several ignition cycles,
and the vehicle has been driven several miles
(kilometers) at speeds greater than 30 mph
(48 km/h), see an authorized dealer as soon as
possible to have the problem diagnosed and
corrected.
The ESC OFF Indicator Light and the ESC Indi
-
cator Light come on momentarily each time the
ignition is placed in the ON/RUN or MAR/ON/
RUN position.
Each time the ignition is turned to ON/RUN or
MAR/ON/RUN, the ESC system will be on, even
if it was turned off previously.
The ESC system will make buzzing or clicking
sounds when it is active. This is normal; the
sounds will stop when ESC becomes inactive.
This light will come on when the vehicle is in an
ESC event.
Electronic Stability Control (ESC) OFF
Warning Light — If Equipped
This warning light indicates the ESC is off.
Each time the ignition is turned to
ON/RUN or ACC/ON/RUN, the ESC
system will be on, even if it was turned
off previously.
GREEN INDICATOR LIGHTS
Turn Signal Indicator Lights
When the left or right turn signal is
activated, the turn signal indicator will
flash independently and the
corresponding exterior turn signal lamps
will flash. Turn signals can be activated when the
multifunction lever is moved down (left) or up
(right).
NOTE:
A continuous chime will sound if the vehicle is
driven more than 1 mile (1.6 km) with either
turn signal on.
Check for an inoperative outside light bulb if
either indicator flashes at a rapid rate.
Parking/Headlights On Indicator Light
This indicator light will illuminate when
the parking lights or headlights are
turned on Ú page 24.
Front Fog Indicator Light — If Equipped
This indicator light will illuminate when
the front fog lights are on Ú page 24.
WARNING!
A malfunctioning catalytic converter, as
referenced above, can reach higher
temperatures than in normal operating
conditions. This can cause a fire if you drive
slowly or park over flammable substances such
as dry plants, wood, cardboard, etc. This could
result in death or serious injury to the driver,
occupants or others.
CAUTION!
Prolonged driving with the Malfunction Indicator
Light (MIL) on could cause damage to the
vehicle control system. It also could affect fuel
economy and driveability. If the MIL is flashing,
severe catalytic converter damage and power
loss will soon occur. Immediate service is
required.
3
22_VM_OM_EN_USC_t.book Page 49
Page 52 of 260
50GETTING TO KNOW YOUR INSTRUMENT PANEL
Cruise Control Indicator Light —
If Equipped
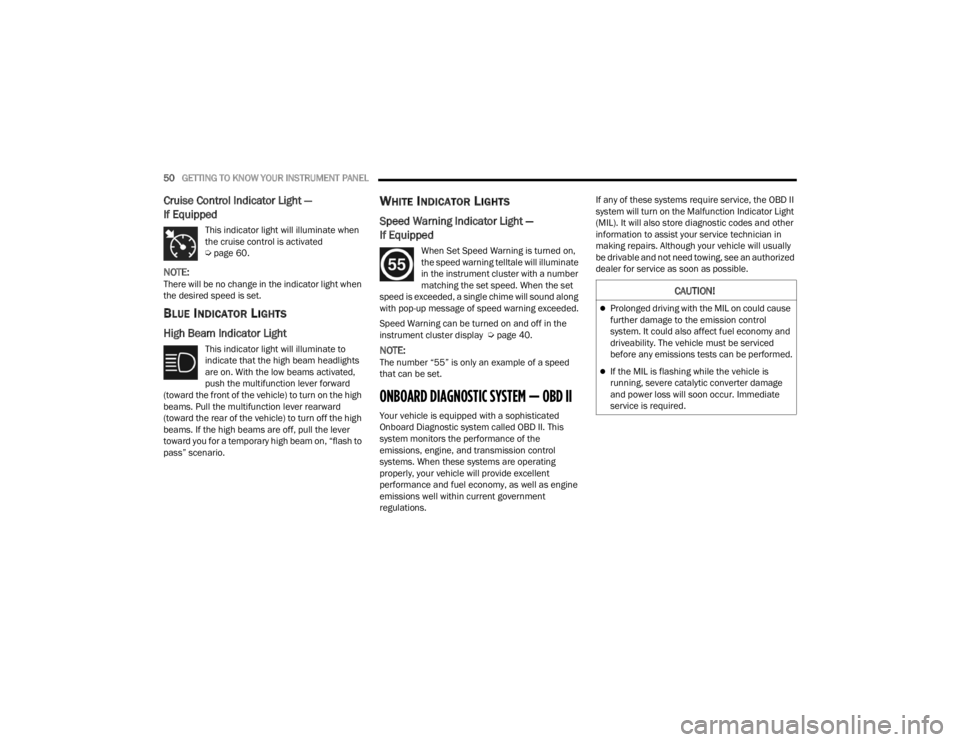
This indicator light will illuminate when
the cruise control is activated
Úpage 60.
NOTE:There will be no change in the indicator light when
the desired speed is set.
BLUE INDICATOR LIGHTS
High Beam Indicator Light
This indicator light will illuminate to
indicate that the high beam headlights
are on. With the low beams activated,
push the multifunction lever forward
(toward the front of the vehicle) to turn on the high
beams. Pull the multifunction lever rearward
(toward the rear of the vehicle) to turn off the high
beams. If the high beams are off, pull the lever
toward you for a temporary high beam on, “flash to
pass” scenario.
WHITE INDICATOR LIGHTS
Speed Warning Indicator Light —
If Equipped
When Set Speed Warning is turned on,
the speed warning telltale will illuminate
in the instrument cluster with a number
matching the set speed. When the set
speed is exceeded, a single chime will sound along
with pop-up message of speed warning exceeded.
Speed Warning can be turned on and off in the
instrument cluster display Ú page 40.
NOTE:The number “55” is only an example of a speed
that can be set.
ONBOARD DIAGNOSTIC SYSTEM — OBD II
Your vehicle is equipped with a sophisticated
Onboard Diagnostic system called OBD II. This
system monitors the performance of the
emissions, engine, and transmission control
systems. When these systems are operating
properly, your vehicle will provide excellent
performance and fuel economy, as well as engine
emissions well within current government
regulations. If any of these systems require service, the OBD II
system will turn on the Malfunction Indicator Light
(MIL). It will also store diagnostic codes and other
information to assist your service technician in
making repairs. Although your vehicle will usually
be drivable and not need towing, see an authorized
dealer for service as soon as possible.
CAUTION!
Prolonged driving with the MIL on could cause
further damage to the emission control
system. It could also affect fuel economy and
driveability. The vehicle must be serviced
before any emissions tests can be performed.
If the MIL is flashing while the vehicle is
running, severe catalytic converter damage
and power loss will soon occur. Immediate
service is required.
22_VM_OM_EN_USC_t.book Page 50
Page 55 of 260

STARTING AND OPERATING53
IF ENGINE FAILS TO START
If the engine fails to start after you have followed
the “Normal Starting” or “Extreme Cold Weather”
procedure, and has not experienced an extended
park condition as identified in “Extended Park
Starting” procedure, it may be flooded. Push the
accelerator pedal all the way to the floor and hold
it there. Crank the engine for no more than 10
seconds. This should clear any excess fuel in case
the engine is flooded. Leave the ignition key in the
MAR (ON/RUN) position, release the accelerator
pedal and repeat the “Normal Starting” procedure.
AFTER STARTING
The idle speed is controlled automatically, and it
will decrease as the engine warms up.
ENGINE BLOCK HEATER — IF EQUIPPED
The engine block heater warms the engine and
permits quicker starts in cold weather.
Connect the cord to a 110-115 Volt AC electrical
outlet with a grounded, three-wire extension cord.
For ambient temperatures below 0°F (-18°C), the
engine block heater is recommended. For ambient
temperatures below -20°F (-29°C), the engine
block heater is required.
The engine block heater cord is routed under the
hood, behind to the driver’s side headlamp. Follow
the steps below to properly use the engine block
heater:
1. Locate the engine block heater cord (behind
the driver’s side headlamp).
2. Undo the hook-and-loop strap that secures the heater cord in place. 3. Pull the cord to the front of the vehicle and
plug it into a grounded, three-wire extension
cord.
4. After the vehicle is running, reattach the cord to the hook-and-loop strap and properly stow
away behind the driver’s side headlamp.
NOTE:
The engine block heater cord is a factory
installed option. If your vehicle is not equipped,
heater cords are available from an authorized
dealer.
The engine block heater will require 110 Volts
AC and 6.5 Amps to activate the heater
element.
The engine block heater must be plugged in at
least one hour to have an adequate warming
effect on the engine.
WARNING!
Never pour fuel or other flammable liquid into
the throttle body air inlet opening in an
attempt to start the vehicle. This could result
in flash fire causing serious personal injury.
Do not attempt to push or tow your vehicle to
get it started. Vehicles equipped with an auto -
matic transmission cannot be started this
way. Unburned fuel could enter the catalytic
converter and once the engine has started,
ignite and damage the converter and vehicle.
If the vehicle has a discharged battery,
booster cables may be used to obtain a start
from a booster battery or the battery in
another vehicle. This type of start can be
dangerous if done improperly Ú page 181.
CAUTION!
To prevent damage to the starter, do not
continuously crank the engine for more than 10
seconds at a time. Wait 10 to 15 seconds before
trying again.
WARNING!
Remember to disconnect the engine block
heater cord before driving. Damage to the
110-115 Volt electrical cord could cause
electrocution.
4
22_VM_OM_EN_USC_t.book Page 53
Page 58 of 260

56STARTING AND OPERATING
KEY IGNITION PARK INTERLOCK
This vehicle is equipped with a Key Ignition Park
Interlock which requires the transmission to be in
PARK before the ignition can be turned to the full
STOP (OFF/LOCK) (key removal) position. The key
can only be removed from the ignition when the
ignition is in the STOP (OFF/LOCK) position, and
once removed, the transmission is locked in PARK.
BRAKE/TRANSMISSION SHIFT
I
NTERLOCK (BTSI) SYSTEM
This vehicle is equipped with a BTSI that holds the
transmission gear selector in PARK unless the
brakes are applied. To shift the transmission out of
PARK, the ignition must be in the MAR (ON/RUN)
position (engine running or not) and the brake
pedal must be pressed. The brake pedal must also be pressed to shift from
NEUTRAL into DRIVE or REVERSE when the vehicle
is stopped or moving at low speeds.
9-SPEED AUTOMATIC TRANSMISSION
The transmission gear range (PRND) is displayed
both beside the gear selector and in the
instrument cluster display. To select a gear range,
push the lock button on the gear selector and
move the lever rearward or forward. You must also
press the brake pedal to shift the transmission out
of PARK (or NEUTRAL, when the vehicle is stopped
or moving at low speeds). Select the DRIVE range
for normal driving.
NOTE:In the event of a mismatch between the gear
selector position and the actual transmission gear
(for example, driver selects REVERSE while driving
forward), the position indicator will blink continu
-
ously until the selector is returned to the proper
position, or the requested shift can be completed.
The electronically controlled transmission adapts
its shift schedule based on driver inputs, along
with environmental and road conditions. The
transmission electronics are self-calibrating;
therefore, the first few shifts on a new vehicle may
be somewhat abrupt. This is a normal condition,
and precision shifts will develop within a few
hundred miles or kilometers. The 9-speed transmission has been developed to
meet the needs of current and future FWD/AWD
vehicles. Software and calibration is refined to
optimize the customer’s driving experience and
fuel economy. By design, some vehicle and
driveline combinations utilize NINTH gear only in
very specific driving situations and conditions.
Only shift from DRIVE to PARK or REVERSE when
the accelerator pedal is released and the vehicle is
stopped. Be sure to keep your foot on the brake
pedal when shifting between these gears.
The transmission gear selector provides PARK,
REVERSE, NEUTRAL, DRIVE, and Electronic Range
Select (ERS) shift positions. Manual downshifts can
be made using the ERS shift control. Moving the gear
selector into the ERS “-”/”+” position (beside the
DRIVE position) activates ERS mode, displays the
current gear in the instrument cluster, and prevents
automatic upshifts beyond this gear. In ERS mode,
toggling the gear selector forward “-” or rearward “+”
will change the highest available gear
Ú
page 59.
NOTE:If the gear selector cannot be moved to the PARK,
REVERSE, or NEUTRAL position (when pushed
forward) it is probably in the ERS “+”/”-” position
(beside the DRIVE position). In ERS mode, the
transmission gear limit (1, 2, 3, etc.) is displayed in
the instrument cluster. Move the gear selector to
the right (into the DRIVE [D] position) for access to
PARK, REVERSE, and NEUTRAL.
CAUTION!
Shift into or out of PARK or REVERSE only after
the vehicle has come to a complete stop.
Do not shift between PARK, REVERSE,
NEUTRAL, or DRIVE when the engine is above
idle speed.
Before shifting into any gear, make sure your
foot is firmly pressing the brake pedal.
22_VM_OM_EN_USC_t.book Page 56
Page 60 of 260

58STARTING AND OPERATING
The following indicators should be used to ensure
that you have properly engaged the transmission
into the PARK position:
When shifting into PARK, push the lock button
on the gear selector and firmly move the gear
selector all the way forward until it stops and is
fully seated.
Look at the transmission gear position display
and verify that it indicates the PARK position.
With brake pedal released, verify that the gear
selector will not move out of PARK.
REVERSE (R)
This range is for moving the vehicle backward.
Shift into REVERSE only after the vehicle has come
to a complete stop.
NEUTRAL (N)
Use this range when the vehicle is standing for
prolonged periods with the engine running. Apply
the parking brake and shift the transmission into
PARK if you must exit the vehicle.
DRIVE (D)
This range should be used for most city and
highway driving. It provides the smoothest upshifts
and downshifts, and the best fuel economy. The
transmission automatically upshifts through all
forward gears.
When frequent transmission shifting occurs (such
as when operating the vehicle under heavy loading
conditions, in hilly terrain, traveling into strong
head winds, or while towing a heavy trailer), use
the Electronic Range Select (ERS) shift control to
select a lower gear range Úpage 59. Under these
conditions, using a lower gear range will improve
performance and extend transmission life by
reducing excessive shifting and heat buildup.
If the transmission temperature exceeds normal
operating limits, the transmission controller may
modify the transmission shift schedule, reduce
engine torque, and/or expand the range of torque
converter clutch engagement. This is done to
prevent transmission damage due to overheating.
Never leave children alone in a vehicle, or with
access to an unlocked vehicle. Allowing chil -
dren to be in a vehicle unattended is
dangerous for a number of reasons. A child or
others could be seriously or fatally injured.
Children should be warned not to touch the
parking brake, brake pedal or the transmis -
sion gear selector.
Do not leave the ignition key in or near the
vehicle (or in a location accessible to chil-
dren). A child could operate power windows,
other controls, or move the vehicle.
CAUTION!
Before moving the transmission gear selector
out of PARK, you must turn the ignition to the
ON/RUN position, and also press the brake
pedal. Otherwise, damage to the gear selector
could result.
DO NOT race the engine when shifting from
PARK or NEUTRAL into another gear range, as
this can damage the drivetrain.
WARNING!
WARNING!
Do not coast in NEUTRAL and never turn off the
ignition to coast down a hill. These are unsafe
practices that limit your response to changing
traffic or road conditions. You might lose control
of the vehicle and have a collision.
CAUTION!
Towing the vehicle, coasting, or driving for any
other reason with the transmission in NEUTRAL
can cause severe transmission damage.
For Recreational Towing Ú page 75.
For Towing A Disabled Vehicle Ú page 187.
22_VM_OM_EN_USC_t.book Page 58
Page 61 of 260

STARTING AND OPERATING59
If the transmission becomes extremely hot, the
Transmission Temperature Warning Light may
illuminate and the transmission may operate
differently until the transmission cools down.
During cold temperatures, transmission
operation may be modified depending on engine
and transmission temperature as well as vehicle
speed. This feature improves warm up time of the
engine and transmission to achieve maximum
efficiency. Engagement of the torque converter
clutch, and shifts into EIGHTH or NINTH gear, are
inhibited until the transmission fluid is warm
Ú
page 59. Normal operation will resume once
the transmission temperature has risen to a
suitable level.
Transmission Limp Home Mode
Transmission function is monitored electronically
for abnormal conditions. If a condition is detected
that could result in transmission damage,
Transmission Limp Home Mode is activated. In this
mode, the transmission may operate only in a fixed
gear, or may remain in NEUTRAL. The Malfunction
Indicator Light (MIL) may be illuminated. Limp
Home Mode may allow the vehicle to be driven to
an authorized dealer for service without damaging
the transmission. In the event of a momentary problem, the
transmission can be reset to regain all forward
gears by performing the following steps:
1. Stop the vehicle.
2. Shift the transmission into PARK.
3. Turn the ignition OFF.
4. Wait approximately 10 seconds.
5. Restart the engine.
6. Shift into the desired gear range. If the
problem is no longer detected, the
transmission will return to normal operation.
NOTE:
Even if the transmission can be reset, we recommend
that you visit an authorized dealer at your earliest
possible convenience. An authorized dealer has diag -
nostic equipment to assess the condition of your
transmission. If the transmission cannot be reset,
authorized dealer service is required.
Torque Converter Clutch
A feature designed to improve fuel economy has
been included in the automatic transmission on
your vehicle. A clutch within the torque converter
engages automatically at calibrated speeds. This
may result in a slightly different feeling or response
during normal operation in the upper gears. When
the vehicle speed drops or during some
accelerations, the clutch automatically
disengages.
NOTE:The torque converter clutch will not engage until
the transmission fluid is warm [usually after 1 to
3 miles (2 to 5 km) of driving]. Because the engine
speed is higher when the torque converter clutch is
not engaged, it may seem as if the transmission is
not shifting properly when cold. This is normal. The
torque converter clutch will function normally once
the transmission is sufficiently warm.
Electronic Range Select (ERS) Operation
The ERS shift control allows the driver to limit the
highest available gear. For example, if you set the
transmission gear limit to FIFTH gear, the
transmission will not shift above FIFTH gear, but
will shift through the lower gears normally.
You can switch between DRIVE and ERS mode at
any vehicle speed. When the gear selector is in the
DRIVE position, the transmission will operate
automatically, shifting between all available gears.
Moving the gear selector to the ERS position (beside
DRIVE) will activate ERS mode, display the current
gear in the instrument cluster, and set that gear as
the top available gear. Once in ERS mode, moving
the gear selector forward “-” or rearward “+” will
change the top available gear, which will be
displayed in the instrument cluster.
To exit ERS mode, simply return the gear selector
to the DRIVE position.4
22_VM_OM_EN_USC_t.book Page 59
Page 68 of 260

66STARTING AND OPERATING
NOTE:If snow, ice, mud, or any foreign substance builds
up on the camera lens, clean the lens, rinse with
water, and dry with a soft cloth. Do not cover the
lens.
REFUELING THE VEHICLE
The gas cap is located on the left side of the
vehicle. If the gas cap is lost or damaged, be sure
to use the correct replacement cap for this vehicle
1. Open the fuel filler door.
2. Remove the fuel cap by rotating it counter -
clockwise.
Fuel Filler Cap
NOTE:The driver's side sliding door cannot be opened
while the fuel door is open. This feature operates
only when the sliding door is in a closed position
prior to opening the fuel door.
3. Fully insert the gasoline nozzle into the filler
pipe.
4. Fill the vehicle with fuel.
NOTE:
When the fuel nozzle “clicks” or shuts off,
the fuel tank is full.
Wait five seconds before removing the fuel
nozzle to allow excess fuel to drain from the
nozzle.
5. Remove gasoline nozzle, reinstall fuel cap and close fuel filler door.
CAUTION!
To avoid vehicle damage, ParkView should
only be used as a parking aid. The ParkView
camera is unable to view every obstacle or
object in your drive path.
To avoid vehicle damage, the vehicle must be
driven slowly when using ParkView to be able
to stop in time when an obstacle is seen. It is
recommended that the driver look frequently
over his/her shoulder when using ParkView.
WARNING!
Never have any smoking materials lit in or
near the vehicle when the gas cap is removed
or the tank is being filled.
Never add fuel when the engine is running.
This is in violation of most state and federal
fire regulations and may cause the Malfunc -
tion Indicator Light (MIL) to turn on.
A fire may result if gasoline is pumped into a
portable container that is inside of a vehicle.
You could be burned. Always place gas
containers on the ground while filling.
CAUTION!
Damage to the fuel system or emissions
control system could result from using an
improper fuel tank filler tube cap. A poorly
fitting cap could let impurities into the fuel
system and may cause the Malfunction Indi -
cator Light (MIL) to turn on, due to fuel vapors
escaping from the system.
To avoid fuel spillage and overfilling, do not
“top off” the fuel tank after filling.
22_VM_OM_EN_USC_t.book Page 66
Page 69 of 260
STARTING AND OPERATING67
NOTE:
Tighten the fuel filler cap until you hear a
“clicking” sound. This is an indication that the
fuel filler cap is properly tightened.
If the gas cap is not tightened properly, the MIL
may come on. Be sure the gas cap is tightened
every time the vehicle is refueled.
VEHICLE LOADING
As required by National Highway Traffic Safety
Administration regulations, your vehicle has a
certification label affixed to the driver's side door or
B-pillar.
If seats are removed for carrying cargo, do not
exceed the specified GVWR and GAWR.
VEHICLE CERTIFICATION LABEL
Your vehicle has a Vehicle Certification Label
affixed to the driver’s side B-pillar or the rear of the
driver’s door.
The label contains the following information:
Name of manufacturer
Month and year of manufacture
Gross Vehicle Weight Rating (GVWR)
Gross Axle Weight Rating (GAWR) front and rear
Vehicle Identification Number (VIN)
Type of vehicle
Month, Day, and Hour of manufacture (MDH)
The bar code allows a computer scanner to read
the VIN.
GROSS VEHICLE WEIGHT RATING
(GVWR)
The GVWR is the total allowable weight of your
vehicle. This includes driver, passengers, and
cargo. The total load must be limited so that you do
not exceed the GVWR.
GROSS AXLE WEIGHT RATING (GAWR)
The GAWR is the maximum capacity of the front
and rear axles. Distribute the load over the front
and rear axles evenly. Make sure that you do not
exceed either front or rear GAWR.
TIRE SIZE
The tire size on the Vehicle Certification Label
represents the actual tire size on your vehicle.
Replacement tires must be equal to the load
capacity of this tire size.
RIM SIZE
This is the rim size that is appropriate for the tire
size listed.
INFLATION PRESSURE
This is the cold tire inflation pressure for your
vehicle for all loading conditions up to full GAWR.
CURB WEIGHT
The curb weight of a vehicle is defined as the total
weight of the vehicle with all fluids, including
vehicle fuel, at full capacity conditions, and with no
occupants or cargo loaded into the vehicle. The
front and rear curb weight values are determined
by weighing your vehicle on a commercial scale
before any occupants or cargo are added.
WARNING!
Because the front wheels steer the vehicle, it is
important that you do not exceed the maximum
front or rear GAWR. A dangerous driving
condition can result if either rating is exceeded.
You could lose control of the vehicle and have a
collision.
4
22_VM_OM_EN_USC_t.book Page 67