2022 RAM PROMASTER CITY oil change
[x] Cancel search: oil changePage 4 of 260
2
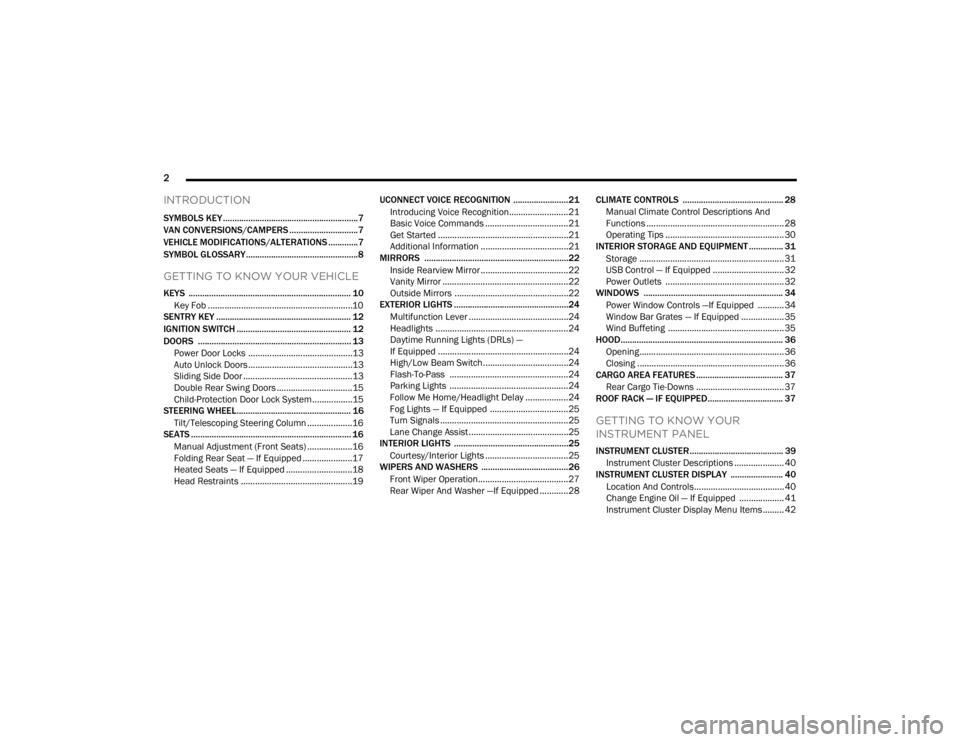
INTRODUCTION
SYMBOLS KEY ...........................................................7
VAN CONVERSIONS/CAMPERS ..............................7
VEHICLE MODIFICATIONS/ALTERATIONS .............7
SYMBOL GLOSSARY.................................................8
GETTING TO KNOW YOUR VEHICLE
KEYS ....................................................................... 10 Key Fob .............................................................10
SENTRY KEY ........................................................... 12
IGNITION SWITCH .................................................. 12
DOORS ................................................................... 13
Power Door Locks ............................................13
Auto Unlock Doors ............................................13
Sliding Side Door ..............................................13
Double Rear Swing Doors ................................15
Child-Protection Door Lock System.................15
STEERING WHEEL.................................................. 16
Tilt/Telescoping Steering Column ...................16
SEATS ...................................................................... 16
Manual Adjustment (Front Seats) ...................16
Folding Rear Seat — If Equipped .....................17
Heated Seats — If Equipped ............................18
Head Restraints ...............................................19 UCONNECT VOICE RECOGNITION ........................21
Introducing Voice Recognition.........................21
Basic Voice Commands ...................................21
Get Started .......................................................21
Additional Information .....................................21
MIRRORS ...............................................................22
Inside Rearview Mirror .....................................22
Vanity Mirror .....................................................22
Outside Mirrors ................................................22
EXTERIOR LIGHTS ..................................................24
Multifunction Lever ..........................................24
Headlights ........................................................24
Daytime Running Lights (DRLs) —
If Equipped .......................................................24
High/Low Beam Switch....................................24
Flash-To-Pass ..................................................24
Parking Lights ..................................................24
Follow Me Home/Headlight Delay ..................24
Fog Lights — If Equipped .................................25
Turn Signals ......................................................25
Lane Change Assist..........................................25
INTERIOR LIGHTS ..................................................25
Courtesy/Interior Lights ...................................25
WIPERS AND WASHERS ......................................26
Front Wiper Operation......................................27
Rear Wiper And Washer —If Equipped ............28 CLIMATE CONTROLS ............................................ 28
Manual Climate Control Descriptions And
Functions .......................................................... 28
Operating Tips .................................................. 30
INTERIOR STORAGE AND EQUIPMENT ............... 31
Storage ............................................................. 31
USB Control — If Equipped .............................. 32
Power Outlets .................................................. 32
WINDOWS ............................................................. 34
Power Window Controls —If Equipped ........... 34
Window Bar Grates — If Equipped .................. 35
Wind Buffeting .................................................35
HOOD....................................................................... 36
Opening............................................................. 36
Closing ..............................................................36
CARGO AREA FEATURES ...................................... 37
Rear Cargo Tie-Downs ..................................... 37
ROOF RACK — IF EQUIPPED................................. 37
GETTING TO KNOW YOUR
INSTRUMENT PANEL
INSTRUMENT CLUSTER......................................... 39
Instrument Cluster Descriptions ..................... 40
INSTRUMENT CLUSTER DISPLAY ....................... 40
Location And Controls...................................... 40
Change Engine Oil — If Equipped ................... 41
Instrument Cluster Display Menu Items ......... 42
22_VM_OM_EN_USC_t.book Page 2
Page 43 of 260
GETTING TO KNOW YOUR INSTRUMENT PANEL41
The menu items described below are an example
of what can be found in the vehicle's menu:
Dimmer
Speed Beep
Trip A / B (options are selectable through the
steering wheel stalk)
Buzzer Volume
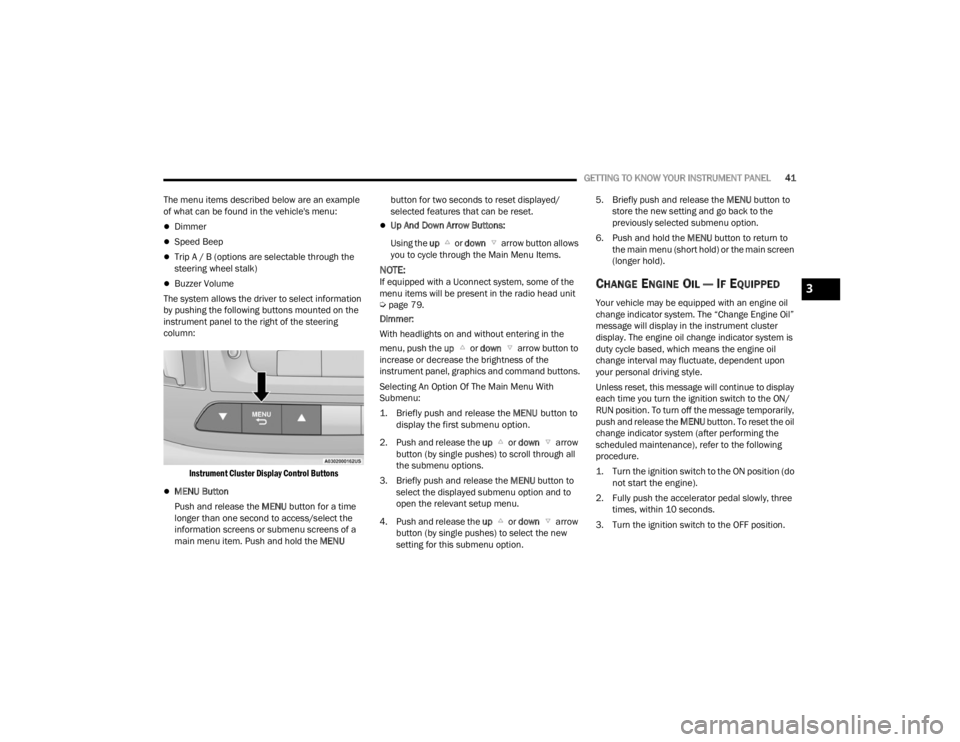
The system allows the driver to select information
by pushing the following buttons mounted on the
instrument panel to the right of the steering
column:
Instrument Cluster Display Control Buttons
MENU Button
Push and release the MENU button for a time
longer than one second to access/select the
information screens or submenu screens of a
main menu item. Push and hold the MENU button for two seconds to reset displayed/
selected features that can be reset.
Up And Down Arrow Buttons:
Using the up or down arrow button allows
you to cycle through the Main Menu Items.
NOTE:If equipped with a Uconnect system, some of the
menu items will be present in the radio head unit
Ú page 79.
Dimmer:
With headlights on and without entering in the
menu, push the up or down arrow button to
increase or decrease the brightness of the
instrument panel, graphics and command buttons.
Selecting An Option Of The Main Menu With
Submenu:
1. Briefly push and release the
MENU
button to
display the first submenu option.
2. Push and release the up or down arrow
button (by single pushes) to scroll through all
the submenu options.
3. Briefly push and release the MENU button to
select the displayed submenu option and to
open the relevant setup menu.
4. Push and release the up or down arrow
button (by single pushes) to select the new
setting for this submenu option. 5. Briefly push and release the MENU
button to
store the new setting and go back to the
previously selected submenu option.
6. Push and hold the MENU button to return to
the main menu (short hold) or the main screen
(longer hold).CHANGE ENGINE OIL — IF EQUIPPED
Your vehicle may be equipped with an engine oil
change indicator system. The “Change Engine Oil”
message will display in the instrument cluster
display. The engine oil change indicator system is
duty cycle based, which means the engine oil
change interval may fluctuate, dependent upon
your personal driving style.
Unless reset, this message will continue to display
each time you turn the ignition switch to the ON/
RUN position. To turn off the message temporarily,
push and release the MENU button. To reset the oil
change indicator system (after performing the
scheduled maintenance), refer to the following
procedure.
1. Turn the ignition switch to the ON position (do not start the engine).
2. Fully push the accelerator pedal slowly, three times, within 10 seconds.
3. Turn the ignition switch to the OFF position.
3
22_VM_OM_EN_USC_t.book Page 41
Page 44 of 260
42GETTING TO KNOW YOUR INSTRUMENT PANEL
NOTE:If the indicator message illuminates when you start
the vehicle, the oil change indicator system did not
reset. If necessary, repeat this procedure.
INSTRUMENT CLUSTER DISPLAY MENU
I
TEMS
Speed Beep
This function is used to set a speed limit (MPH or
km/h); the driver is alerted when this limit is
exceeded.
To set the desired speed limit:
1. Push the
MENU
button briefly. The display will
show the wording (SPEED BEEP) and the unit
(MPH) or (km/h) previously set.
2. If the function is on, push and release the up
or down arrow button to select the required
speed limit and then push MENU to confirm.
NOTE:The speed may be set in the range from 20 to
125 mph (30 to 200 km/h) according to the previ -
ously chosen unit.
The setting will increase/decrease by five units
each time the up or down arrow button is
pushed. Hold down the up or down arrow
button to automatically increase/decrease the setting rapidly. Complete the adjustment when you
approach the desired value.
Push the
MENU button briefly to return to the menu
screen or hold the MENU button down to return to
the standard screen without storing.
To cancel the setting:
1. Briefly push the
MENU
button, “ON” will flash
in the display.
2. Push the down arrow button, “OFF” will
flash in the display.
3. Push the MENU button briefly to return to the
menu screen or hold the MENU button down to
return to the standard screen without storing.
Trip B Data
This function can be used to activate (On) or
deactivate (Off) the Trip B display (Partial Trip)
Ú page 43.
To switch the function On/Off:
1. Push the
MENU
button briefly. The display will
flash On or Off according to the previous
setting.
2. Push and release the up or down arrow
button to select. Push the
MENU button briefly to return to the menu
screen or hold the MENU button down to return to
the standard screen without storing.
Buzzer Volume
With this function, the volume of the acoustic
signal which accompanies the display of failure/
warning can be adjusted according to seven levels.
To set the desired volume:
1. Push the
MENU
button, the previously set
volume level will flash on the display.
2. Push and release the up or down arrow
button to adjust.
3. Push the MENU button to return to the menu
screen or hold the MENU button down to
return to the standard screen without storing.
Seat Belt Buzzer
Only shows in the instrument cluster display if the
seat belt reminder was previously deactivated by
an authorized dealer.
NOTE:This is a one-time occurrence to enable the
acoustic signal.
22_VM_OM_EN_USC_t.book Page 42
Page 56 of 260

54STARTING AND OPERATING
ENGINE BREAK-IN RECOMMENDATIONS
A long break-in period is not required for the engine
and drivetrain (transmission and axle) in your
vehicle.
Drive moderately during the first 300 miles
(500 km). After the initial 60 miles (100 km),
speeds up to 50 or 55 mph (80 or 90 km/h) are
desirable.
While cruising, brief full-throttle acceleration within
the limits of local traffic laws contributes to a good
break-in. Wide-open throttle acceleration in low
gear can be detrimental and should be avoided.
The engine oil installed in the engine at the factory
is a high-quality energy conserving type lubricant.
Oil changes should be consistent with anticipated
climate conditions under which vehicle operations
will occur. For the recommended viscosity and
quality grades Ú page 240.
NOTE:A new engine may consume some oil during its first
few thousand miles (kilometers) of operation. This
should be considered a normal part of the break-in
and not interpreted as a concern. Please check
your oil level with the engine oil indicator often
during the break-in period. Add oil as required.
PARKING BRAKE
Before leaving the vehicle, make sure that the
parking brake is fully applied. Also, be certain to
leave an automatic transmission in PARK.
The parking brake lever is located in the center
console. To apply the parking brake, pull the lever
up as firmly as possible. To release the parking
brake, pull the lever up slightly, push the center
button, then lower the lever completely.
Parking Brake
When the parking brake is applied with the ignition
switch in the ON position, the Brake Warning Light
in the instrument cluster display will illuminate.
NOTE:
When the parking brake is applied and the auto
-
matic transmission is placed in gear, the Brake
Warning Light will flash. If vehicle speed is
detected, a chime will sound to alert the driver.
Fully release the parking brake before
attempting to move the vehicle.
This light only shows that the parking brake is
applied. It does not show the degree of brake
application.
When parking on a hill, it is important to turn the
front wheels toward the curb on a downhill grade
and away from the curb on an uphill grade. For
vehicles equipped with an automatic transmission,
apply the parking brake before placing the gear
selector in PARK, otherwise the load on the
transmission locking mechanism may make it
difficult to move the gear selector out of PARK. The
parking brake should always be applied whenever
the driver is not in the vehicle.
CAUTION!
Never use Non-Detergent Oil or Straight Mineral
Oil in the engine or damage may result.
22_VM_OM_EN_USC_t.book Page 54
Page 172 of 260

170SAFETY
(Continued)
Lights
Have someone observe the operation of brake
lights and exterior lights while you work the
controls. Check turn signal and high beam
indicator lights on the instrument panel.
Door Latches
Check for proper closing, latching, and locking.
Fluid Leaks
Check area under the vehicle after overnight
parking for fuel, coolant, oil, or other fluid leaks.
Also, if gasoline fumes are detected or if fuel or
brake fluid leaks are suspected, the cause should
be located and corrected immediately.
EXHAUST GAS
The best protection against carbon monoxide entry
into the vehicle body is a properly maintained
engine exhaust system.
Whenever a change is noticed in the sound of the
exhaust system, when exhaust fumes can be
detected inside the vehicle, or when the underside
or rear of the vehicle is damaged, have an
authorized dealer inspect the complete exhaust
system and adjacent body areas for broken,
damaged, deteriorated, or mispositioned parts.
Open seams or loose connections could permit
exhaust fumes to seep into the passenger
compartment. In addition, inspect the exhaust
system each time the vehicle is raised for
lubrication or oil change. Replace as required.
CARBON MONOXIDE WARNINGS
WARNING!
Exhaust gases can injure or kill. They contain
carbon monoxide (CO), which is colorless and
odorless. Breathing it can make you
unconscious and can eventually poison you. To
avoid breathing (CO), follow these safety tips:
Do not run the engine in a closed garage or in
confined areas any longer than needed to
move your vehicle in or out of the area.
If you are required to drive with the trunk/lift -
gate/rear doors open, make sure that all
windows are closed and the climate control
BLOWER switch is set at high speed. DO NOT
use the recirculation mode.
If it is necessary to sit in a parked vehicle with
the engine running, adjust your heating or
cooling controls to force outside air into the
vehicle. Set the blower at high speed.
WARNING!
WARNING!
Carbon monoxide (CO) in exhaust gases is
deadly. Follow the precautions below to prevent
carbon monoxide poisoning:
Do not inhale exhaust gases. They contain
carbon monoxide, a colorless and odorless
gas, which can kill. Never run the engine in a
closed area, such as a garage, and never sit in
a parked vehicle with the engine running for
an extended period. If the vehicle is stopped in
an open area with the engine running for more
than a short period, adjust the ventilation
system to force fresh, outside air into the
vehicle.
Guard against carbon monoxide with proper
maintenance. Have the exhaust system
inspected every time the vehicle is raised.
Have any abnormal conditions repaired
promptly. Until repaired, drive with all side
windows fully open.
22_VM_OM_EN_USC_t.book Page 170
Page 191 of 260

189
SERVICING AND MAINTENANCE
SCHEDULED SERVICING
Your vehicle is equipped with an automatic oil
change indicator system. The oil change indicator
system will remind you that it is time to take your
vehicle in for scheduled maintenance.
Based on engine operation conditions, the oil
change indicator message will illuminate. This
means that service is required for your vehicle.
Operating conditions such as frequent short-trips,
trailer tow, extended engine idle time, extremely
hot or cold ambient temperatures will influence
when the “Oil Change Required” message is
displayed. Have your vehicle serviced as soon as
possible, within the next 500 miles (805 km).An authorized dealer will reset the oil change
indicator message after completing the scheduled
oil change. If a scheduled oil change is performed
by someone other than an authorized dealer, to
reset the message Ú
page 41.
NOTE:Under no circumstances should oil change
intervals exceed 10,000 miles (16,000 km), 350
hours of engine run time or 12 months, whichever
comes first. The 350 hours of engine run or idle
time is generally only a concern for fleet
customers. Once A Month Or Before A Long Trip:
Check engine oil level.
Check windshield washer fluid level.
Check tire pressure and look for unusual wear
or damage. Rotate tires at the first sign of irreg
-
ular wear, even if it occurs before the oil indi -
cator system turns on.
Check the fluid levels of the coolant reservoir
and brake master cylinder, fill as needed.
Check function of all interior and exterior lights.
8
22_VM_OM_EN_USC_t.book Page 189
Page 192 of 260
190SERVICING AND MAINTENANCE
MAINTENANCE PLAN
Refer to the maintenance schedule for the required maintenance intervals. More frequent maintenance may be needed in severe conditions, such as dusty areas
and very short trip driving. In some extreme conditions, additional maintenance not specified in the maintenance schedule may be required.
At Every Oil Change Interval As Indicated By Oil Change Indicator System:
Change oil and filter.
Rotate the tires at the first sign of irregular wear, even if it occurs before the oil indicator system turns on.
Inspect battery and clean and tighten terminals as required.
Inspect the CV/Universal joints.
Inspect brake pads, shoes, rotors, drums, hoses, lines and parking brake.
Inspect engine cooling system protection and hoses.
Inspect exhaust system.
Inspect engine air cleaner if using in dusty or off-road conditions.
Inspect and replace the Evaporative System Fresh Air Filter as necessary; replacement may be more frequent if vehicle is operated in extreme dusty conditions.
22_VM_OM_EN_USC_t.book Page 190
Page 198 of 260
196SERVICING AND MAINTENANCE
Synthetic Engine Oils
Your engine was designed for synthetic engine oils,
only use synthetic API approved engine oils.
Synthetic engine oils which do not have both the
engine oil certification mark and the correct SAE
viscosity grade number should not be used.
Materials Added To Engine Oil
The manufacturer strongly recommends against
the addition of any additives (other than leak
detection dyes) to the engine oil. Engine oil is an
engineered product and its performance may be
impaired by supplemental additives.
Disposing Of Used Engine Oil And Oil
Filters
Care should be taken in disposing of used engine
oil and oil filters from your vehicle. Used oil and oil
filters, indiscriminately discarded, can present a
problem to the environment. Contact an
authorized dealer, service station or governmental
agency for advice on how and where used oil and
oil filters can be safely discarded in your area.
ENGINE OIL FILTER
The engine oil filter should be replaced with a new
filter at every engine oil change.
Engine Oil Filter Selection
A full-flow type disposable oil filter should be used
for replacement. The quality of replacement filters
varies considerably. Only high quality Mopar®
certified filters should be used.
ENGINE AIR CLEANER FILTER
For the proper maintenance intervals Úpage 190.
NOTE:Be sure to follow the Severe Duty Conditions main -
tenance interval if applicable Ú page 189.Engine Air Cleaner Filter Selection
The quality of replacement filters varies
considerably. Only high quality Mopar® certified
filters should be used.
AIR CONDITIONER MAINTENANCE
For best possible performance, your air conditioner
should be checked and serviced by an authorized
dealer at the start of each warm season. This
service should include cleaning of the condenser
fins and a performance test. Drive belt tension
should also be checked at this time.
CAUTION!
Do not use chemical flushes in your engine oil as
the chemicals can damage your engine. Such
damage is not covered by the New Vehicle
Limited Warranty.
WARNING!
The air induction system (air cleaner, hoses,
etc.) can provide a measure of protection in the
case of engine backfire. Do not remove the air
induction system (air cleaner, hoses, etc.) unless
such removal is necessary for repair or
maintenance. Make sure that no one is near the
engine compartment before starting the vehicle
with the air induction system (air cleaner, hoses,
etc.) removed. Failure to do so can result in
serious personal injury.
WARNING!
Use only refrigerants and compressor lubri
-
cants approved by FCA for your air condi -
tioning system. Some unapproved refrigerants
are flammable and can explode, injuring you.
Other unapproved refrigerants or lubricants
can cause the system to fail, requiring costly
repairs. Refer to Warranty Information Book,
for further warranty information.
The air conditioning system contains refrig -
erant under high pressure. To avoid risk of
personal injury or damage to the system,
adding refrigerant or any repair requiring lines
to be disconnected should be done by an
experienced technician.
22_VM_OM_EN_USC_t.book Page 196