2022 RAM PROMASTER CITY set clock
[x] Cancel search: set clockPage 16 of 260
14GETTING TO KNOW YOUR VEHICLE
Closing/Locking With A Key Fob
Push and release the lock button on the key fob to
lock all doors, including the cargo area (side lateral
sliding doors and rear doors). The turn signal lights
will flash to acknowledge the lock signal.
Horn activation settings after a key fob lock
command can be adjusted manually through the
Uconnect system Ú page 79.
Locking With The Mechanical Key In Passenger
Vehicle
Push the mechanical key release button to expose
the mechanical key, insert the key into the driver
door exterior lock cylinder and turn the key
clockwise to lock all doors.
Locking With The Mechanical Key In Cargo Vehicle
Push the mechanical key release button to expose
the mechanical key, insert the key into the driver
door exterior lock cylinder and turn the key
clockwise to lock the front doors. Insert the key into
the rear door exterior lock cylinder and turn the key
clockwise to lock the rear doors.
Closing And Locking From Outside
Grab the side door handle and push towards the
front of the vehicle. Once the side door is secured
in the full closed position, use one of the prior
locking methods to lock the sliding side doors.
Opening And Closing From The Inside
Opening:
Pull the interior door handle to unlock the door,
then pull the handle and slide the door towards the
rear of the vehicle until it can go no farther.
Closing:
Pull the interior door handle to release the door
and then push it towards the front of the vehicle.
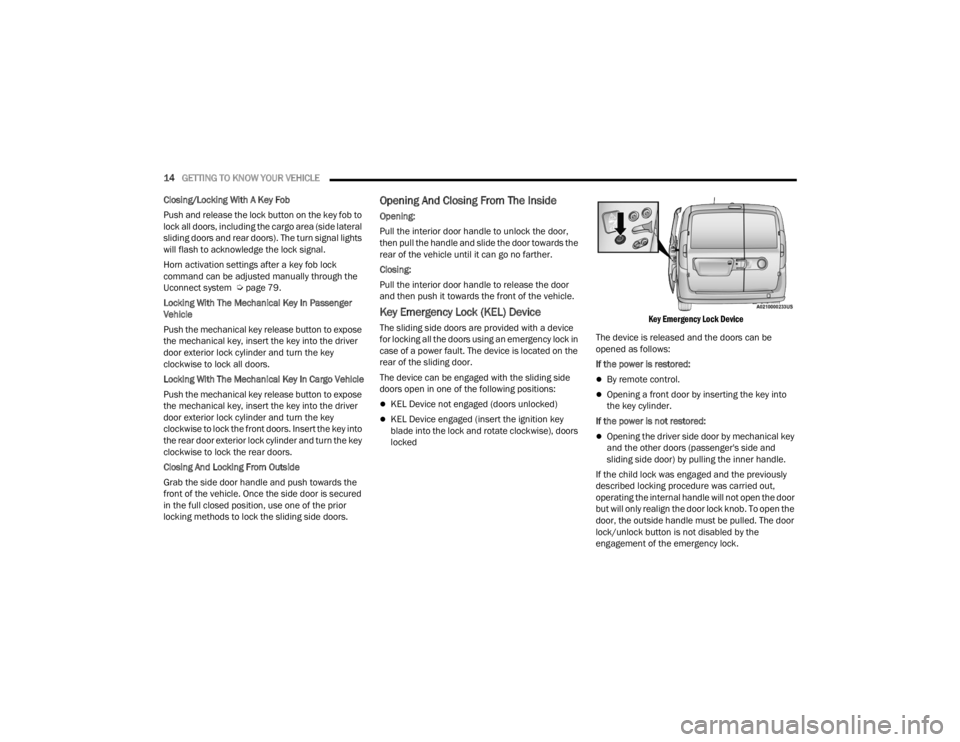
Key Emergency Lock (KEL) Device
The sliding side doors are provided with a device
for locking all the doors using an emergency lock in
case of a power fault. The device is located on the
rear of the sliding door.
The device can be engaged with the sliding side
doors open in one of the following positions:
KEL Device not engaged (doors unlocked)
KEL Device engaged (insert the ignition key
blade into the lock and rotate clockwise), doors
locked
Key Emergency Lock Device
The device is released and the doors can be
opened as follows:
If the power is restored:
By remote control.
Opening a front door by inserting the key into
the key cylinder.
If the power is not restored:
Opening the driver side door by mechanical key
and the other doors (passenger's side and
sliding side door) by pulling the inner handle.
If the child lock was engaged and the previously
described locking procedure was carried out,
operating the internal handle will not open the door
but will only realign the door lock knob. To open the
door, the outside handle must be pulled. The door
lock/unlock button is not disabled by the
engagement of the emergency lock.
22_VM_OM_EN_USC_t.book Page 14
Page 31 of 260
GETTING TO KNOW YOUR VEHICLE29
(Continued)
Recirculation Button
Press and release this button to change
the system between recirculation mode
and outside air mode. The Recirculation
indicator and the A/C indicator
illuminate when the Recirculation button is
pressed. Recirculation can be used when outside
conditions such as smoke, odors, dust, or high
humidity are present. Recirculation can be used in
all modes. Recirculation may be unavailable
(button on the touchscreen greyed out) if
conditions exist that could create fogging on the
inside of the windshield. The A/C can be
deselected manually without disturbing the mode
control selection. Continuous use of the
Recirculation mode may make the inside air stuffy
and window fogging may occur. Extended use of
this mode is not recommended. Recirculation
mode may automatically adjust to optimize
customer experience for warming, cooling,
dehumidification, etc.
In cold weather, use of Recirculation mode may
lead to excessive window fogging. The
Recirculation feature may be unavailable if
conditions exist that could create fogging on the
inside of the windshield.
Front Defrost Setting
Use Defrost mode with maximum
temperature settings for best
windshield and side window defrosting
and defogging. Turn the knob to the
Front Defrost position. Air comes from the
windshield and side window demist outlets.
Rear Defrost Button — If Equipped
Push and release the Rear Defrost
Control button to turn on the rear
window defroster and the heated
outside mirrors (if equipped). An
indicator will illuminate when the rear window
defroster is on. The rear window defroster
automatically turns OFF after 20 minutes.Temperature Control
Temperature Control regulates the temperature of
the air forced through the climate system.
The temperature increases as you turn
the temperature control knob clockwise.
The temperature decreases as you turn
the temperature control knob
counterclockwise.
Blower Control
There are four blower speeds. Use this
control to regulate the amount of air
forced through the system in any mode
you select. The blower speed increases
as you move the control clockwise from the OFF
position.
CAUTION!
Failure to follow these cautions can cause
damage to the heating elements:
Use care when washing the inside of the rear
window. Do not use abrasive window cleaners
on the interior surface of the window. Use a
soft cloth and a mild washing solution, wiping
parallel to the heating elements. Labels can
be peeled off after soaking with warm water.
Do not use scrapers, sharp instruments, or
abrasive window cleaners on the interior
surface of the window.
Keep all objects a safe distance from the
window.
CAUTION!
2
22_VM_OM_EN_USC_t.book Page 29
Page 84 of 260
82MULTIMEDIA
Voice
Clock & Date
When the Voice button is pressed on the touchscreen, the system displays the options related to the vehicle’s Voice Recognition feature.
NOTE:Depending on the vehicle’s options, feature settings may vary.
Setting Name Description
Voice Response Length This setting will change the response length for the Voice Recognition system.
When set to “Brief”, the system provides a shortened audio description. When
set to “Long”, the system provides the full audio description from the system.
Show Command List This setting will allow you to turn the Command List on or off. The “Always”
setting will always show the Command List. The “w/Help” setting will show the
Command List and provide a brief description of what the command does.
The “Never” setting will turn the Command List off.
When the Clock & Date button is pressed on the touchscreen, the system displays the different options related to the vehicle’s internal clock.
NOTE:Depending on the vehicle’s options, feature settings may vary.
Setting Name
Description
Sync Time This setting will sync the time to the system’s GPS receiver. The system will
control the time via GPS location.
Set Time & Format/Time Format This setting will allow you to set the time format (AM/PM). “Sync Time” must
be off for this setting to be available. The “12 h” setting will set the time to a
12-hour format. The “24 h” setting will set the time to a 24-hour format.
22_VM_OM_EN_USC_t.book Page 82
Page 85 of 260
MULTIMEDIA83
Safety/Assistance
Lights
Set Date This setting will allow you to set the date. The selectable options are “Date”,
“Month”, and “Year”. You can also change the clock settings.
Show Time Status This setting will place the time in the radio’s status bar.
Setting NameDescription
When the Safety/Assistance button is pressed, the system displays the option related to the vehicle’s safety settings.
NOTE:Depending on the vehicle’s options, feature settings may vary.
Setting NameDescription
ParkView Backup Camera Delay This setting will add a delay to the ParkView Backup Camera when shifting out
of REVERSE.
After pressing the Lights button on the touchscreen, the following setting will be available:
NOTE:
When the Daytime Running Lights feature is selected, the daytime running lights can be turned on or off. This feature is only allowed by law in the country
of the vehicle purchased.
Depending on the vehicle’s options, feature settings may vary.
Setting Name
Description
Daytime Running Lights This setting will allow you to turn the Daytime Running Lights on or off.
5
22_VM_OM_EN_USC_t.book Page 83
Page 91 of 260
MULTIMEDIA89
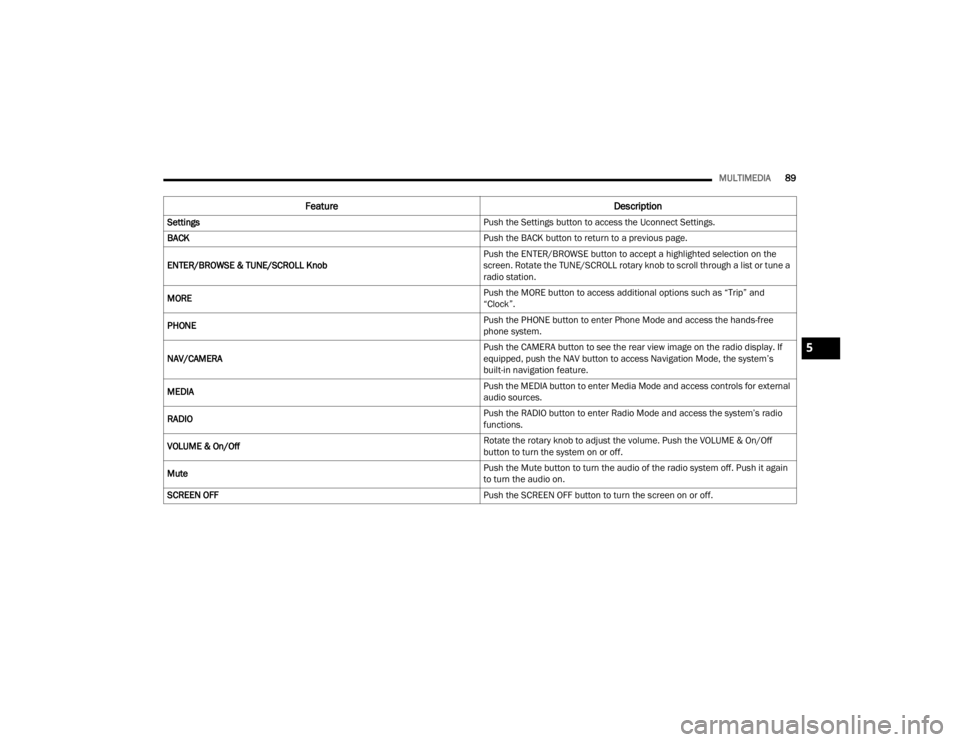
Feature Description
Settings Push the Settings button to access the Uconnect Settings.
BACK Push the BACK button to return to a previous page.
ENTER/BROWSE & TUNE/SCROLL Knob Push the ENTER/BROWSE button to accept a highlighted selection on the
screen. Rotate the TUNE/SCROLL rotary knob to scroll through a list or tune a
radio station.
MORE Push the MORE button to access additional options such as “Trip” and
“Clock”.
PHONE Push the PHONE button to enter Phone Mode and access the hands-free
phone system.
NAV/CAMERA Push the CAMERA button to see the rear view image on the radio display. If
equipped, push the NAV button to access Navigation Mode, the system’s
built-in navigation feature.
MEDIA Push the MEDIA button to enter Media Mode and access controls for external
audio sources.
RADIO Push the RADIO button to enter Radio Mode and access the system’s radio
functions.
VOLUME & On/Off Rotate the rotary knob to adjust the volume. Push the VOLUME & On/Off
button to turn the system on or off.
Mute Push the Mute button to turn the audio of the radio system off. Push it again
to turn the audio on.
SCREEN OFF Push the SCREEN OFF button to turn the screen on or off.
5
22_VM_OM_EN_USC_t.book Page 89
Page 93 of 260

MULTIMEDIA91
UCONNECT MODES
RADIO MODE
Operating Radio Mode
Uconnect 3/3 NAV With 5-inch Display Radio Mode
The radio is equipped with the following modes:
FM
AM
SiriusXM® Radio
Push the Radio button on the faceplate to enter
the Radio Mode. The different tuner modes, FM/
AM/SXM, can then be selected by pressing the
corresponding buttons on the touchscreen in the
Radio mode.
SWITCHING THE SYSTEM ON/OFF
The screen will switch on/off when the Volume &
On/Off button is pushed.
VOLUME/POWER
Rotate the Volume knob to adjust the volume.
When the audio system is turned on, the sound will
be set at the same volume level as last played.
Push the On/Off button to turn the system on or
off.
ENTER/BROWSE AND TUNE/SCROLL
CONTROL
Turn the rotary Tune/Scroll knob clockwise to
increase or counterclockwise to decrease the radio
station frequency.
SEEK FUNCTIONS
Seek Up And Seek Down
Press and release the Seek Up or Seek Down
button on the touchscreen to tune the radio to the
next available station or channel. If the radio
reaches the starting station after passing through
the entire band two times, the radio will stop at the
station where it began.
Fast Seek Up And Fast Seek Down
Press, hold, and then release the Seek Up or
Seek Down button on the touchscreen to
advance the radio through the available stations or
channels at a faster rate. The radio stops at the
next available station or channel when the button
on the touchscreen is released.
NOTE:
Pressing and holding either the Seek Up or
Seek Down button will scan the different
frequency bands at a slower rate.
1 — Preset Buttons
2 — All Presets Button
3 — Seek Down Button
4 — Radio Band Button (FM/AM/SXM)
5 — Direct Tune Button
6 — Info Button
7 — Audio Settings Button
8 — Seek Up Button
5
22_VM_OM_EN_USC_t.book Page 91