2022 PEUGEOT LANDTREK sport mode
[x] Cancel search: sport modePage 6 of 164

4
Overview
Instruments and controls
These illustrations and descriptions are intended
as a guide. The presence and location of some
elements vary depending on the version or trim
level.
1.Electric windows
Central locking/unlocking
2. Side control bar
3. Horn
Driver front airbag
4. Instrument panel
5. Front courtesy/map reading lamps
6. Glasses holder
7. Interior rear view mirror
8. Monochrome screen or touch screen
9. Heating/air conditioning controls
10. Central control bar (lower and upper)
11 . Audio USB socket/Charger USB socket
12. Key ignition switch or START/STOP button
13. 2H, 4H and 4L transmission mode selector
14. Gearbox
15. Sport/Eco button
16. Parking brake
Cigarette lighter/12
V (120 W) accessory
socket
17. Front passenger airbag
18. Glove box
19. Deactivate front passenger airbag (on the
side of the dashboard)
20. Fuel filler flap opening control
Steering-mounted controls
Depending on the vehicle’s equipment, the
function and location of the controls may vary.1.External lighting/Direction indicator controls
2. Wiper/Screenwash controls
3. Audio system settings
4. Speed limiter/Cruise control
A. Speed limiter/Cruise control pause
Page 9 of 164

7
Instruments
1Instrument panels
Dials
1.Speedometer (mph or km/h)
2. Display (monochrome or colour)
3. Rev counter (x 1,000 rpm)
4. Fuel level indicator
5. Engine coolant temperature gauge
Instrument panel displays
Monochrome display
Colour display
1. Vehicle tab: current display (doors open,
trip computer, cruise control or speed limiter
settings, digital speedometer, warning or
function status messages, tyre pressure
status)
2. Diagnostic tab: vehicle warning log display
3. Settings tab: choice of instrument panel brightness level, warning sound volume,
display language and distance units
4. Display zone
5. Driving mode (Eco, Normal, Sport)
Arrow and recommended gear (with
monochrome display)
6. Total distance recorder (miles or km)
7. Gear shift indicator (arrow and recommended
gear) and automatic gearbox status
8. DTE (Distance To Empty): remaining range
(miles or km)
9. Outside temperature
Display language and units
They depend on the instrument panel
display setting.
When travelling abroad, the speed must be
shown in the official units of the country you
are driving in (mph, miles or km/h, km).
Choice of display tabs
► Press button A located to the right of the
steering wheel to display and scroll through the
various tabs.
►
Rotate thumbwheel B
located to the right
of the steering wheel to display the various
windows or select the different menus.
►
Once the window is displayed or the menu
selected, browse and select by pressing
thumbwheel B
.
►
Then select or modify and press thumbwheel
B
to confirm.
►
Press button
A to exit the selected menu.
Without any action on the controls, the Vehicle
tab automatically reappears after a few
moments.
Page 16 of 164

14
Instruments
► "RDS"; selection of RDS mode (real-time
traffic information, automatic station tracking and
radio station titles),
►
"
RPT"; USB audio content repeat order,
► variation of a setting value, search for
a radio station or play next/previous for a
USB or Bluetooth
® source,
56► navigate between the menus
and the audio files for USB
playback,
► Audio; audio settings men u,
1► Answer; call in Bluetooth® mode,
4► End call; call in Bluetooth® mode.
For more information on the monochrome
screen, refer to the "Audio equipment and
telematics” section.
Touch screen
This system gives access to the following elements:
–
Permanent
display of the time.
–
Display and reminder of air conditioning
system settings.
–
V
ehicle functions and equipment setting
menus.
–
Audio system and telephone controls and
display of related information.
* Depending on equipment.
– Display of visual manoeuvring aid functions
– Navigation system controls and
display
of related information (depending on
version).
For safety reasons, always stop the
vehicle before performing operations
that require sustained attention.
Some functions are not accessible while
driving.
Recommendations
Do not use pointed objects on the touch screen.
Do not touch the touch screen with wet hands.
Use a soft, clean cloth to clean the touch screen.
Principles
Use the buttons indicated on the touch screen to
access the various menus.
After a few moments with no action on the second page, the first page is
displayed automatically.
To deactivate/activate a function, press the slider
that appears opposite the function. The slider
changes to orange to indicate that the function
is activated.
Return to the menu page.
Menus
It is possible to modify the appearance of
the touch screen by selecting a different
background and display mode ( Classic,
Sport or Technology ). Depending on the
selected mode, the menus can be displayed
in various locations and in different ways.
For more information on changing the
appearance of the touch screen, refer to the
Audio equipment and telematics section.
Example with the " Classic" display mode.
Media
Refer to the "Audio equipment and
telematics" section.
Radio
Refer to the "Audio equipment and
telematics" section.
Navigation*
Refer to the "Audio equipment and
telematics" section.
Telephone
Page 75 of 164

73
Driving
6switched off, an audible signal sounds and a
message appears.
►
Return the gear selector to P
; the audible
signal stops and the message disappears.
Malfunction
In the event of a malfunction, this warning
lamp comes on and a message is
displayed, when the ignition is switched on.
In this case, the gearbox goes into back-up
mode and is locked in 3
rd gear. You may feel a
significant jolt (without risk to the gearbox) when
changing from
P
to R and from N to R.
Do not exceed 62 mph (100
km/h), local speed
restrictions permitting.
Have the system checked by a PEUGEOT
dealer or a qualified workshop.
There is a risk of damaging the gearbox: – If the accelerator and brake pedals are
depressed simultaneously
.
–
In the event of a battery failure, forcing the
selector from position P
to another position.
Driving mode
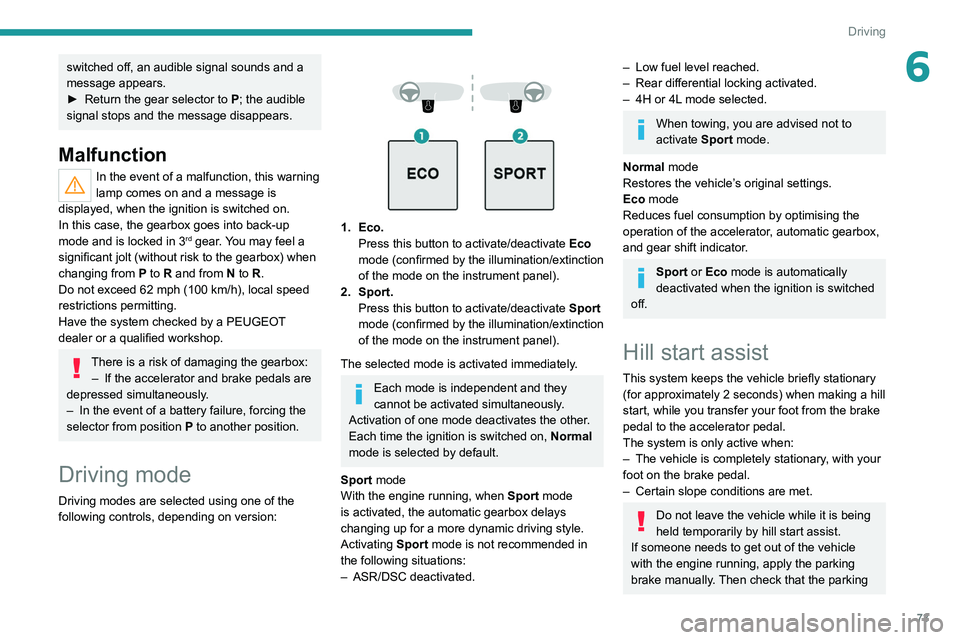
Driving modes are selected using one of the
following controls, depending on version:
1. Eco. Press this button to activate/deactivate Eco
mode (confirmed by the illumination/extinction
of the mode on the instrument panel).
2. Sport. Press this button to activate/deactivate
Sport
mode (confirmed by the illumination/extinction
of the mode on
the instrument panel).
The selected mode is activated immediately.
Each mode is independent and they
cannot be activated simultaneously.
Activation of one mode deactivates the other.
Each time the ignition is switched on, Normal
mode is selected by default.
Sport mode
With the engine running, when
Sport
mode
is activated, the automatic gearbox delays
changing up for a more dynamic driving style.
Activating
Sport mode is not recommended in
the following situations:
–
ASR/DSC deactivated.
– Low fuel level reached.
– Rear differential locking activated.
–
4H or 4L
mode selected.
When towing, you are advised not to
activate Sport mode.
Normal mode
Restores the vehicle’s original settings.
Eco mode
Reduces fuel consumption by optimising the
operation of the accelerator, automatic gearbox,
and gear shift indicator.
Sport or Eco mode is automatically
deactivated when the ignition is switched
off.
Hill start assist
This system keeps the vehicle briefly stationary
(for approximately 2 seconds) when making a hill
start, while you transfer your foot from the brake
pedal to the accelerator pedal.
The system is only active when:
–
The vehicle is completely stationary
, with your
foot on the brake pedal.
–
Certain slope conditions are met.
Do not leave the vehicle while it is being
held temporarily by hill start assist.
If someone needs to get out of the vehicle
with the engine running, apply the parking
brake manually. Then check that the parking
Page 77 of 164

75
Driving
6The alert is raised when the vehicle is moving,
not when stationary.
A pressure sensor is located in the valve of each
tyre (except the spare wheel).
The tyre under-inflation detection cannot, in any circumstances, replace the need
for vigilance on the part of the driver.
This system does not avoid the need to
regularly check the tyre pressures (including
the spare wheel), especially before a long
journey.
Driving with under-inflated tyres, particularly
in adverse conditions (heavy load, high
speed, long journey):
–
worsens road-holding.
–
lengthens braking distances.
–
causes premature wear of the tyres.
–
increases energy consumption.
The inflation pressures defined for the vehicle can be found on the tyre pressure
label.
For more information on the Identification
markings, refer to the corresponding section.
Checking tyre pressures
This check should be done monthly
when the tyres are "cold" (vehicle stopped for
1 hour or after a journey of less than 6 miles
(10
km) at moderate speeds).
Otherwise, add 0.3 bar to the pressures
shown on the label.
Under-inflation alert
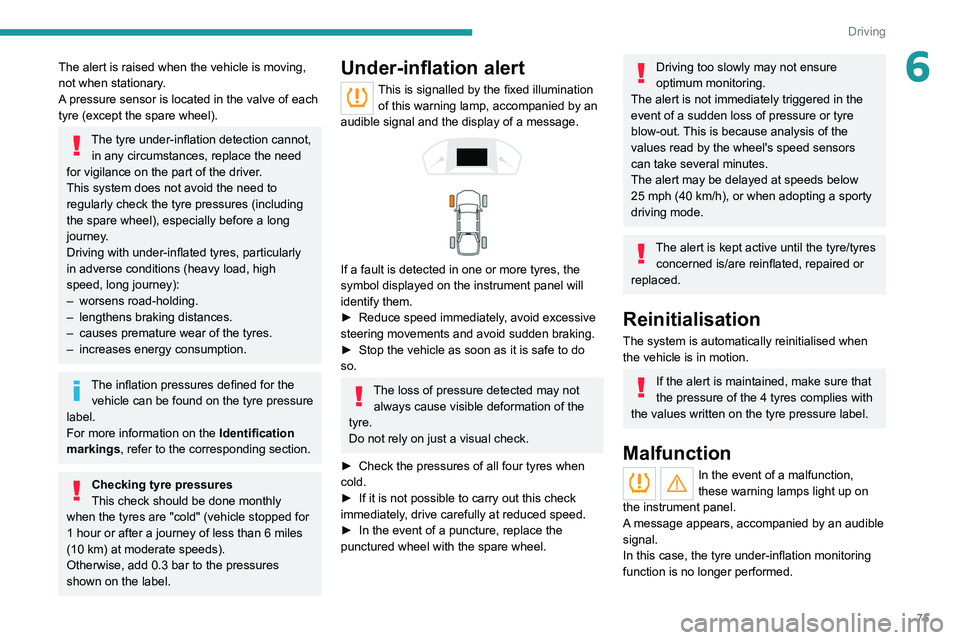
This is signalled by the fixed illumination of this warning lamp, accompanied by an
audible signal and the display of a message.
If a fault is detected in one or more tyres, the
symbol displayed on the instrument panel will
identify them.
►
Reduce speed immediately
, avoid excessive
steering movements and avoid sudden braking.
►
Stop the vehicle as soon as it is safe to do
so.
The loss of pressure detected may not always cause visible deformation of the
tyre.
Do not rely on just a visual check.
►
Check the pressures of all four tyres when
cold.
►
If it is not possible to carry out this check
immediately
, drive carefully at reduced speed.
►
In the event of a puncture, replace the
punctured wheel with the spare wheel.
Driving too slowly may not ensure
optimum monitoring.
The alert is not immediately triggered in the
event of a sudden loss of pressure or tyre
blow-out. This is because analysis of the
values read by the wheel's speed sensors
can take several minutes.
The alert may be delayed at speeds below
25 mph (40 km/h), or when adopting a sporty
driving mode.
The alert is kept active until the tyre/tyres
concerned is/are reinflated, repaired or
replaced.
Reinitialisation
The system is automatically reinitialised when
the vehicle is in motion.
If the alert is maintained, make sure that
the pressure of the 4 tyres complies with
the values written on the tyre pressure label.
Malfunction
In the event of a malfunction,
these warning lamps light up on
the instrument panel.
A message appears, accompanied by an audible
signal.
In this case, the tyre under-inflation monitoring
function is no longer performed.
Page 105 of 164

103
Practical information
7of the throttle body against any projection of
liquid (oil, water, detergent or solvent).
►
Remove grease and carbon deposits from
the surface of the main duct with a specific
"carburettor" type cleaner
.
►
Rotate the throttle valve inside the duct to
clean the seats on each side.
►
Wipe and dry the throttle body with a soft,
lint-free cloth.
If no cleaning has been done for a long
time, deposits may be difficult to remove.
Clean and wipe the throttle body
several
times with a soft, lint-free cloth.
Never immerse the throttle body in a
cleaning liquid or in an ultrasonic tank.
Never use:
–
detergents containing methyl ketone or
other highly corrosive substances as well as
household cleaning detergent;
–
cleaning products directly on the throttle
bearings as well as on the body's connector;
–
hard, sharp or abrasive tools to remove
difficult deposits. Use a soft cloth with a
suitable detergent.
Refitting the throttle body
Before refitting the throttle body, check
the condition of the seal. If it is damaged,
replace it with a new one. ►
Install the seal on the intake manifold and fit
the throttle body
B, making sure that the seal
does not fall.
For reassembly, carry out the operations in the
reverse order to those for removal. Tighten the
screws to the correct tightening torque.
Free-wheeling
In certain situations, you must allow the vehicle
to free-wheel (while being towed, on a rolling
road, in an automatic car wash, or being
transported by rail or sea freight, etc.).
The procedure differs depending on the type of
gearbox and transmission.
/
To release them
► With the vehicle stationary and the engine
running, depress the brake pedal and release
the parking brake.
►
With a manual gearbox, move the gear lever
into neutral.
►
With an automatic gearbox, select position N
.
►
For 4-wheel drive vehicles (4x4), put the
transmission selector in 2H
mode.
►
Switch the ignition off.
Advice on care and maintenance
General recommendations
Observe the following recommendations to avoid
damaging the vehicle.
Exterior
Never use a high-pressure jet wash in
the engine compartment - risk of
damaging the electrical components!
Do not wash the vehicle in bright sunshine or
extremely cold conditions.
When washing the vehicle in an
automatic roller-brush car wash, be sure
to lock the doors and, depending on version,
move the electronic key away.
When using a high-pressure washer, keep
the jet nozzle at a minimum distance of 30
cm from the vehicle (particularly on any stone
chip impacts, sensors or seals).
Promptly clean up any stains containing
chemicals liable to damage the vehicle's
paintwork (including tree resin, bird
droppings, insect secretions, pollen and tar).
Depending on the environment, clean the
vehicle frequently to remove salty deposits
(in coastal areas), soot (in industrial areas)
and mud/salts (in wet or cold areas). These
substances can be highly corrosive.
Page 147 of 164

145
Alphabetical index
Settings, equipment 13–15
Sidelamps
44–45, 112, 115
Snow chains
90
Socket, 12 V accessory
37, 41
Speed limiter
77–78
Speedometer
7, 77
Sport mode
73
Stability control (ESC)
50–51
Starting a Diesel engine
89
Starting the engine
64
Starting the vehicle
64–66
Starting using another battery
67, 117
Station, radio
128, 133
Stay, bonnet
91–92
Steering mounted controls, audio
128, 131
Steering wheel
96
Steering wheel, adjustment
28
Stickers, customising ~ Stickers,
expressive
104
Stopping the vehicle
64–66
Storage
37–41
Storage boxes
40
Storage compartments
37
Stowing rings
40
Sunshine sensor
32
Suspension
97
Switching off the engine
64
Synchronising the remote control
21T
Tables of engines 123–124
Tailgate
22
Tank, fuel
89
Technical data
123–124
Telephone
129–130, 135
Temperature, coolant
11
Ticket holder
37
Time (setting)
13, 137
Tipper truck fittings
40
Tipper truck lighting
42
Tools
107–108, 108–109
Top Tether (fixing)
60
Total distance recorder
12
Touch screen
14
Towbar
51, 90
Towed loads
122
Towing another vehicle
120–121
Traction control (ASR)
50–51
Trailer
51, 90
Trailer stability assist (TSA)
51
Trajectory control systems
50
Triangle, warning
106
Trip computer
12–13
Trip distance recorder
12
Tyres
96, 126
Tyre under-inflation detection
74
U
Under-inflation (detection) 74
Unlocking
16–18
Unlocking from the inside
19
Unlocking the doors
19
Updating the time
137
USB
129, 133–135
V
Vehicle data recording and privacy 138
Ventilation
32–34
Visibility
36
W
Warning and indicator lamps 8
Warning lamp, driver's
seat belt not fastened
54
Warning lamps
8
Warning lamp, seat belts
54
Warnings and indicators
8
Washing
77
Washing (advice)
103–104
Weights
122
Wheel, spare
96, 107–109
Windscreen wipers
46, 48
Wiper blades (changing)
47
Wipers
46, 48