2022 PEUGEOT LANDTREK power steering
[x] Cancel search: power steeringPage 10 of 164
8
Instruments
Warning and indicator
lamps
Displayed as symbols, the warning and indicator
lamps inform the driver of the occurrence of a
malfunction (warning lamps) or of the operating
status of a system (operation or deactivation
indicator lamps). Certain lamps light up in two
ways (fixed or flashing) and/or in several colours.
Associated warnings
The illumination of a lamp may be accompanied
by an audible signal and/or a message displayed
in a screen.
Relating the type of alert to the operating status
of the vehicle allows you to determine whether
the situation is normal or whether a fault has
occurred: refer to the description of each lamp
for further information.
When the ignition is switched on
Certain red or orange warning lamps come on
for a few seconds when the ignition is switched
on. These warning lamps should go off as soon
as the engine is started.
For more information on a system or a function,
refer to the corresponding section.
Persistent warning lamp
If a red or orange warning lamp comes on, there
may be fault which needs further investigation.
If a lamp remains lit
The references (1), (2) and (3) in the warning
and indicator lamp description indicate whether
you should contact a qualified professional in
addition to the immediate recommended actions.
(1): You must stop the vehicle.
Stop as soon as it is safe to do so and switch off
the ignition.
(2): Contact a PEUGEOT dealer or a qualified
workshop.
(3): Go to a PEUGEOT dealer or a qualified
workshop.
List of warning and
indicator lamps
Red warning/indicator lamps
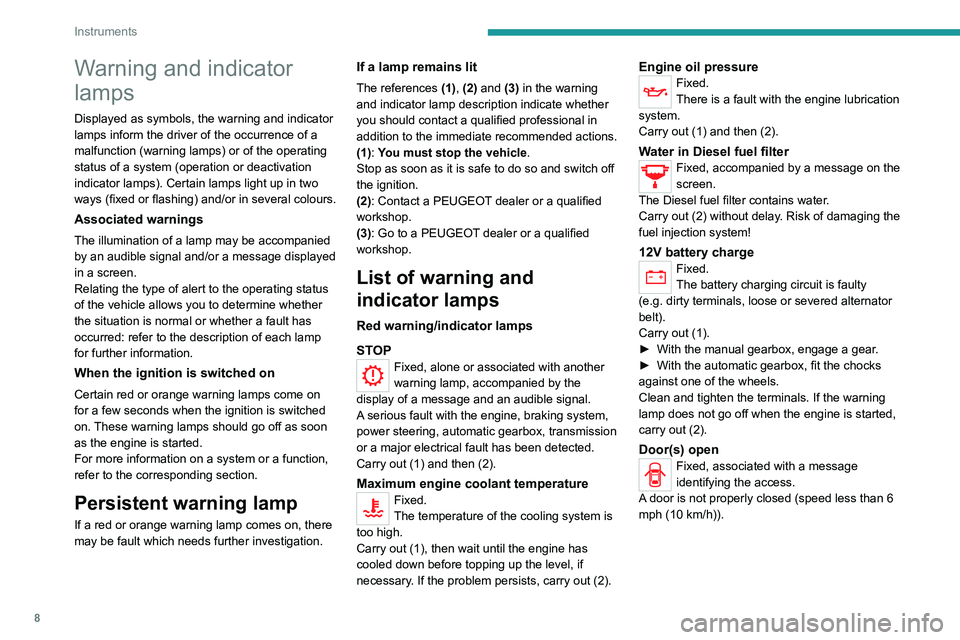
STOP
Fixed, alone or associated with another
warning lamp, accompanied by the
display of a message and an audible signal.
A serious fault with the engine, braking system,
power steering, automatic gearbox, transmission
or a major electrical fault has been detected.
Carry out (1) and then (2).
Maximum engine coolant temperatureFixed.
The temperature of the cooling system is
too high.
Carry out (1), then wait until the engine has
cooled down before topping up the level, if
necessary. If the problem persists, carry out (2).
Engine oil pressureFixed.
There is a fault with the engine lubrication
system.
Carry out (1) and then (2).
Water in Diesel fuel filterFixed, accompanied by a message on the
screen.
The Diesel fuel filter contains water.
Carry out (2) without delay. Risk of damaging the
fuel injection system!
12V battery chargeFixed.
The battery charging circuit is faulty
(e.g.
dirty terminals, loose or severed alternator
belt).
Carry out (1).
►
With the manual gearbox, engage a gear
.
►
With the automatic gearbox, fit the chocks
against one of the wheels.
Clean and tighten the terminals. If the warning
lamp does not go off when the engine is started,
carry out (2).
Door(s) openFixed, associated with a message
identifying the access.
A door is not properly closed (speed less than 6
mph (10 km/h)).
Page 39 of 164

37
Ease of use and comfort
37.Retractable cup holder (press on it to
release)
8. USB socket and USB charger socket
9. Cigarette lighter/12
V (120 W) accessory
socket
10. Storage compartment
11 . Card holder
12. Cup holder and storage compartment
13. Front armrest with storage (depending on
version)
Ensure the retractable cup holder 7 is
clean before putting it back in its housing
- risk of jamming the mechanism.
Make sure you do not leave any item in
the passenger compartment which could
act like a magnifying glass under the effect of
the sun's rays and cause a fire - risk of fire or
damage to interior surfaces!
Glove box
► To open the glove box, lift the handle.
With the ignition on, the glove box is lit when
open.
Depending on version, it contains an adjustable
ventilation nozzle, distributing the same
conditioned air as the vents in the passenger
compartment.
Never drive with the glove box open
when a passenger is at the front. It may
cause injury during sharp deceleration!
Cigarette lighter/12 V
accessory socket(s)
► To use the cigarette lighter, press it in and
wait a few seconds until it pops out automatically.
►
T
o use a 12 V accessory (max. power:
120
W), remove the cigarette lighter and connect
a suitable adaptor.
You can use this socket to connect a telephone
charger, a bottle warmer, etc.
After use, put the cigarette lighter back into place
straight away.
The connection of an electrical device not approved by PEUGEOT, such as a
USB charger, may adversely affect the
operation of vehicle electrical systems,
causing faults such as poor radio reception or
interference with displays in the screens.
USB socket(s)
Sockets 1, 2 and 3 (depending on version) can
be used to charge a portable device.
Socket
1 also enables audio files sent to your
audio system to be played through the vehicle's
speakers.
These files can be managed using the steering-
mounted controls or those on the touch screen.
Depending on version,
socket 1 also allows a
smartphone to be connected by MirrorLink
TM,
Android Auto® or CarPlay®, enabling certain
smartphone applications to be used on the touch
screen.
For best results, use a cable made or approved
by the device manufacturer.
Page 66 of 164
64
Driving
Do not exceed the maximum towable
weights.
At altitude: reduce the maximum load by
10% per 1,000 metres of altitude; the lower
air density at high altitudes decreases engine
performance.
New vehicle: do not tow a trailer until the
vehicle has driven at least 620 miles
(1,000 kilometres).
If the outside temperature is high, let the
engine idle for 1 to 2 minutes after the
vehicle comes to a stop, to help it to cool.
Before setting off
Nose weight
► Distribute the load in the trailer so that the
heaviest items are as close as possible to the
axle and the nose weight (at the point where it
joins your vehicle) approaches the maximum
permitted without exceeding it.
Tyres
► Check the tyre pressures of the towing
vehicle and of the trailer , observing the
recommended pressures.
Lighting
► Check the electrical signalling on the trailer
and the headlamp beam height of your vehicle.
If a genuine PEUGEOT towing device is
used, the rear parking sensors will be
deactivated automatically to avoid the audible
signal.
When driving
Cooling
Towing a trailer uphill causes the coolant
temperature to increase. The maximum towable
load depends on the gradient and the exterior
temperature. The fan’s cooling capacity does not
increase with engine speed.
►
Reduce speed and lower the engine speed to
limit the amount of heating produced.
►
Pay constant attention to the coolant
temperature.
If this warning lamp and the STOP
warning lamp come on, stop the vehicle
and switch off the engine as soon as possible.
Brakes
Using the engine brake is recommended to limit
the overheating of the brakes. Braking distances
are increased when towing a trailer.
Side wind
Bear in mind that the vehicle will be more
susceptible to wind when towing.
Anti-theft protection
Electronic immobiliser
The keys contain a code, which must be
recognised by the vehicle before starting is
possible.
If the system malfunctions, indicated by the
display of a message, the engine will not start.
Contact a PEUGEOT dealer.
Starting / Switching off the
engine with the key
Key ignition switch
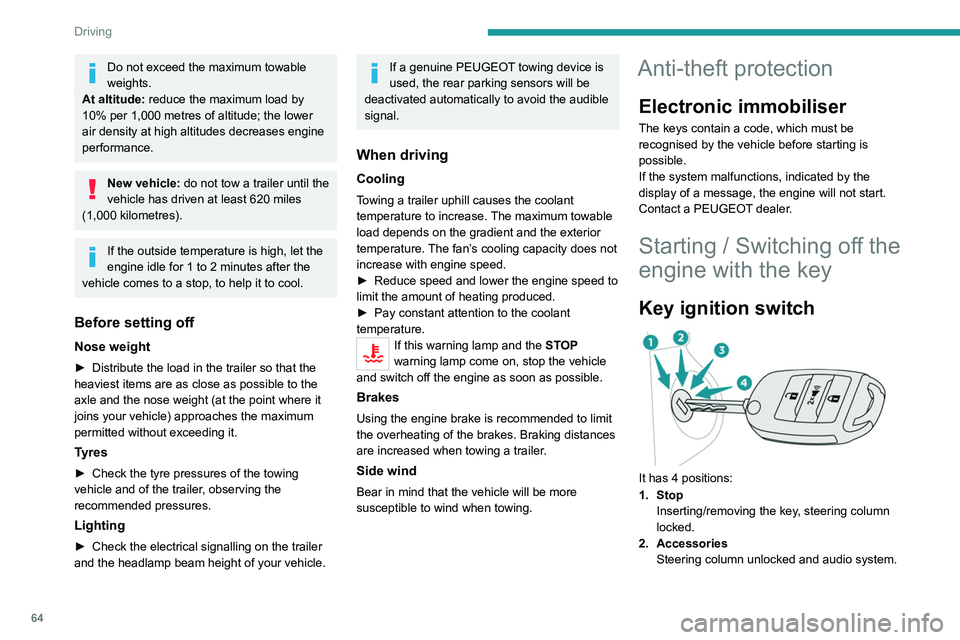
It has 4 positions:
1. Stop Inserting/removing the key, steering column
locked.
2. Accessories Steering column unlocked and audio system.
3. IgnitionIgnition, preheating (Diesel), engine starting.
4. Starting
Avoid attaching heavy objects to the key or the remote control. This would weigh
down on its shaft in the ignition switch and
could cause a malfunction.
Ignition position
This allows the use of the vehicle's electrical
equipment (ventilation, electric windows) or the
charging of accessories.
Once the battery charge level drops to the
reserve level, the system switches to energy
economy mode. The power supply is cut off
automatically to preserve the remaining battery
charge.
Starting the engine
With the parking brake applied:
► With a manual gearbox, place the gear lever
in neutral then fully depress the clutch pedal.
► With an automatic gearbox, place the gear
selector in mode N or P then depress the brake
pedal.
► Insert the key into the ignition switch; the
system recognises the code.
► Unlock the steering column by simultaneously
turning the steering wheel and the key.
Page 67 of 164
65
Driving
63. IgnitionIgnition, preheating (Diesel), engine starting.
4. Starting
Avoid attaching heavy objects to the key or the remote control. This would weigh
down on its shaft in the ignition switch and
could cause a malfunction.
Ignition position
This allows the use of the vehicle's electrical
equipment (ventilation, electric windows) or the
charging of accessories.
Once the battery charge level drops to the
reserve level, the system switches to energy
economy mode. The power supply is cut off
automatically to preserve the remaining battery
charge.
Starting the engine
With the parking brake applied:
► With a manual gearbox, place the gear lever
in neutral then fully depress the clutch pedal.
►
With an
automatic gearbox, place the gear
selector in mode N or P then depress the brake
pedal.
►
Insert the key into the ignition switch; the
system recognises the code.
►
Unlock
the steering column by simultaneously
turning the steering wheel and the key.
In certain cases, you may need to apply
significant force to move the steering
wheel (e.g.
wheels turned to full lock).
►
With a
petrol engine , operate the starter
motor by turning the key to position 4 without
pressing the accelerator pedal, until the engine
starts. As soon as the engine starts, release the
key so it returns to position 3.
Petrol engines
With Petrol engines, after a cold start,
pre-heating the catalytic converter can cause
noticeable engine vibrations, for anything up
to 2 minutes (accelerated idle speed).
►
With a
Diesel engine, turn the key to position
3, to
activate the engine preheating system.
Wait until this warning lamp goes off on
the instrument panel, then turn the key to
position 4 without pressing the accelerator pedal,
to operate the starter motor. As soon as the
engine starts, release the key so it returns to
position 3.
In wintry conditions, the warning lamp
may stay on for a longer period. When
the engine is hot, the warning lamp does not
come on.
In mild conditions, do not leave the engine
to warm up while stationary, but move off
straight away and drive at moderate speed.
If the engine does not start straight away,
switch off the ignition. Wait a few
seconds before operating the starter motor
again. If the engine does not start after a few
attempts, do not keep trying - risk of
damaging the starter motor and the engine!
Contact a PEUGEOT dealer or a qualified
workshop.
If the wheels are not straight, a message
appears prompting the driver to
straighten the wheels by turning the steering
wheel.
Switching off the engine
► Immobilise the vehicle.
► With the engine at idle, turn the key to
position 2
.
►
Insert the key one notch into the ignition
switch and turn it to position 1
, then remove the
key from the ignition switch.
►
T
o lock the steering column, turn the steering
wheel until it locks.
The flashing of the immobiliser/alarm (padlock) indicator lamp is normal and
allows you to activate the function(s).
To facilitate unlocking of the steering column, it is recommended that the
wheels be returned to the straight ahead
position before switching off the engine.
Page 71 of 164
69
Driving
6Never exceed the speed of 5 mph (8
km/h) with the rear differential locked, and
deactivate the locking as soon as conditions
allow.
4-wheel drive
transmission selector
Manual selector for choosing the most suitable
transmission mode according to the different
driving conditions encountered (low grip, for
example).
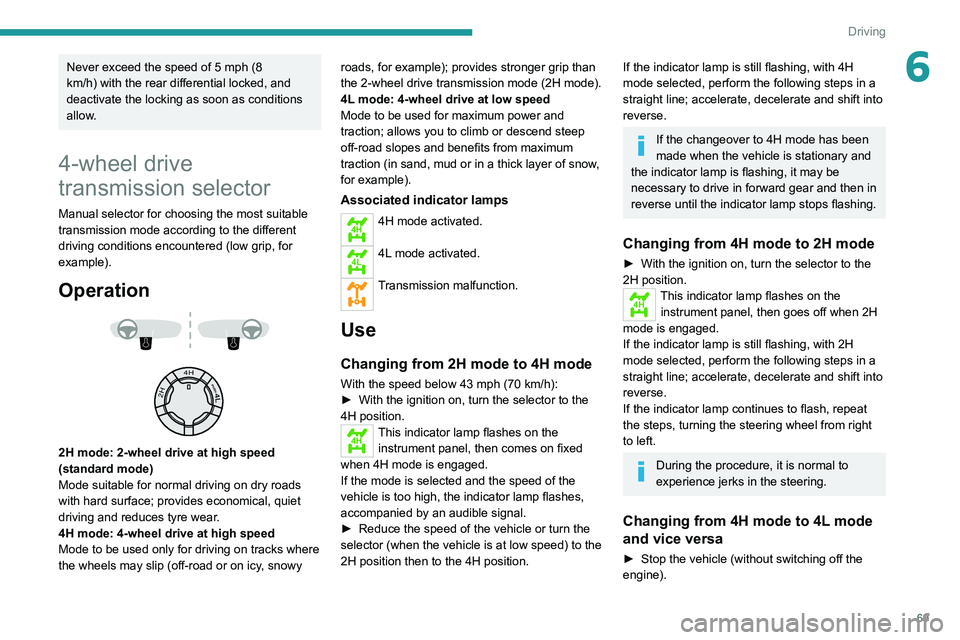
Operation
��
��
2H mode: 2-wheel drive at high speed
(standard mode)
Mode suitable for normal driving on dry roads
with hard surface; provides economical, quiet
driving and reduces tyre wear.
4H mode: 4-wheel drive at high speed
Mode to be used only for driving on tracks where
the wheels may slip (off-road or on icy, snowy roads, for example); provides stronger grip than
the 2-wheel drive transmission
mode (2H mode).
4L mode: 4-wheel drive at low speed
Mode to be used for maximum power and
traction; allows you to climb or descend steep
off-road slopes and benefits from maximum
traction (in sand, mud or in a thick layer of snow,
for example).
Associated indicator lamps
4H4H mode activated.
4L4L mode activated.
Transmission malfunction.
Use
Changing from 2H mode to 4H mode
With the speed below 43 mph (70 km/h):
► With the ignition on, turn the selector to the
4H position.
4HThis indicator lamp flashes on the instrument panel, then comes on fixed
when 4H mode is engaged.
If the mode is selected and the speed of the
vehicle is too high, the indicator
lamp flashes,
accompanied by an audible signal.
►
Reduce the speed of the vehicle or turn the
selector (when the vehicle is at low speed) to the
2H position then to the 4H position.
If the indicator lamp is still flashing, with 4H
mode selected, perform the following steps in a
straight line; accelerate, decelerate and shift into
reverse.
If the changeover to 4H mode has been
made when the vehicle is stationary and
the indicator
lamp is flashing, it may be
necessary to drive in forward gear and then in
reverse until the indicator
lamp stops flashing.
Changing from 4H mode to 2H mode
► With the ignition on, turn the selector to the
2H position.
4HThis indicator lamp flashes on the
instrument panel, then goes off when 2H
mode is engaged.
If the indicator
lamp is still flashing, with 2H
mode selected, perform the following steps in a
straight line; accelerate, decelerate and shift into
reverse.
If the indicator
lamp continues to flash, repeat
the steps, turning the steering wheel from right
to left.
During the procedure, it is normal to
experience jerks in the steering.
Changing from 4H mode to 4L mode
and vice versa
► Stop the vehicle (without switching off the
engine).
Page 94 of 164
92
Practical information
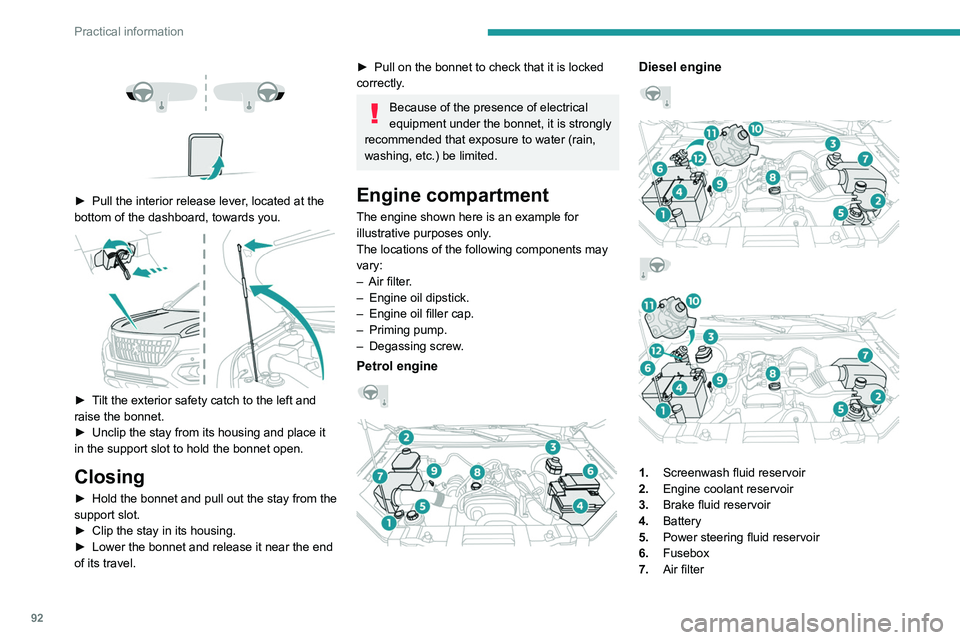
► Pull the interior release lever , located at the
bottom of the dashboard, towards you.
► Tilt the exterior safety catch to the left and
raise the bonnet.
►
Unclip the stay from its housing and place it
in the support slot to hold the bonnet open.
Closing
► Hold the bonnet and pull out the stay from the
support slot.
►
Clip the stay in its housing.
►
Lower the bonnet and release it near the end
of its travel.
► Pull on the bonnet to check that it is locked
correctly .
Because of the presence of electrical
equipment under the bonnet, it is strongly
recommended that exposure to water (rain,
washing, etc.) be limited.
Engine compartment
The engine shown here is an example for
illustrative purposes only.
The locations of the following components may
vary:
–
Air filter
.
–
Engine oil dipstick.
–
Engine oil filler cap.
–
Priming pump.
–
Degassing screw
.
Petrol engine
Diesel engine
1. Screenwash fluid reservoir
2. Engine coolant reservoir
3. Brake fluid reservoir
4. Battery
5. Power steering fluid reservoir
6. Fusebox
7. Air filter
8.Engine oil filler cap
9. Engine oil dipstick
10. Priming pump*
11 . Degassing screw*
12. Fuel filter*
Diesel fuel system
This system is under very high pressure.
All work must be carried out only by a
PEUGEOT dealer or a qualified workshop
Checking levels
Check all of the following levels regularly in
accordance with the manufacturer's service
schedule. Top them up if required, unless
otherwise indicated.
If a level drops significantly, have the
corresponding system checked by a PEUGEOT
dealer or a qualified workshop.
The fluids must comply with the manufacturer's requirements and with
the vehicle's engine.
Take care when working under the bonnet, as certain areas of the engine
may be extremely hot (risk of burns) and the
cooling fan could start at any time (even with
the ignition off).
* Depending on engine.
Page 96 of 164
94
Practical information
workshop to find out which type of oil is suited
to your vehicle's engine.
Oil grade
Before topping up or changing the
engine oil, check that the oil is suitable
for your engine and complies with the
recommendations in the service schedule
supplied with the vehicle (or available
from your PEUGEOT dealer or qualified
workshop).
Use of non-recommended oil may invalidate
your warranty in the event of engine failure.
Topping up the engine oil level
For the location of the engine oil filler cap, please
refer to the corresponding engine compartment
illustration.
Never remove the oil filler cap with the
engine running. Risk of burns and
splashes inside the engine compartment.
►
Add oil in small quantities, avoiding any spills
on engine components (risk of fire).
►
W
ait a few minutes before checking the level
again using the dipstick.
►
T
op up the level if necessary.
►
After checking the level, carefully screw the
oil filler cap back on
and replace the dipstick in
its tube.
Brake fluid
�� ������ ��
The level of this fluid should be close to
the "MAX" mark. If not, check the brake
pads for wear.
To know how often the brake fluid should be
replaced, refer to the manufacturer's servicing
schedule.
Clean the cap before removing it to refill.
Use only DOT4 brake fluid from a sealed
container.
Power steering fluid
The level of this fluid should be close to the "MAX" mark. Check it, with the
vehicle parked on level ground and with the
engine cold.
Engine coolant
It is normal to top up this fluid between
two services.
The check and top-up must only be done with
the engine cold.
A level of coolant that is too low risks causing
major damage to the engine; the coolant level
must be close to the "MAX" mark without ever
going above it.
If the level is close to or below the " MIN" mark, it
is essential to top it up.
When topping up with a cold engine, start the
engine and slowly add coolant until it reaches
the "MAX" mark.
When the engine is hot, the temperature of the
coolant is regulated by the fan.
As the cooling system is pressurised, wait at
least one hour after switching off the engine
before carrying out any work.
In order to avoid the risk of scalding if you need
to top up in an emergency, wrap a cloth around
the cap and unscrew the cap by two turns to
allow the pressure to drop.
Once the pressure has dropped, remove the cap
and top up to the required level.
Filling up with engine coolant
Do this when the engine coolant reservoir is
empty or when the cooling system has been
drained.
►
Open the cap on the reservoir and top up
until the level reaches the " MAX
" mark.
►
Replace the cap on the engine coolant
reservoir
.
►
Increase engine speed to 2,000 rpm until the
radiator's intake hose becomes hot.
►
Allow the engine to cool and add coolant until
the level reaches the " MAX
" mark.
►
Do this repeatedly until the level in the
reservoir no longer drops.
We recommend using a coolant that
contains a glycol-based long-life
anti-freeze agent.
Never use water to fill or top up the
coolant system - risk of freezing and
damaging the engine!
Screenwash fluid
Top up to the required level when necessary.
Tank capacity: 3 litres.
Fluid specification
The fluid must be topped up with a pre-mixed
product.
In winter (temperatures below zero), a fluid
containing an anti-freeze agent which is
appropriate for the temperature conditions
must be used in order to protect the system's
components (pump, tank, ducts, jets).
Filling with pure water is prohibited in all
circumstances (risk of freezing,
limescale, etc.).
Checks
Unless otherwise indicated, check these
components in accordance with the
manufacturer's service schedule and according
to your engine.
Otherwise, have them checked by a PEUGEOT
dealer or a qualified workshop.
Only use products recommended by
PEUGEOT or products of equivalent
quality and specification.
In order to optimise the operation of
components as important as those in the
Page 144 of 164
142
Alphabetical index
Courtesy lamp, rear 39
Courtesy lamps
39
Cruise control
78–79
Cup holder
37
D
Date (setting) 13, 137
Daytime running lamps
44, 112
Deactivating the passenger airbag
56, 59–60
Defrosting
29, 36
Defrosting, front
36
Demisting
29, 36
Demisting, front
36
Demisting, rear
36
Demisting, rear screen
36
Dials and gauges
7
Dimensions
125
Dipstick
93
Direction indicators
45, 112, 114–115
Display screen, instrument panel
7
Door pockets
37
Doors
22
Driving
62–63
Driving aids camera (warnings)
76
Driving aids (recommendations)
76
Driving economically
6
Dynamic stability control (DSC)
50–51
E
EBFD 50
Eco-driving (advice)
6
ECO mode
73
Electric windows
24
Electronic brake force distribution (EBFD)
50
Emergency braking assistance (EBA)
50
Emergency switching off
67
Emergency warning lamps
49, 106
Engine
97
Engine compartment
92
Engine, Diesel
89, 92, 107, 124
Engine, petrol
92, 123
Engines
122–124
Environment
6, 21
ESC (electronic stability control)
50
Extinguisher
106
F
Filling the fuel tank 89
Filter, air
95, 100
Filter, Diesel fuel
102
Filter, oil
95, 101
Filter, particle
95
Filter, passenger compartment
32, 95, 99
Fitting a wheel
109, 111
Fitting roof bars
91
Fittings, front
37
Fittings, interior
37–38
Fittings, rear 39–40
Flap, fuel filler
89
Flashing indicators
45, 114
Floor storage compartment
31
Fluid, brake
94
Fluid, engine coolant
94
Fluid, power steering
94
Foglamps, front
43–44, 112, 115
Foglamps, rear
43
Folding bench seat
31
Folding the rear seat backrest
28
Folding the rear seats
30
Front map reading lights
39
Fuel
6, 89
Fuel consumption
6
Fuel tank
89
Fuses
11 6
G
Gauge, fuel 89
Gearbox, automatic
71, 74, 96, 118
Gearbox, manual
70–71, 74, 96
Gear lever, manual gearbox
70–71
Gear shift indicator ~
Gear efficiency indicator
74
Glove box
37
Grab handles
37