2022 PEUGEOT LANDTREK bonnet
[x] Cancel search: bonnetPage 4 of 164

2
Contents
■
Overview
■
Eco-driving
1InstrumentsInstrument panels 7
Warning and indicator lamps 8
Total distance recorder 12
Lighting dimmer 12
Trip computer 12
Monochrome screen 13
Touch screen 14
2AccessElectronic key with remote control function and
built-in key, 16
Keyless Entry and Starting 18
Central locking 19
Back-up procedures 20
Doors 22
Tailgate 22
Alarm 23
Electric windows 24
3Ease of use and comfortFront seats 26
2-seat front bench seat 27
Steering wheel adjustment 28
Mirrors 29
Rear bench seat 30
Heating and Ventilation 32
Heating 33
Manual air conditioning 33
Dual-zone automatic air conditioning 34
Front demisting - defrosting 36
Rear screen demisting/defrosting 36
Front fittings 36
Courtesy lamps 38
Rear fittings 39
Tipper body fittings 40
4Lighting and visibilityLighting control stalk 43
Cornering lighting 44
Direction indicators 45
Headlamp beam height adjustment 45
Automatic illumination of headlamps 45
Guide-me-home and welcome lighting 46
Wiper control stalk 46
Changing a wiper blade 47
Automatic wipers 48
5SafetyGeneral safety recommendations 49
Hazard warning lamps 49
Horn 50
Electronic stability control (ESC) 50
Hill Assist Descent Control 52
Seat belts 53
Airbags 55
Child seats 58
Deactivating the front passenger airbag 59
ISOFIX child seats 60
Child lock 61
6DrivingDriving recommendations 62
Starting / Switching off the engine with the key 64
Starting/Switching off the engine with
Keyless Entry and Starting
66
Manual parking brake 68
Locking the rear differential 68
4-wheel drive transmission selector 69
6-speed manual gearbox 70
6-speed automatic gearbox 71
Driving mode 73
Hill start assist 73
Gear shift indicator 74
Tyre under-inflation detection 74
Driving and manoeuvring aids - General
recommendations
76
Speed limiter 77
Overspeed alert at 75 mph (120
km/h) 78
Cruise control - Specific recommendations 78
Cruise control 78
Lane departure warning system 79
Parking sensors 81
Reversing camera 83
"Off Road" camera 83
360° camera 84
7Practical informationRecommended fuel 89
Refuelling 89
Towing device 90
Snow chains 90
Roof bars 91
Bonnet 91
Engine compartment 92
Checking levels 93
Page 14 of 164

12
Instruments
After switching off the ignition, carefully open the bonnet and check the coolant
level.
For more information on Checking
levels, refer to the corresponding
section.
Total distance recorder
The total distance recorder measures the total
distance travelled by the vehicle since its initial
registration.
With the ignition on, the total distance is
displayed at all times. It remains displayed for
30
seconds after switching off the ignition. It is
displayed when the driver's door is opened, and
when the vehicle is locked or unlocked.
When travelling abroad, you may have to
change the distance units (km or miles):
the road speed must be displayed in the local
country’s official unit (km/h or mph).
The unit is changed via the screen
configuration menu, with the vehicle
stationary.
Instrument panel lighting
dimmer
Instrument panel lighting
dimmer
► In the Settings tab, select
“Brightness”.
► Adjust the brightness, using the knob located
on the right side of the steering wheel.
Touch screen lighting
dimmer
► Press the " Settings" button.
► Select “Display” then “Brightness”.
► Adjust the brightness by moving the
slider
.
The brightness can be set differently for day mode (lighting control stalk in the
"OFF " position) and night mode (lighting
control stalk in any other position).
Trip computer
Displays information related to the current trip
(range, fuel consumption, average speed, etc.).
Display of data on the
instrument panel
The trip computer data display is selected using
the knob located on the right of the steering
wheel.
With a touch screen, depending on the
theme selected on the screen, the trip
computer data will be displayed.
Display of the different windows
► From the " vehicle" tab, move the knob up
or down to successively display the different
windows.
–
Current information is displayed in succession,
with: •
The range (with monochrome display).
•
The short trip.
•
The long trip.
•
The average speed.
•
The display of the cruise control speed
setting (depending on version).
Page 19 of 164
17
Access
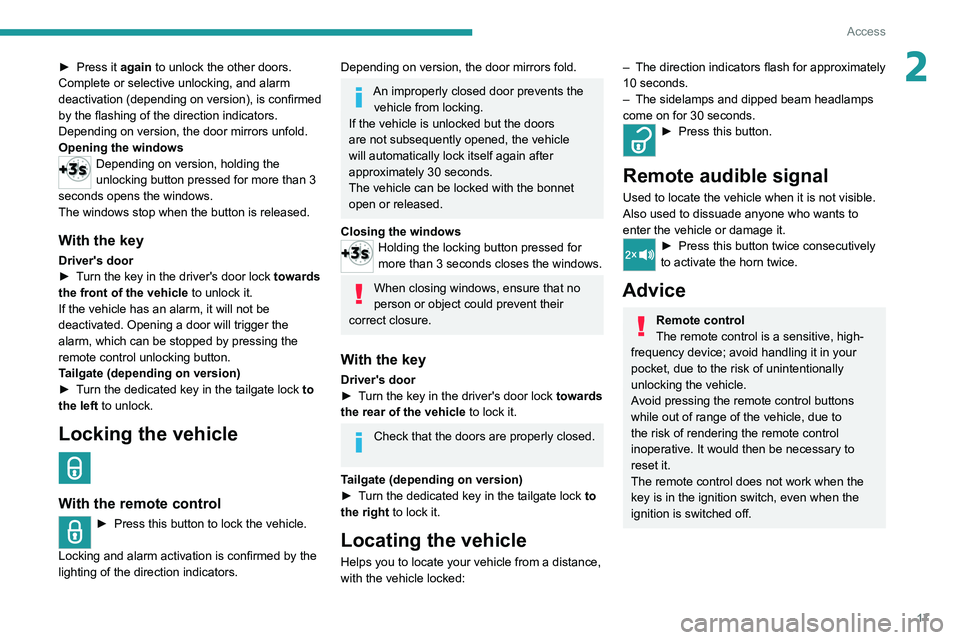
2► Press it again to unlock the other doors.
Complete or selective unlocking, and alarm
deactivation (depending on version), is confirmed
by the flashing of the direction indicators.
Depending on version, the door mirrors unfold.
Opening the windows
Depending on version, holding the
unlocking button pressed for more than 3
seconds opens the windows.
The windows stop when the button is released.
With the key
Driver's door
► T urn the key in the driver's door lock towards
the front of the vehicle to unlock it.
If the vehicle has an alarm, it will not be
deactivated. Opening a door will trigger the
alarm, which can be stopped by pressing the
remote control unlocking button.
Tailgate (depending on version)
►
T
urn the dedicated key in the tailgate lock to
the left to unlock.
Locking the vehicle
With the remote control
► Press this button to lock the vehicle.
Locking and alarm activation is confirmed by the
lighting of the direction indicators.
Depending on version, the door mirrors fold.
An improperly closed door prevents the vehicle from locking.
If the vehicle is unlocked but the doors
are not subsequently opened, the vehicle
will automatically lock itself again after
approximately 30
seconds.
The vehicle can be locked with the bonnet
open or released.
Closing the windows
Holding the locking button pressed for
more than 3 seconds closes the windows.
When closing windows, ensure that no
person or object could prevent their
correct closure.
With the key
Driver's door
► T urn the key in the driver's door lock towards
the rear of the vehicle to lock it.
Check that the doors are properly closed.
Tailgate (depending on version)
►
T
urn the dedicated key in the tailgate lock to
the right to lock it.
Locating the vehicle
Helps you to locate your vehicle from a distance,
with the vehicle locked:
– The direction indicators flash for approximately
10 seconds.
–
The sidelamps and dipped beam headlamps
come on for 30 seconds.
► Press this button.
Remote audible signal
Used to locate the vehicle when it is not visible.
Also used to dissuade anyone who wants to
enter the vehicle or damage it.
► Press this button twice consecutively
to activate the horn twice.
Advice
Remote control
The remote control is a sensitive, high-
frequency device; avoid handling it in your
pocket, due to the risk of unintentionally
unlocking the vehicle.
Avoid pressing the remote control buttons
while out of range of the vehicle, due to
the risk of rendering the remote control
inoperative. It would then be necessary to
reset it.
The remote control does not work
when the
key is in the ignition switch, even when the
ignition is switched off.
Page 24 of 164
22
Access
Doors
Opening
From outside
► After unlocking the vehicle or with the
"Keyless Entry and Starting" system electronic
key in the recognition zone, pull the door handle.
From inside
► Pull the interior opening control of a door; this
unlocks the vehicle completely .
With selective unlocking activated:
– Opening the driver's door unlocks
the driver's door only (if the vehicle has not
already been completely unlocked).
–
Opening one of the passenger doors
unlocks the rest of the vehicle.
Closing
If a door is not properly closed, a message is
displayed on the instrument panel if the engine
is running, accompanied by an audible signal
when the vehicle is travelling at more than 12
mph (20
km/h).
Tailgate
Safety recommendations
Never drive with the tailgate down.
Ensure that there are no people or
obstacles present (on the ground and higher
up) when unloading.
Never place your hands near the bracket
when handling the tailgate, there is a risk of
trapping your fingers.
The loading bay tailgate is heavy, open it
carefully.
Observe the payload indicated on the
manufacturer's label present on the vehicle.
Regularly check that the suspensions are in
good condition and that the tyres are inflated
to the recommended pressure.
Spread the load evenly in the loading bay.
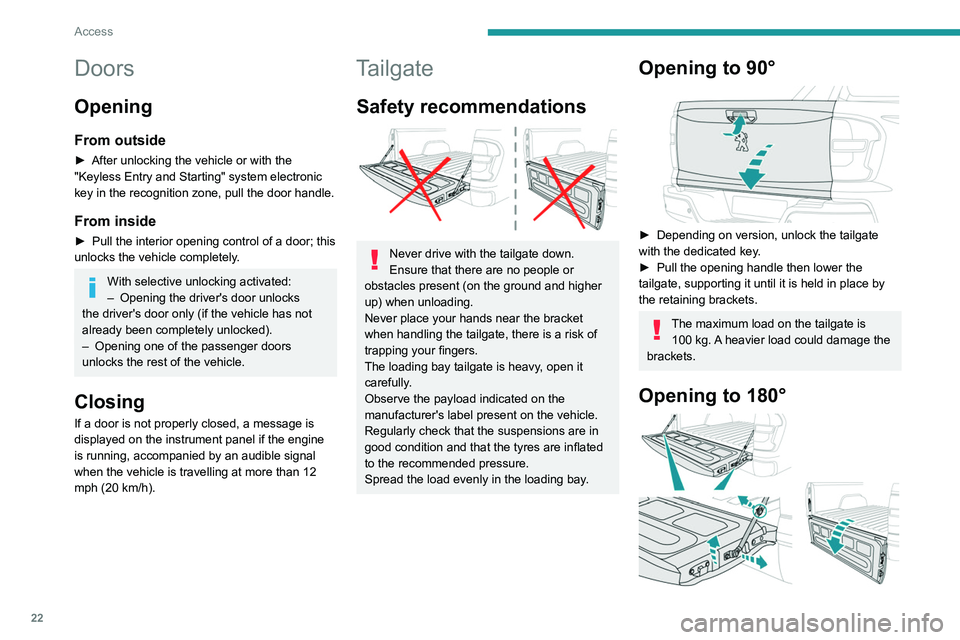
Opening to 90°
► Depending on version, unlock the tailgate
with the dedicated key .
►
Pull the opening handle then lower the
tailgate, supporting it until it is held in place by
the retaining brackets.
The maximum load on the tailgate is 100 kg. A heavier load could damage the
brackets.
Opening to 180°
Depending on version, it is possible to increase
the opening angle to around 180°.
► After opening the tailgate, raise the tailgate
slightly by pulling the brackets in the opposite
direction of operation.
► When the position is obtained, remove the
brackets from their shaft on both sides of the
tailgate.
Closing
► Raise the tailgate until the locks latch into
place.
Depending on version, if the brackets
have been detached, be sure to reinstall
them before closing the tailgate again.
Check that the 2 locks are correctly locked by
pulling the tailgate on each side.
Alarm
(Depending on version)
System which protects and provides a deterrent
against theft and break-ins.
Exterior perimeter monitoring
The system checks for opening of the vehicle.
The alarm is triggered if anyone tries to open a
door or the bonnet, for example.
Work on the alarm system
Consult a PEUGEOT dealer or a
qualified workshop.
Page 25 of 164
23
Access
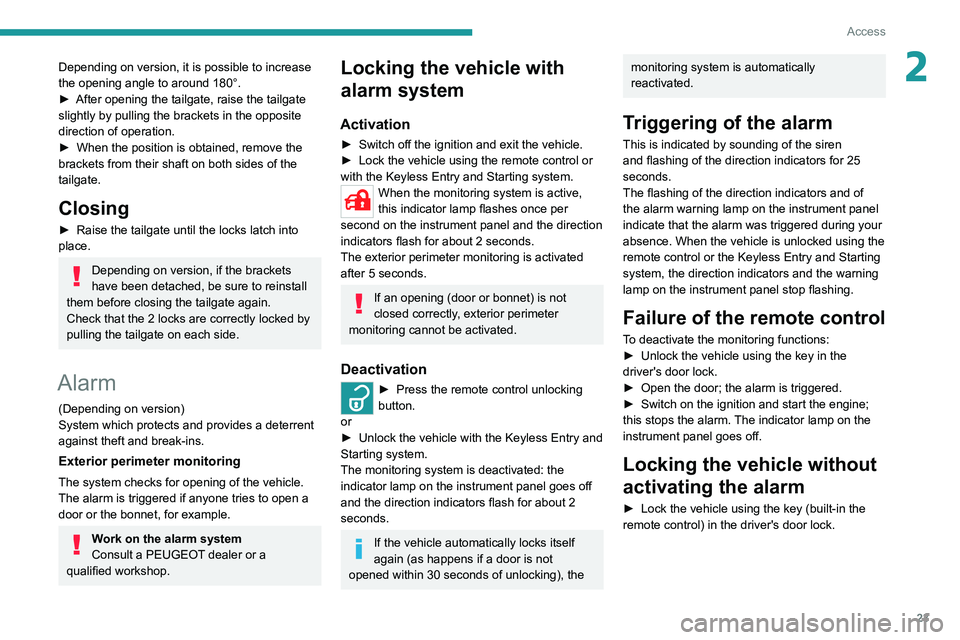
2Depending on version, it is possible to increase
the opening angle to around 180°.
►
After opening the tailgate, raise the tailgate
slightly by pulling the brackets in the opposite
direction of operation.
►
When the position is obtained, remove the
brackets from their shaft on both sides of the
tailgate.
Closing
► Raise the tailgate until the locks latch into
place.
Depending on version, if the brackets
have been detached, be sure to reinstall
them before closing the tailgate again.
Check that the 2 locks are correctly locked by
pulling the tailgate on each side.
Alarm
(Depending on version)
System which protects and provides a deterrent
against theft and break-ins.
Exterior perimeter monitoring
The system checks for opening of the vehicle.
The alarm is triggered if anyone tries to open a
door or the bonnet, for example.
Work on the alarm system
Consult a PEUGEOT dealer or a
qualified workshop.
Locking the vehicle with
alarm system
Activation
► Switch off the ignition and exit the vehicle.
► Lock the vehicle using the remote control or
with the Keyless Entry and Starting system.
When the monitoring system is active,
this indicator lamp flashes once per
second on the instrument panel and the direction
indicators flash for about 2 seconds.
The exterior perimeter monitoring is activated
after 5 seconds.
If an opening (door or bonnet) is not
closed correctly, exterior perimeter
monitoring cannot be activated.
Deactivation
► Press the remote control unlocking
button.
or
►
Unlock the vehicle with the Keyless Entry and
Starting system.
The monitoring system is deactivated: the
indicator lamp on the instrument panel goes off
and the direction indicators flash for about 2
seconds.
If the vehicle automatically locks itself
again (as happens if a door is not
opened within 30 seconds of unlocking), the
monitoring system is automatically
reactivated.
Triggering of the alarm
This is indicated by sounding of the siren
and flashing of the direction indicators for 25
seconds.
The flashing of the direction indicators and of
the alarm warning lamp on the instrument panel
indicate that the alarm was triggered during your
absence. When the vehicle is unlocked using the
remote control or the Keyless Entry and Starting
system, the direction indicators and the warning
lamp on the instrument panel
stop flashing.
Failure of the remote control
To deactivate the monitoring functions:
► Unlock the vehicle using the key in the
driver's door lock.
►
Open the door; the alarm is triggered.
►
Switch on the ignition and start the engine;
this stops the alarm.
The indicator lamp on the
instrument panel goes off.
Locking the vehicle without
activating the alarm
► Lock the vehicle using the key (built-in the
remote control) in the driver's door lock.
Page 93 of 164
91
Practical information
7► Fit the snow chains following the instructions
provided by the manufacturer .
►
Move off gently and drive for a few moments,
without exceeding 19
mph (30 km/h) for metal
snow chains or 31 mph (50 km/h) for plastic
snow chains.
►
Stop the vehicle and check that the snow
chains are correctly tightened.
It is strongly recommended that you
practise fitting the snow chains on a level
and dry surface before setting off.
Avoid driving with snow chains on roads that have been cleared of snow to avoid
damaging the vehicle's tyres and the road
surface. If the vehicle is fitted with alloy
wheels, check that no part of the chain or its
fixings is in contact with the wheel rim.
Use snow chains that are appropriate for
the size of your tyres and ensure they
are correctly fitted. Chains that are the wrong
size or incorrectly fitted can damage the
braking system, suspension, bodywork and
wheels.
Never exceed the maximum speed limit
stated in the snow chains user guide.
Roof bars
As a safety measure and to avoid damaging the roof, it is essential to use
transverse roof bars approved for your
vehicle.
Observe the instructions on fitting and use
contained in the guide supplied with the roof
bars.
Maximum load distributed over the roof
bars, for a loading height not exceeding
40 cm: 100
kg.
As this value may change, please verify the
maximum load quoted in the guide supplied
with the roof bars.
If the height exceeds 40 cm, adapt the speed
of the vehicle to the profile of the road to
avoid damaging the roof bars and the fixings
on the vehicle.
Be sure to refer to national legislation in order
to comply with the regulations for transporting
objects that are longer than the vehicle.
Recommendations
Distribute the load uniformly, taking care
to avoid overloading one of the sides.
Arrange the heaviest part of the load as close
as possible to the roof.
Secure the load firmly.
Drive gently: the vehicle will be more
susceptible to the effects of side winds and its
stability may be affected.
Regularly check the security and tight
fastening of the roof bars, at least before each
trip.
Remove the roof bars once they are no longer
needed.
Bonnet
When the engine is hot, handle the
exterior safety catch and the bonnet stay
with care (risk of burns), using the protected
area.
When the bonnet is open, take care not to
damage the safety catch.
Do not open the bonnet under very windy
conditions.
Cooling of the engine when stopped
The engine cooling fan may start after
the engine has been switched off.
Take care with objects or clothing that
could be caught in the blades of the fan!
Opening
► Open the driver's door .
Page 94 of 164
92
Practical information
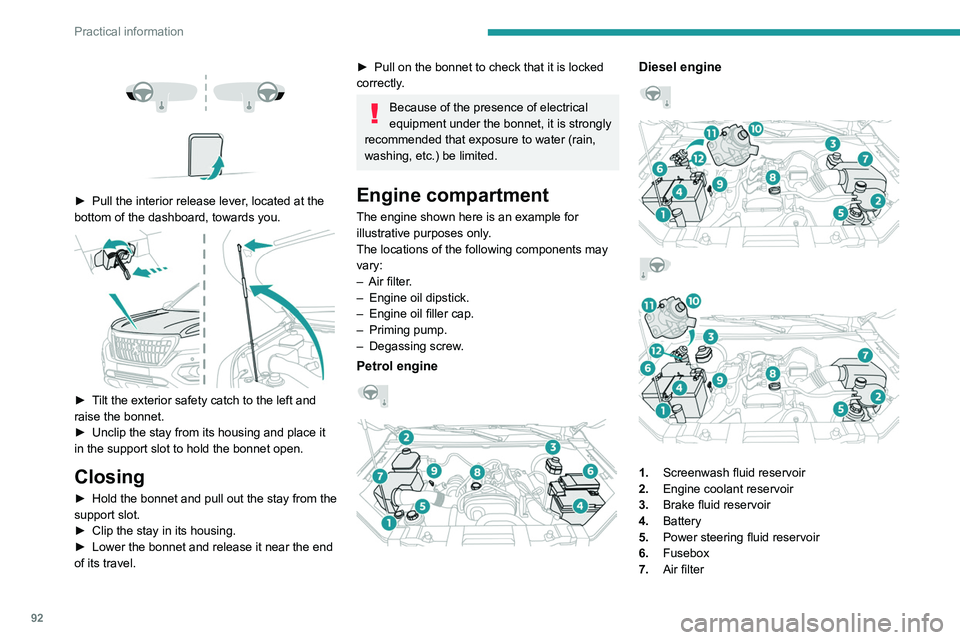
► Pull the interior release lever , located at the
bottom of the dashboard, towards you.
► Tilt the exterior safety catch to the left and
raise the bonnet.
►
Unclip the stay from its housing and place it
in the support slot to hold the bonnet open.
Closing
► Hold the bonnet and pull out the stay from the
support slot.
►
Clip the stay in its housing.
►
Lower the bonnet and release it near the end
of its travel.
► Pull on the bonnet to check that it is locked
correctly .
Because of the presence of electrical
equipment under the bonnet, it is strongly
recommended that exposure to water (rain,
washing, etc.) be limited.
Engine compartment
The engine shown here is an example for
illustrative purposes only.
The locations of the following components may
vary:
–
Air filter
.
–
Engine oil dipstick.
–
Engine oil filler cap.
–
Priming pump.
–
Degassing screw
.
Petrol engine
Diesel engine
1. Screenwash fluid reservoir
2. Engine coolant reservoir
3. Brake fluid reservoir
4. Battery
5. Power steering fluid reservoir
6. Fusebox
7. Air filter
8.Engine oil filler cap
9. Engine oil dipstick
10. Priming pump*
11 . Degassing screw*
12. Fuel filter*
Diesel fuel system
This system is under very high pressure.
All work must be carried out only by a
PEUGEOT dealer or a qualified workshop
Checking levels
Check all of the following levels regularly in
accordance with the manufacturer's service
schedule. Top them up if required, unless
otherwise indicated.
If a level drops significantly, have the
corresponding system checked by a PEUGEOT
dealer or a qualified workshop.
The fluids must comply with the manufacturer's requirements and with
the vehicle's engine.
Take care when working under the bonnet, as certain areas of the engine
may be extremely hot (risk of burns) and the
cooling fan could start at any time (even with
the ignition off).
* Depending on engine.
Page 95 of 164
93
Practical information
78.Engine oil filler cap
9. Engine oil dipstick
10. Priming pump*
11 . Degassing screw*
12. Fuel filter*
Diesel fuel system
This system is under very high pressure.
All work must be carried out only by a
PEUGEOT dealer or a qualified workshop
Checking levels
Check all of the following levels regularly in
accordance with the manufacturer's service
schedule. Top them up if required, unless
otherwise indicated.
If a level drops significantly, have the
corresponding system checked by a PEUGEOT
dealer or a qualified workshop.
The fluids must comply with the manufacturer's requirements and with
the vehicle's engine.
Take care when working under the bonnet, as certain areas of the engine
may be extremely hot (risk of burns) and the
cooling fan could start at any time (even with
the ignition off).
* Depending on engine.
Used products
Avoid prolonged contact of used oil or fluids with the skin.
Most of these fluids are harmful to health and
very corrosive.
Do not discard used oil or fluids into
sewers or onto the ground.
Empty used oil into the containers reserved
for this purpose at a PEUGEOT dealer or a
qualified workshop.
Engine oil
The level is checked, with the engine having been switched off for at least 30
minutes and on level ground, using the dipstick.
It is normal to top up the oil level between two
services (or oil changes). It is recommended
that you check the level, and top up if necessary,
every 3,000 miles (5,000 km).
In order to maintain the reliability of the
engine and emissions control system,
never use additives in the engine oil.
Checking using the dipstick
For the location of the dipstick, please refer
to the illustration of the corresponding engine
compartment.
► Grasp the dipstick by its coloured grip and
pull it out completely .
►
Wipe the end of the dipstick using a clean,
lint-free cloth.
► Reinsert the dipstick and push fully down,
then pull it out again to visually check the oil
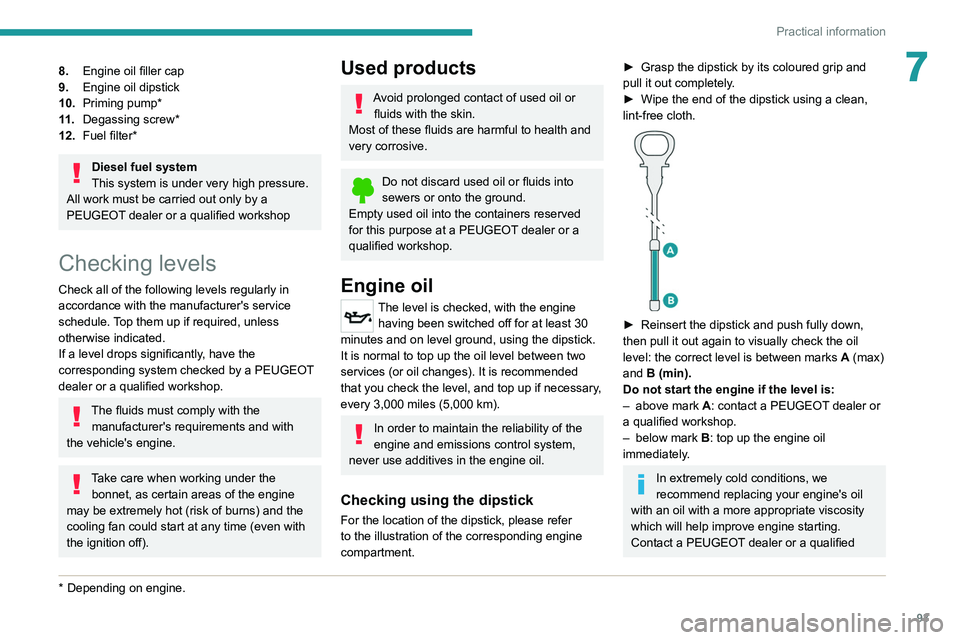
level: the correct level is between marks A
(max)
and B (min).
Do not start the engine if the level is:
–
above mark
A: contact a PEUGEOT dealer or
a qualified workshop.
–
below mark B
: top up the engine oil
immediately.
In extremely cold conditions, we
recommend replacing your engine's oil
with an oil with a more appropriate viscosity
which will help improve engine starting.
Contact a PEUGEOT dealer or a qualified