2022 PEUGEOT LANDTREK lock
[x] Cancel search: lockPage 70 of 164
68
Driving
Manual parking brake
Release
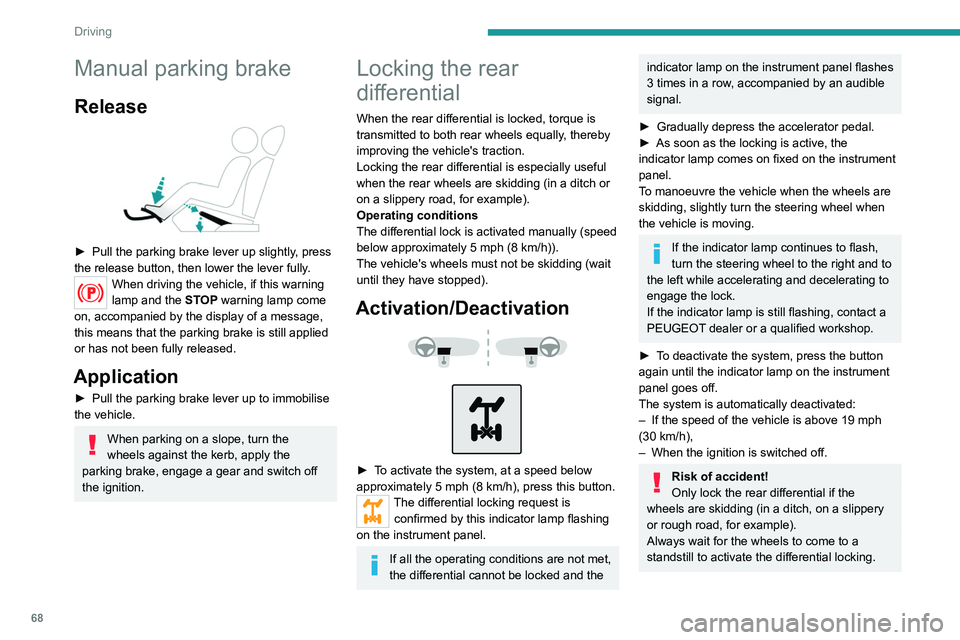
► Pull the parking brake lever up slightly, press
the release button, then lower the lever fully.
When driving the vehicle, if this warning
lamp and the STOP warning lamp come
on, accompanied by the display of a message,
this means that the parking brake is still applied
or has not been fully released.
Application
► Pull the parking brake lever up to immobilise
the vehicle.
When parking on a slope, turn the
wheels against the kerb, apply the
parking brake, engage a gear and switch off
the ignition.
Locking the rear
differential
When the rear differential is locked, torque is
transmitted to both rear wheels equally, thereby
improving the vehicle's traction.
Locking the rear differential is especially useful
when the rear wheels are skidding (in a ditch or
on a slippery road, for example).
Operating conditions
The differential lock is activated manually (speed
below approximately 5 mph (8 km/h)).
The vehicle's wheels must not be skidding (wait
until they have stopped).
Activation/Deactivation
► To activate the system, at a speed below
approximately 5 mph (8 km/h), press this button.
The differential locking request is confirmed by this indicator lamp flashing
on the instrument panel.
If all the operating conditions are not met,
the differential cannot be locked and the
indicator lamp on the instrument panel flashes
3 times in a row , accompanied by an audible
signal.
►
Gradually depress the accelerator pedal.
►
As soon as the locking is active, the
indicator
lamp comes on fixed on the instrument
panel.
To manoeuvre the vehicle when the wheels are
skidding, slightly turn the steering wheel when
the vehicle is moving.
If the indicator lamp continues to flash,
turn the steering wheel to the right and to
the left while accelerating and decelerating to
engage the lock.
If the indicator
lamp is still flashing, contact a
PEUGEOT dealer or a qualified workshop.
►
T
o deactivate the system, press the button
again until the indicator
lamp on the instrument
panel goes off.
The system is automatically deactivated:
–
If the speed of the vehicle is above 19 mph
(30
km/h),
–
When the ignition is switched off.
Risk of accident!
Only lock the rear differential if the
wheels are skidding (in a ditch, on a slippery
or rough road, for example).
Always wait for the wheels to come to a
standstill to activate the differential locking.
Never exceed the speed of 5 mph (8
km/h) with the rear differential locked, and
deactivate the locking as soon as conditions
allow.
4-wheel drive
transmission selector
Manual selector for choosing the most suitable
transmission mode according to the different
driving conditions encountered (low grip, for
example).
Operation
��
��
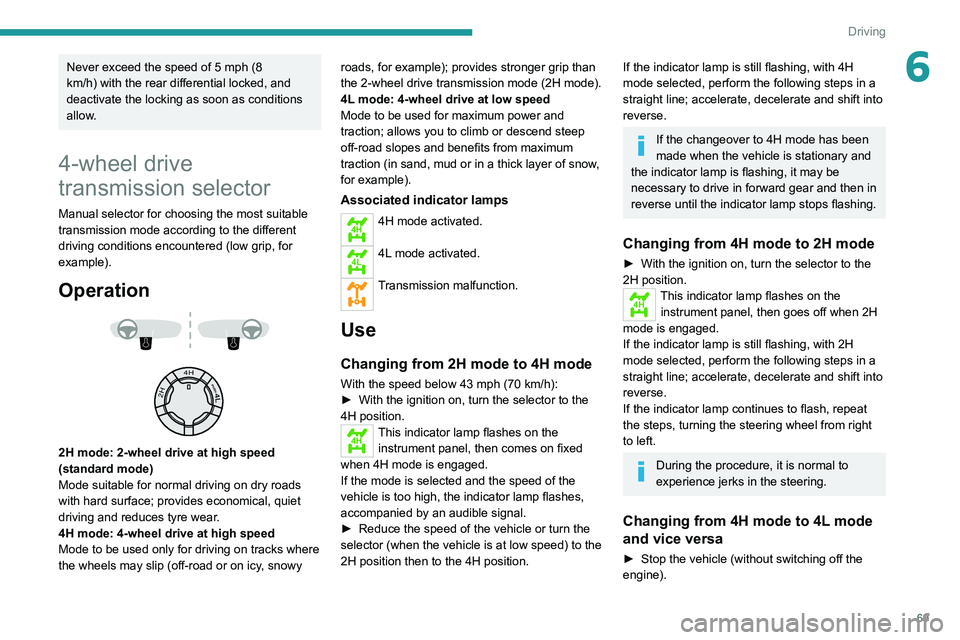
2H mode: 2-wheel drive at high speed
(standard mode)
Mode suitable for normal driving on dry roads
with hard surface; provides economical, quiet
driving and reduces tyre wear.
4H mode: 4-wheel drive at high speed
Mode to be used only for driving on tracks where
the wheels may slip (off-road or on icy, snowy
Page 71 of 164
69
Driving
6Never exceed the speed of 5 mph (8
km/h) with the rear differential locked, and
deactivate the locking as soon as conditions
allow.
4-wheel drive
transmission selector
Manual selector for choosing the most suitable
transmission mode according to the different
driving conditions encountered (low grip, for
example).
Operation
��
��
2H mode: 2-wheel drive at high speed
(standard mode)
Mode suitable for normal driving on dry roads
with hard surface; provides economical, quiet
driving and reduces tyre wear.
4H mode: 4-wheel drive at high speed
Mode to be used only for driving on tracks where
the wheels may slip (off-road or on icy, snowy roads, for example); provides stronger grip than
the 2-wheel drive transmission
mode (2H mode).
4L mode: 4-wheel drive at low speed
Mode to be used for maximum power and
traction; allows you to climb or descend steep
off-road slopes and benefits from maximum
traction (in sand, mud or in a thick layer of snow,
for example).
Associated indicator lamps
4H4H mode activated.
4L4L mode activated.
Transmission malfunction.
Use
Changing from 2H mode to 4H mode
With the speed below 43 mph (70 km/h):
► With the ignition on, turn the selector to the
4H position.
4HThis indicator lamp flashes on the instrument panel, then comes on fixed
when 4H mode is engaged.
If the mode is selected and the speed of the
vehicle is too high, the indicator
lamp flashes,
accompanied by an audible signal.
►
Reduce the speed of the vehicle or turn the
selector (when the vehicle is at low speed) to the
2H position then to the 4H position.
If the indicator lamp is still flashing, with 4H
mode selected, perform the following steps in a
straight line; accelerate, decelerate and shift into
reverse.
If the changeover to 4H mode has been
made when the vehicle is stationary and
the indicator
lamp is flashing, it may be
necessary to drive in forward gear and then in
reverse until the indicator
lamp stops flashing.
Changing from 4H mode to 2H mode
► With the ignition on, turn the selector to the
2H position.
4HThis indicator lamp flashes on the
instrument panel, then goes off when 2H
mode is engaged.
If the indicator
lamp is still flashing, with 2H
mode selected, perform the following steps in a
straight line; accelerate, decelerate and shift into
reverse.
If the indicator
lamp continues to flash, repeat
the steps, turning the steering wheel from right
to left.
During the procedure, it is normal to
experience jerks in the steering.
Changing from 4H mode to 4L mode
and vice versa
► Stop the vehicle (without switching off the
engine).
Page 73 of 164
71
Driving
6Engaging reverse gear
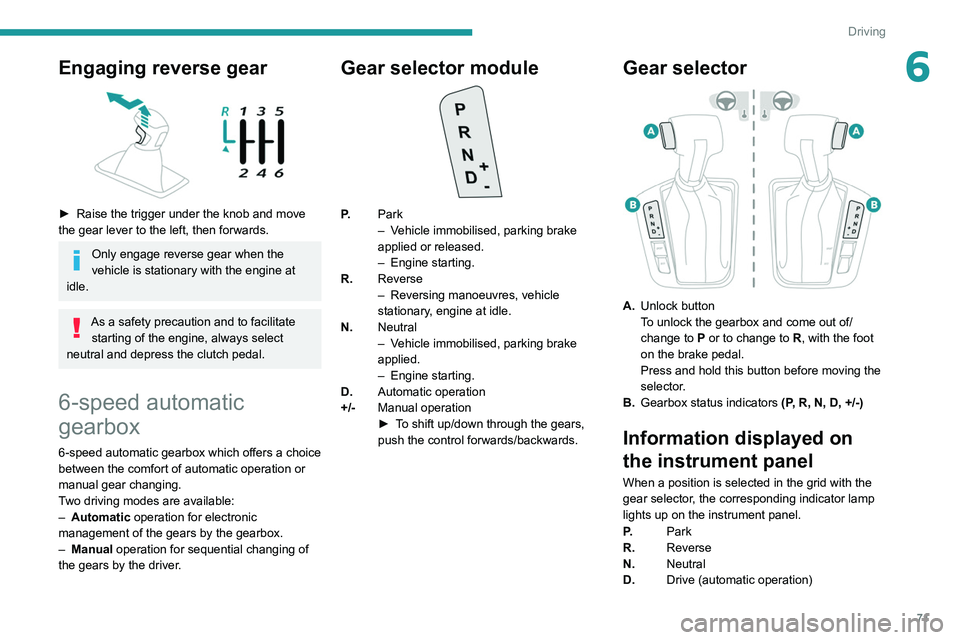
► Raise the trigger under the knob and move
the gear lever to the left, then forwards.
Only engage reverse gear when the
vehicle is stationary with the engine at
idle.
As a safety precaution and to facilitate starting of the engine, always select
neutral and depress the clutch pedal.
6-speed automatic
gearbox
6-speed automatic gearbox which offers a choice
between the comfort of automatic operation or
manual gear changing.
Two driving modes are available:
–
Automatic
operation for electronic
management of the gears by the gearbox.
–
Manual
operation for sequential changing of
the gears by the driver.
Gear selector module
P. Park
–
V ehicle immobilised, parking brake
applied or released.
–
Engine starting.
R. Reverse
–
Reversing manoeuvres, vehicle
stationary
, engine at idle.
N. Neutral
–
V
ehicle immobilised, parking brake
applied.
–
Engine starting.
D. Automatic operation
+/- Manual operation
►
T
o shift up/down through the gears,
push the control forwards/backwards.
Gear selector
A. Unlock button
To unlock the gearbox and come out of/
change to
P or to change to R, with the foot
on the brake pedal.
Press and hold this button before moving the
selector.
B. Gearbox status indicators (P, R, N, D, +/-)
Information displayed on
the instrument panel
When a position is selected in the grid with the
gear selector, the corresponding indicator lamp
lights up on the instrument panel.
P.Park
R. Reverse
N. Neutral
D. Drive (automatic operation)
Page 74 of 164
72
Driving
1...6.Gear engaged during manual operation
-. Instruction not accepted during manual
operation
Starting the vehicle
► With your foot on the brake pedal,
press the unlock button and select
position P
or N.
►
Start the engine.
If the conditions are not met, you will hear an
audible signal, accompanied by the display of a
message.
►
With the engine running, depress the brake
pedal.
►
Release the parking brake.
►
Select position R
, D or +/-.
►
Gradually release the brake pedal.
The vehicle moves off immediately
.
If position N is selected inadvertently
while driving, allow the engine to return
to idle, then select position D to accelerate.
When the engine is running at idle with
the brakes released, if position R, D or
+/- is selected, the vehicle moves off even
without the accelerator being pressed.
Never leave children unattended in the
vehicle when the engine is running.
When carrying out maintenance with the
engine running, apply the parking brake and
select position P.
Automatic operation
► Select position D for automatic changing of
the six gears.
The gearbox then operates in auto-adaptive
mode, without any intervention on the part of the
driver. It continuously selects the most suitable
gear according to the driving style, the road
profile and the load in the vehicle.
For maximum acceleration without touching the
selector, press the accelerator fully down (kick-
down). The gearbox changes down automatically
or holds the gear selected until the maximum
engine speed is reached.
When braking, the gearbox changes down
automatically to provide effective engine braking.
If you release the accelerator sharply, the
gearbox will not shift to a higher gear for safety
reasons.
Never select position N while the vehicle
is moving.
Never select positions P or R unless the
vehicle is completely stationary.
Manual operation
To limit fuel consumption during an extended standstill with the engine
running (for example, in a traffic jam), set the
gear selector to N and apply the parking
brake.
► Selecting position +/- enables sequential
shifting between the six gears.
►
T
o shift up/down through the gears, push the
control forwards/backwards.
The gearbox only changes gear if the vehicle
speed and engine speed conditions allow;
otherwise, the rules for automatic operation are
temporarily applied.
D disappears, and the gears engaged appear in
succession on the instrument panel.
If the engine speed is too low or too high, the
selected gear flashes for a few seconds, then the
gear actually engaged is shown.
It is possible to change from position D to
position +/-
at any time.
When the vehicle is stationary or moving very
slowly, the gearbox selects gear 1 automatically.
This symbol is displayed if a gear is not
engaged correctly (gear selector between
two positions).
Switching off the vehicle
Before switching off the engine, it is possible to
engage position P or N to place the gearbox in
neutral.
In both cases, apply the parking brake to
immobilise the vehicle.
If the gear selector is not in position P,
when the driver's door is opened or
approximately 45 seconds after the ignition is
switched off, an audible signal sounds and a
message appears.
► Return the gear selector to P; the audible
signal stops and the message disappears.
Malfunction
In the event of a malfunction, this warning
lamp comes on and a message is
displayed, when the ignition is switched on.
In this case, the gearbox goes into back-up
mode and is locked in 3
rd gear. You may feel a
significant jolt (without risk to the gearbox) when
changing from P to R and from N to R.
Do not exceed 62 mph (100 km/h), local speed
restrictions permitting.
Have the system checked by a PEUGEOT
dealer or a qualified workshop.
There is a risk of damaging the gearbox: – If the accelerator and brake pedals are
depressed simultaneously.
– In the event of a battery failure, forcing the
selector from position P to another position.
Driving mode
Driving modes are selected using one of the
following controls, depending on version:
Page 75 of 164
73
Driving
6switched off, an audible signal sounds and a
message appears.
►
Return the gear selector to P
; the audible
signal stops and the message disappears.
Malfunction
In the event of a malfunction, this warning
lamp comes on and a message is
displayed, when the ignition is switched on.
In this case, the gearbox goes into back-up
mode and is locked in 3
rd gear. You may feel a
significant jolt (without risk to the gearbox) when
changing from
P
to R and from N to R.
Do not exceed 62 mph (100
km/h), local speed
restrictions permitting.
Have the system checked by a PEUGEOT
dealer or a qualified workshop.
There is a risk of damaging the gearbox: – If the accelerator and brake pedals are
depressed simultaneously
.
–
In the event of a battery failure, forcing the
selector from position P
to another position.
Driving mode
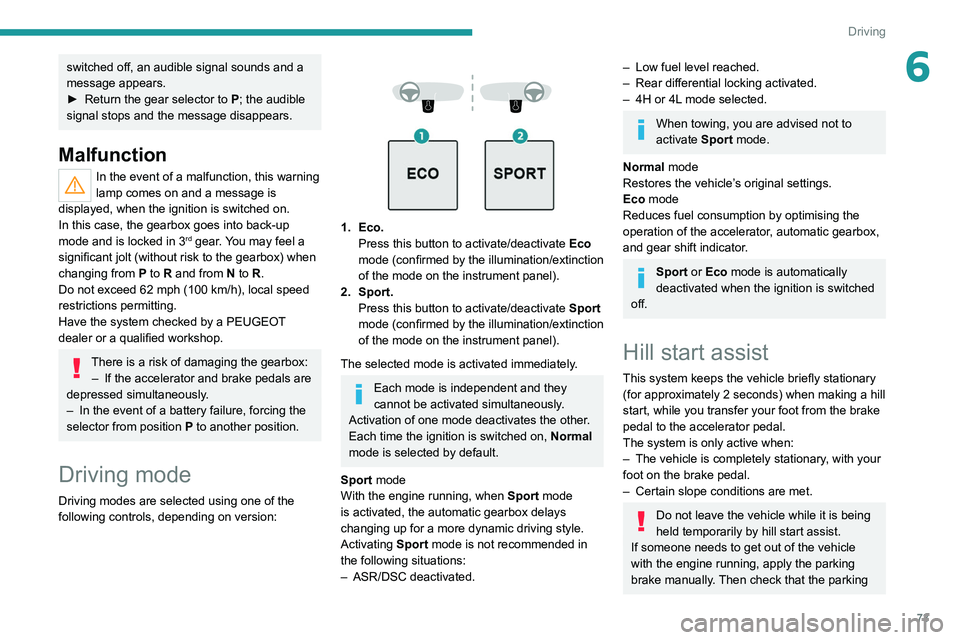
Driving modes are selected using one of the
following controls, depending on version:
1. Eco. Press this button to activate/deactivate Eco
mode (confirmed by the illumination/extinction
of the mode on the instrument panel).
2. Sport. Press this button to activate/deactivate
Sport
mode (confirmed by the illumination/extinction
of the mode on
the instrument panel).
The selected mode is activated immediately.
Each mode is independent and they
cannot be activated simultaneously.
Activation of one mode deactivates the other.
Each time the ignition is switched on, Normal
mode is selected by default.
Sport mode
With the engine running, when
Sport
mode
is activated, the automatic gearbox delays
changing up for a more dynamic driving style.
Activating
Sport mode is not recommended in
the following situations:
–
ASR/DSC deactivated.
– Low fuel level reached.
– Rear differential locking activated.
–
4H or 4L
mode selected.
When towing, you are advised not to
activate Sport mode.
Normal mode
Restores the vehicle’s original settings.
Eco mode
Reduces fuel consumption by optimising the
operation of the accelerator, automatic gearbox,
and gear shift indicator.
Sport or Eco mode is automatically
deactivated when the ignition is switched
off.
Hill start assist
This system keeps the vehicle briefly stationary
(for approximately 2 seconds) when making a hill
start, while you transfer your foot from the brake
pedal to the accelerator pedal.
The system is only active when:
–
The vehicle is completely stationary
, with your
foot on the brake pedal.
–
Certain slope conditions are met.
Do not leave the vehicle while it is being
held temporarily by hill start assist.
If someone needs to get out of the vehicle
with the engine running, apply the parking
brake manually. Then check that the parking
Page 94 of 164
92
Practical information
► Pull the interior release lever , located at the
bottom of the dashboard, towards you.
► Tilt the exterior safety catch to the left and
raise the bonnet.
►
Unclip the stay from its housing and place it
in the support slot to hold the bonnet open.
Closing
► Hold the bonnet and pull out the stay from the
support slot.
►
Clip the stay in its housing.
►
Lower the bonnet and release it near the end
of its travel.
► Pull on the bonnet to check that it is locked
correctly .
Because of the presence of electrical
equipment under the bonnet, it is strongly
recommended that exposure to water (rain,
washing, etc.) be limited.
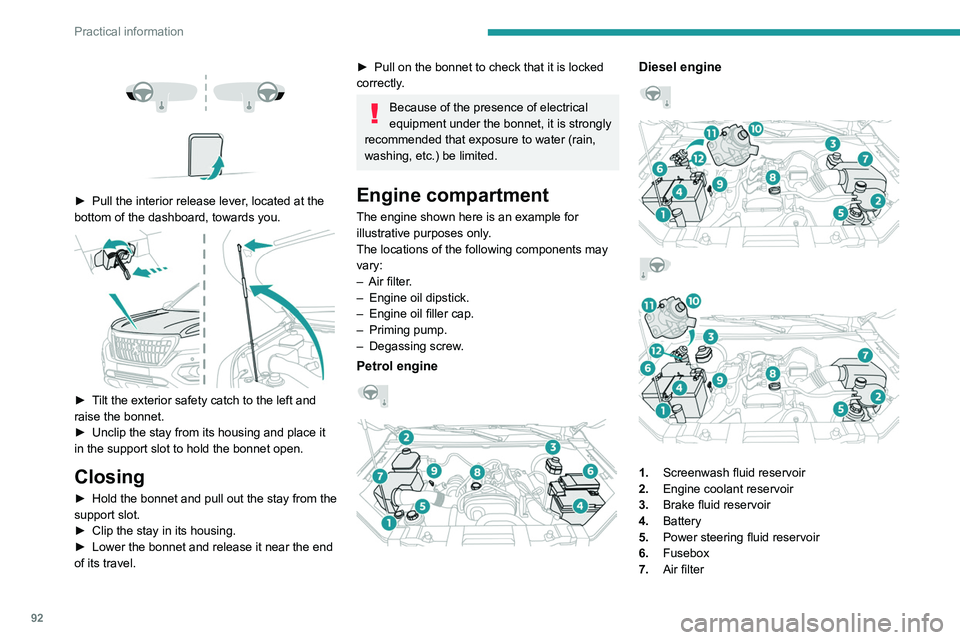
Engine compartment
The engine shown here is an example for
illustrative purposes only.
The locations of the following components may
vary:
–
Air filter
.
–
Engine oil dipstick.
–
Engine oil filler cap.
–
Priming pump.
–
Degassing screw
.
Petrol engine
Diesel engine
1. Screenwash fluid reservoir
2. Engine coolant reservoir
3. Brake fluid reservoir
4. Battery
5. Power steering fluid reservoir
6. Fusebox
7. Air filter
8.Engine oil filler cap
9. Engine oil dipstick
10. Priming pump*
11 . Degassing screw*
12. Fuel filter*
Diesel fuel system
This system is under very high pressure.
All work must be carried out only by a
PEUGEOT dealer or a qualified workshop
Checking levels
Check all of the following levels regularly in
accordance with the manufacturer's service
schedule. Top them up if required, unless
otherwise indicated.
If a level drops significantly, have the
corresponding system checked by a PEUGEOT
dealer or a qualified workshop.
The fluids must comply with the manufacturer's requirements and with
the vehicle's engine.
Take care when working under the bonnet, as certain areas of the engine
may be extremely hot (risk of burns) and the
cooling fan could start at any time (even with
the ignition off).
* Depending on engine.
Page 100 of 164
98
Practical information
Always wear gloves, protective glasses and
suitable clothing to avoid direct contact with
liquids against the skin or eyes.
In the event of contact with the skin, wash
the affected area thoroughly with soap and
running water.
In the event of contact with the eyes,
immediately rinse the eyes with large
amounts of water or with an eye wash
solution for at least 15 minutes. Seek medical
attention if you feel a persistent burning
sensation or irritation.
Never go underneath the vehicle raised
using a jack; always use an axle
stand-type support.
When working on the vehicle's electrical
system, take care not to cause a short circuit -
risk of burns and fire.
Flammable products and all sources of heat
(sparks, for example) must be kept away from
the battery, the fuel tank and all components
of the fuel system.
Never run the engine in a closed space
without sufficient ventilation; always use a
ventilation system such as an exhaust gas
extractor, for example.
Never leave liquids (oil, coolant) unattended.
Keep these liquids out of the reach of children
and animals.
The liquids and components replaced must have the same characteristics and
comply with the manufacturer's
recommendations.
General checks
Check the following components to ensure
proper operation and longevity of the vehicle.
For more information on the components
to be
checked, refer to the Checking levels, Checks
and Advice on care
sections.
Daily checks
Check that all vehicle lamps (front and
rear) are working properly.
Check the condition of the door mirrors and
the adjustment controls.
Check that all the doors can be opened,
closed and locked correctly.
Regularly check all levels, the condition of the
tyres and the bodywork.
Monthly checks
Check:
–
The engine coolant level.
–
The absence of leaks on all the pipes and
hoses visible on the vehicle as well as the
tanks.
–
The proper functioning of the elements of
the: •
Heating and ventilation system.
•
Air conditioning system.
• Parking brake (application and release).
• Horn.
–
The tightening of the wheel nuts (if
necessary
, retighten them to the specific
tightening values).
–
The good condition of the wipers.
–
The absence of significant play in the
steering wheel and steering.
–
The correct travel of the brake pedal as
well as the clutch pedal.
General recommendations
related to maintenance
operations
Electronic engine management
computer
The electronic computer is not completely
waterproof. When performing maintenance
in the rain or washing the engine, it must be
protected from water.
Never remove or disconnect any part of the
electronic injection system to avoid the entry
of moisture, oil or any other foreign body.
Do not install a radio antenna or other
equipment likely to generate interference near
the electronic computer.
Do not expose the electronic computer to a
temperature higher than 105°C.
Before any welding operation on the vehicle,
it is essential to disconnect the electronic
computer - risk of damage to the electronic
system components.
Fuel system
All work on the fuel system must be
carried out only by a PEUGEOT dealer or a
qualified workshop.
Electrical system
Never:
– disconnect the battery cables or the
electrical wiring harness connectors when the
engine is running.
– reverse the polarities when reconnecting
the battery (risk of damage to electronic
components).
– pierce the insulation of the electrical wires
during an electrical check or diagnosis.
Changing the 12 V battery
Petrol engine
Page 105 of 164
103
Practical information
7of the throttle body against any projection of
liquid (oil, water, detergent or solvent).
►
Remove grease and carbon deposits from
the surface of the main duct with a specific
"carburettor" type cleaner
.
►
Rotate the throttle valve inside the duct to
clean the seats on each side.
►
Wipe and dry the throttle body with a soft,
lint-free cloth.
If no cleaning has been done for a long
time, deposits may be difficult to remove.
Clean and wipe the throttle body
several
times with a soft, lint-free cloth.
Never immerse the throttle body in a
cleaning liquid or in an ultrasonic tank.
Never use:
–
detergents containing methyl ketone or
other highly corrosive substances as well as
household cleaning detergent;
–
cleaning products directly on the throttle
bearings as well as on the body's connector;
–
hard, sharp or abrasive tools to remove
difficult deposits. Use a soft cloth with a
suitable detergent.
Refitting the throttle body
Before refitting the throttle body, check
the condition of the seal. If it is damaged,
replace it with a new one. ►
Install the seal on the intake manifold and fit
the throttle body
B, making sure that the seal
does not fall.
For reassembly, carry out the operations in the
reverse order to those for removal. Tighten the
screws to the correct tightening torque.
Free-wheeling
In certain situations, you must allow the vehicle
to free-wheel (while being towed, on a rolling
road, in an automatic car wash, or being
transported by rail or sea freight, etc.).
The procedure differs depending on the type of
gearbox and transmission.
/
To release them
► With the vehicle stationary and the engine
running, depress the brake pedal and release
the parking brake.
►
With a manual gearbox, move the gear lever
into neutral.
►
With an automatic gearbox, select position N
.
►
For 4-wheel drive vehicles (4x4), put the
transmission selector in 2H
mode.
►
Switch the ignition off.
Advice on care and maintenance
General recommendations
Observe the following recommendations to avoid
damaging the vehicle.
Exterior
Never use a high-pressure jet wash in
the engine compartment - risk of
damaging the electrical components!
Do not wash the vehicle in bright sunshine or
extremely cold conditions.
When washing the vehicle in an
automatic roller-brush car wash, be sure
to lock the doors and, depending on version,
move the electronic key away.
When using a high-pressure washer, keep
the jet nozzle at a minimum distance of 30
cm from the vehicle (particularly on any stone
chip impacts, sensors or seals).
Promptly clean up any stains containing
chemicals liable to damage the vehicle's
paintwork (including tree resin, bird
droppings, insect secretions, pollen and tar).
Depending on the environment, clean the
vehicle frequently to remove salty deposits
(in coastal areas), soot (in industrial areas)
and mud/salts (in wet or cold areas). These
substances can be highly corrosive.