2022 PEUGEOT LANDTREK tow
[x] Cancel search: towPage 48 of 164
46
Lighting and visibility
Fast wiping.
If the ignition has been switched off with
the windscreen wipers active, you must
operate the control stalk again to reactivate
wiping when the ignition is switched on again
(unless the ignition was off for less than
a minute).
Decreasing or increasing the wiping
frequency
► Rotate the ring to increase/decrease
the wiping frequency (with " INT" or
"AUTO" wiping position).
Windscreen wash
► Pull the wiper control stalk towards you and
hold.
A final wiping cycle is performed when
screenwashing ends.
In fog or snow, the rain/sunshine sensor
may detect sufficient light. For this
reason, the lighting will not come on
automatically.
The inner surface of the windscreen may become misted up and affect the proper
operation of the rain/sunshine sensor.
In humid and cold weather, demist the
windscreen regularly.
Guide-me-home and
welcome lighting
Guide-me-home lighting
Depending on version, when the light is poor, the
dipped beam headlamps come on automatically
when the ignition is switched off.
Guide-me-home lighting goes off automatically
after a period of time.
You can activate/deactivate this function and adjust the guide-me-home lighting
duration in the Vehicle settings
touch screen
menu.
Welcome lighting
When unlocking the vehicle, this system
automatically switches on the dipped beam
headlamps and certain lights in the passenger
compartment.
DOORWhen the front courtesy lamp control is
activated, the front courtesy lamp comes
on automatically when a door is opened.
Depending on version, the front doors have sill
lighting. Each sill light automatically switches on
when a front door is opened to facilitate entry
into the vehicle at night.
You can activate/deactivate this function and adjust the welcome lighting duration
in the Vehicle settings touch screen menu.
Wiper control stalk
Before operating the wipers in wintry
conditions, clear any snow, ice or frost
from the windscreen and around the wiper
arms and blades.
Do not operate the wipers on a dry
windscreen. In extremely hot or cold
weather, check that the wiper blades are not
stuck to the windscreen before operating the
wipers.
After using an automatic car wash, you may temporarily notice abnormal noises
and poorer wiping performance.
You do not
need to replace the wiper blades.
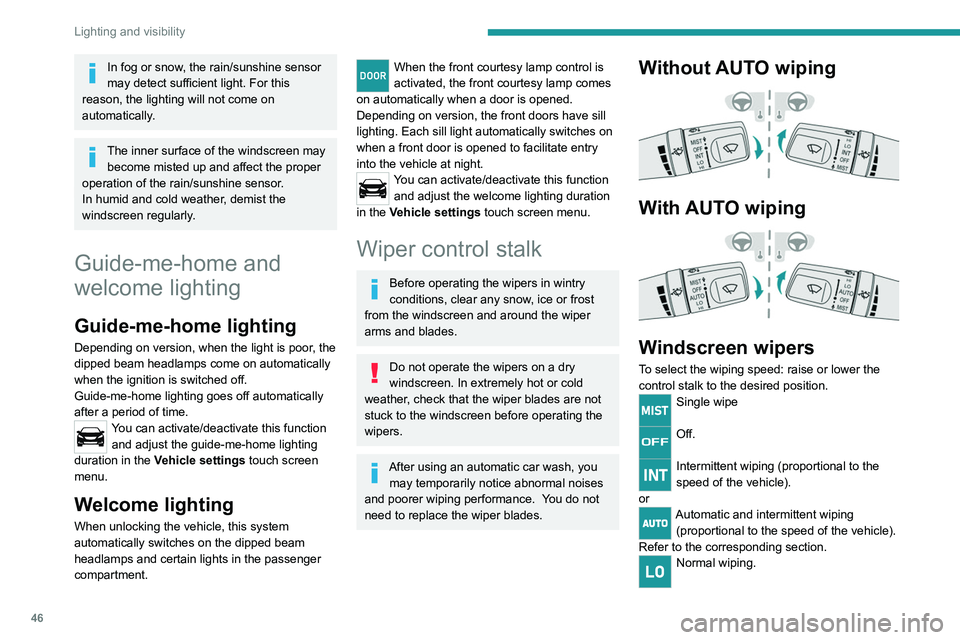
Without AUTO wiping
With AUTO wiping
Windscreen wipers
To select the wiping speed: raise or lower the
control stalk to the desired position.
Single wipe
Off.
Intermittent wiping (proportional to the
speed of the vehicle).
or
Automatic and intermittent wiping (proportional to the speed of the vehicle).
Refer to the corresponding section.
Normal wiping.
Page 49 of 164
47
Lighting and visibility
4Fast wiping.
If the ignition has been switched off with
the windscreen wipers active, you must
operate the control stalk again to reactivate
wiping when the ignition is switched on again
(unless the ignition was off for less than
a
minute).
Decreasing or increasing the wiping
frequency
► Rotate the ring to increase/decrease
the wiping frequency (with " INT
" or
"AUTO" wiping position).
Windscreen wash
► Pull the wiper control stalk towards you and
hold.
A
final wiping cycle is performed when
screenwashing ends.
To avoid damaging the wiper blades, do not operate the screenwash if the
screenwash reservoir is empty.
Only operate the screenwash if there is no
risk of the fluid freezing on the windscreen
and hindering visibility. During the winter
period, use "very cold climate" rated products.
Never top up with water.
Changing a wiper blade
To check that the wiper blades have not become rough, gently slide your finger
along the blade.
To maintain the effectiveness of the wipers, it
is advisable to:
–
handle them with care.
–
clean them regularly using soapy water
.
–
clean the windscreen regularly with a
special detergent.
–
avoid using them to hold cardboard on the
windscreen.
–
replace them at the first signs of wear
.
For safety reasons and to avoid
damaging the windscreen or the
windscreen wiper blades, always clean them
if foreign bodies
are present (for example:
sand, dust, oil, bird droppings).
Never use petrol, thinner or another similar
solvent to clean the wiper blades.
Never shake, rotate or bend the wiper arm
and blade.
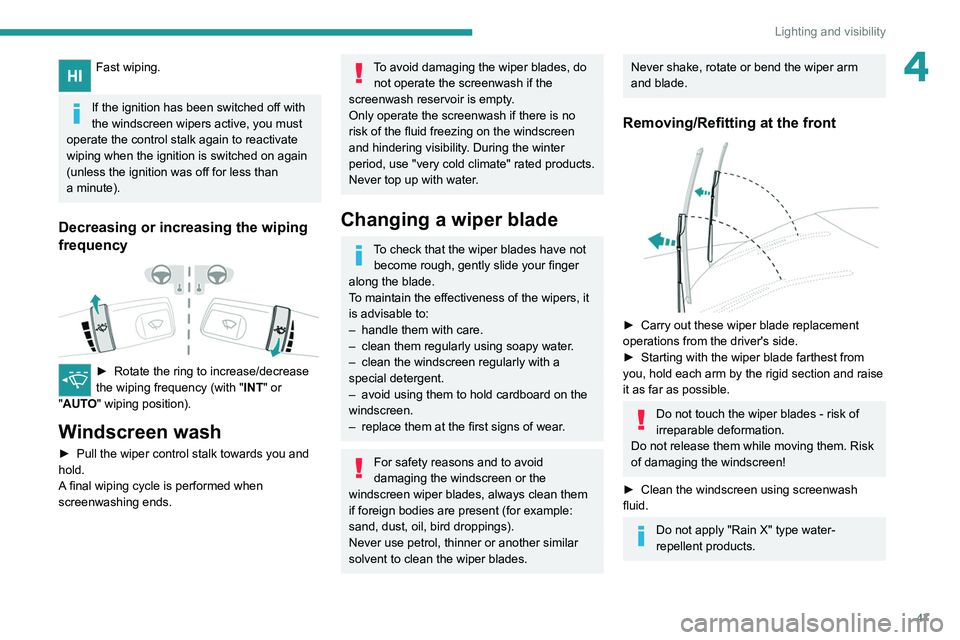
Removing/Refitting at the front
► Carry out these wiper blade replacement
operations from the driver's side.
►
Starting with the wiper blade farthest from
you, hold each arm by the rigid section and raise
it as far as possible.
Do not touch the wiper blades - risk of
irreparable deformation.
Do not release them while moving them. Risk
of damaging the windscreen!
►
Clean the windscreen using screenwash
fluid.
Do not apply "Rain X" type water-
repellent products.
Page 53 of 164
51
Safety
5or more wheels spinning. It also enhances the
vehicle's directional stability.
In the event that a wheel has poor grip, anti-slip
regulation brakes the spinning wheel and returns
the engine torque to the wheel that has the best
grip in order to prevent being bogged down.
If there is a difference between the vehicle’s
trajectory and the path desired by the driver, the
dynamic stability control system automatically
uses engine braking and the brakes on one or
more wheels to return the vehicle to the desired
path, within the limits of the laws of physics.
These systems are activated automatically every
time the vehicle is started.
These systems are activated in the event of a problem with grip or trajectory
(confirmed by this warning lamp flashing on the
instrument panel).
Deactivation/Reactivation
In exceptional conditions (e.g. starting a vehicle
which is bogged down, stuck in snow, on soft
ground, etc.), it may be advisable to deactivate
the ASR and DSC systems, so that the wheels
can turn freely and regain grip.
Reactivate the systems as soon as the level of
grip permits.
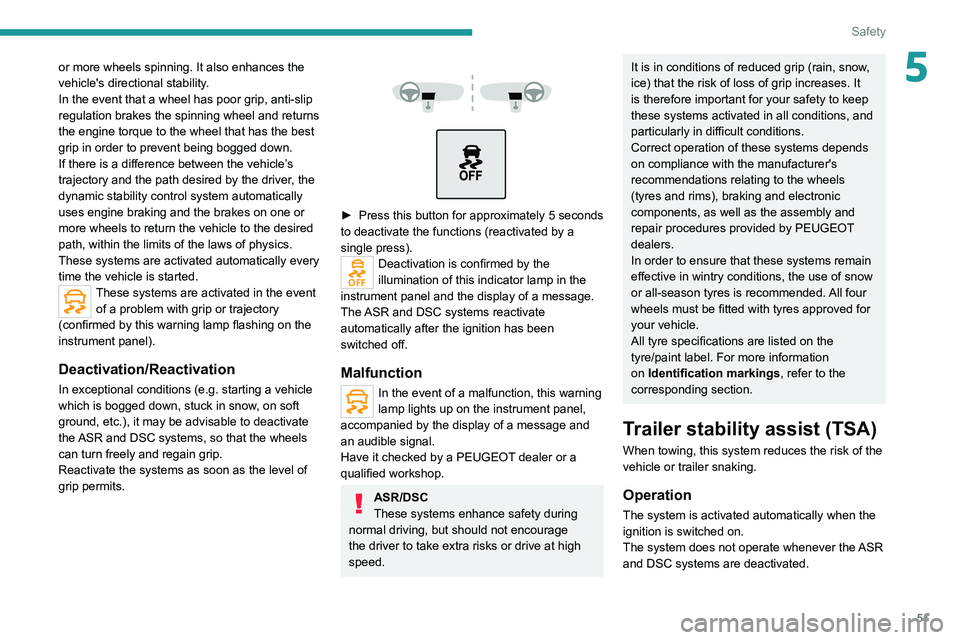
► Press this button for approximately 5 seconds
to deactivate the functions (reactivated by a
single press).
Deactivation is confirmed by the
illumination of this indicator lamp in the
instrument panel and the display of a message.
The ASR and DSC systems reactivate
automatically after the ignition has been
switched off.
Malfunction
In the event of a malfunction, this warning
lamp lights up on the instrument panel,
accompanied by the display of a message and
an audible signal.
Have it checked by a PEUGEOT dealer or a
qualified workshop.
ASR/DSC
These systems enhance safety during
normal driving, but should not encourage
the driver to take extra risks or drive at high
speed.
It is in conditions of reduced grip (rain, snow,
ice) that the risk of loss of grip increases. It
is therefore important for your safety to keep
these systems activated in all conditions, and
particularly in difficult conditions.
Correct operation of these systems depends
on compliance with the manufacturer's
recommendations relating to the wheels
(tyres and rims), braking and electronic
components, as well as the assembly and
repair procedures provided by PEUGEOT
dealers.
In order to ensure that these systems remain
effective in wintry conditions, the use of snow
or all-season tyres is recommended. All four
wheels must be fitted with tyres approved for
your vehicle.
All tyre specifications are listed on the
tyre/paint label. For more information
on Identification markings , refer to the
corresponding section.
Trailer stability assist (TSA)
When towing, this system reduces the risk of the
vehicle or trailer snaking.
Operation
The system is activated automatically when the
ignition is switched on.
The system does not operate whenever the ASR
and DSC systems are deactivated.
Page 54 of 164
52
Safety
– If the gearbox is in neutral or if the clutch
pedal is depressed, the speed decreases and
the indicator lamp flashes slowly; in this case,
the maintained descent speed is lower.
Activation of the system may cause noise in the transmission. This is perfectly
normal and has no consequence on the
behaviour of the vehicle.
On a descent, with the vehicle stationary, if the
driver releases the accelerator and brake pedals,
the system will release the brakes to set the
vehicle gradually in motion.
The brake lamps light up automatically when the
system is regulating.
If the speed exceeds 22 mph (35 km/h),
regulation is paused automatically, but the
indicator lamp in the instrument panel remains
on.
Regulation resumes automatically when the
speed falls below 22 mph (35 km/h) again, if the
slope and pedal release conditions are met.
Depress the accelerator or brake pedal again to
pause the cruise control.
Switching off
► Press the button until the indicator lamp on
the instrument panel goes off.
At a speed of approximately 50 mph (80 km/h),
the system is automatically deactivated and the
indicator lamp on the instrument panel goes off.
The electronic stability control system (ESC)
must not have any faultsK
The vehicle speed must be less than
approximately 53 mph (85
km/h).
If the system detects that the trailer is
snaking, it applies the brakes to stabilise
the trailer and reduces engine power, if
necessary, to slow the vehicle (indicated by the
flashing of this warning lamp on the instrument
panel and the brake lamps coming on).
For information on weights and towed loads,
refer to the Engine technical data and towed
loads section or your vehicle’s registration
certificate.
To ensure safe driving with a Towing device,
refer to the corresponding section.
Malfunction
If a fault occurs, this warning lamp lights
up on the instrument panel, accompanied
by a message and an audible signal.
To continue towing a trailer, reduce speed and
drive carefully!
Have it checked by a PEUGEOT dealer or a
qualified workshop.
The trailer stability control system provides an extra safety feature under
normal driving conditions, when following the
recommendations for use of trailers and
current legislation in force in your country. It
must not encourage the driver to take extra
risks, such as using a trailer in unsuitable
conditions of operation (e.g. excessive load,
exceeded nose weight, worn or under-inflated
tyres, faulty braking system) or driving at
excessive speed.
In certain cases, the system may not detect
trailer snaking, particularly with a light trailer
.
When driving on slippery or poor surfaces, the
system may not be able to prevent sudden
trailer snaking.
Hill Assist Descent
Control
Hill Assist Descent Control system for steep
slopes and on road surfaces with poor grip
(e.g.
gravel, mud).
This system reduces the risk of loss of control
or slipping of the vehicle when descending in
forward gear.
During a descent, the system assists the driver
in maintaining a constant speed, depending on
the gear engaged, while progressively releasing
the brakes.
For the system to activate, the gradient
must be greater than 5%.
The system can be used with the gearbox in
neutral.
Otherwise, engage a gear corresponding to
the speed to prevent the engine stalling.
With an automatic gearbox, the system can
be used with the selector at
N
or D.
The system is no longer available and no longer active if the speed of the vehicle is
above 22 mph (35
km/h).
Switching on
By default, the system is not selected.
The state of the function is not saved when the
ignition is switched off.
The driver can select the system when the
engine is running, when the vehicle is stationary
or when moving at speeds up to approximately
31 mph (50
km/h).
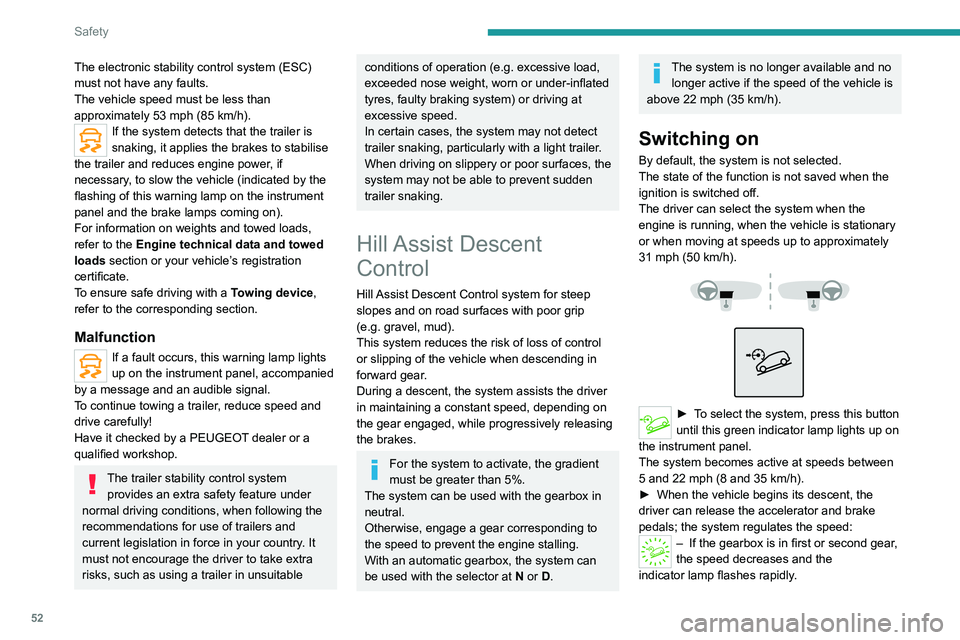
► To select the system, press this button
until this green indicator lamp lights up on
the instrument panel.
The system becomes active at speeds between
5 and 22 mph
(8 and 35 km/h).
►
When the vehicle begins its descent, the
driver can release the accelerator and brake
pedals; the system regulates the speed:
– If the gearbox is in first or second gear ,
the speed decreases and the
indicator
lamp flashes rapidly.
Page 58 of 164
56
Safety
Deployment
It deploys simultaneously with the corresponding
lateral airbag in the event of a serious side
impact applied to all or part of the side impact
zone B.
The curtain airbag inflates between the front
and rear occupants of the vehicle and the
corresponding windows.
Malfunction
In the event of a malfunction, this warning
lamp lights up on the instrument panel.
Contact a PEUGEOT dealer or a qualified
workshop to have the system checked.
The airbags may not be deployed in the event of
a serious impact.
In the event of a minor impact or bump at
the side of the vehicle or if the vehicle
rolls over, the airbags may not be deployed.
In the event of a rear or front collision, none of
the lateral airbags are deployed.
Advice
For the airbags to be fully effective,
observe the safety recommendations
below.
Adopt a normal and upright sitting position.
Fasten your seat belt and position it correctly.
Do not place anything between the occupants
and the airbags (e.g. child, animal, object), do
not fix or attach anything near or in the path of
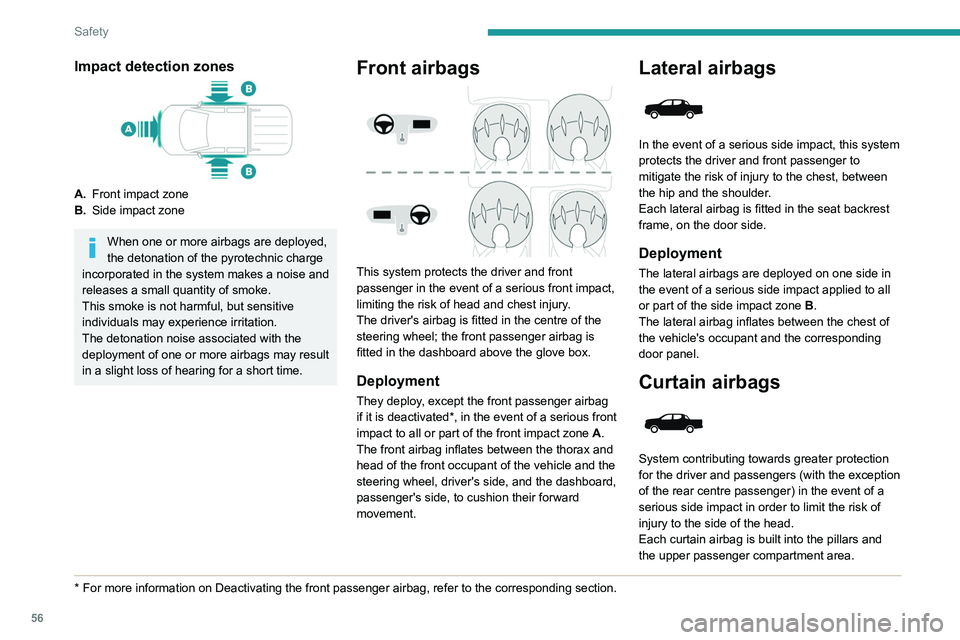
Impact detection zones
A. Front impact zone
B. Side impact zone
When one or more airbags are deployed,
the detonation of the pyrotechnic charge
incorporated in the system makes a noise and
releases a small quantity of smoke.
This smoke is not harmful, but sensitive
individuals may experience irritation.
The detonation noise associated with the
deployment of one or more airbags may result
in a slight loss of hearing for a short time.
* For more information on Deactivating the front passenger airbag, refer t\
o the corresponding section.
Front airbags
This system protects the driver and front
passenger in the event of a serious front impact,
limiting the risk of head and chest injury.
The driver's airbag is fitted in the centre of the
steering wheel; the front passenger airbag is
fitted in the dashboard above the glove box.
Deployment
They deploy, except the front passenger airbag
if it is deactivated*, in the event of a serious front
impact to all or part of the front impact zone A.
The front airbag inflates between the thorax and
head of the front occupant of the vehicle and the
steering wheel, driver's side, and the dashboard,
passenger's side, to cushion their forward
movement.
Lateral airbags
In the event of a serious side impact, this system
protects the driver and front passenger to
mitigate the risk of injury to the chest, between
the hip and the shoulder.
Each lateral airbag is fitted in the seat backrest
frame, on the door side.
Deployment
The lateral airbags are deployed on one side in
the event of a serious side impact applied to all
or part of the side impact zone B.
The lateral airbag inflates between the chest of
the vehicle's occupant and the corresponding
door panel.
Curtain airbags
System contributing towards greater protection
for the driver and passengers (with the exception
of the rear centre passenger) in the event of a
serious side impact in order to limit the risk of
injury to the side of the head.
Each curtain airbag is built into the pillars and
the upper passenger compartment area.
Page 62 of 164
60
Safety
An incorrectly installed child seat in a vehicle compromises the child's safety in
the event of an accident.
Strictly observe the fitting instructions
provided in the user guide supplied with the
child seat.
Manual child lock
The system prevents a rear door from being
opened using its interior handle.
The control is located on the edge of each rear
door (marked by a label).
Locking/Unlocking
► To lock, push the black control as far as it
will go: • to the left on the left-hand rear door,
• to the right on the right-hand rear door.
► To unlock, push the control in the opposite
direction.
Vehicles not equipped with a
deactivation/reactivation control
Installing a "rearward
facing" child seat on
the front passenger seat is strictly prohibited
- risk of death or serious injury in the event of
airbag deployment!
Deactivating/Reactivating the front
passenger airbag
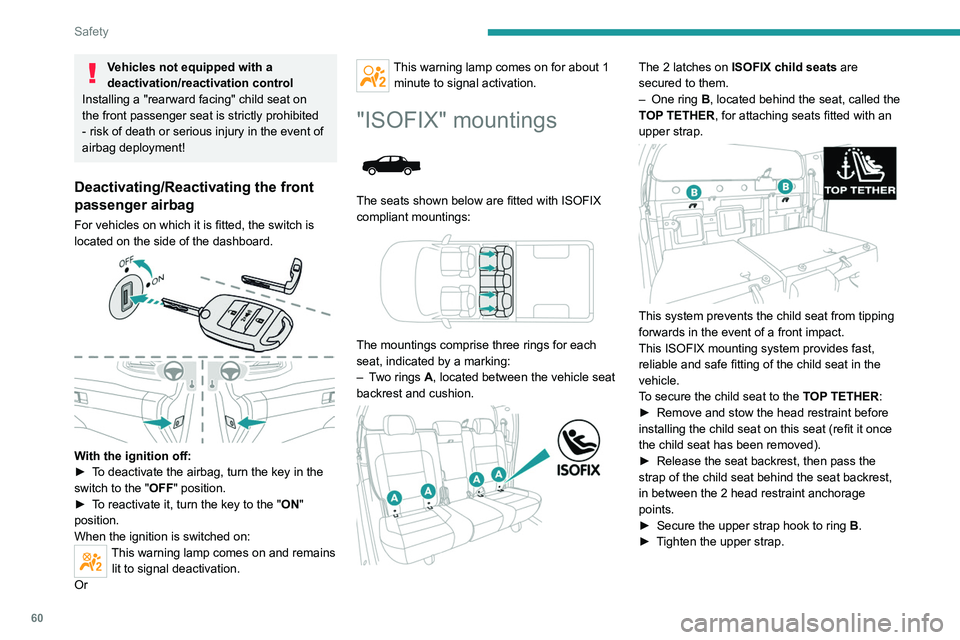
For vehicles on which it is fitted, the switch is
located on the side of the dashboard.
With the ignition off:
► T o deactivate the airbag, turn the key in the
switch to the "OFF " position.
►
T
o reactivate it, turn the key to the "ON"
position.
When the ignition is switched on:
This warning lamp comes on and remains lit to signal deactivation.
Or
This warning lamp comes on for about 1 minute to signal activation.
"ISOFIX" mountings
The seats shown below are fitted with ISOFIX
compliant mountings:
The mountings comprise three rings for each
seat, indicated by a marking:
–
T
wo rings A, located between the vehicle seat
backrest and cushion.
The 2 latches on ISOFIX child seats are
secured to them.
–
One ring
B, located behind the seat, called the
TOP TETHER, for attaching seats fitted with an
upper strap.
This system prevents the child seat from tipping
forwards in the event of a front impact.
This ISOFIX mounting system provides fast,
reliable and safe fitting of the child seat in the
vehicle.
To secure the child seat to the TOP TETHER:
►
Remove and stow the head restraint before
installing the child seat on this seat (refit it once
the child seat has been removed).
►
Release the seat backrest, then pass the
strap of the child seat behind the seat backrest,
in between the 2 head restraint anchorage
points.
►
Secure the upper strap hook to ring
B
.
►
T
ighten the upper strap.
Page 65 of 164
63
Driving
6Check and clean the vehicle after each off-road
trip.
Important!
Never leave the engine running in a
closed space without sufficient
ventilation. Internal combustion engines emit
toxic exhaust gases such as carbon
monoxide. Danger of poisoning and death!
In very severe wintry conditions
(temperature below -23°C), let the engine
run for 4 minutes before moving off, to ensure
the correct operation and durability of the
mechanical components of your vehicle
(engine and gearbox).
Never drive with the parking brake
applied . Risk of overheating and
damaging the braking system!
Do not park the vehicle or leave the
engine running on a flammable
surface (e.g. dry grass, dead leaves).The
vehicle exhaust system is very hot, even
several minutes after the engine stops. Risk
of fire!
Never drive on surfaces covered with
vegetation (tall grass, accumulated
dead leaves, crops, debris) such as a field,
a country lane overgrown with bushes or a
grassy verge.
This vegetation could come into contact with
the vehicle's exhaust system
or other systems
which are very hot. Risk of fire!
Make sure you do not leave any item in
the passenger compartment which could
act like a magnifying glass under the effect of
the sun's rays and cause a fire - risk of fire or
damage to interior surfaces!
Never leave the vehicle unattended,
with the engine running . If you have to
leave your vehicle with the engine running,
apply the parking brake and put the gearbox
into neutral or position N or P (depending on
the type of gearbox).
Never leave children inside the vehicle
unsupervised.
On flooded roads
We strongly advise against driving on flooded
roads, as this could cause serious damage to the
engine or gearbox, as well as to your vehicle's
electrical systems.
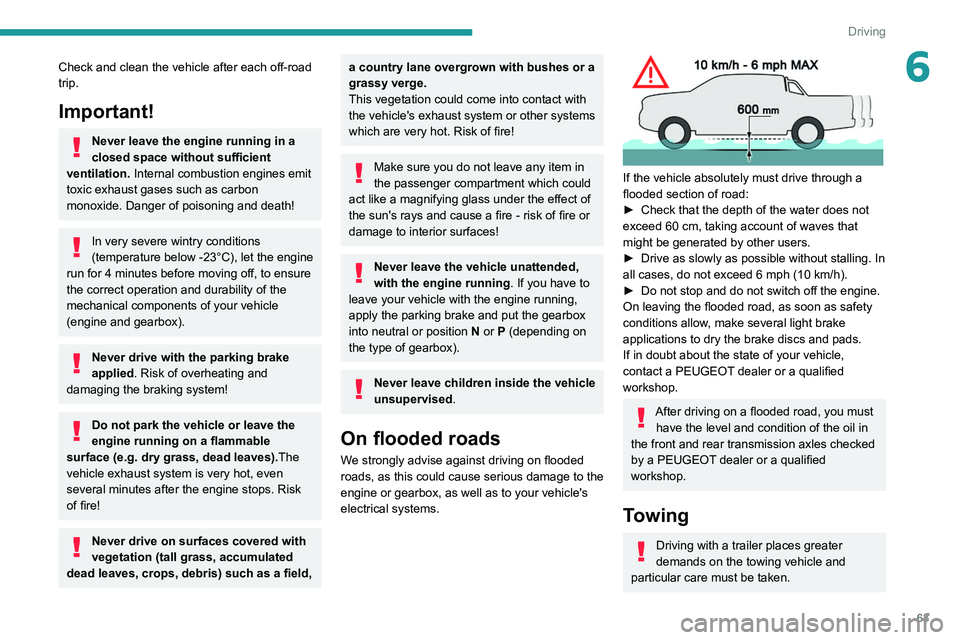
If the vehicle absolutely must drive through a
flooded section of road:
►
Check that the depth of the water does not
exceed 60
cm, taking account of waves that
might be generated by other users.
►
Drive as slowly as possible without stalling. In
all cases, do not exceed 6 mph (10
km/h).
►
Do not stop and do not switch off the engine.
On leaving the flooded road, as soon as safety
conditions allow
, make several light brake
applications to dry the brake discs and pads.
If in doubt about the state of your vehicle,
contact a PEUGEOT dealer or a qualified
workshop.
After driving on a flooded road, you must have the level and condition of the oil in
the front and rear transmission axles checked
by a PEUGEOT dealer or a qualified
workshop.
Towing
Driving with a trailer places greater
demands on the towing vehicle and
particular care must be taken.
Page 66 of 164
64
Driving
Do not exceed the maximum towable
weights.
At altitude: reduce the maximum load by
10% per 1,000 metres of altitude; the lower
air density at high altitudes decreases engine
performance.
New vehicle: do not tow a trailer until the
vehicle has driven at least 620 miles
(1,000 kilometres).
If the outside temperature is high, let the
engine idle for 1 to 2 minutes after the
vehicle comes to a stop, to help it to cool.
Before setting off
Nose weight
► Distribute the load in the trailer so that the
heaviest items are as close as possible to the
axle and the nose weight (at the point where it
joins your vehicle) approaches the maximum
permitted without exceeding it.
Tyres
► Check the tyre pressures of the towing
vehicle and of the trailer , observing the
recommended pressures.
Lighting
► Check the electrical signalling on the trailer
and the headlamp beam height of your vehicle.
If a genuine PEUGEOT towing device is
used, the rear parking sensors will be
deactivated automatically to avoid the audible
signal.
When driving
Cooling
Towing a trailer uphill causes the coolant
temperature to increase. The maximum towable
load depends on the gradient and the exterior
temperature. The fan’s cooling capacity does not
increase with engine speed.
►
Reduce speed and lower the engine speed to
limit the amount of heating produced.
►
Pay constant attention to the coolant
temperature.
If this warning lamp and the STOP
warning lamp come on, stop the vehicle
and switch off the engine as soon as possible.
Brakes
Using the engine brake is recommended to limit
the overheating of the brakes. Braking distances
are increased when towing a trailer.
Side wind
Bear in mind that the vehicle will be more
susceptible to wind when towing.
Anti-theft protection
Electronic immobiliser
The keys contain a code, which must be
recognised by the vehicle before starting is
possible.
If the system malfunctions, indicated by the
display of a message, the engine will not start.
Contact a PEUGEOT dealer.
Starting / Switching off the
engine with the key
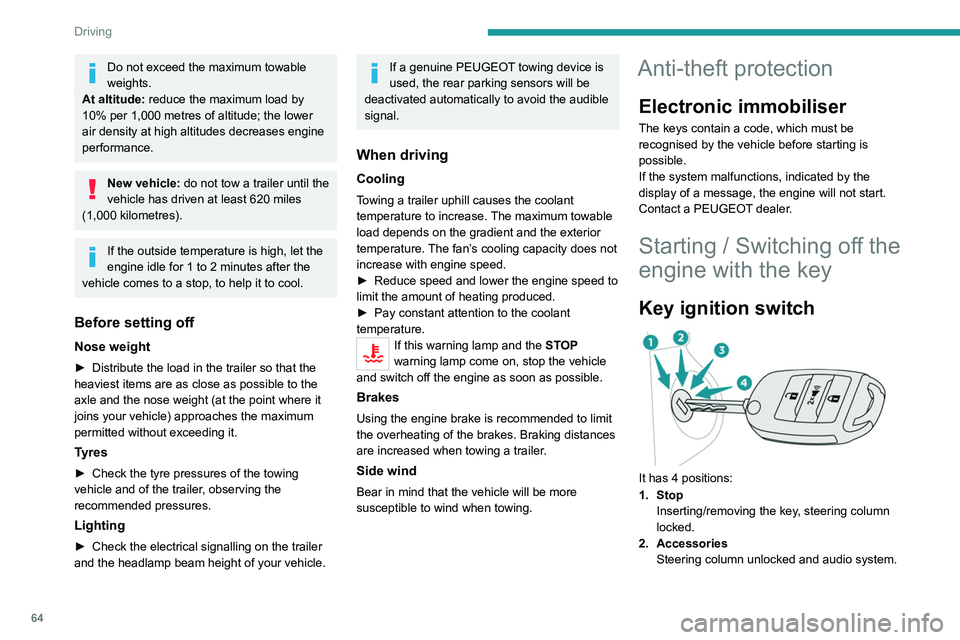
Key ignition switch
It has 4 positions:
1. Stop Inserting/removing the key, steering column
locked.
2. Accessories Steering column unlocked and audio system.
3. IgnitionIgnition, preheating (Diesel), engine starting.
4. Starting
Avoid attaching heavy objects to the key or the remote control. This would weigh
down on its shaft in the ignition switch and
could cause a malfunction.
Ignition position
This allows the use of the vehicle's electrical
equipment (ventilation, electric windows) or the
charging of accessories.
Once the battery charge level drops to the
reserve level, the system switches to energy
economy mode. The power supply is cut off
automatically to preserve the remaining battery
charge.
Starting the engine
With the parking brake applied:
► With a manual gearbox, place the gear lever
in neutral then fully depress the clutch pedal.
► With an automatic gearbox, place the gear
selector in mode N or P then depress the brake
pedal.
► Insert the key into the ignition switch; the
system recognises the code.
► Unlock the steering column by simultaneously
turning the steering wheel and the key.