2022 PEUGEOT LANDTREK fuel filter
[x] Cancel search: fuel filterPage 8 of 164

6
Eco-driving
Eco-driving
Eco-driving refers to a range of everyday
practices that allow the motorist to optimise
the vehicle's energy consumption (fuel and/or
electricity) and CO
2 emissions.
Optimise your use of the gearbox
With a manual gearbox, move off gently and
change up promptly. While accelerating, change
up early.
With an automatic gearbox, favour automatic
mode. Do not depress the accelerator pedal
heavily or suddenly.
With a 4-wheel drive vehicle, favour 2H
transmission (standard) mode over 4H mode.
With a manual gearbox, the gear shift indicator
prompts you to engage the most suitable gear.
Whenever this indication is displayed on the
instrument panel, follow it straight away.
Drive smoothly
Maintain a safe distance between vehicles, use
engine braking rather than the brake pedal and
press the accelerator gradually. These practices
help to save on energy consumption, reduce
CO
2 emissions and decrease general traffic
noise.
Favour the use of the "Eco" driving mode.
When the traffic is flowing smoothly, select the
cruise control.
Control the use of electrical equipment
Before moving off, if the passenger compartment
is too warm, ventilate it by opening the windows
and air vents before using the air conditioning.
At speeds above 31
mph (50 km/h), close the
windows and leave the air vents open.
Consider using equipment that can help keep
the temperature in the passenger compartment
down.
Unless automatically regulated, switch off the air
conditioning as soon as the desired temperature
has been reached.
Switch off the demisting and defrosting functions,
if they are not managed automatically.
Switch off the heated seat as soon as possible.
Adapt your use of the headlamps and/or
foglamps to the level of visibility, in accordance
with current legislation in the country in which
you are driving.
Avoid running the engine before moving off,
particularly in winter (other than in severe wintry
conditions: temperature below -23°C). The
vehicle will warm up much faster while driving.
As a passenger, avoid connecting your
multimedia devices (e.g.
film, music, video
game) to help reduce the consumption of energy.
Disconnect all portable devices before leaving
the vehicle.
Limit the causes of excess consumption
Spread loads throughout the vehicle.
Limit the loads carried in the vehicle and
minimise wind resistance (e.g.
roof bars, roof rack, bicycle carrier, trailer). Preferably, use a
roof box.
Remove roof bars and roof racks after use.
At the end of winter, remove snow tyres and refit
summer tyres.
Comply with the servicing instructions
Check tyre pressures regularly, with the tyres
cold, referring to the label in the door aperture on
the left-hand side.
Carry out this check in particular:
–
before a long journey
.
–
at each change of season.
–
after a long period out of use.
Do not forget the spare wheel and, where
applicable, the tyres on your trailer or caravan.
Have your vehicle serviced regularly (e.g.
engine
oil, oil filter, air filter, passenger compartment
filter, etc.). Observe the schedule of operations in
the manufacturer's service schedule.
With an HDi Diesel engine, if the particle filter
is faulty, your vehicle will emit pollution. Visit a
PEUGEOT dealer or a qualified workshop as
soon as possible to restore your vehicle's particle
emissions to legal levels.
When filling the fuel tank, do not continue after
the third cut-out of the nozzle, to avoid overflow.
You will only see the fuel consumption of your
new vehicle settle down to a consistent average
after the first 1,900 miles (3,000 kilometres).
Page 10 of 164
8
Instruments
Warning and indicator
lamps
Displayed as symbols, the warning and indicator
lamps inform the driver of the occurrence of a
malfunction (warning lamps) or of the operating
status of a system (operation or deactivation
indicator lamps). Certain lamps light up in two
ways (fixed or flashing) and/or in several colours.
Associated warnings
The illumination of a lamp may be accompanied
by an audible signal and/or a message displayed
in a screen.
Relating the type of alert to the operating status
of the vehicle allows you to determine whether
the situation is normal or whether a fault has
occurred: refer to the description of each lamp
for further information.
When the ignition is switched on
Certain red or orange warning lamps come on
for a few seconds when the ignition is switched
on. These warning lamps should go off as soon
as the engine is started.
For more information on a system or a function,
refer to the corresponding section.
Persistent warning lamp
If a red or orange warning lamp comes on, there
may be fault which needs further investigation.
If a lamp remains lit
The references (1), (2) and (3) in the warning
and indicator lamp description indicate whether
you should contact a qualified professional in
addition to the immediate recommended actions.
(1): You must stop the vehicle.
Stop as soon as it is safe to do so and switch off
the ignition.
(2): Contact a PEUGEOT dealer or a qualified
workshop.
(3): Go to a PEUGEOT dealer or a qualified
workshop.
List of warning and
indicator lamps
Red warning/indicator lamps
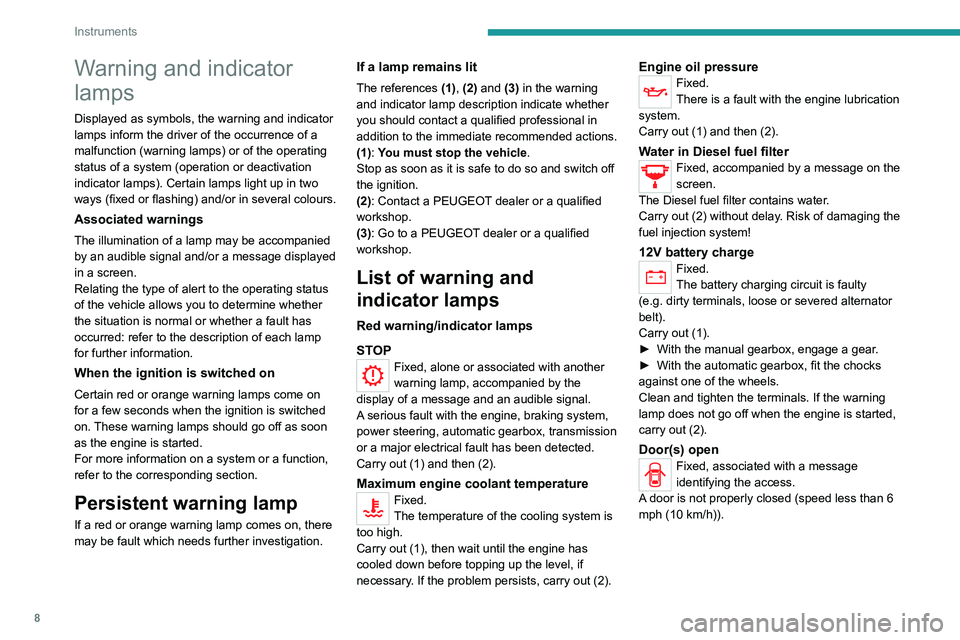
STOP
Fixed, alone or associated with another
warning lamp, accompanied by the
display of a message and an audible signal.
A serious fault with the engine, braking system,
power steering, automatic gearbox, transmission
or a major electrical fault has been detected.
Carry out (1) and then (2).
Maximum engine coolant temperatureFixed.
The temperature of the cooling system is
too high.
Carry out (1), then wait until the engine has
cooled down before topping up the level, if
necessary. If the problem persists, carry out (2).
Engine oil pressureFixed.
There is a fault with the engine lubrication
system.
Carry out (1) and then (2).
Water in Diesel fuel filterFixed, accompanied by a message on the
screen.
The Diesel fuel filter contains water.
Carry out (2) without delay. Risk of damaging the
fuel injection system!
12V battery chargeFixed.
The battery charging circuit is faulty
(e.g.
dirty terminals, loose or severed alternator
belt).
Carry out (1).
►
With the manual gearbox, engage a gear
.
►
With the automatic gearbox, fit the chocks
against one of the wheels.
Clean and tighten the terminals. If the warning
lamp does not go off when the engine is started,
carry out (2).
Door(s) openFixed, associated with a message
identifying the access.
A door is not properly closed (speed less than 6
mph (10 km/h)).
Page 94 of 164
92
Practical information
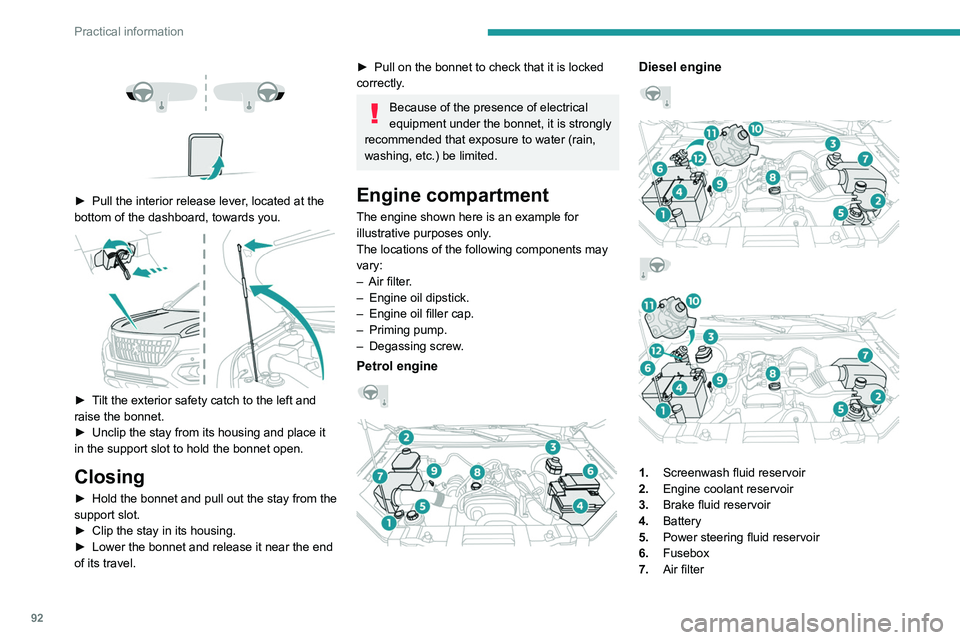
► Pull the interior release lever , located at the
bottom of the dashboard, towards you.
► Tilt the exterior safety catch to the left and
raise the bonnet.
►
Unclip the stay from its housing and place it
in the support slot to hold the bonnet open.
Closing
► Hold the bonnet and pull out the stay from the
support slot.
►
Clip the stay in its housing.
►
Lower the bonnet and release it near the end
of its travel.
► Pull on the bonnet to check that it is locked
correctly .
Because of the presence of electrical
equipment under the bonnet, it is strongly
recommended that exposure to water (rain,
washing, etc.) be limited.
Engine compartment
The engine shown here is an example for
illustrative purposes only.
The locations of the following components may
vary:
–
Air filter
.
–
Engine oil dipstick.
–
Engine oil filler cap.
–
Priming pump.
–
Degassing screw
.
Petrol engine
Diesel engine
1. Screenwash fluid reservoir
2. Engine coolant reservoir
3. Brake fluid reservoir
4. Battery
5. Power steering fluid reservoir
6. Fusebox
7. Air filter
8.Engine oil filler cap
9. Engine oil dipstick
10. Priming pump*
11 . Degassing screw*
12. Fuel filter*
Diesel fuel system
This system is under very high pressure.
All work must be carried out only by a
PEUGEOT dealer or a qualified workshop
Checking levels
Check all of the following levels regularly in
accordance with the manufacturer's service
schedule. Top them up if required, unless
otherwise indicated.
If a level drops significantly, have the
corresponding system checked by a PEUGEOT
dealer or a qualified workshop.
The fluids must comply with the manufacturer's requirements and with
the vehicle's engine.
Take care when working under the bonnet, as certain areas of the engine
may be extremely hot (risk of burns) and the
cooling fan could start at any time (even with
the ignition off).
* Depending on engine.
Page 95 of 164
93
Practical information
78.Engine oil filler cap
9. Engine oil dipstick
10. Priming pump*
11 . Degassing screw*
12. Fuel filter*
Diesel fuel system
This system is under very high pressure.
All work must be carried out only by a
PEUGEOT dealer or a qualified workshop
Checking levels
Check all of the following levels regularly in
accordance with the manufacturer's service
schedule. Top them up if required, unless
otherwise indicated.
If a level drops significantly, have the
corresponding system checked by a PEUGEOT
dealer or a qualified workshop.
The fluids must comply with the manufacturer's requirements and with
the vehicle's engine.
Take care when working under the bonnet, as certain areas of the engine
may be extremely hot (risk of burns) and the
cooling fan could start at any time (even with
the ignition off).
* Depending on engine.
Used products
Avoid prolonged contact of used oil or fluids with the skin.
Most of these fluids are harmful to health and
very corrosive.
Do not discard used oil or fluids into
sewers or onto the ground.
Empty used oil into the containers reserved
for this purpose at a PEUGEOT dealer or a
qualified workshop.
Engine oil
The level is checked, with the engine having been switched off for at least 30
minutes and on level ground, using the dipstick.
It is normal to top up the oil level between two
services (or oil changes). It is recommended
that you check the level, and top up if necessary,
every 3,000 miles (5,000 km).
In order to maintain the reliability of the
engine and emissions control system,
never use additives in the engine oil.
Checking using the dipstick
For the location of the dipstick, please refer
to the illustration of the corresponding engine
compartment.
► Grasp the dipstick by its coloured grip and
pull it out completely .
►
Wipe the end of the dipstick using a clean,
lint-free cloth.
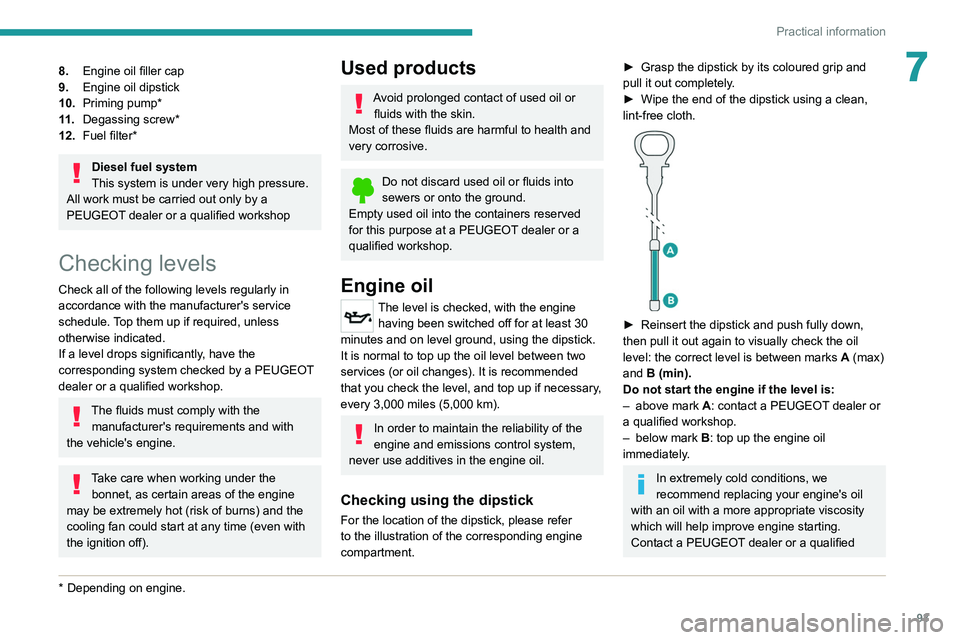
► Reinsert the dipstick and push fully down,
then pull it out again to visually check the oil
level: the correct level is between marks A
(max)
and B (min).
Do not start the engine if the level is:
–
above mark
A: contact a PEUGEOT dealer or
a qualified workshop.
–
below mark B
: top up the engine oil
immediately.
In extremely cold conditions, we
recommend replacing your engine's oil
with an oil with a more appropriate viscosity
which will help improve engine starting.
Contact a PEUGEOT dealer or a qualified
Page 97 of 164
95
Practical information
7Screenwash fluid
Top up to the required level when necessary.
Tank capacity: 3 litres.
Fluid specification
The fluid must be topped up with a pre-mixed
product.
In winter (temperatures below zero), a fluid
containing an anti-freeze agent which is
appropriate for the temperature conditions
must be used in order to protect the system's
components (pump, tank, ducts, jets).
Filling with pure water is prohibited in all
circumstances (risk of freezing,
limescale, etc.).
Checks
Unless otherwise indicated, check these
components in accordance with the
manufacturer's service schedule and according
to your engine.
Otherwise, have them checked by a PEUGEOT
dealer or a qualified workshop.
Only use products recommended by
PEUGEOT or products of equivalent
quality and specification.
In order to optimise the operation of
components as important as those in the
braking system, PEUGEOT selects and offers
very specific products.
12 V battery
The battery does not require any maintenance.
Check regularly that the terminals are correctly
tightened (versions without quick-release
terminals) and that the connections are clean.
For more information on the precautions
to take before any work on the 12 V
battery, refer to the corresponding section.
Passenger compartment
filter
Depending on the environment and the
use of the vehicle (e.g. dusty atmosphere,
city driving), change it twice as often, if
necessary .
A clogged passenger compartment filter
can adversely affect air conditioning
system performance and generate
undesirable odours.
Air filter
Depending on the environment and the
use of the vehicle (e.g. dusty atmosphere,
city driving), change it twice as often, if
necessary .
Oil filter
Change the oil filter each time the engine
oil is changed.
Diesel fuel filter
Change the Diesel fuel filter according to
the schedule of operations in the
manufacturer's service schedule.
A clogged Diesel fuel filter can reduce engine performance and damage the
injection system.
Bleeding water from the Diesel fuel
filter
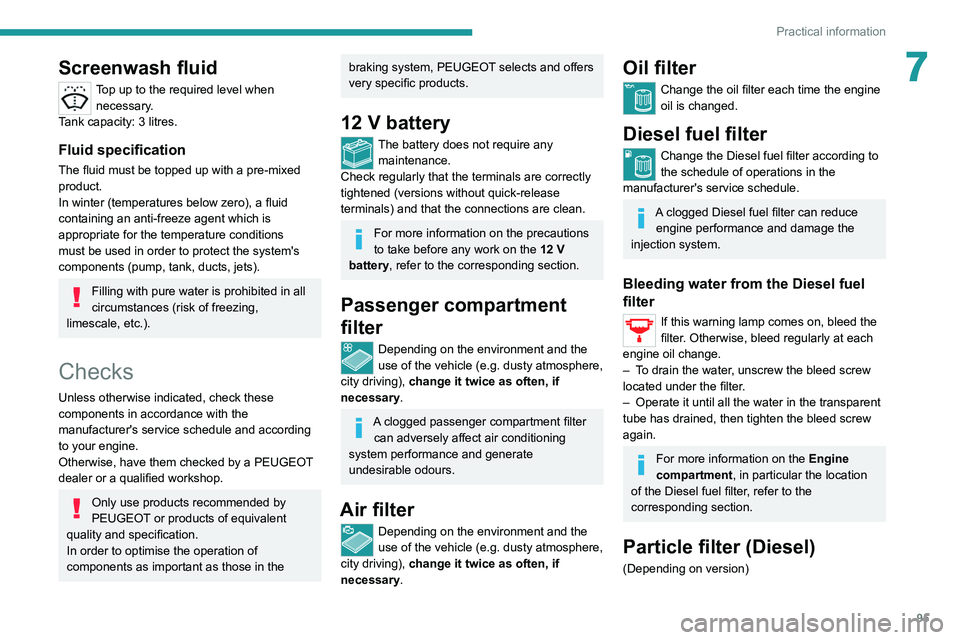
If this warning lamp comes on, bleed the
filter. Otherwise, bleed regularly at each
engine oil change.
–
T
o drain the water, unscrew the bleed screw
located under the filter.
–
Operate it until all the water in the transparent
tube has drained, then tighten the bleed screw
again.
For more information on the Engine
compartment, in particular the location
of the Diesel fuel filter, refer to the
corresponding section.
Particle filter (Diesel)
(Depending on version)
Page 101 of 164
99
Practical information
7computer - risk of damage to the electronic
system components.
Fuel system
All work on the fuel system must be
carried out only by a PEUGEOT dealer or a
qualified workshop.
Electrical system
Never:
–
disconnect the battery cables or the
electrical wiring harness connectors when the
engine is running.
–
reverse the polarities when reconnecting
the battery (risk of damage to electronic
components).
–
pierce the insulation of the electrical wires
during an electrical check or diagnosis.
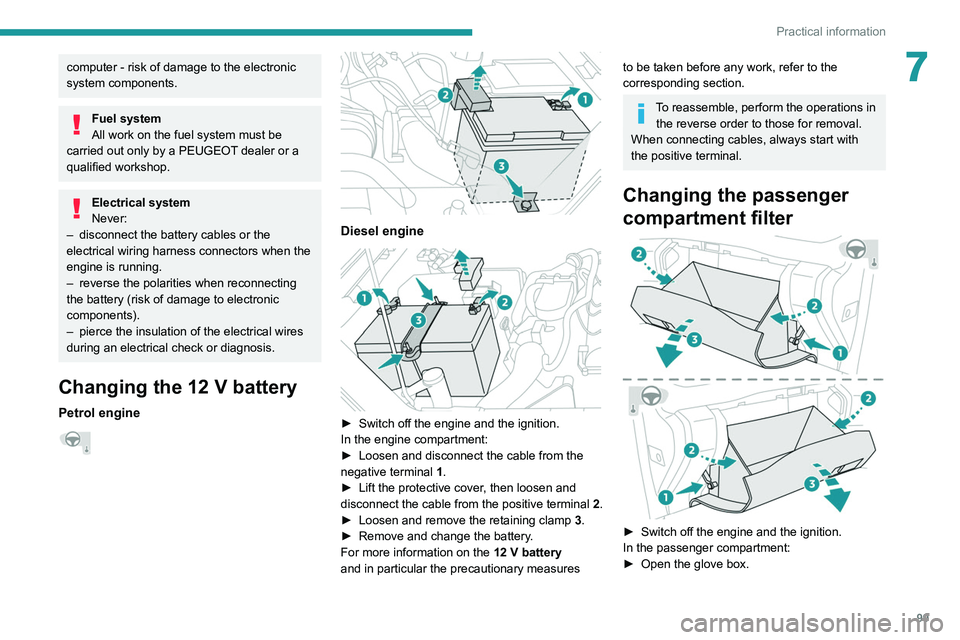
Changing the 12 V battery
Petrol engine
Diesel engine
► Switch off the engine and the ignition.
In the engine compartment:
►
Loosen and disconnect the cable from the
negative terminal
1.
►
Lift the protective cover
, then loosen and
disconnect the cable from the positive terminal
2.
►
Loosen and remove the retaining clamp 3
.
►
Remove and change the battery
.
For more information on the 12 V battery
and in particular the precautionary measures
to be taken before any work, refer to the
corresponding section.
To reassemble, perform the operations in the reverse order to those for removal.
When connecting cables, always start with
the positive terminal.
Changing the passenger
compartment filter
► Switch off the engine and the ignition.
In the passenger compartment:
►
Open the glove box.
Page 104 of 164
102
Practical information
After the operation, check the engine oil level with the dipstick and top up if
necessary.
For more information on Engine oil and in
particular on checking the level, refer to the
corresponding section.
Never start the engine without the oil
filter - risk of splashing and serious
damage to the engine!
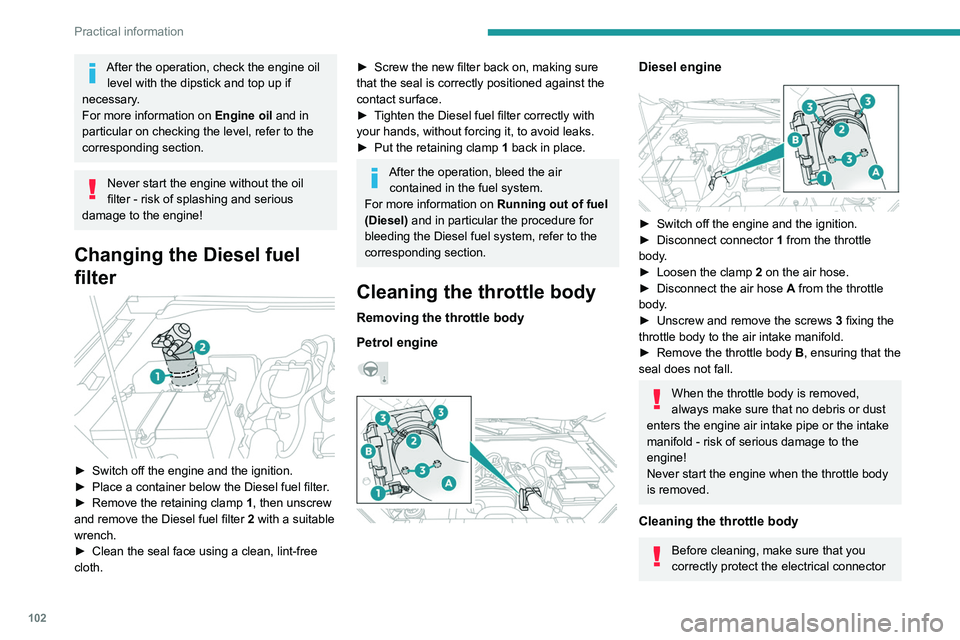
Changing the Diesel fuel
filter
► Switch off the engine and the ignition.
► Place a container below the Diesel fuel filter .
►
Remove the retaining clamp 1
, then unscrew
and remove the Diesel fuel filter 2 with a suitable
wrench.
►
Clean the seal face using a clean, lint-free
cloth.
► Screw the new filter back on, making sure
that the seal is correctly positioned against the
contact surface.
►
T
ighten the Diesel fuel filter correctly with
your hands, without forcing it, to avoid leaks.
►
Put the retaining clamp 1
back in place.
After the operation, bleed the air contained in the fuel system.
For more information on Running out of fuel
(Diesel) and in particular the procedure for
bleeding the Diesel
fuel system, refer to the
corresponding section.
Cleaning the throttle body
Removing the throttle body
Petrol engine
Diesel engine
► Switch off the engine and the ignition.
► Disconnect connector 1
from the throttle
body.
►
Loosen the clamp 2
on the air hose.
►
Disconnect the air hose A
from the throttle
body.
►
Unscrew and remove the screws 3
fixing the
throttle body to the air intake manifold.
►
Remove the throttle body B
, ensuring that the
seal does not fall.
When the throttle body is removed,
always make sure that no debris or dust
enters the engine air intake pipe or the intake
manifold - risk of serious damage to the
engine!
Never start the engine when the throttle body
is removed.
Cleaning the throttle body
Before cleaning, make sure that you
correctly protect the electrical connector
Page 144 of 164
142
Alphabetical index
Courtesy lamp, rear 39
Courtesy lamps
39
Cruise control
78–79
Cup holder
37
D
Date (setting) 13, 137
Daytime running lamps
44, 112
Deactivating the passenger airbag
56, 59–60
Defrosting
29, 36
Defrosting, front
36
Demisting
29, 36
Demisting, front
36
Demisting, rear
36
Demisting, rear screen
36
Dials and gauges
7
Dimensions
125
Dipstick
93
Direction indicators
45, 112, 114–115
Display screen, instrument panel
7
Door pockets
37
Doors
22
Driving
62–63
Driving aids camera (warnings)
76
Driving aids (recommendations)
76
Driving economically
6
Dynamic stability control (DSC)
50–51
E
EBFD 50
Eco-driving (advice)
6
ECO mode
73
Electric windows
24
Electronic brake force distribution (EBFD)
50
Emergency braking assistance (EBA)
50
Emergency switching off
67
Emergency warning lamps
49, 106
Engine
97
Engine compartment
92
Engine, Diesel
89, 92, 107, 124
Engine, petrol
92, 123
Engines
122–124
Environment
6, 21
ESC (electronic stability control)
50
Extinguisher
106
F
Filling the fuel tank 89
Filter, air
95, 100
Filter, Diesel fuel
102
Filter, oil
95, 101
Filter, particle
95
Filter, passenger compartment
32, 95, 99
Fitting a wheel
109, 111
Fitting roof bars
91
Fittings, front
37
Fittings, interior
37–38
Fittings, rear 39–40
Flap, fuel filler
89
Flashing indicators
45, 114
Floor storage compartment
31
Fluid, brake
94
Fluid, engine coolant
94
Fluid, power steering
94
Foglamps, front
43–44, 112, 115
Foglamps, rear
43
Folding bench seat
31
Folding the rear seat backrest
28
Folding the rear seats
30
Front map reading lights
39
Fuel
6, 89
Fuel consumption
6
Fuel tank
89
Fuses
11 6
G
Gauge, fuel 89
Gearbox, automatic
71, 74, 96, 118
Gearbox, manual
70–71, 74, 96
Gear lever, manual gearbox
70–71
Gear shift indicator ~
Gear efficiency indicator
74
Glove box
37
Grab handles
37