2022 PEUGEOT LANDTREK lights
[x] Cancel search: lightsPage 81 of 164
79
Driving
6Switching off the ignition cancels any
speed setting.
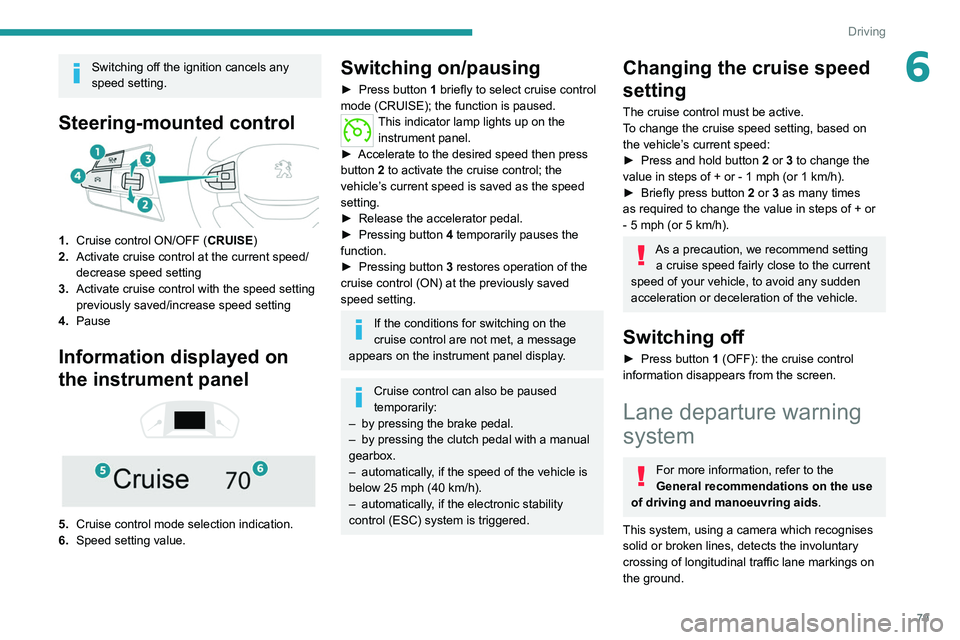
Steering-mounted control
1.Cruise control ON/OFF (CRUISE)
2. Activate cruise control at the current speed/
decrease speed setting
3. Activate cruise control with the speed setting
previously saved/increase speed setting
4. Pause
Information displayed on
the instrument panel
5. Cruise control mode selection indication.
6. Speed setting value.
Switching on/pausing
► Press button 1 briefly to select cruise control
mode (CRUISE); the function is paused.
This indicator lamp lights up on the instrument panel.
►
Accelerate to the desired speed then press
button
2 to activate the cruise control; the
vehicle’s current speed is saved as the speed
setting.
►
Release the accelerator pedal.
►
Pressing button 4
temporarily pauses the
function.
►
Pressing button 3
restores operation of the
cruise control (ON) at the previously saved
speed setting.
If the conditions for switching on the
cruise control are not met, a message
appears on the instrument panel display.
Cruise control can also be paused
temporarily:
–
by pressing the brake pedal.
–
by pressing the clutch pedal with a manual
gearbox.
–
automatically
, if the speed of the vehicle is
below 25 mph (40
km/h).
–
automatically
, if the electronic stability
control (ESC) system is triggered.
Changing the cruise speed
setting
The cruise control must be active.
To change the cruise speed setting, based on
the vehicle’s current speed:
►
Press and hold button
2
or 3 to change the
value in steps of +
or - 1 mph (or 1 km/h).
►
Briefly press button
2 or 3 as many times
as required to change the value in steps of +
or
-
5 mph (or 5 km/h).
As a precaution, we recommend setting a cruise speed fairly close to the current
speed of your vehicle, to avoid any sudden
acceleration or deceleration of the vehicle.
Switching off
► Press button 1 (OFF): the cruise control
information disappears from the screen.
Lane departure warning
system
For more information, refer to the
General recommendations on the use
of driving and manoeuvring aids .
This system, using a camera which recognises
solid or broken lines, detects the involuntary
crossing of longitudinal traffic lane markings on
the ground.
Page 83 of 164
81
Driving
6Operating limits
The system goes into standby automatically in
the following cases:
–
ESC deactivated or operation triggered.
–
Speed below 40 mph (65
km/h).
–
Driving over lane markings.
–
Activation
of the direction indicators.
–
Crossing the inside line on a bend.
–
Driving on a tight bend.
–
Activation
of the hazard warning lamps.
The following situations may interfere with the operation of the system or
prevent it from working:
–
Insufficient contrast between the road
surface and the verge or hard shoulder
(e.g.
shade).
–
Lane markings worn, hidden (snow
, mud)
or multiple (roadworks, etc.),
–
Close proximity to the vehicle in front (lane
markings may not be detected).
–
Roads that are narrow
, winding.
Risk of undesirable operation
The system should be deactivated in the
following situations:
–
When changing a wheel or working near a
wheel.
–
T
owing or with a bicycle carrier on a towing
device, especially with trailer not plugged in or
not approved. –
Road in poor condition, unstable or with very
poor grip (risk of aquaplaning, snow
, ice).
–
Adverse weather conditions.
–
Driving on racing circuits.
–
Driving on a rolling road.
Deactivation/Activation
By default, the system is automatically activated
at every engine start.
►
At any time, press and hold this button (for
around 5 seconds) to deactivate the system
or
press briefly to reactivate it.
The warning lamp lights up on the
instrument panel when the system is
activated.
Malfunction
In the event of a malfunction, this warning
lamp comes on on the instrument panel,
accompanied by the display of a message and
an audible signal.
Contact a PEUGEOT dealer or a qualified
workshop.
Parking sensors
For more information, refer to the
General recommendations on the use
of driving and manoeuvring aids .
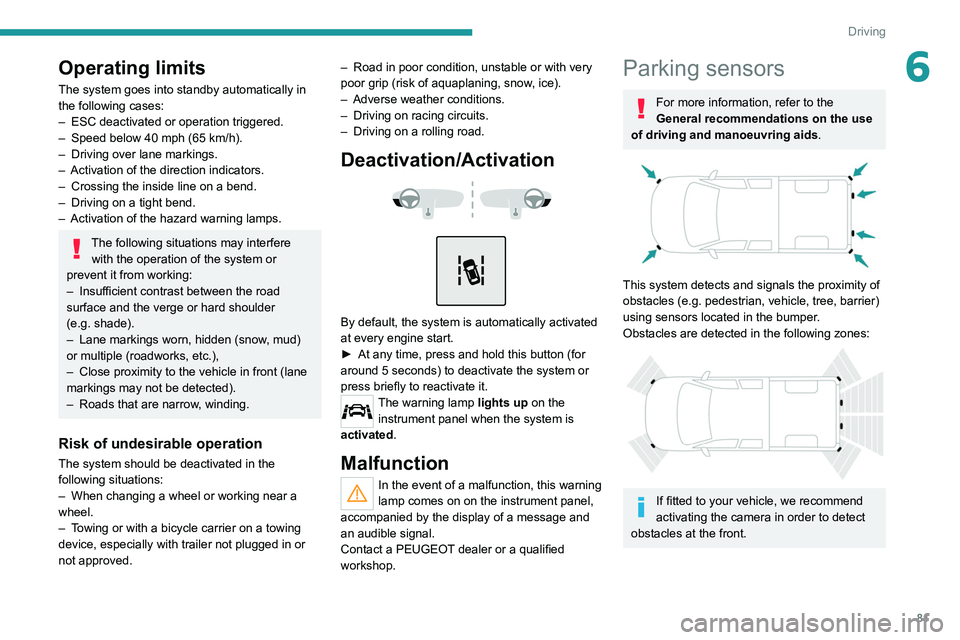
This system detects and signals the proximity of
obstacles (e.g.
pedestrian, vehicle, tree, barrier)
using sensors located in the bumper.
Obstacles are detected in the following zones:
If fitted to your vehicle, we recommend
activating the camera in order to detect
obstacles at the front.
Page 84 of 164
82
Driving
Rear parking sensors
► Engage reverse gear to start the system
(confirmed by an audible signal).
The system is switched off when reverse gear is
disengaged.
Audible assistance
The system signals the presence of obstacles
within the sensors’ detection zone.
The proximity information is given by an
intermittent audible signal, the frequency of
which increases as the vehicle approaches the
obstacle.
When the distance between the vehicle and
the obstacle becomes less than about thirty
centimetres, the audible signal becomes
continuous.
The sound emitted by the speaker (right or
left) indicates the side on which the obstacle is
located.
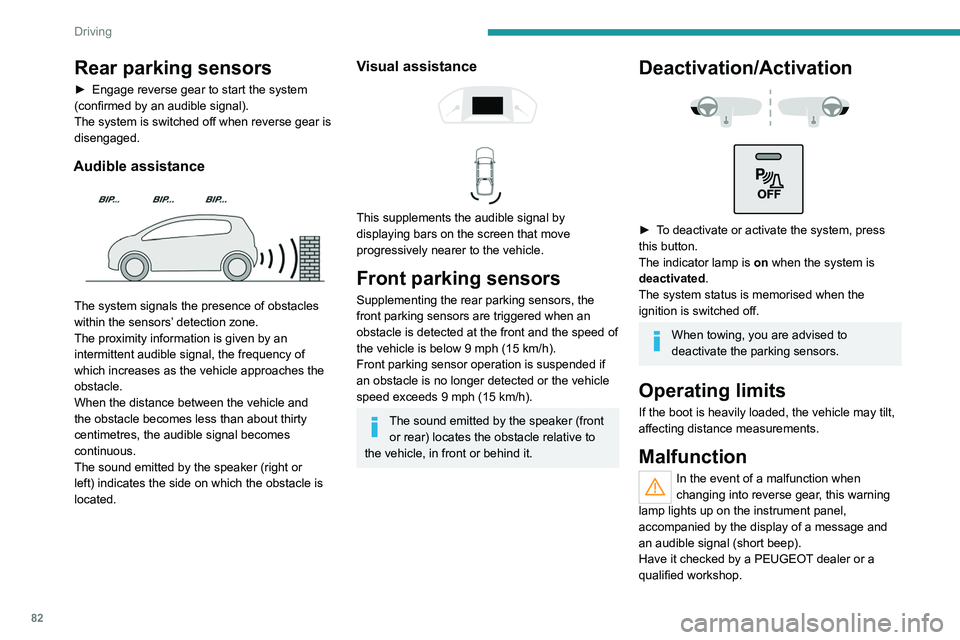
Visual assistance
This supplements the audible signal by
displaying bars on the screen that move
progressively nearer to the vehicle.
Front parking sensors
Supplementing the rear parking sensors, the
front parking sensors are triggered when an
obstacle is detected at the front and the speed of
the vehicle is below 9 mph (15 km/h).
Front parking sensor operation is suspended if
an obstacle is no longer detected or the vehicle
speed exceeds 9 mph (15
km/h).
The sound emitted by the speaker (front or rear) locates the obstacle relative to
the vehicle, in front or behind it.
Deactivation/Activation
► To deactivate or activate the system, press
this button.
The indicator lamp is on when the system is
deactivated.
The system status is memorised when the
ignition is switched off.
When towing, you are advised to
deactivate the parking sensors.
Operating limits
If the boot is heavily loaded, the vehicle may tilt,
affecting distance measurements.
Malfunction
In the event of a malfunction when
changing into reverse gear, this warning
lamp lights up on the instrument panel,
accompanied by the display of a message and
an audible signal (short beep).
Have it checked by a PEUGEOT dealer or a
qualified workshop.
Reversing camera
For more information, refer to the
General recommendations on the use
of driving and manoeuvring aids .
The visual reversing assistance camera is
activated automatically when reverse gear is
engaged.
The function may be supplemented by parking
sensors.
The image is displayed on the touch screen.
Page 91 of 164
89
Practical information
7
Recommended fuel
Petrol engines are compatible with minimum 91
RON unleaded fuel.
Diesel engines are compatible with type B0
fuel not containing Fatty Acid Methyl Ester
(biofuel) and B7 and B10 type fuels conforming
to EN590 and EN16734 standards containing
respectively up to 7% and 10% of Fatty Acid
Methyl Ester.
Depending on the country of sale, the Diesel
fuel must be suited to the ambient temperature
in order to optimise engine performance and
minimise polluting emissions.
Temperature greater than Diesel quality
5°C (+41°F) N°0
-5°C (+23°F) N°-10
-10°C (+14°F) N°-20
-25°C (-13°F) N°-35
The use of any other type of (bio) fuel
(vegetable or animal oils, pure or diluted,
domestic fuel, etc.) is strictly prohibited (risk
of damage to the engine and fuel system).
Diesel at low temperature
At temperatures below 0 °C (+32 °F), the
formation of paraffins in summer-type Diesel
fuels could prevent the engine from operating correctly
. In these temperature conditions, use
winter-type Diesel fuel and keep the fuel tank
more than 50 % full.
At temperatures below -15 °C (+5 °F) to avoid
problems starting, it is best to park the vehicle
under shelter (heated garage).
Travelling abroad
Certain fuels could damage your vehicle’s
engine.
In certain countries, the use of a particular
fuel may be required (specific octane rating,
specific trade name, etc.) to ensure correct
operation of the engine.
For all additional information, consult a dealer.
Refuelling
Fuel tank capacity: approximately 80 litres.
Reserve level: approximately 11 litres.
Low fuel level
When the low fuel level is reached, this
warning lamp lights up on the instrument
panel. When it first comes on, about 11 litres of
fuel remain.
Until sufficient fuel is added, this warning lamp
appears every time the ignition is switched on,
accompanied by the message and the audible
signal. When driving, this message and audible
signal are repeated with increasing frequency as
the fuel level drops towards 0.
You must refuel as soon as possible to avoid
running out of fuel.
For more information on Running out of fuel
(Diesel), refer to the corresponding section.
A small arrow by the warning lamp indicates which side of the vehicle the
fuel filler flap is located on.
Refuelling
When refuelling, at least 10 litres must be added
in order to be registered by the fuel gauge.
Opening the filler cap may create a noise caused
by an inrush of air. This vacuum is normal,
caused by the sealing of the fuel system.
To refuel in complete safety:
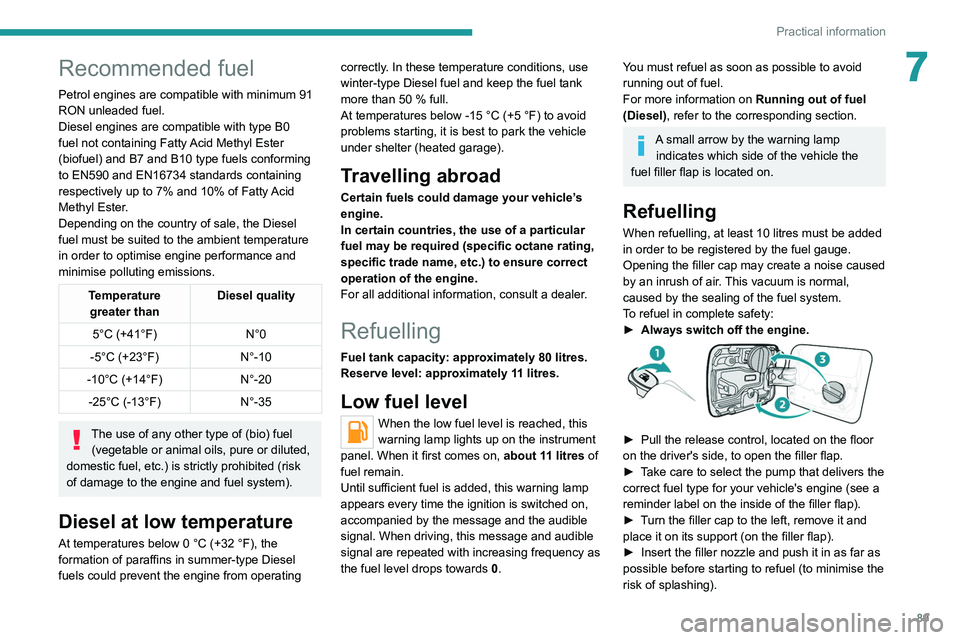
►
Always switch off the engine.
► Pull the release control, located on the floor
on the driver's side, to open the filler flap.
►
T
ake care to select the pump that delivers the
correct fuel type for your vehicle's engine (see a
reminder label on the inside of the filler flap).
►
T
urn the filler cap to the left, remove it and
place it on its support (on the filler
flap).
►
Insert the filler nozzle and push it in as far as
possible before starting to refuel (to minimise the
risk of splashing).
Page 111 of 164
109
In the event of a breakdown
8
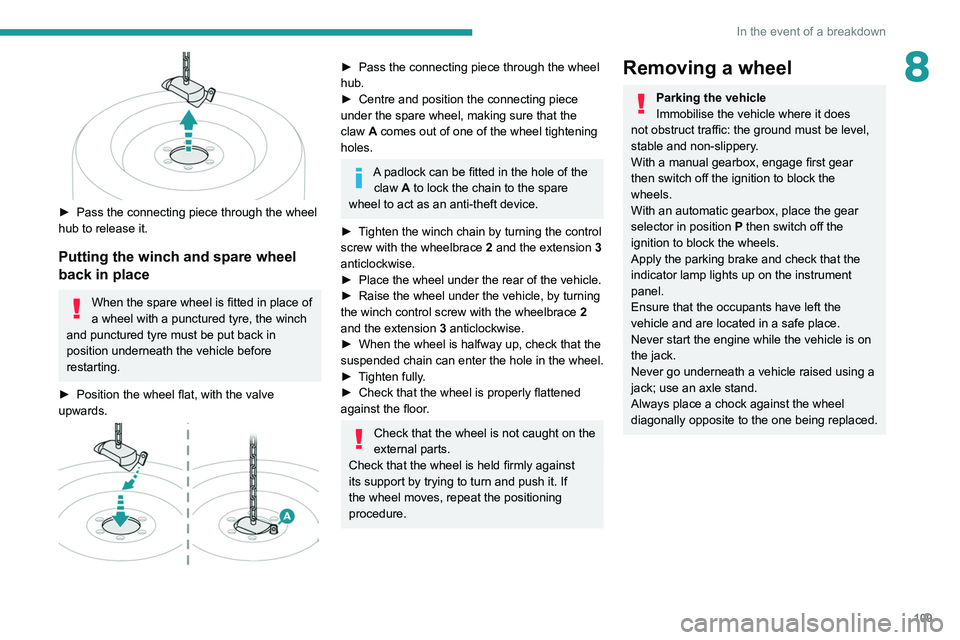
► Pass the connecting piece through the wheel
hub to release it.
Putting the winch and spare wheel
back in place
When the spare wheel is fitted in place of
a wheel with a punctured tyre, the winch
and punctured tyre must be put back in
position underneath the vehicle before
restarting.
►
Position the wheel flat, with the valve
upwards.
► Pass the connecting piece through the wheel
hub.
►
Centre and position the connecting piece
under the spare wheel, making sure that the
claw
A comes out of one of the wheel tightening
holes.
A padlock can be fitted in the hole of the claw A to lock the chain to the spare
wheel to act as an anti-theft device.
►
T
ighten the winch chain by turning the control
screw with the wheelbrace 2 and the extension 3
anticlockwise.
►
Place the wheel under the rear of the vehicle.
►
Raise the wheel under the vehicle, by turning
the winch control screw with the wheelbrace 2
and the extension 3 anticlockwise.
►
When the wheel is halfway up, check that the
suspended
chain can enter the hole in the wheel.
►
T
ighten fully.
►
Check that the wheel is properly flattened
against the floor
.
Check that the wheel is not caught on the
external parts.
Check that the wheel is held firmly against
its support by trying to turn and push it. If
the wheel moves, repeat the positioning
procedure.
Removing a wheel
Parking the vehicle
Immobilise the vehicle where it does
not obstruct traffic: the ground must be level,
stable and non-slippery.
With a manual gearbox, engage first gear
then switch off the ignition to block the
wheels.
With an automatic gearbox, place the gear
selector in position P then switch off the
ignition to block the wheels.
Apply the parking brake and check that the
indicator lamp lights up on the instrument
panel.
Ensure that the occupants have left the
vehicle and are located in a safe place.
Never start the engine while the vehicle is on
the jack.
Never go underneath a vehicle raised using a
jack; use an axle stand.
Always place a chock against the wheel
diagonally opposite to the one being replaced.
Page 140 of 164
138
Event data recorders
Event data recorders
Electronic control units are installed in your
vehicle. Control units process data which is
received by vehicle sensors, for example, or
which they generate themselves or exchange
amongst themselves. Some control units are
necessary for the safe functioning of your
vehicle, others assist you while you drive (driver
assistance systems), while others provide
comfort or infotainment functions.
The following contains general information about
data processing in the vehicle. You will find
additional information as to which specific data is
uploaded, stored and passed on to third parties
and for what purpose in your vehicle under
the key word Data Protection closely linked
to the references for the affected functional
characteristics in the relevant owner's manual
or in the general terms of sale. These are also
available online.
Operating data in the
vehicle
Control units process data for operation of the
vehicle.
This data includes, for example:
–
vehicle status information (e.g. speed,
movement delay
, lateral acceleration, wheel
rotation rate, "seat belts fastened" display)
–
ambient conditions (e.g. temperature, rain
sensor
, distance sensor)
As a rule such data is transient and is not stored
for longer than an operational cycle, and only
processed on board the vehicle itself. Often
control units include data storage (including the
vehicle key). This is used to allow information
to be documented temporarily or permanently
on vehicle condition, component stress,
maintenance requirements and technical events
and errors.
Depending on technical equipment levels, the
data stored is as follows:
–
system component operating states (e.g. fill
level, tyre pressure, battery status)
–
faults and defects in important system
components (e.g. lights, brakes)
–
system reactions in special driving situations
(e.g. triggering of an airbag, actuation of the
stability control systems)
–
information on events damaging the vehicle
–
for electric vehicles the amount of charge in
the high-voltage battery
, estimated range In special cases (e.g. if the vehicle has detected
a malfunction), it may be necessary to save data
that would otherwise just be volatile.
When you use services (e.g. repairs,
maintenance), the operating data saved can
be read together with the vehicle identification
number and used where necessary. Staff
working for the service network (e.g. garages,
manufacturers) or third parties (e.g. breakdown
services) can read the data from the vehicle.
The same applies to warranty work and quality
assurance measures.
Data is generally read via the OBD (On-Board
Diagnostics) port prescribed by law in the
vehicle. The operating data read documents the
technical condition of the vehicle or individual
components and assists with fault diagnosis,
compliance with warranty obligations and quality
improvement. This data, in particular information
on component stress, technical events, operator
errors and other faults, is transmitted to the
manufacturer where appropriate, together
with the vehicle identification number. The
manufacturer is also subject to product liability.
The manufacturer potentially also uses operating
data from vehicles for product recalls. This data
can also be used to check customer warranty
and guarantee claims.
Fault memories in the vehicle can be reset by a
service company when carrying out servicing or
repairs or at your request.
Comfort and infotainment
functions
Comfort settings and custom settings can be
stored in the vehicle and changed or reset at any
time.
Depending on the equipment level in question,
these include
–
seat and steering wheel position settings
– chassis and air conditioning settings
– custom settings such as interior lighting
You can input your own data in the infotainment
functions for your vehicle as part of the selected
features.
Depending on the equipment level in question,
these include
– multimedia data such as music, videos or
photos for playback in an integrated multimedia
system
– address book data for use with an integrated
hands-free system or an integrated navigation
system
– input destinations
– data on the use of online services
This data for comfort and infotainment functions
can be stored locally in the vehicle or be kept on
a device that you have connected to the vehicle
(e.g. a smartphone, USB stick or MP3 player).
Data that you have input yourself can be deleted
at any time.
This data can only be transmitted out of the
vehicle at your request, particularly when using
Page 144 of 164
142
Alphabetical index
Courtesy lamp, rear 39
Courtesy lamps
39
Cruise control
78–79
Cup holder
37
D
Date (setting) 13, 137
Daytime running lamps
44, 112
Deactivating the passenger airbag
56, 59–60
Defrosting
29, 36
Defrosting, front
36
Demisting
29, 36
Demisting, front
36
Demisting, rear
36
Demisting, rear screen
36
Dials and gauges
7
Dimensions
125
Dipstick
93
Direction indicators
45, 112, 114–115
Display screen, instrument panel
7
Door pockets
37
Doors
22
Driving
62–63
Driving aids camera (warnings)
76
Driving aids (recommendations)
76
Driving economically
6
Dynamic stability control (DSC)
50–51
E
EBFD 50
Eco-driving (advice)
6
ECO mode
73
Electric windows
24
Electronic brake force distribution (EBFD)
50
Emergency braking assistance (EBA)
50
Emergency switching off
67
Emergency warning lamps
49, 106
Engine
97
Engine compartment
92
Engine, Diesel
89, 92, 107, 124
Engine, petrol
92, 123
Engines
122–124
Environment
6, 21
ESC (electronic stability control)
50
Extinguisher
106
F
Filling the fuel tank 89
Filter, air
95, 100
Filter, Diesel fuel
102
Filter, oil
95, 101
Filter, particle
95
Filter, passenger compartment
32, 95, 99
Fitting a wheel
109, 111
Fitting roof bars
91
Fittings, front
37
Fittings, interior
37–38
Fittings, rear 39–40
Flap, fuel filler
89
Flashing indicators
45, 114
Floor storage compartment
31
Fluid, brake
94
Fluid, engine coolant
94
Fluid, power steering
94
Foglamps, front
43–44, 112, 115
Foglamps, rear
43
Folding bench seat
31
Folding the rear seat backrest
28
Folding the rear seats
30
Front map reading lights
39
Fuel
6, 89
Fuel consumption
6
Fuel tank
89
Fuses
11 6
G
Gauge, fuel 89
Gearbox, automatic
71, 74, 96, 118
Gearbox, manual
70–71, 74, 96
Gear lever, manual gearbox
70–71
Gear shift indicator ~
Gear efficiency indicator
74
Glove box
37
Grab handles
37