2022 PEUGEOT 308 service indicator
[x] Cancel search: service indicatorPage 7 of 260

5
Overview
1.Exterior lighting controls/Direction indicators/
Instrument panel display page/Service
indicator
2. Wiper controls/Screenwash/Trip computer
3. Automatic gearbox control paddles
4. Speed limiter/Cruise control/Adaptive cruise
control/Drive Assist Plus or Drive Assist 2.0
controls
A. Increase/Decrease the speed setting
Display and adjustment of the distance
setting to the vehicle in front (Adaptive cruise
control)
B. Select/Deselect the Cruise control
Select/Deselect the Adaptive cruise control/
Drive Assist Plus
C. Start/Pause the Speed limiter or Cruise
control with the speed setting saved
Confirmation of vehicle restart after automatic
stop (Adaptive cruise control with Stop&Go
function)
D. Select/Deselect the Speed limiter
E. Activation of the Speed limiter or Cruise
control with the speed setting saved
Use the speed suggested by the Road signs
recognition function
5. Horn/Driver front airbag
6. Audio system setting controls
F. Press: Display favourite radio stations/media
Up/Down: previous/next radio/media/
smartphone selection
Press: validation of a selection
G. Increase/Decrease the volume H.
Pick up/Hang up
Access to the Phone application's call log
I. Short press: system voice commands
Long press: smartphone voice commands
Side control bar
1. LED technology headlamps beam height
adjustment
2. Dynamic stability control/Traction control
3. Motorised tailgate (SW)
4. Heated windscreen
5. Heated steering wheel
6. Opening the fuel filler flap
7. Temperature pre-conditioning operation
indicator lamp
Centre control bars
1. Automatic air conditioning system controls/
HOME button
or
i-Toggles/HOME button
2. Audio system controls
3. Shortcuts for driving aids
4. Access to the Climate application
5. Windscreen and front windows demisting
6. Recirculation of interior air
7. Rear screen de-icing
8. Switching automatic air conditioning off
9. Hazard warning lamps
Page 10 of 260

8
Eco-driving
Eco-driving
Eco-driving refers to a range of everyday
practices that allow the motorist to optimise
the vehicle's energy consumption (fuel and/or
electricity) and CO
2 emissions.
Optimise your use of the gearbox
With a manual gearbox, move off gently and
change up promptly. While accelerating, change
up early.
With an automatic gearbox, favour automatic
mode. Do not depress the accelerator pedal
heavily or suddenly.
The gear shift indicator prompts you to engage
the most suitable gear. Whenever this indication
is displayed on the instrument panel, follow it
straight away.
With an automatic gearbox, this indicator
appears only in manual mode.
Drive smoothly
Maintain a safe distance between vehicles, use
engine braking rather than the brake pedal and
press the accelerator gradually. These practices
help to save on energy consumption, reduce
CO
2 emissions and decrease general traffic
noise.
With an EAT8 gearbox, with the gear selector
in mode
D, and except in Sport mode, favour
"free-wheeling" by fully lifting your foot from the
accelerator pedal in order to save fuel.
When the traffic is flowing smoothly, select the
cruise control.
Control the use of electrical equipment
Before moving off, if the passenger compartment
is too warm, ventilate it by opening the windows
and air vents before using the air conditioning.
At speeds above 31
mph (50 km/h), close the
windows and leave the air vents open.
Consider using equipment that can help keep
the temperature in the passenger compartment
down.
Unless automatically regulated, switch off the air
conditioning as soon as the desired temperature
has been reached.
Switch off the demisting and defrosting functions,
if they are not managed automatically.
Switch off the heated seat and heated steering
wheel as soon as possible.
Adapt your use of the headlamps and/or
foglamps to the level of visibility, in accordance
with current legislation in the country in which
you are driving.
Avoid running the engine before moving off,
particularly in winter (other than in severe wintry
conditions: temperature below -23°C). The
vehicle will warm up much faster while driving.
As a passenger, avoid connecting your
multimedia devices (e.g.
film, music, video
game) to help reduce the consumption of energy.
Disconnect all portable devices before leaving
the vehicle.
Limit the causes of excess consumption
Spread loads throughout the vehicle. Place the
heaviest items in the boot as close as possible to
the rear seats.
Limit the loads carried in the vehicle and
minimise wind resistance (e.g.
roof bars, roof
rack, bicycle carrier, trailer). Preferably, use a
roof box.
Remove roof bars and roof racks after use.
At the end of winter, remove snow tyres and refit
summer tyres.
Comply with the servicing instructions
Check tyre pressures regularly, with the tyres
cold, referring to the label in the door aperture on
the driver's side.
Carry out this check in particular:
–
before a long journey
.
–
at each change of season.
–
after a long period out of use.
Do not forget the spare wheel and, where
applicable, the tyres on your trailer or caravan.
Have your vehicle serviced regularly (e.g.
engine
oil, oil filter, air filter, passenger compartment
filter, etc.). Observe the schedule of operations in
the manufacturer's service schedule.
With a BlueHDi Diesel engine, if the SCR system
has a fault, your vehicle will emit pollution. Visit
a PEUGEOT dealer or a qualified workshop
as soon as possible to restore your vehicle's
nitrogen oxide emissions to legal levels.
When filling the fuel tank, do not continue after
the third cut-out of the nozzle, to avoid overflow.
Page 12 of 260

10
Instruments
Driver information
Instrument panel
The instrument panel displays all the information
the driver needs about the status of the vehicle's
various systems.
This information appears in the form of warning
and indicator lamps and messages.
Depending on the vehicle's equipment, the
instrument panel may be either:
–
Analogue dials with an LCD or matrix display
.
–
A
fully digital display.
Matrix instrument panel
Dials
1.Coolant temperature indicator (°C)
2. Analogue speedometer (mph or km/h)
3. Matrix display
4. Rev counter (x 1,000 rpm), graduation
depends on the engine (Petrol or Diesel)
5. Fuel gauge
Matrix display
The matrix display can be personalised using a
system of pages.
1.Cruise control/speed limiter settings
Display of speed limit signs
2. Gear shift indicator (arrow and recommended
gear)
Selector position and gear on automatic
gearbox
3. Personalisable area:
–
Digital speedometer (mph or km/h)
–
T
rip computer information
–
Road signs recognition
–
Display of driving aids
–
Fatigue detection system
4. Service indicator
, then total distance recorder
(miles or km)
These functions are displayed in turn when
the ignition is switched on.
Driving mode selected (other than " Normal"
mode)
Choice of the displayed page
► Press the button located at the end of the
lighting control stalk to scroll through the different
pages.
The new page is applied immediately
.
Digital instrument panels
Digital instrument panels are of the head-up or
3D head-up type.
They can be personalised using a system of
pages and widgets.
Depending on the page displayed, certain
information is not displayed or is presented
differently.
Page 15 of 260

13
Instruments
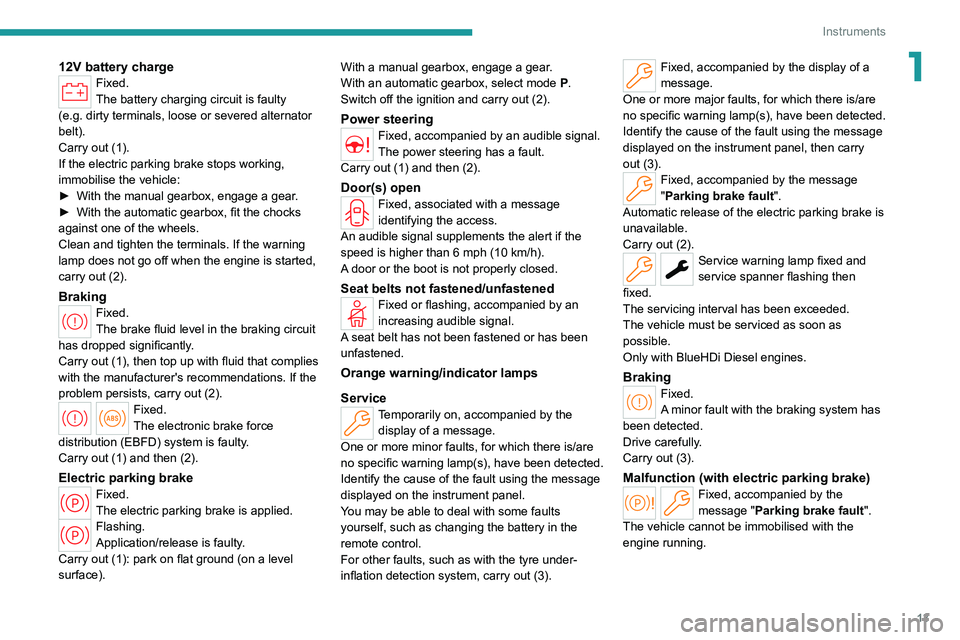
112V battery chargeFixed.
The battery charging circuit is faulty
(e.g.
dirty terminals, loose or severed alternator
belt).
Carry out (1).
If the electric parking brake stops working,
immobilise the vehicle:
►
With the manual gearbox, engage a gear
.
►
With the automatic gearbox, fit the chocks
against one of the wheels.
Clean and tighten the terminals. If the warning
lamp does not go off when the engine is started,
carry out (2).
BrakingFixed.
The brake fluid level in the braking circuit
has dropped significantly.
Carry out (1), then top up with fluid that complies
with the manufacturer's recommendations. If the
problem persists, carry out (2).
Fixed.
The electronic brake force
distribution
(EBFD) system is faulty.
Carry out (1) and then (2).
Electric parking brakeFixed.
The electric parking brake is applied.
Flashing.
Application/release is faulty.
Carry out (1): park on flat ground (on a level
surface). With a manual gearbox, engage a gear.
With an automatic gearbox, select mode
P
.
Switch off the ignition and carry out (2).
Power steeringFixed, accompanied by an audible signal.
The power steering has a fault.
Carry out (1) and then (2).
Door(s) openFixed, associated with a message
identifying the access.
An audible signal supplements the alert if the
speed is higher than 6 mph (10
km/h).
A door or the boot is not properly closed.
Seat belts not fastened/unfastenedFixed or flashing, accompanied by an
increasing audible signal.
A seat belt has not been fastened or has been
unfastened.
Orange warning/indicator lamps
Service
Temporarily on, accompanied by the display of a message.
One or more minor faults, for which there is/are
no specific warning lamp(s), have been detected.
Identify the cause of the fault using the message
displayed on the instrument panel.
You may be able to deal with some faults
yourself, such as changing the battery in the
remote control.
For other faults, such as with the tyre under-
inflation detection system, carry out (3).
Fixed, accompanied by the display of a
message.
One or more major faults, for which there is/are
no specific warning lamp(s), have been detected.
Identify the cause of the fault using the message
displayed on the instrument panel, then carry
out (3).
Fixed, accompanied by the message
"Parking brake fault".
Automatic release of the electric parking brake is
unavailable.
Carry out (2).
Service warning lamp fixed and
service spanner flashing then
fixed.
The servicing interval has been exceeded.
The vehicle must be serviced as soon as
possible.
Only with BlueHDi Diesel engines.
BrakingFixed.
A minor fault with the braking system has
been detected.
Drive carefully.
Carry out (3).
Malfunction (with electric parking brake)Fixed, accompanied by the
message "Parking brake fault".
The vehicle cannot be immobilised with the
engine running.
Page 20 of 260

18
Instruments
Fixed.
The function has been activated
via the touch screen.
The lighting control stalk ring is in the “ AUTO”
position.
For more information, refer to the Lighting and
visibility section.
Blue warning/indicator lamps
Main beam headlamps
Fixed.
The lamps are on.
Black/white warning lamps
Foot on the brake
Fixed.
Insufficient or no pressure on the brake
pedal.
With an automatic gearbox, with the engine
running, before releasing the parking brake, to
move out of mode P.
e-SAVE function (Rechargeable hybrid)Fixed, accompanied by the reserved
electric range.
The function is activated.
Indicators
Service indicator
The servicing information is expressed in terms
of distance (miles or kilometres) and time
(months or days).
The alert is given at whichever of these two
terms is reached first.
The servicing information is displayed in the
instrument panel. Depending on the version of
the vehicle:
–
The distance recorder display line indicates
the distance remaining before the next service
is due, or the distance travelled since it was due
preceded by the "-" sign.
–
An alert message indicates the distance
remaining, as well as the period before the next
service is due or how long it is overdue.
The value indicated is calculated according to the distance covered and
the time elapsed since the last service.
The alert may also be triggered close to a
due date.
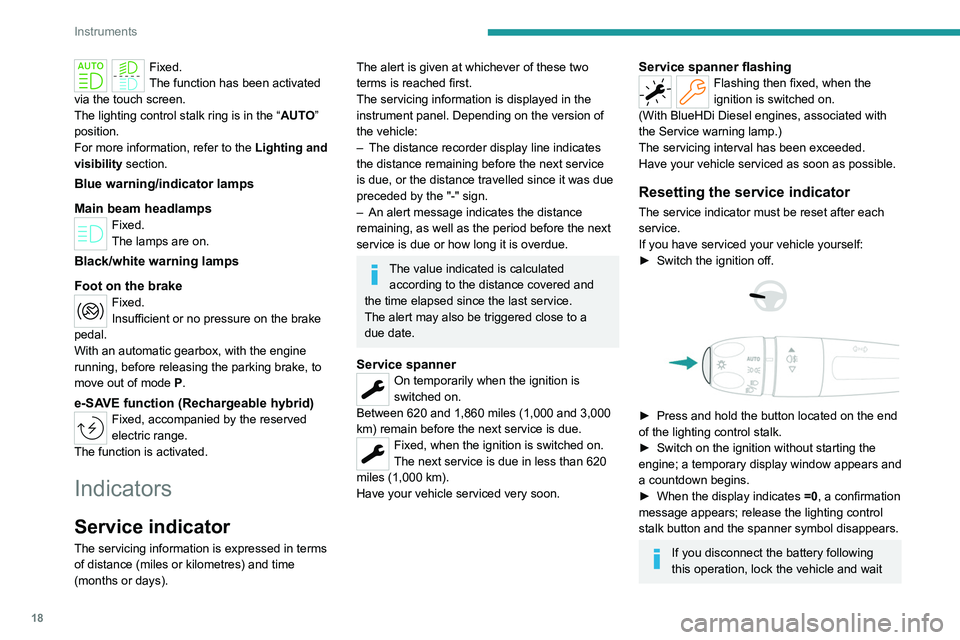
Service spannerOn temporarily when the ignition is
switched on.
Between 620 and 1,860 miles (1,000 and 3,000
km) remain before the next service is due.
Fixed, when the ignition is switched on.
The next service is due in less than 620
miles (1,000 km).
Have your vehicle serviced very soon.
Service spanner flashingFlashing then fixed, when the
ignition is switched on.
(With
BlueHDi Diesel engines, associated with
the Service warning lamp.)
The servicing interval has been exceeded.
Have your vehicle serviced as soon as possible.
Resetting the service indicator
The service indicator must be reset after each
service.
If you have serviced your vehicle yourself:
►
Switch the ignition off.
► Press and hold the button located on the end
of the lighting control stalk.
►
Switch on the ignition without starting the
engine; a temporary
display window appears and
a countdown begins.
►
When the display indicates =0
, a confirmation
message appears; release the lighting control
stalk button and the spanner symbol disappears.
If you disconnect the battery following
this operation, lock the vehicle and wait
Page 21 of 260

19
Instruments
1at least 5 minutes for the reset to be
registered.
Reminder of the servicing information
Servicing information is accessible using
the Settings > Vehicle application on the
touch screen.
►
Then select
Safety > Diagnostics.
Engine oil level indicator
(Depending on version)
The level read will only be correct if the vehicle is on level ground and the engine
has been off for more than 30 minutes.
Low oil level
This is indicated by the message " Oil
level incorrect" on the instrument panel,
accompanied by the lighting of the Service
warning lamp and an audible signal.
If a low oil level is confirmed by a check using
the dipstick, the level must be topped up to avoid
damage to the engine.
For more information on Checking levels, refer
to the corresponding section.
Oil gauge malfunction
This is indicated by the message " Oil level
measurement invalid" on the instrument panel.
Consult a PEUGEOT dealer or a qualified
workshop.
In the event of a malfunction of the
electric gauge, the oil level is no longer
monitored.
If the system is faulty, you must check the
engine oil level using the manual dipstick
located in the engine compartment.
For more information on Checking levels,
refer to the corresponding section.
Coolant temperature
indicator
With the engine running:
– In zone A, the temperature is correct.
–
In zone
B, the temperature is too high.
The associated warning lamp and the
STOP
warning lamp light up in red on the
instrument panel, accompanied by the display of
a message and an audible signal.
You must stop the vehicle as soon as it is
safe to do so.
Wait a few minutes before switching off the
engine.
After switching off the ignition, carefully open the bonnet and check the coolant
level.
For more information on Checking
levels, refer to the corresponding
section.
AdBlue® range indicators
(BlueHDi)
The Diesel BlueHDi engines are equipped with
a system that associates the SCR (Selective
Catalytic Reduction) emissions control system
and the Diesel particle filter (DPF) for the
treatment of exhaust gases. They cannot
function without AdBlue
® fluid.
When the level of AdBlue® falls below the
reserve level (between 1,500 and 0 miles (2,400
and 0
km)), a warning lamp lights up when
the ignition is switched on and an estimate
of the distance that can be travelled before
engine starting is prevented is displayed in the
instrument panel.
The engine starting prevention system required by regulations is activated
automatically once the AdBlue
® tank is empty.
It is then no longer possible to start the
engine until the minimum level of AdBlue
® has
been topped up.
Page 40 of 260

38
Access
Manual closing of the
motorised tailgate in case of
failure
This operation is only necessary in the case of
failure of the tailgate motor .
If the failure originates from the battery, it is
recommended to recharge it or change it with the
tailgate closed.
In this situation, a significant force may be
needed to close the tailgate.
►
Close it gently without slamming, as slowly as
possible, by pushing at the centre of the tailgate.
Do not lower the tailgate by pushing at
one of its sides - risk of damage!
Precautions in use
In wintry conditions
To avoid any operating problems, remove
the snow or wait until the ice melts before
requesting motorised opening of the tailgate.
When washing
When washing the vehicle in an
automatic car wash, do not forget to lock and
move away from the vehicle
to prevent any
risk of unwanted opening.
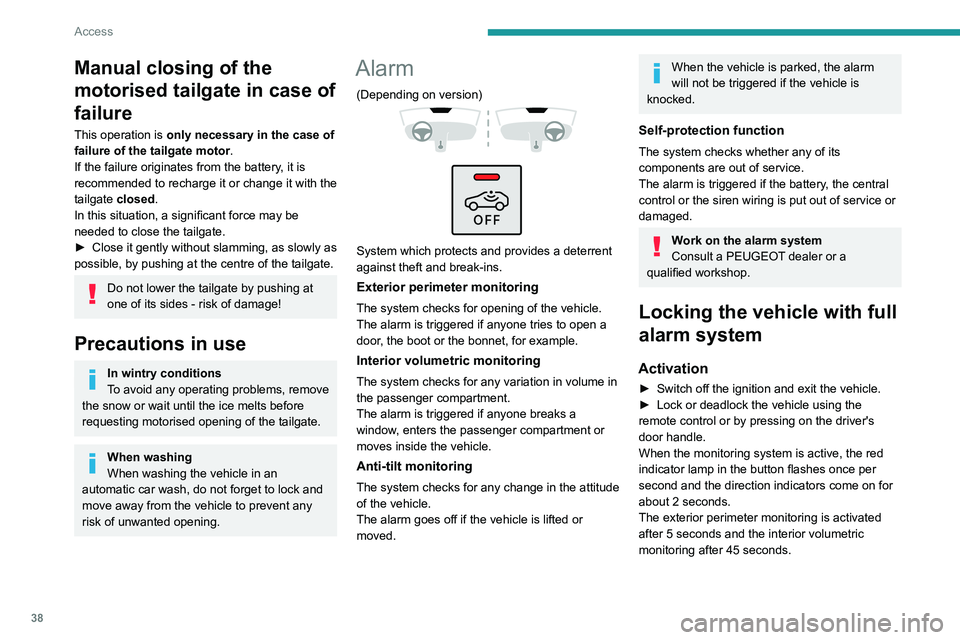
Alarm
(Depending on version)
System which protects and provides a deterrent
against theft and break-ins.
Exterior perimeter monitoring
The system checks for opening of the vehicle.
The alarm is triggered if anyone tries to open a
door, the boot or the bonnet, for example.
Interior volumetric monitoring
The system checks for any variation in volume in
the passenger compartment.
The alarm is triggered if anyone breaks a
window, enters the passenger compartment or
moves inside the vehicle.
Anti-tilt monitoring
The system checks for any change in the attitude
of the vehicle.
The alarm goes off if the vehicle is lifted or
moved.
When the vehicle is parked, the alarm
will not be triggered if the vehicle is
knocked.
Self-protection function
The system checks whether any of its
components are out of service.
The alarm is triggered if the battery, the central
control or the siren wiring is put out of service or
damaged.
Work on the alarm system
Consult a PEUGEOT dealer or a
qualified workshop.
Locking the vehicle with full
alarm system
Activation
► Switch off the ignition and exit the vehicle.
► Lock or deadlock the vehicle using the
remote control or by pressing on the driver's
door handle.
When the monitoring system is active, the red
indicator lamp in the button flashes once per
second and the direction indicators come on for
about 2 seconds.
The exterior perimeter monitoring is activated
after 5 seconds and the interior volumetric
monitoring after 45 seconds.
Page 80 of 260

78
Safety
General safety
recommendations
Do not remove the labels attached in
different places on your vehicle. They
include safety warnings as well as
identification information for the vehicle.
Depending on country regulations,
certain safety equipment may be
mandatory: high visibility safety vests,
warning triangles, breathalysers, spare bulbs,
spare fuses, fire extinguisher, first aid kit, mud
flaps at the rear of the vehicle, etc.
Installing electrical accessories:
– The fitting of electrical equipment or
accessories not approved by PEUGEOT
may
cause excessive current consumption and
faults and failures with the electrical system
of your vehicle. Contact a PEUGEOT dealer
for information on the range of approved
accessories.
–
As a safety measure, access to the
diagnostic socket, used for the vehicle's
electronic systems, is reserved strictly for
PEUGEOT
dealers or qualified workshops,
equipped with the special tools required (risk
of malfunctions of the vehicle's electronic
systems that could cause breakdowns or
serious accidents). The Manufacturer cannot
be held responsible if this advice is not
followed.
–
Any modification or adaptation not intended
or authorised by PEUGEOT
or carried out
without meeting the technical requirements
defined by the Manufacturer will result in the
suspension of the commercial warranty.
Installation of accessory radio
communication transmitters
Before installing a radio communication
transmitter with an external aerial, you must
without fail contact a PEUGEOT dealer for
the specification of transmitters which can
be fitted (frequency, maximum power, aerial
position, specific installation requirements),
in line with the Vehicle Electromagnetic
Compatibility Directive (2004/104/EC).
Declarations of conformity for radio
equipment
The relevant certificates are available on the
http://public.servicebox.peugeot.com/APddb/
website.
Hazard warning lamps
► Pressing this button causes all the direction
indicators to flash.
They can work with the ignition switched off.
Automatic operation of hazard warning lamps
When braking in an emergency, depending on
the rate of deceleration, the hazard warning
lamps come on automatically. They switch off
automatically when you next accelerate.
They can be switched off by pressing the button.