2022 PEUGEOT 308 light
[x] Cancel search: lightPage 31 of 260
29
Access
2Remote lighting of the
lamps
Availability of this function depends on version.► Press this button. The sidelamps,
dipped beam headlamps, number plate
lamps and door mirror spotlamps come on for 30
seconds.
Pressing again before the end of the timed
period switches off the lamps immediately.
Advice
Remote control
The remote control is a sensitive, high-
frequency device; avoid handling it in your
pocket, due to the risk of unintentionally
unlocking the vehicle.
Avoid pressing the remote control buttons
while out of range of the vehicle, due to
the risk of rendering the remote control
inoperative. It would then be necessary to
reset it.
The remote control does not work
when the
key is in the ignition switch, even when the
ignition is switched off.
Anti-theft protection
Do not modify the electronic vehicle
immobiliser, as this might result in
malfunctions.
For vehicles with a key ignition switch,
remember to remove the key and turn the
steering wheel to engage the steering lock.
Locking the vehicle
Driving with the doors locked could make
it more difficult for the emergency services
to enter the passenger compartment in an
emergency.
As a safety precaution, remove the key from
the ignition or take the electronic key with you
when leaving the vehicle, even for a short
time.
Purchasing a second-hand vehicle
Have the key codes memorised by a
PEUGEOT dealer, to ensure that the keys
in your possession are the only ones able to
start the vehicle.
Proximity Keyless Entry
and Start
This is a Keyless Entry and Start system.
It enables automatic vehicle locking/unlocking
simply by detecting the electronic key.
As long as the driver has the electronic key
on their person, the vehicle unlocks as they
approach and locks when they walk away.
If the electronic key is present in an area
between 2 and 5 m from the vehicle for more than 30 minutes, the system is deactivated to
preserve the battery.
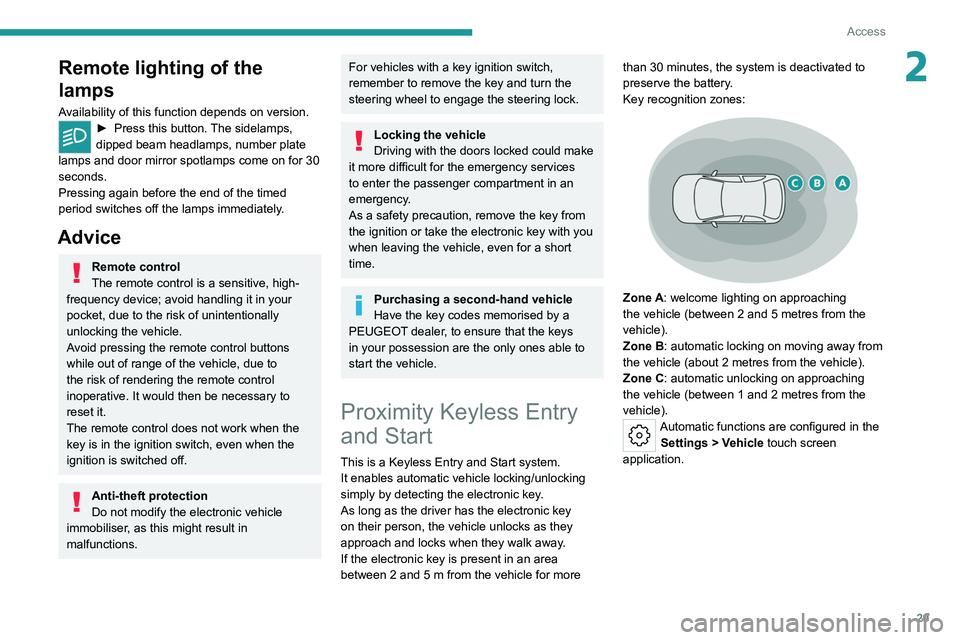
Key recognition zones:
Zone A: welcome lighting on approaching
the vehicle (between 2 and 5
metres from the
vehicle).
Zone B: automatic locking on moving away from
the vehicle (about 2
metres from the vehicle).
Zone C: automatic unlocking on approaching
the vehicle (between 1 and 2
metres from the
vehicle).
Automatic functions are configured in the Settings > Vehicle touch screen
application.
Page 32 of 260
30
Access
Unlocking the vehicle
Selective unlocking (driver’s door, boot) is
configured in the Settings
> Vehicle
touch screen application.
Complete unlocking
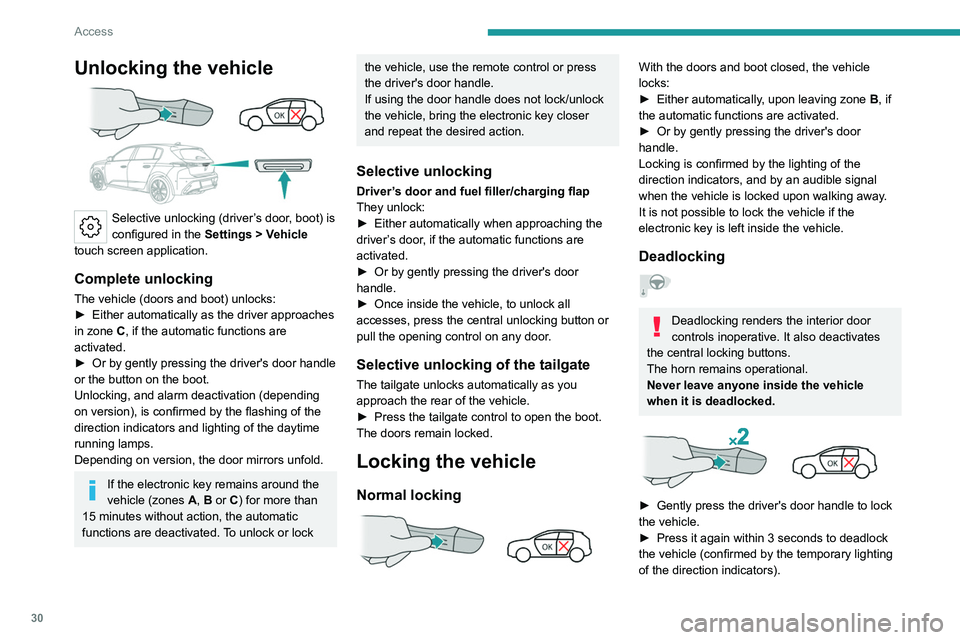
The vehicle (doors and boot) unlocks:
► Either automatically as the driver approaches
in zone
C, if the automatic functions are
activated.
►
Or by gently pressing the driver's door handle
or the button on the boot.
Unlocking, and alarm deactivation (depending
on version), is confirmed by the flashing of the
direction indicators and lighting of the daytime
running lamps.
Depending on version, the door mirrors unfold.
If the electronic key remains around the
vehicle (zones A, B or C) for more than
15 minutes without action, the automatic
functions are deactivated. To unlock or lock
the vehicle, use the remote control or press
the driver's door handle.
If using the door handle does not lock/unlock
the vehicle, bring the electronic key closer
and repeat the desired action.
Selective unlocking
Driver’s door and fuel filler/charging flap
They unlock:
►
Either automatically when approaching the
driver
’s door, if the automatic functions are
activated.
►
Or by gently pressing the driver's door
handle.
►
Once inside the vehicle, to unlock all
accesses, press the central unlocking button or
pull the opening control on any door
.
Selective unlocking of the tailgate
The tailgate unlocks automatically as you
approach the rear of the vehicle.
►
Press the tailgate control to open the boot.
The doors remain locked.
Locking the vehicle
Normal locking
With the doors and boot closed, the vehicle
locks:
►
Either automatically
, upon leaving zone B, if
the automatic functions are activated.
►
Or by gently pressing the driver's door
handle.
Locking is confirmed by the lighting of the
direction indicators, and by an audible signal
when the vehicle is locked upon walking away
.
It is not possible to lock the vehicle if the
electronic key is left inside the vehicle.
Deadlocking
Deadlocking renders the interior door
controls inoperative. It also deactivates
the central locking buttons.
The horn remains operational.
Never leave anyone inside the vehicle
when it is deadlocked.
► Gently press the driver's door handle to lock
the vehicle.
►
Press it again within 3
seconds to deadlock
the vehicle (confirmed by the temporary lighting
of the direction indicators).
Page 33 of 260
31
Access
2If one of the doors or the boot is still open
or if the electronic key for the Keyless
Entry and Start
system has been left inside
the vehicle, central locking will not take place.
If the vehicle is unlocked but the doors or
tailgate are not subsequently opened, the
vehicle will automatically lock itself again after
about 30
seconds. If fitted to the vehicle, the
alarm is automatically reactivated (if
previously activated).
Automatic folding/unfolding of the door mirrors is configured in the Settings
>
Vehicle touch screen application.
As a safety measure, never leave the vehicle, even for a short time, without
taking the Keyless Entry and Start system’s
electronic key with you.
Be aware of the risk of theft of the vehicle if
the key is present in one of the defined areas
while the vehicle is unlocked.
In order to preserve the battery in the
electronic key and the vehicle's battery:
–
The unlocking
on approach function
(zone
C) automatically switches to hibernation
mode after several days (approximately one
week) without being used. To unlock the
vehicle, use the remote control or press on
the driver’s door handle. The next time the
vehicle is started, the automatic unlocking
and locking functions will be reactivated.
–
If the welcome lighting is triggered
several times in succession without the
vehicle subsequently being started, it will be
deactivated.
–
All "hands-free" functions switch to
hibernation mode after 21 days without being
used.
To restore these functions, unlock the
vehicle using the remote control and start the
engine.
Electrical interference
The electronic key may not work if it is
close to an electronic device (e.g.
mobile
telephone (switched on or on standby), laptop
computer, strong magnetic fields). If this
occurs, move the electronic key away from
the electronic device.
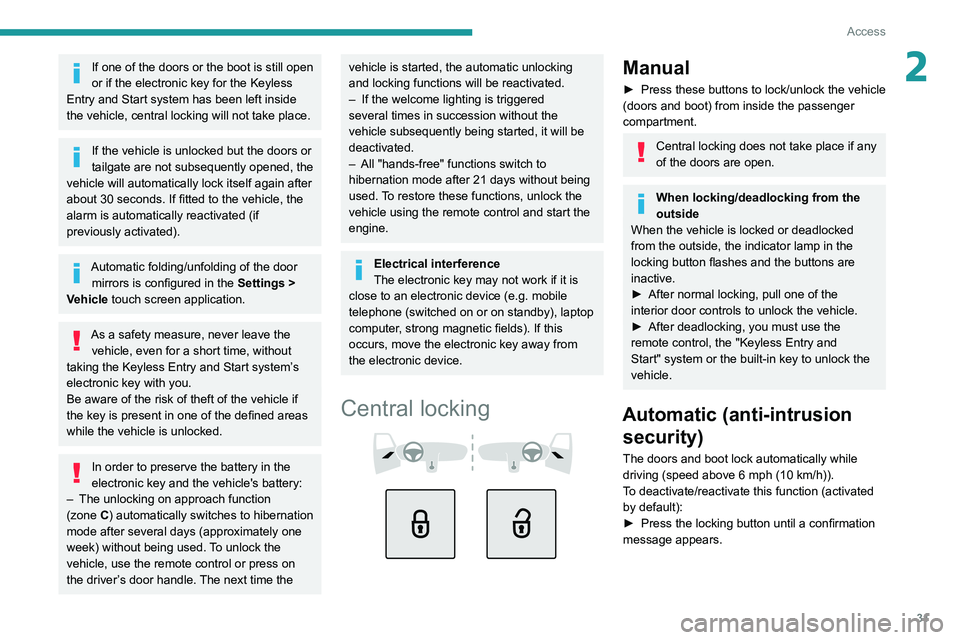
Central locking
Manual
► Press these buttons to lock/unlock the vehicle
(doors and boot) from inside the passenger
compartment.
Central locking does not take place if any
of the doors are open.
When locking/deadlocking from the
outside
When the vehicle is locked or deadlocked
from the outside, the indicator lamp in the
locking button
flashes and the buttons are
inactive.
►
After normal locking, pull one of the
interior door controls to unlock the vehicle.
►
After deadlocking, you must use the
remote control, the "Keyless Entry and
Start" system or the built-in key to unlock the
vehicle.
Automatic (anti-intrusion security)
The doors and boot lock automatically while
driving (speed above 6 mph (10
km/h)).
To deactivate/reactivate this function (activated
by default):
►
Press the locking button until a confirmation
message appears.
Page 38 of 260
36
Access
or
► T wo consecutive presses on the control D on
the dashboard.
The tailgate opens, either completely by default, or to the position memorised
beforehand.
If motorised operation is not activated, these
actions release the tailgate (partially-open
position).
When the vehicle is locked, the request to
open the boot with one of the controls A
or B unlocks the vehicle, or only the boot if
selective unlocking is activated, prior to the
opening of the boot.
Closing
► A short press on the interior tailgate control C.
It is possible to interrupt the operation of
the tailgate at any point.
Pressing one of these controls again
interrupts the movement that is underway.
Hands-free function (Hands-
Free Tailgate Access)
With the electronic key on your person, this
function allows the motorised tailgate to be
opened, closed or stopped via a "kicking"
movement under the rear bumper.
The "Hands-free tailgate/opening" function is configured in the Settings
>
Vehicle touch screen application.
Ensure that you are steady on your feet
before performing the "kicking"
movement.
Take care not to touch the exhaust system
which may be hot - risk of burns!
Rechargeable hybrid vehicles
The function is not available when the
vehicle is connected.
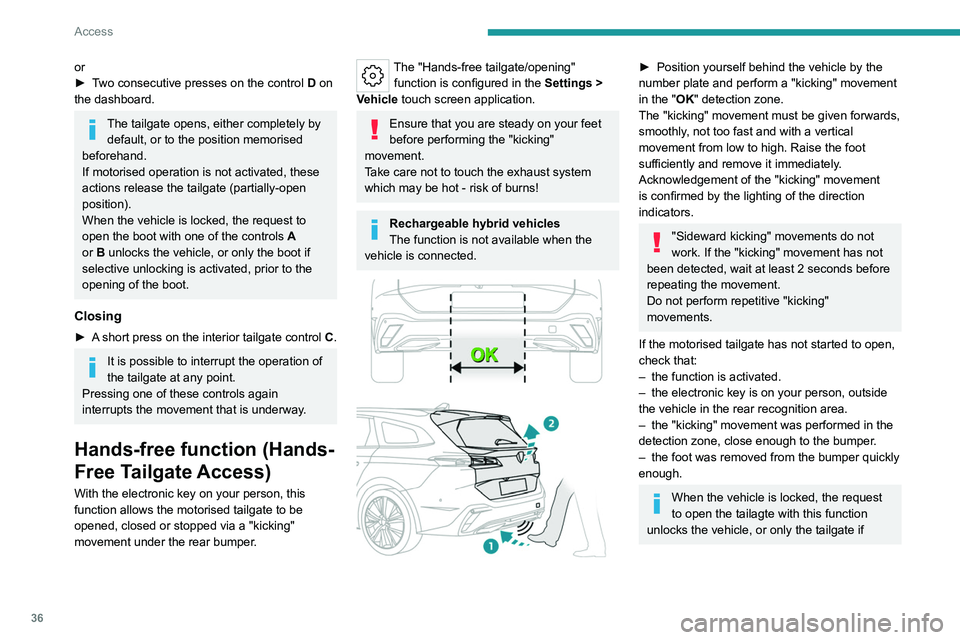
► Position yourself behind the vehicle by the
number plate and perform a "kicking" movement
in the "
OK" detection zone.
The "kicking" movement must be given forwards,
smoothly, not too fast and with a vertical
movement from low to high. Raise the foot
sufficiently and remove it immediately.
Acknowledgement of the "kicking" movement
is confirmed by the lighting of the direction
indicators.
"Sideward kicking" movements do not
work. If the "kicking" movement has not
been detected, wait at least 2 seconds before
repeating the movement.
Do not perform repetitive "kicking"
movements.
If the motorised tailgate has not started to open,
check that:
–
the function is activated.
–
the electronic key is on your person, outside
the vehicle in the rear recognition area.
–
the "kicking" movement was performed in the
detection zone, close enough to the bumper
.
–
the foot was removed from the bumper quickly
enough.
When the vehicle is locked, the request
to open the tailagte with this function
unlocks the vehicle, or only the tailgate if
Page 41 of 260
39
Access
2The alarm does not activate when locking automatically from a distance.
If an opening (door, boot or bonnet) is not
properly closed, the vehicle is not locked,
but the exterior perimeter monitoring will be
activated after 45 seconds, at the same time
as the interior volumetric monitoring.
Deactivation
► Press one of the remote control unlocking
buttons:
Short press.
Long press.
or
►
Unlock the vehicle by pressing the driver
’s
door handle.
The monitoring system is deactivated: the
indicator lamp in the button goes off and the
direction indicators flash for about 2 seconds.
After unlocking using the remote
control
If the vehicle automatically locks itself again
(as happens if a door or the boot is not
opened within 30 seconds of unlocking), the
monitoring system is automatically activated.
Locking the vehicle
with exterior perimeter
monitoring only
Deactivate the interior volumetric and anti-tilt
monitoring to avoid the unwanted triggering of
the
alarm, in certain cases such as:
–
Slightly open window
.
–
W
ashing the vehicle.
–
Changing a wheel.
–
T
owing the vehicle.
–
T
ransport on a ship or ferry.
Deactivating the interior volumetric
and anti-tilt monitoring
► Switch off the ignition and within 10 seconds
press the alarm button until its red indicator lamp
is on fixed.
►
Get out of the vehicle.
►
Immediately lock the vehicle using the remote
control or the Keyless Entry and Start system.
Only the exterior perimeter monitoring is
activated; the button's red indicator lamp flashes
once every second.
To take effect, this deactivation must be carried out after each time the ignition is
switched off.
Reactivating the interior volumetric
and anti-tilt monitoring
► Deactivate the exterior perimeter monitoring
by unlocking the vehicle using the remote control
or the Keyless Entry and Start system.
The indicator lamp in the button goes off.
►
Reactivate all monitoring by locking the
vehicle using the remote control or the Keyless
Entry and Start system.
The red indicator lamp in the button once again
flashes every second.
Triggering of the alarm
This is indicated by sounding of the siren
and flashing of the direction indicators for 30
seconds.
Depending on the country of sale, certain
monitoring functions remain active until the alarm
has been triggered eleven times consecutively.
When the vehicle is unlocked using the remote
control or the Keyless Entry and Start system,
rapid flashing of the red indicator lamp in the
button informs you that the alarm was triggered
during your absence. When the ignition is
switched on, this flashing stops.
Failure of the remote control
To deactivate the monitoring functions:
► Unlock the vehicle using the key in the front
left-hand door lock.
►
Open the door; the alarm is triggered.
Page 42 of 260
40
Access
► Switch on the ignition; this stops the alarm.
The indicator lamp in the button goes off.
Locking the vehicle without
activating the alarm
► Lock the vehicle using the key (built-in the
remote control) in the front left-hand door lock.
Automatic activation
(Depending on version)
The system is activated automatically 2 minutes
after the last door or the boot is closed.
►
T
o avoid triggering the alarm on entering the
vehicle, first press the unlocking button on the
remote control or unlock the vehicle using the
"Keyless Entry and Start" system.
Malfunction
When the ignition is switched on, the fixed
lighting of the red indicator lamp in the button
indicates a system malfunction.
Have it checked by a PEUGEOT dealer or a
qualified workshop.
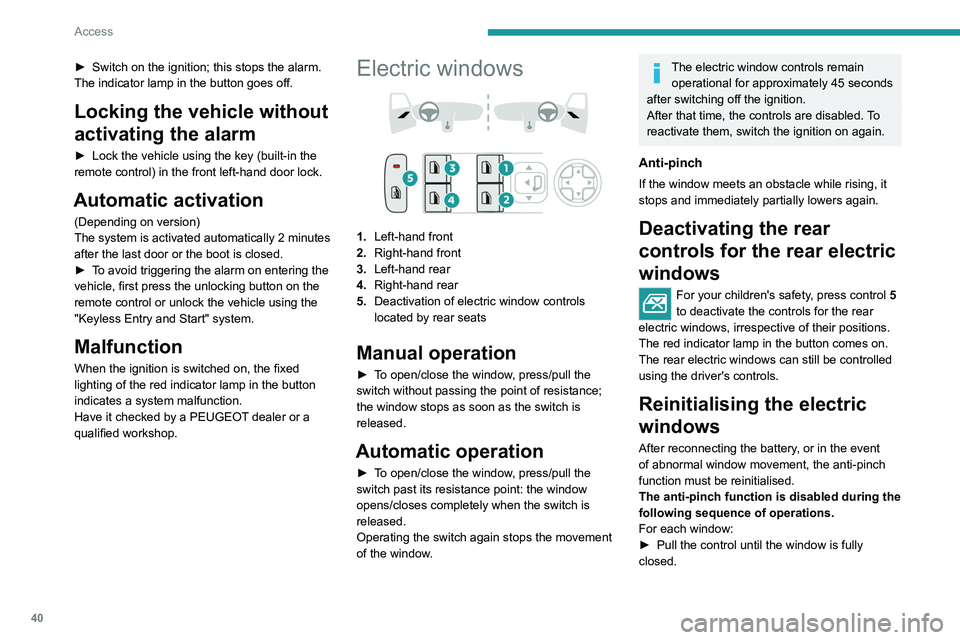
Electric windows
1. Left-hand front
2. Right-hand front
3. Left-hand rear
4. Right-hand rear
5. Deactivation of electric window controls
located by rear seats
Manual operation
► To open/close the window, press/pull the
switch without passing the point of resistance;
the window stops as soon as the switch is
released.
Automatic operation
► To open/close the window, press/pull the
switch past its resistance point: the window
opens/closes completely when the switch is
released.
Operating the switch again stops the movement
of the window.
The electric window controls remain
operational for approximately 45 seconds
after switching off the ignition.
After that time, the controls are disabled. To
reactivate them, switch the ignition on again.
Anti-pinch
If the window meets an obstacle while rising, it
stops and immediately partially lowers again.
Deactivating the rear
controls for the rear electric
windows
For your children's safety, press control 5
to deactivate the controls for the rear
electric windows, irrespective of their positions.
The red indicator lamp in the button comes on.
The rear electric windows can still be controlled
using the driver's controls.
Reinitialising the electric
windows
After reconnecting the battery, or in the event
of abnormal window movement, the anti-pinch
function must be reinitialised.
The anti-pinch function is disabled during the
following sequence of operations.
For each window:
►
Pull the control until the window is fully
closed.
Page 44 of 260
42
Access
Anti-pinch system
If the sunroof encounters an obstacle when
closing, the movement is automatically reversed.
Opening/closing the sunroof
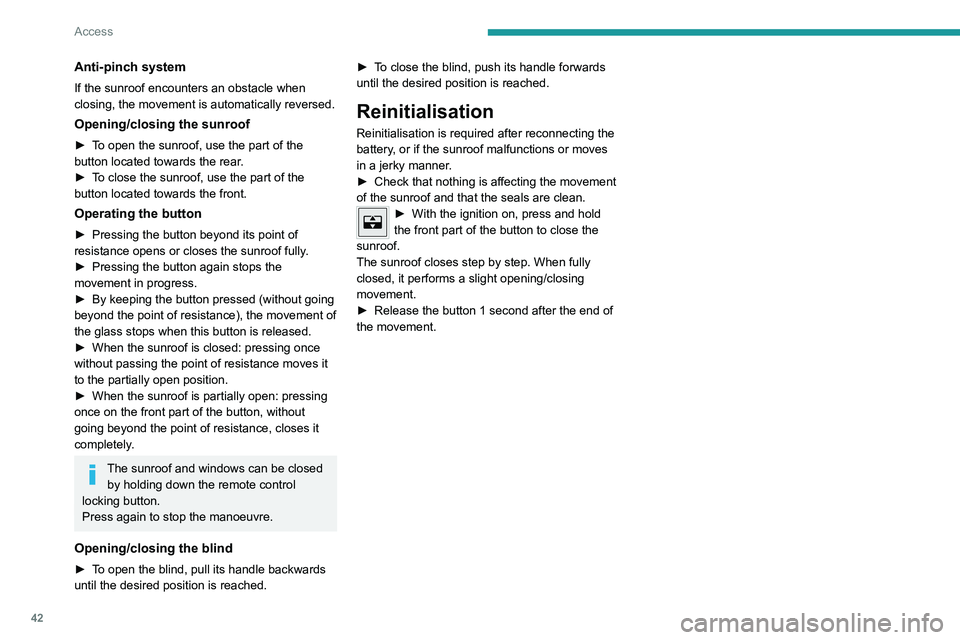
► To open the sunroof, use the part of the
button located towards the rear.
►
T
o close the sunroof, use the part of the
button located towards the front.
Operating the button
► Pressing the button beyond its point of
resistance opens or closes the sunroof fully .
►
Pressing the button again stops the
movement in progress.
►
By keeping the button pressed (without going
beyond the point of resistance), the movement of
the glass stops when this button is released.
►
When the sunroof is closed: pressing once
without passing the point of resistance moves it
to the partially open position.
►
When the sunroof is partially open: pressing
once on the front part of the button, without
going beyond the point of resistance, closes it
completely
.
The sunroof and windows can be closed by holding down the remote control
locking button.
Press again to stop the manoeuvre.
Opening/closing the blind
► To open the blind, pull its handle backwards
until the desired position is reached. ►
T
o close the blind, push its handle forwards
until the desired position is reached.
Reinitialisation
Reinitialisation is required after reconnecting the
battery, or if the sunroof malfunctions or moves
in a jerky manner.
►
Check that nothing is affecting the movement
of the sunroof and that the seals are clean.
► With the ignition on, press and hold
the front part of the button to close the
sunroof.
The sunroof closes step by step. When fully
closed, it performs a slight opening/closing
movement.
►
Release the button 1 second after the end of
the movement.
Page 45 of 260
43
Ease of use and comfort
3Driving position
Correct seating position
Adopting a good driving position contributes to
improving driver comfort and protection.
It also optimises interior and exterior visibility as
well as access to controls.
Certain seat adjustments described in this
section depend on the trim level and the country
in which the vehicle is sold.
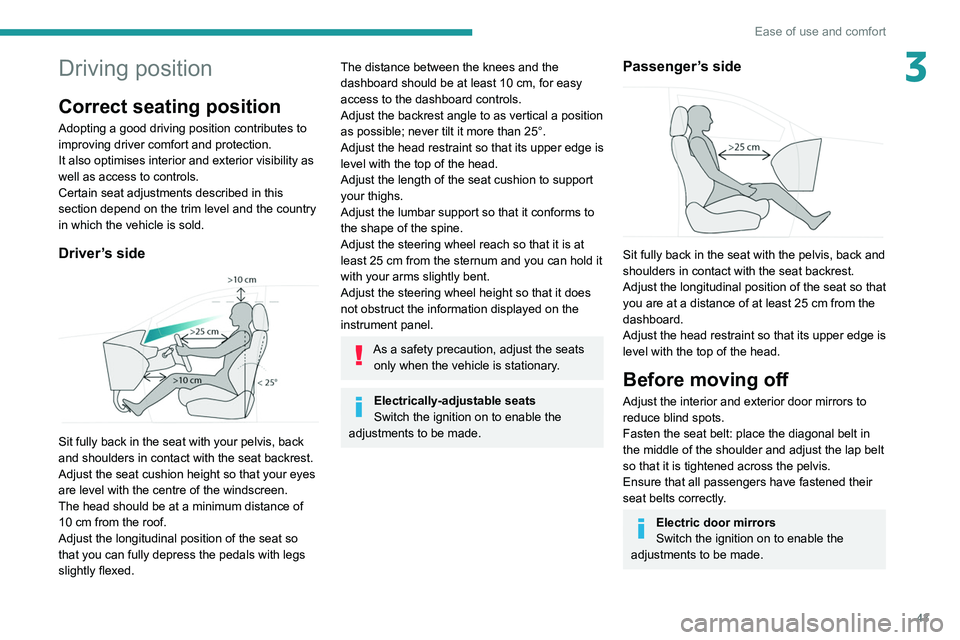
Driver’s side
Sit fully back in the seat with your pelvis, back
and shoulders in contact with the seat backrest.
Adjust the seat cushion height so that your eyes
are level with the centre of the windscreen.
The head should be at a minimum distance of
10 cm from the roof.
Adjust the longitudinal position of the seat so
that you can fully depress the pedals with legs
slightly flexed.
The distance between the knees and the
dashboard should be at least 10 cm, for easy
access to the dashboard controls.
Adjust the backrest angle to as vertical a position
as possible; never tilt it more than 25°.
Adjust the head restraint so that its upper edge is
level with the top of the head.
Adjust the length of the seat cushion to support
your thighs.
Adjust the lumbar support so that it conforms to
the shape of the spine.
Adjust the steering wheel reach so that it is at
least 25
cm from the sternum and you can hold it
with your arms slightly bent.
Adjust the steering wheel height so that it does
not obstruct the information displayed on the
instrument panel.
As a safety precaution, adjust the seats only when the vehicle is stationary.
Electrically-adjustable seats
Switch the ignition on to enable the
adjustments to be made.
Passenger’s side
Sit fully back in the seat with the pelvis, back and
shoulders in contact with the seat backrest.
Adjust the longitudinal position of the seat so that
you are at a distance of at least 25
cm from the
dashboard.
Adjust the head restraint so that its upper edge is
level with the top of the head.
Before moving off
Adjust the interior and exterior door mirrors to
reduce blind spots.
Fasten the seat belt: place the diagonal belt in
the middle of the shoulder and adjust the lap belt
so that it is tightened across the pelvis.
Ensure that all passengers have fastened their
seat belts correctly.
Electric door mirrors
Switch the ignition on to enable the
adjustments to be made.