2022 PEUGEOT 308 charging
[x] Cancel search: chargingPage 32 of 260
30
Access
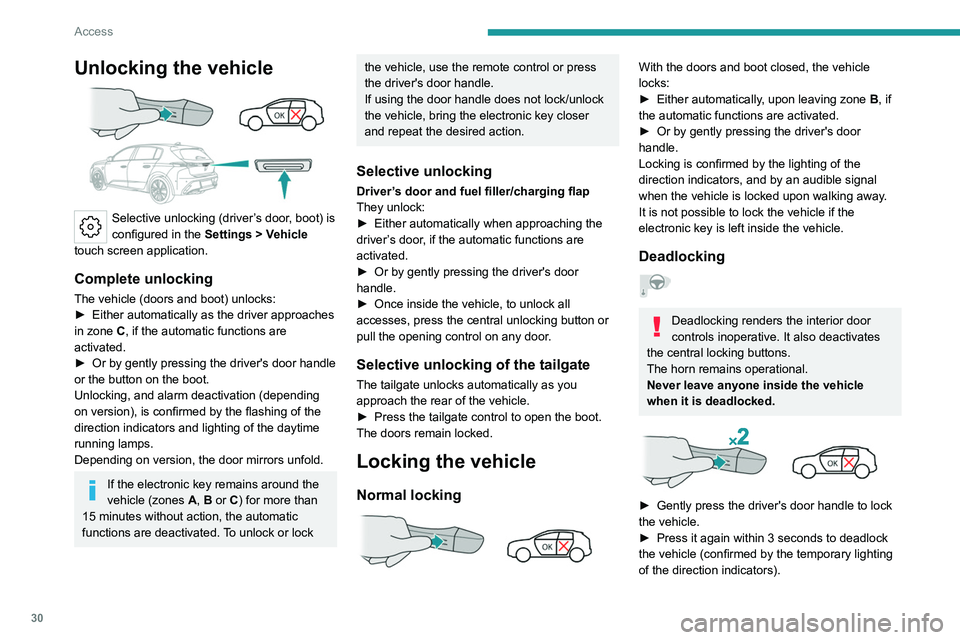
Unlocking the vehicle
Selective unlocking (driver’s door, boot) is
configured in the Settings
> Vehicle
touch screen application.
Complete unlocking
The vehicle (doors and boot) unlocks:
► Either automatically as the driver approaches
in zone
C, if the automatic functions are
activated.
►
Or by gently pressing the driver's door handle
or the button on the boot.
Unlocking, and alarm deactivation (depending
on version), is confirmed by the flashing of the
direction indicators and lighting of the daytime
running lamps.
Depending on version, the door mirrors unfold.
If the electronic key remains around the
vehicle (zones A, B or C) for more than
15 minutes without action, the automatic
functions are deactivated. To unlock or lock
the vehicle, use the remote control or press
the driver's door handle.
If using the door handle does not lock/unlock
the vehicle, bring the electronic key closer
and repeat the desired action.
Selective unlocking
Driver’s door and fuel filler/charging flap
They unlock:
►
Either automatically when approaching the
driver
’s door, if the automatic functions are
activated.
►
Or by gently pressing the driver's door
handle.
►
Once inside the vehicle, to unlock all
accesses, press the central unlocking button or
pull the opening control on any door
.
Selective unlocking of the tailgate
The tailgate unlocks automatically as you
approach the rear of the vehicle.
►
Press the tailgate control to open the boot.
The doors remain locked.
Locking the vehicle
Normal locking
With the doors and boot closed, the vehicle
locks:
►
Either automatically
, upon leaving zone B, if
the automatic functions are activated.
►
Or by gently pressing the driver's door
handle.
Locking is confirmed by the lighting of the
direction indicators, and by an audible signal
when the vehicle is locked upon walking away
.
It is not possible to lock the vehicle if the
electronic key is left inside the vehicle.
Deadlocking
Deadlocking renders the interior door
controls inoperative. It also deactivates
the central locking buttons.
The horn remains operational.
Never leave anyone inside the vehicle
when it is deadlocked.
► Gently press the driver's door handle to lock
the vehicle.
►
Press it again within 3
seconds to deadlock
the vehicle (confirmed by the temporary lighting
of the direction indicators).
Page 60 of 260
58
Ease of use and comfort
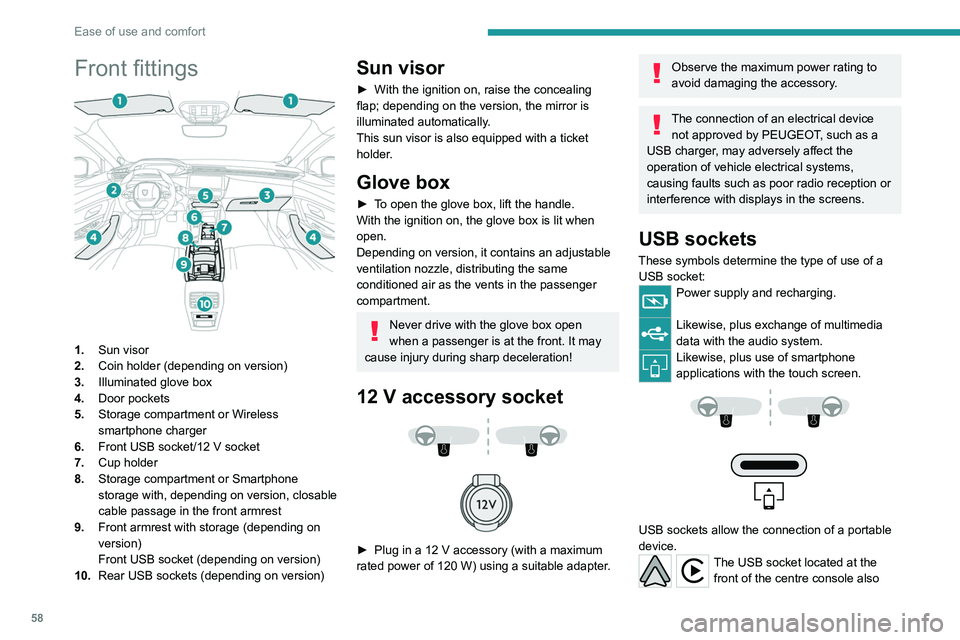
Front fittings
1.Sun visor
2. Coin holder (depending on version)
3. Illuminated glove box
4. Door pockets
5. Storage compartment or Wireless
smartphone charger
6. Front USB socket/12 V socket
7. Cup holder
8. Storage compartment or Smartphone
storage with, depending on version,
closable
cable passage in the front armrest
9. Front armrest with storage (depending on
version)
Front USB socket (depending on version)
10. Rear USB sockets (depending on version)
Sun visor
► With the ignition on, raise the concealing
flap; depending on the version, the mirror is
illuminated automatically.
This sun visor is also equipped with a ticket
holder.
Glove box
► To open the glove box, lift the handle.
With the ignition on, the glove box is lit when
open.
Depending on version, it contains an adjustable
ventilation nozzle, distributing the same
conditioned air as the vents in the passenger
compartment.
Never drive with the glove box open
when a passenger is at the front. It may
cause injury during sharp deceleration!
12 V accessory socket
► Plug in a 12 V accessory (with a maximum
rated power of 120 W) using a suitable adapter.
Observe the maximum power rating to
avoid damaging the accessory.
The connection of an electrical device not approved by PEUGEOT, such as a
USB charger, may adversely affect the
operation of vehicle electrical systems,
causing faults such as poor radio reception or
interference with displays in the screens.
USB sockets
These symbols determine the type of use of a USB socket:
Power supply and recharging.
Likewise, plus exchange of multimedia
data with the audio system.
Likewise, plus use of smartphone
applications with the touch screen.
USB sockets allow the connection of a portable
device.
The USB socket located at the front of the centre console also
Page 61 of 260
59
Ease of use and comfort
3allows a smartphone to be connected by Android
Auto® or CarPlay®, enabling certain smartphone
applications to be used on the touch screen.
For best results, use a cable made or approved
by the device manufacturer.
These applications can be managed using the
steering-mounted controls or the audio system
controls.
Smartphone storage/USB socket
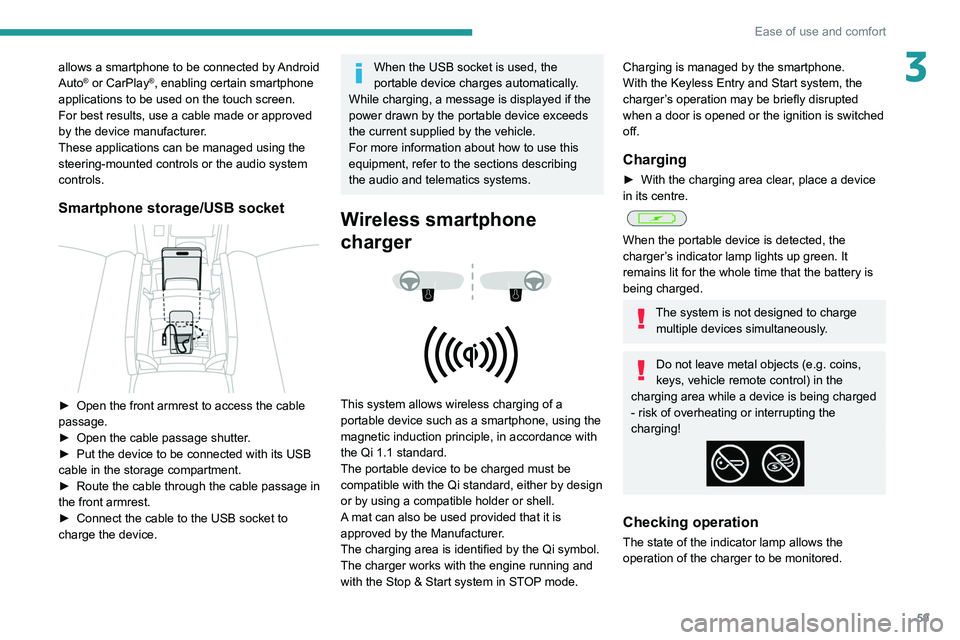
► Open the front armrest to access the cable
passage.
►
Open the cable passage shutter
.
►
Put the device to be connected with its USB
cable in the storage compartment.
►
Route the cable through the cable passage in
the front armrest.
►
Connect the cable to the USB socket to
charge the device.
When the USB socket is used, the
portable device charges automatically.
While charging, a message is displayed if the
power drawn by the portable device exceeds
the current supplied by the vehicle.
For more information about how to use this
equipment, refer to the sections describing
the audio and telematics systems.
Wireless smartphone
charger
This system allows wireless charging of a
portable device such as a smartphone, using the
magnetic induction principle, in accordance with
the Qi 1.1 standard.
The portable device to be charged must be
compatible with the Qi standard, either by design
or by using a compatible holder or shell.
A mat can also be used provided that it is
approved by the Manufacturer.
The charging area is identified by the Qi symbol.
The charger works with the engine running and
with the Stop & Start system in STOP mode.
Charging is managed by the smartphone.
With the Keyless Entry and Start system, the
charger’s operation may be briefly disrupted
when a door is opened or the ignition is switched
off.
Charging
► With the charging area clear , place a device
in its centre.
When the portable device is detected, the
charger’s indicator lamp lights up green. It
remains lit for the whole time that the battery is
being charged.
The system is not designed to charge multiple devices simultaneously.
Do not leave metal objects (e.g. coins,
keys, vehicle remote control) in the
charging area while a device is being charged
- risk of overheating or interrupting the
charging!
Checking operation
The state of the indicator lamp allows the
operation of the charger to be monitored.
Page 62 of 260
60
Ease of use and comfort
State of the
indicator lampMeaning
Off Engine switched off.
No compatible devices
detected.
Charging complete.
Fixed green Compatible portable device detected.
Charging.
Flashing orange Foreign object detected in the charging zone.
Portable device not well
centred in the charging
zone.
Fixed orange Malfunction of the portable device's battery
meter.
Device battery
temperature too high.
Charger malfunction.
If the indicator lamp is fixed orange:
– remove the device, then place it back in the
centre of the charging zone.
or
–
remove the device and try again in a quarter
of an hour
.
If the problem persists, have the system checked
by a PEUGEOT dealer or a qualified workshop.
Front armrest
It includes a storage space and is illuminated
when the cover is opened (depending on
version).
Opening
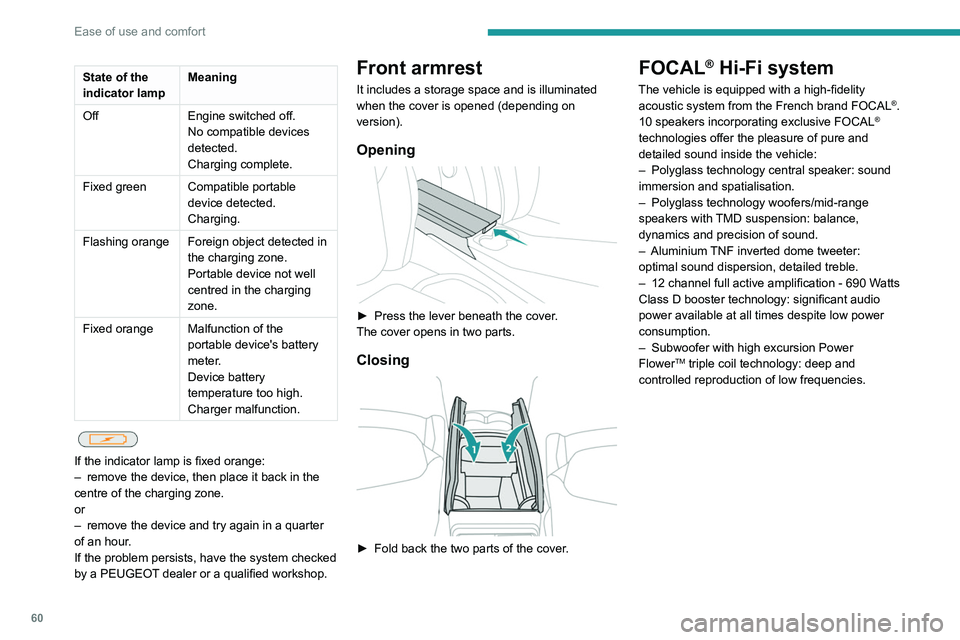
► Press the lever beneath the cover.
The cover opens in two parts.
Closing
► Fold back the two parts of the cover .
FOCAL® Hi-Fi system
The vehicle is equipped with a high-fidelity
acoustic system from the French brand FOCAL®.
10 speakers incorporating exclusive FOCAL®
technologies offer the pleasure of pure and
detailed sound inside the vehicle:
–
Polyglass technology central speaker: sound
immersion and spatialisation.
–
Polyglass technology woofers/mid-range
speakers with
TMD suspension: balance,
dynamics and precision of sound.
–
Aluminium
TNF inverted dome tweeter:
optimal sound dispersion, detailed treble.
–
12 channel full active amplification - 690 W
atts
Class D booster technology: significant audio
power available at all times despite low power
consumption.
–
Subwoofer with high excursion Power
FlowerTM triple coil technology: deep and
controlled reproduction of low frequencies.
Page 68 of 260
66
Ease of use and comfort
Boot lamp
It comes on automatically when the boot is
opened and goes off automatically when the
boot is closed.
The lighting time varies according to the
circumstances:
–
When the ignition is off, approximately 10
minutes.
–
In energy saving mode, approximately 30
seconds.
–
With the engine running, unlimited.
Storage well
► Lift the rigid boot floor as far as possible or lift
the hinged boot carpet (depending on version) to
access the storage well.
►
With the 2-position boot floor (SW), lift the
boot floor as far as possible or lift the cover at
the back of
the boot to access one or other of the
storage wells.
The cover at the back of the boot
is also
accessible from the second row seats if the
backrests of the rear bench seat are folded
down.
Depending on version, it includes:
–
A
hazard warning triangle.
–
A
temporary puncture repair kit with the tool
kit.
–
A
spare wheel with the tool kit.
–
The traction battery charging cables
(Rechargeable hybrid). The load space cover can also be stored here
(SW).
Page 90 of 260

88
Safety
In the event of a minor impact or bump at
the side of the vehicle or if the vehicle
rolls over, the airbags may not be deployed.
In the event of a rear or front collision, none of
the lateral airbags are deployed.
Advice
For the airbags to be fully effective,
observe the safety recommendations
below.
Adopt a normal and upright sitting position.
Fasten your seat belt and position it correctly.
Do not place anything between the occupants
and the airbags (e.g.
child, animal, object), do
not fix or attach anything near or in the path of
the airbags, as this could cause injuries when
they are deployed.
Never modify the original definition of the
vehicle, particularly in the area directly around
the airbags.
Even if all of the precautions mentioned are
observed, a risk of injury or of minor burns to
the head, chest or arms cannot be ruled out
when an airbag is deployed. The bag inflates
almost instantly (within a few milliseconds)
then deflates within the same time,
discharging the hot gas via openings provided
for this purpose.
After an accident or if the vehicle has been
stolen, have the airbag systems checked.
All work must be carried out only by a
PEUGEOT dealer or a qualified workshop
Front airbags
Do not drive holding the steering wheel
by its spokes or resting your hands on the
centre part of the wheel.
Passengers must not place their feet on the
dashboard.
Do not smoke as deployment of the airbags
can cause burns or the risk of injury from a
cigarette or pipe.
Never remove or pierce the steering wheel or
hit it violently.
Do not fix or attach anything to the steering
wheel or dashboard, as this could cause
injuries when the airbags are deployed.
Lateral airbags
Use only approved seat covers
compatible with the deployment of these
airbags. For information on the range of seat
covers suitable for your vehicle, contact a
PEUGEOT dealer.
Do not fix or attach anything to the seat
backrests (e.g.
clothing) as this could cause
injuries to the chest or arm when the airbag is
deployed.
Do not sit with the upper part of the body any
nearer to the door than necessary.
The vehicle's front door panels include side
impact sensors.
A damaged door or any unauthorised or
incorrectly executed work (modification or
repair) on the front doors or their interior trim
could compromise the operation of these
sensors - risk of malfunction of the lateral
airbags!
All work must be carried out only by a
PEUGEOT dealer or a qualified workshop
Curtain airbags
Do not fix or attach anything to the roof,
as this could cause head injuries when the
curtain airbag is deployed.
Do not remove the grab handles installed on
the roof.
Child seats
The legislation on carrying children is specific to each country. Refer to the
legislation in force in your country.
For maximum safety, please observe the
following recommendations:
–
In accordance with European regulations, all
children under the age of 12 or less than one
and a half metres tall must travel in approved
child seats suited to their weight , on seats
fitted with a seat belt or ISOFIX mountings.
–
Statistically
, the safest seats in your
vehicle for carrying children are the rear
seats.
–
A
child weighing less than 9 kg must travel
in the "rearward facing" position both in the
front and in the rear.
Page 101 of 260
99
Driving
6Starting / Switching off the
engine with the key
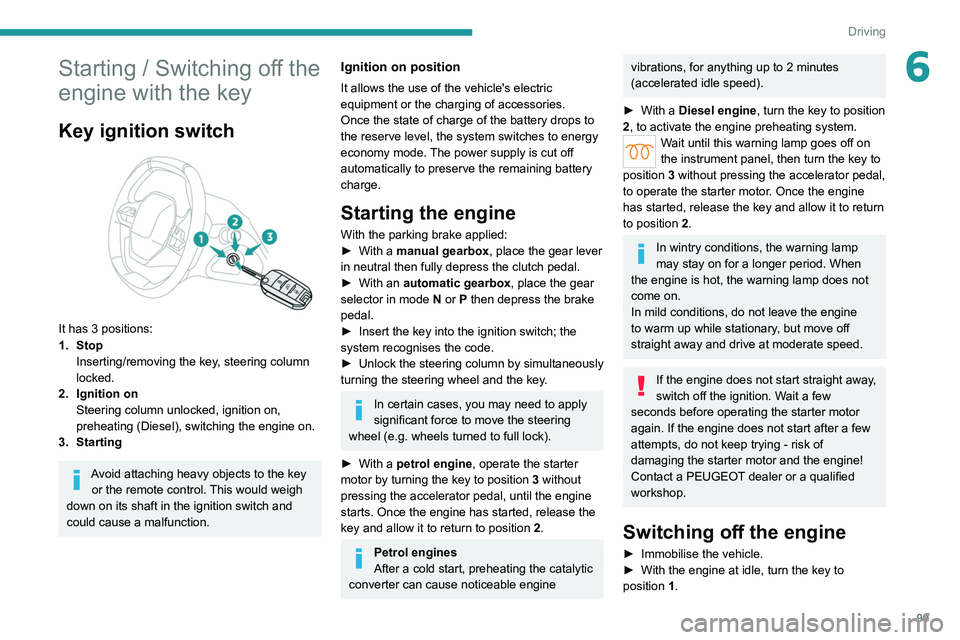
Key ignition switch
It has 3 positions:
1. StopInserting/removing the key, steering column
locked.
2. Ignition on Steering column unlocked, ignition on,
preheating (Diesel), switching the engine on.
3. Starting
Avoid attaching heavy objects to the key or the remote control. This would weigh
down on its shaft in the ignition switch and
could cause a malfunction.
Ignition on position
It allows the use of the vehicle's electric
equipment or the charging of accessories.
Once the state of charge of the battery drops to
the reserve level, the system switches to energy
economy mode. The power supply is cut off
automatically to preserve the remaining battery
charge.
Starting the engine
With the parking brake applied:
► With a manual gearbox, place the gear lever
in neutral then fully depress the clutch pedal.
►
With an
automatic gearbox, place the gear
selector in mode N or P then depress the brake
pedal.
►
Insert the key into the ignition switch; the
system recognises the code.
►
Unlock
the steering column by simultaneously
turning the steering wheel and the key.
In certain cases, you may need to apply
significant force to move the steering
wheel (e.g.
wheels turned to full lock).
►
With a
petrol engine , operate the starter
motor by turning the key to position 3 without
pressing the accelerator pedal, until the engine
starts. Once the engine has started, release the
key and allow it to return to position 2.
Petrol engines
After a cold start, preheating the catalytic
converter can cause noticeable engine
vibrations, for anything up to 2 minutes
(accelerated idle speed).
►
With a
Diesel engine, turn the key to position
2, to
activate the engine preheating system.
Wait until this warning lamp goes off on
the instrument panel, then turn the key to
position 3 without pressing the accelerator pedal,
to operate the starter motor. Once the engine
has started, release the key and allow it to return
to position 2.
In wintry conditions, the warning lamp
may stay on for a longer period. When
the engine is hot, the warning lamp does not
come on.
In mild conditions, do not leave the engine
to warm up while stationary, but move off
straight away and drive at moderate speed.
If the engine does not start straight away,
switch off the ignition. Wait a few
seconds before operating the starter motor
again. If the engine does not start after a few
attempts, do not keep trying - risk of
damaging the starter motor and the engine!
Contact a PEUGEOT dealer or a qualified
workshop.
Switching off the engine
► Immobilise the vehicle.
► With the engine at idle, turn the key to
position 1
.
Page 108 of 260
106
Driving
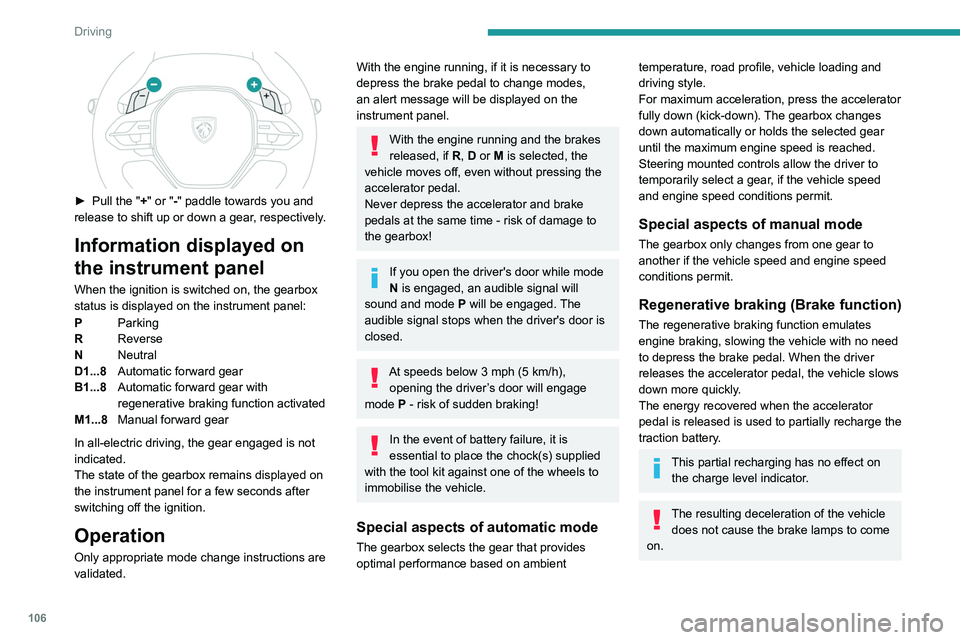
► Pull the "+" or "-" paddle towards you and
release to shift up or down a gear, respectively.
Information displayed on
the instrument panel
When the ignition is switched on, the gearbox
status is displayed on the instrument panel:
P Parking
R Reverse
N Neutral
D1...8 Automatic forward gear
B1...8 Automatic forward gear with
regenerative braking function activated
M1...8 Manual forward gear
In all-electric driving, the gear engaged is not
indicated.
The state of the gearbox remains displayed on
the instrument panel for a few seconds after
switching off the ignition.
Operation
Only appropriate mode change instructions are
validated.
With the engine running, if it is necessary to
depress the brake pedal to change modes,
an alert message will be displayed on the
instrument panel.
With the engine running and the brakes
released, if R, D or M is selected, the
vehicle moves off, even without pressing the
accelerator pedal.
Never depress the accelerator and brake
pedals at the same time - risk of damage to
the gearbox!
If you open the driver's door while mode
N is engaged, an audible signal will
sound and mode P will be engaged. The
audible signal stops when the driver's door is
closed.
At speeds below 3 mph (5 km/h),
opening the driver ’s door will engage
mode P
- risk of sudden braking!
In the event of battery failure, it is
essential to place the chock(s) supplied
with the tool kit against one of the wheels to
immobilise the vehicle.
Special aspects of automatic mode
The gearbox selects the gear that provides
optimal performance based on ambient
temperature, road profile, vehicle loading and
driving style.
For maximum acceleration, press the accelerator
fully down (kick-down). The gearbox changes
down automatically or holds the selected gear
until the maximum engine speed is reached.
Steering mounted controls allow the driver to
temporarily select a gear, if the vehicle speed
and engine speed conditions permit.
Special aspects of manual mode
The gearbox only changes from one gear to
another if the vehicle speed and engine speed
conditions permit.
Regenerative braking (Brake function)
The regenerative braking function emulates
engine braking, slowing the vehicle with no need
to depress the brake pedal. When the driver
releases the accelerator pedal, the vehicle slows
down more quickly.
The energy recovered when the accelerator
pedal is released is used to partially recharge the
traction battery.
This partial recharging has no effect on the charge level indicator.
The resulting deceleration of the vehicle does not cause the brake lamps to come
on.