2022 PEUGEOT 301 parking sensors
[x] Cancel search: parking sensorsPage 4 of 148

2
Contents
■
Overview
■
Eco-driving
1Dashboard instrumentsInstrument panel 7
Warning and indicator lamps 7
Indicators 10
Distance recorders 11
Setting the date and time 12
Trip computer 12
2AccessRemote control / Key 15
Central locking 16
Back-up procedures 17
Doors 18
Boot 18
Alarm 19
Electric windows 20
3Ease of use and comfortFront seats 21
Rear bench seat 22
Steering wheel adjustment 23
Mirrors 23
Heating and Ventilation 24
Air conditioning, manual (without
display screen)
25
Electronic air conditioning (with
display screen)
26
Front demisting - defrosting 27
Demisting/de-icing the rear screen and/or
the door mirrors 28
Interior fittings 28
Courtesy lamps 30
4Lighting and visibilityExterior lighting control stalk 31
Direction indicators 32
Headlamp beam height adjustment 33
Wiper control stalk 33
Changing a wiper blade 34
5SafetyGeneral safety recommendations 35
Hazard warning lamps 35
Horn 36
Electronic stability control (ESC) 36
Seat belts 37
Airbags 39
Child seats 41
Deactivating the front passenger airbag 43
ISOFIX child seats 45
Child lock 48
6DrivingDriving recommendations 49
Starting-switching off the engine 51
Parking brake 52
Hill start assist 52
5-speed manual gearbox 53
6-speed manual gearbox 53
6-speed automatic gearbox 54
Gear shift indicator 56
Stop & Start 56
Tyre under-inflation detection 58
Driving and manoeuvring aids - General
recommendations
60
Speed limiter 61
Cruise control - Specific recommendations 62
Cruise control 63
Rear parking sensors 64
Reversing Camera 65
7Practical informationCompatibility of fuels 67
Refuelling 67
Misfuel prevention (Diesel) 68
Snow chains 68
Energy economy mode 69
Towing device 69
Very cold climate screen 70
Roof bars 70
Bonnet 71
Engine compartment 72
Checking levels 73
Checks 74
Free-wheeling 76
Advice on care and maintenance 76
8In the event of a breakdownWarning triangle 79
Running out of fuel (Diesel) 79
Tool kit 79
Spare wheel 80
Changing a bulb 83
Fuses 87
12 V battery 88
Page 52 of 148

50
Driving
Towing
Driving with a trailer places greater
demands on the towing vehicle and
particular care must be taken.
Do not exceed the maximum towable
weights.
At altitude: reduce the maximum load by
10% per 1,000 metres of altitude; the lower
air density at high altitudes decreases engine
performance.
New vehicle: do not tow a trailer until the
vehicle has driven at least 620 miles
(1,000 kilometres).
If the outside temperature is high, let the
engine idle for 1 to 2 minutes after the
vehicle comes to a stop, to help it to cool.
Before setting off
Nose weight
► Distribute the load in the trailer so that the
heaviest items are located as close as possible
to the axle, and the nose weight (at the point
where it joins your vehicle) approaches the
maximum permitted, without exceeding it.
Tyres
► Check the tyre pressures of the towing
vehicle and of the trailer , observing the
recommended pressures.
Lighting
► Check the electrical signalling on the trailer
and the headlamp beam height of your vehicle.
If a genuine PEUGEOT towing device is
used, the rear parking sensors will be
deactivated automatically to avoid activating
the audible signal.
When driving
Cooling
Towing a trailer uphill causes the coolant
temperature to increase. The maximum towable
load depends on the gradient and the exterior
temperature. The fan’s cooling capacity does not
increase with engine speed.
►
Reduce speed and lower the engine speed to
limit the amount of heating produced.
►
Pay constant attention to the coolant
temperature.
If this warning lamp and the STOP
warning lamp come on, stop the vehicle
and switch off the engine as soon as possible.
Brakes
Using the engine brake is recommended to limit
the overheating of the brakes. Braking distances
are increased when towing a trailer.
Side wind
Bear in mind that the vehicle will be more
susceptible to wind when towing.
Anti-theft protection
Electronic immobiliser
The remote control contains an electronic chip
which has a special code. When the ignition is
switched on, this code must be recognised in
order for starting to be possible.
A few seconds after switching off the ignition,
this system locks the engine control system,
therefore preventing the engine from being
started in the event of a break-in.
In the event of a fault, you are informed
by illumination of this warning lamp, an
audible signal and a message on the screen.
The vehicle will not start; contact a PEUGEOT
dealer as soon as possible.
Page 60 of 148

58
Driving
After the engine has restarted, STOP mode is not available until the vehicle
has reached a speed of 5 mph (8
km/h).
During parking manoeuvres, STOP mode
is not available for a few seconds after
coming out of reverse gear or turning the
steering wheel.
Restarting the engine (START mode)
The engine automatically restarts as soon as the
driver indicates the intention of moving off again:
With a manual gearbox: with the clutch pedal
fully depressed.
With an automatic gearbox:
–
With the selector in mode
D or M: with the
brake pedal released.
–
With the selector in mode
N and the brake
pedal released: with the selector at D or M.
–
With the selector in mode
P and the brake
pedal depressed: with the selector at R, N, D
or M.
–
With reverse gear engaged.
Special cases
The engine will restart automatically if the
conditions for operation are met again and in the
following case:
–
Some specific conditions (braking assistance,
air conditioning setting, etc.).
In these cases, this indicator lamp flashes
for a few seconds, then goes off.
Malfunctions
In the event of a system malfunction, the
warning lamp in this button flashes for a
moment, then illuminates continuously.
Have it checked by a PEUGEOT dealer or a
qualified workshop.
The vehicle stalls in STOP mode
All of the instrument panel warning lamps come
on if there is a fault.
►
Switch off the ignition then start the engine
again.
12 V battery
The Stop & Start system requires a
12 V battery of specific technology and
specification.
All work must be carried out only by a
PEUGEOT
dealer or a qualified workshop
Tyre under-inflation detection
This system alerts the driver if one or more tyres
suffer a drop in pressure.
The alert is raised when the vehicle is moving,
not when stationary.
It compares the information given by the wheel
speed sensors with reference values, which
must be reinitialised every time the tyre
pressures are adjusted or a wheel changed.
It takes into account the last values stored
during the reinitialisation request. It is therefore
essential that the tyre pressure is correct during
the operation. This operation is the driver’s
responsibility.
The tyre under-inflation detection cannot, in any circumstances, replace the need
for vigilance on the part of the driver.
This system does not avoid the need to
regularly check the tyre pressures (including
the spare wheel), especially before a long
journey.
Driving with under-inflated tyres, particularly
in adverse conditions (heavy load, high
speed, long journey):
–
worsens road-holding.
–
lengthens braking distances.
–
causes premature wear of the tyres.
–
increases energy consumption.
The inflation pressures defined for the vehicle can be found on the tyre pressure
label.
For more information on the Identification
markings, refer to the corresponding section.
Checking tyre pressures
This check should be done monthly
when the tyres are "cold" (vehicle stopped for
1 hour or after a journey of less than 6 miles
(10
km) at moderate speeds).
Page 66 of 148

64
Driving
Cruise control can also be paused
temporarily:
–
by pressing the brake pedal.
–
automatically
, if the electronic stability
control (ESC) system is triggered.
Changing the cruise speed
setting
The cruise control must be active.
To change the cruise speed setting, based on
the vehicle’s current speed:
►
For steps of +/- 1
mph (1 km/h), briefly
press
2-SET- or 3-SET+ repeatedly.
►
For steps of +/- 5
mph (5 km/h), press and
hold
2-SET- or 3-SET+.
Pressing and holding 2-SET - or 3-SET+
results in a rapid change in the speed of
the vehicle.
As a precaution, we recommend setting a cruise speed fairly close to the current
speed of your vehicle, to avoid any sudden
acceleration or deceleration of the vehicle.
Switching off
► Turn the thumbwheel 1 to the "OFF" position:
the cruise control information disappears from
the screen.
Malfunction
In the event of a malfunction, dashes are
displayed flashing and then fixed instead of the
speed setting.
Have it checked by a PEUGEOT dealer or a
qualified workshop.
Rear parking sensors
For more information, refer to the
General recommendations on the use
of driving and manoeuvring aids .
This system detects and signals the proximity of
obstacles (e.g.
pedestrian, vehicle, tree, gate)
entering the field of detection of sensors located
in the bumper.
Due to blind spots, obstacles of certain types
(posts, roadworks cones, etc.) which were
detected initially won't be any longer by the end
of the operation.
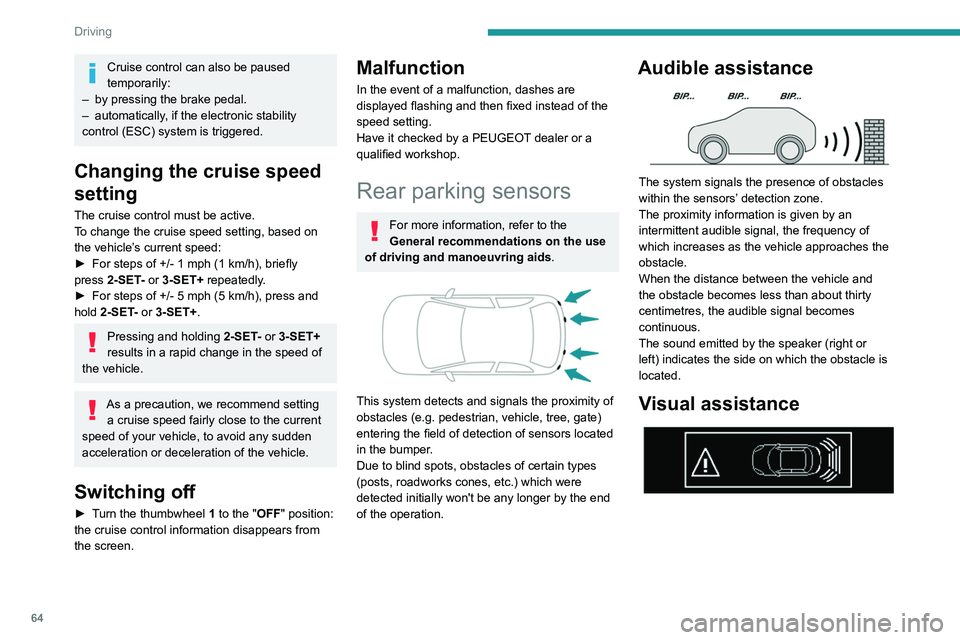
Audible assistance
The system signals the presence of obstacles
within the sensors’ detection zone.
The proximity information is given by an
intermittent audible signal, the frequency of
which increases as the vehicle approaches the
obstacle.
When the distance between the vehicle and
the obstacle becomes less than about thirty
centimetres, the audible signal becomes
continuous.
The sound emitted by the speaker (right or
left) indicates the side on which the obstacle is
located.
Visual assistance
Page 67 of 148

65
Driving
6
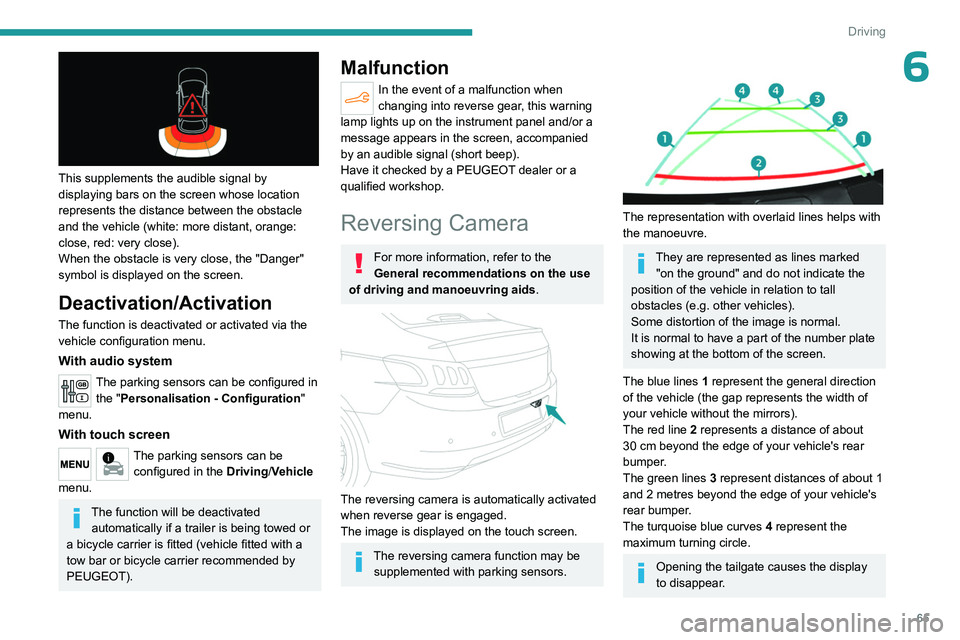
This supplements the audible signal by
displaying bars on the screen whose location
represents the distance between the obstacle
and the vehicle (white: more distant, orange:
close, red: very close).
When the obstacle is very close, the "Danger"
symbol is displayed on the screen.
Deactivation/Activation
The function is deactivated or activated via the
vehicle configuration menu.
With audio system
The parking sensors can be configured in the "Personalisation - Configuration "
menu.
With touch screen
The parking sensors can be configured in the Driving/Vehicle
menu.
The function will be deactivated automatically if a trailer is being towed or
a bicycle carrier is fitted (vehicle fitted with a
tow bar or bicycle carrier recommended by
PEUGEOT).
Malfunction
In the event of a malfunction when
changing into reverse gear, this warning
lamp lights up on the instrument panel and/or a
message appears in the screen, accompanied
by an audible signal (short beep).
Have it checked by a PEUGEOT dealer or a
qualified workshop.
Reversing Camera
For more information, refer to the
General recommendations on the use
of driving and manoeuvring aids .
The reversing camera is automatically activated
when reverse gear is engaged.
The image is displayed on the touch screen.
The reversing camera function may be
supplemented with parking sensors.
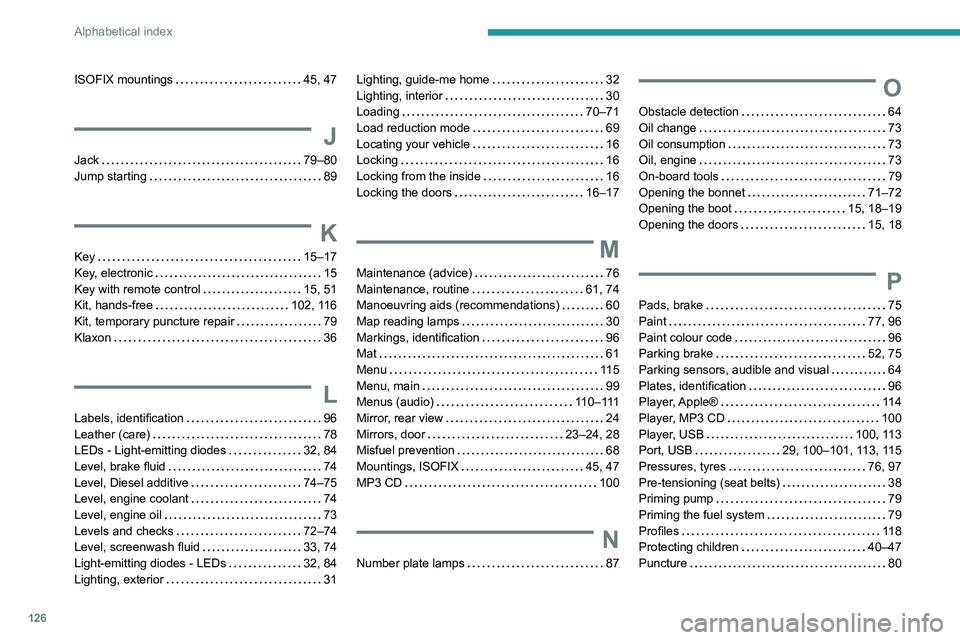
The representation with overlaid lines helps with
the manoeuvre.
They are represented as lines marked "on the ground" and do not indicate the
position of the vehicle in relation to tall
obstacles (e.g. other vehicles).
Some distortion of the image is normal.
It is normal to have a part of the number plate
showing at the bottom of the screen.
The blue lines
1
represent the general direction
of the vehicle (the gap represents the width of
your vehicle without the mirrors).
The red line
2
represents a distance of about
30
cm beyond the edge of your vehicle's rear
bumper.
The green lines
3
represent distances of about 1
and 2
metres beyond the edge of your vehicle's
rear bumper.
The turquoise blue curves
4
represent the
maximum turning circle.
Opening the tailgate causes the display
to disappear.
Page 128 of 148

126
Alphabetical index
ISOFIX mountings 45, 47
J
Jack 79–80
Jump starting
89
K
Key 15–17
Key, electronic
15
Key with remote control
15, 51
Kit, hands-free
102, 116
Kit, temporary puncture repair
79
Klaxon
36
L
Labels, identification 96
Leather (care)
78
LEDs - Light-emitting diodes
32, 84
Level, brake fluid
74
Level, Diesel additive
74–75
Level, engine coolant
74
Level, engine oil
73
Levels and checks
72–74
Level, screenwash fluid
33, 74
Light-emitting diodes - LEDs
32, 84
Lighting, exterior
31
Lighting, guide-me home 32
Lighting, interior
30
Loading
70–71
Load reduction mode
69
Locating your vehicle
16
Locking
16
Locking from the inside
16
Locking the doors
16–17
M
Maintenance (advice) 76
Maintenance, routine
61, 74
Manoeuvring aids (recommendations)
60
Map reading lamps
30
Markings, identification
96
Mat
61
Menu
11 5
Menu, main
99
Menus (audio)
11 0 – 111
Mirror, rear view
24
Mirrors, door
23–24, 28
Misfuel prevention
68
Mountings, ISOFIX
45, 47
MP3 CD
100
N
Number plate lamps 87
O
Obstacle detection 64
Oil change
73
Oil consumption
73
Oil, engine
73
On-board tools
79
Opening the bonnet
71–72
Opening the boot
15, 18–19
Opening the doors
15, 18
P
Pads, brake 75
Paint
77, 96
Paint colour code
96
Parking brake
52, 75
Parking sensors, audible and visual
64
Plates, identification
96
Player, Apple®
11 4
Player, MP3 CD
100
Player, USB
100, 113
Port, USB
29, 100–101, 113, 115
Pressures, tyres
76, 97
Pre-tensioning (seat belts)
38
Priming pump
79
Priming the fuel system
79
Profiles
11 8
Protecting children
40–47
Puncture
80