2022 NISSAN TITAN service
[x] Cancel search: servicePage 433 of 635
• Keep your engine tuned up.
• Follow the recommended scheduledmaintenance.
• Keep the tires inflated to the correct pres- sure. Low tire pressure increases tire
wear and lowers fuel economy.
• Keep the wheels in correct alignment. Im- proper alignment increases tire wear and
lowers fuel economy.
• For vehicles equipped with
, use 4H
or 4L position only when necessary.
4-Wheel Drive operation lowers fuel
economy.
• Use the recommended viscosity engine oil. For additional information, see “Engine
oil and oil filter recommendations”
(P. 10-7).
WARNING
• For 4WD equipped vehicles, do not
attempt to raise two wheels off the
ground and shif t the transmission to
any drive or reverse position with the
engine running. Doing so may result
in drivetrain damage or unexpected
vehicle movement which could result
in serious vehicle damage or per-
sonal injury.
• Do not attempt to test a 4WD
equipped vehicle on a 2-wheel dyna-
mometer (such as the dynamom-
eters used by some states for emis-
sions testing) or similar equipment
even if the other two wheels are
raised off the ground. Make sure you
inform test facility personnel that
your vehicle is equipped with 4WD
before it is placed on a dynamom-
eter. Using the wrong test equipment
may result in drivetrain damage or
unexpected vehicle movement
which could result in serious vehicle
damage or personal injury.CAUTION
• Do not drive the vehicle in the 4H or
4LO position on dry hard surface
roads. Driving on dry, hard surfaces in
4H or 4LO may cause unnecessary
noise, tire wear and increased fuel
consumption.
If the 4WD vehicle information dis-
play warning message turns on
when you are driving on dry hard sur-
face roads:
– In the 4H position, shif t the 4WD
shif t switch to 2WD.
– In the 4LO position, stop the ve-
hicle, move the shif t lever to the N
(Neutral) position with the brake
pedal depressed, and shif t the
4WD shif t switch to 2WD.
• If the vehicle information display
warning message is still on af ter the
above operation, have your vehicle
checked as soon as possible. It is rec-
ommended that you visit a NISSAN
dealer for this service.
INCREASING FUEL ECONOMY USING 4–WHEEL DRIVE (4WD) (if so
equipped)
Starting and driving5-107
Page 435 of 635
*1: Before moving the shif t lever from N (Neutral), wait until the 4LO indicator stays on steady. This indicates that the 4WD shif t procedure is completed and
the transfer gear is correctly set in the 4LO position. If the vehicle is shif ted into gear before the indicator is on steady, the transfer gear may grind , not engage
correctly or stay in the N (Neutral) position.
- If the 4WD vehicle information display warning message illuminates, perform the following procedure to return the transfer case to the correct oper ating
condition.
1. Turn off the engine by placing the ignition switch in the OFF position.
2. Start the engine.
- Check that the 4WD vehicle information display warning message turns off. If the warning message in the vehicle information display stays on, have th e
system checked. It is recommended that you visit a NISSAN dealer for this service.
3. Apply the parking brake, depress the brake pedal and move the shif t lever to the N (Neutral) position.
4. With the brake pedal depressed, move the 4WD shif t switch to the desired mode.
- Be sure to wait until the transfer gear change completes before shif ting the shif t lever from the N (Neutral) position.
*2: While changing in and out of 4LO, the ignition switch must be in the ON position and the vehicle's engine must be running for a shif t to take place and for the
4WD shif t and 4LO position indicators to be operable. Otherwise, the shif t will not take place and no indicators will be on or flashing.
*3: Make sure the transfer 4LO position indicator turns on when you shif t the 4WD shif t switch to 4LO. The
indicator light will also turn on when 4LO
is selected. For additional information, see “Vehicle Dynamic Control (VDC) system” (P. 5-120).
Starting and driving5-109
Page 438 of 635
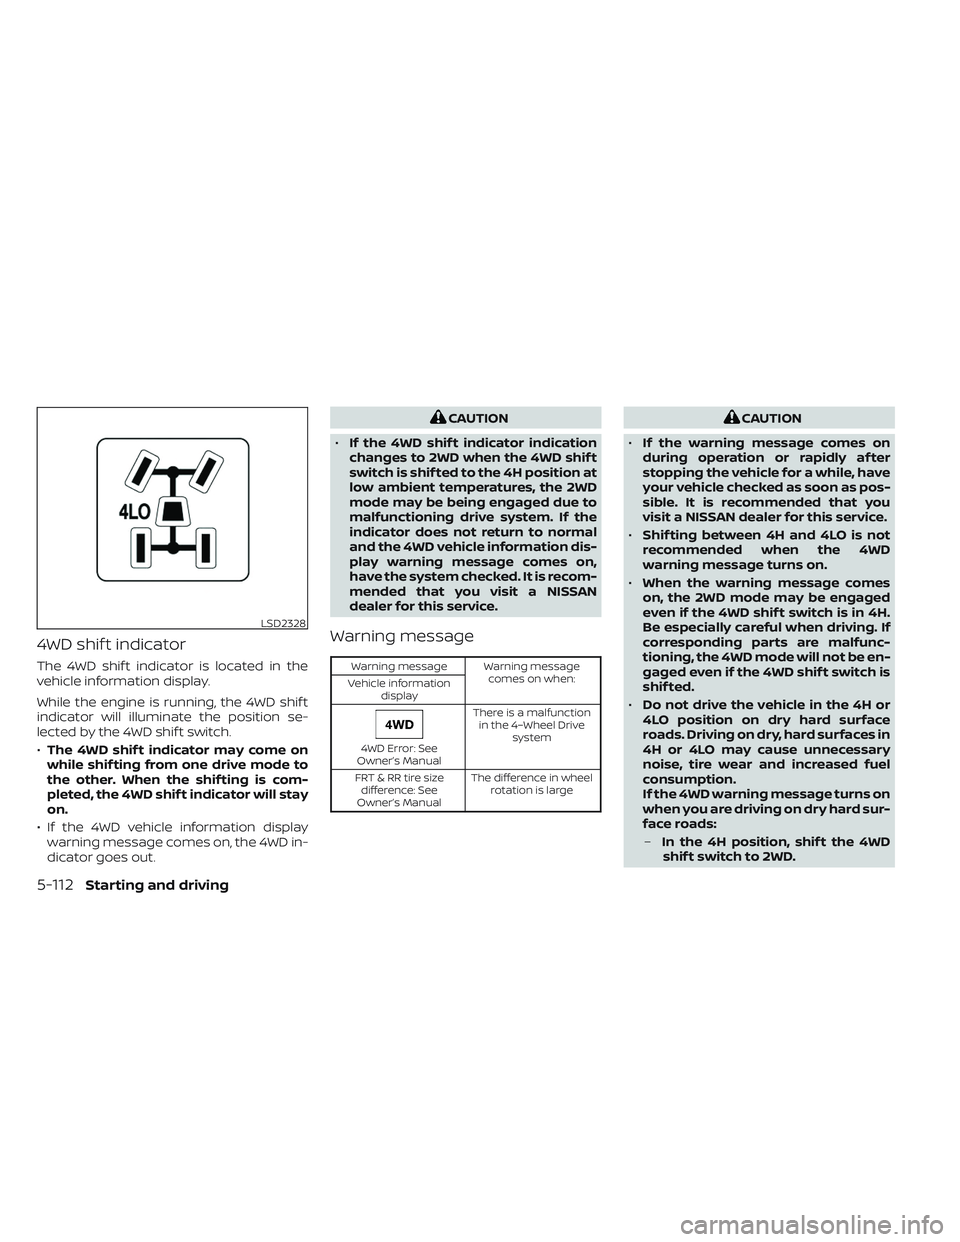
4WD shif t indicator
The 4WD shif t indicator is located in the
vehicle information display.
While the engine is running, the 4WD shif t
indicator will illuminate the position se-
lected by the 4WD shif t switch.
•The 4WD shif t indicator may come on
while shif ting from one drive mode to
the other. When the shif ting is com-
pleted, the 4WD shif t indicator will stay
on.
• If the 4WD vehicle information display warning message comes on, the 4WD in-
dicator goes out.
CAUTION
• If the 4WD shif t indicator indication
changes to 2WD when the 4WD shif t
switch is shif ted to the 4H position at
low ambient temperatures, the 2WD
mode may be being engaged due to
malfunctioning drive system. If the
indicator does not return to normal
and the 4WD vehicle information dis-
play warning message comes on,
have the system checked. It is recom-
mended that you visit a NISSAN
dealer for this service.
Warning message
Warning message Warning message
comes on when:
Vehicle information
display
4WD Error: See
Owner’s Manual There is a malfunction
in the 4–Wheel Drive system
FRT & RR tire size difference: See
Owner’s Manual The difference in wheel
rotation is large
CAUTION
• If the warning message comes on
during operation or rapidly af ter
stopping the vehicle for a while, have
your vehicle checked as soon as pos-
sible. It is recommended that you
visit a NISSAN dealer for this service.
• Shif ting between 4H and 4LO is not
recommended when the 4WD
warning message turns on.
• When the warning message comes
on, the 2WD mode may be engaged
even if the 4WD shif t switch is in 4H.
Be especially careful when driving. If
corresponding parts are malfunc-
tioning, the 4WD mode will not be en-
gaged even if the 4WD shif t switch is
shif ted.
• Do not drive the vehicle in the 4H or
4LO position on dry hard surface
roads. Driving on dry, hard surfaces in
4H or 4LO may cause unnecessary
noise, tire wear and increased fuel
consumption.
If the 4WD warning message turns on
when you are driving on dry hard sur-
face roads:
– In the 4H position, shif t the 4WD
shif t switch to 2WD.
LSD2328
5-112Starting and driving
Page 439 of 635
–In the 4LO position, stop the ve-
hicle, move the automatic trans-
mission shif t lever to the N (Neu-
tral) position with the brake pedal
depressed, and shif t the 4WD shif t
switch to 2WD.
• If the warning message is still on af-
ter the above operation, have your
vehicle checked as soon as possible.
It is recommended that you visit a
NISSAN dealer for this service.
• The transfer case may be damaged if
you continue driving with the
warning message on. The E-Lock system can provide additional
traction and should only be used when a
vehicle has become or is becoming stuck.
This system operates by electronically
“locking” the two rear drive wheels to-
gether, allowing them to turn at the same
speed. The system is used when it is not
possible to free a stuck vehicle even when
using the 4LO position (4-Wheel Drive
vehicles).
When added traction is required, activate
the E-Lock system by pushing the switch
on. For additional information, see “Elec-
tronic locking rear differential (E-Lock) sys-
tem switch” (P. 2-60). Once the system fully
engages, the indicator light in the instru-
ment panel will remain on. When the sys-
tem is activated, both rear wheels will en-
gage, providing added traction.
The rear wheels may momentarily slip or
move to engage the system, and the sys-
tem will only engage up to approximately 4
mph (7 km/h). Once the vehicle is free, the
system should be turned off and driving
resumed.
The Anti-lock Braking System (ABS) is dis-
abled and the ABS warning light illumi-
nates when the E-Lock system is on.WARNING
• Never leave the E-Lock system on
when driving on paved or hard-
surfaced roads. Turning the vehicle
may result in the rear wheels slipping
and result in an accident and per-
sonal injury. Af ter using the E-Lock
system to free the vehicle, turn the
system off.
• Use the E-Lock system only in an
emergency when it is not possible to
free a stuck vehicle even when using
4LO. Never use the E-Lock system on
a slippery road surface such as snow
or ice surface. Using the E-Lock sys-
tem when driving in these road con-
ditions may cause unexpected
movement of the vehicle during en-
gine braking, accelerating or turning,
which may result in an accident and
serious personal injury.
• Observe the above warnings. Other-
wise, loss of normal steering control
may result. This may result in an ac-
cident and serious personal injury.
ELECTRONIC LOCKING REAR
DIFFERENTIAL (E-Lock) SYSTEM (if
so equipped)
Starting and driving5-113
Page 443 of 635
The brake system has two separate hy-
draulic circuits. If one circuit malfunctions,
you will still have braking at two wheels.
BRAKE PRECAUTIONS
Using the brakes
Avoid resting your foot on the brake pedal
while driving. This will overheat the brakes,
wear out the brake pads faster, and reduce
gas mileage.
To help reduce brake wear and to prevent
the brakes from overheating, reduce speed
and downshif t to a lower gear before going
down a slope or long grade. Overheated
brakes may reduce braking performance
and could result in loss of vehicle control.
WARNING
• While driving on a slippery surface,
be careful when braking, accelerat-
ing or downshif ting. Abrupt braking
or accelerating could cause the
wheels to skid and result in an
accident.
• If the engine is not running or is
turned off while driving, the power
assist for the brakes will not work.
Braking will be harder.
Wet brakes
When the vehicle is washed or driven
through water, the brakes may get wet. As
a result, your braking distance will be lon-
ger and the vehicle may pull to one side
during braking.
To dry the brakes, drive the vehicle at a safe
speed while lightly pressing the brake
pedal to heat up the brakes. Do this until
the brakes return to normal. Avoid driving
the vehicle at high speeds until the brakes
function correctly.
Parking brake break-in
Break in the parking brake shoes whenever
the stopping effect of the parking brake is
weakened or whenever the parking brake
shoes and/or drums/rotors are replaced,
in order to assure the best braking
performance.
This procedure is described in the vehicle
service manual. It is recommended that
you visit a NISSAN dealer for this service.
ANTI-LOCK BRAKING SYSTEM (ABS)
WARNING
• The ABS is a sophisticated device, but
it cannot prevent accidents resulting
from careless or dangerous driving
techniques. It can help maintain ve-
hicle control during braking on slip-
pery surfaces. Remember that stop-
ping distances on slippery surfaces
will be longer than on normal sur-
faces even with ABS. Stopping dis-
tances may also be longer on rough,
gravel or snow covered roads, or if
you are using tire chains. Always
maintain a safe distance from the ve-
hicle in front of you. Ultimately, the
driver is responsible for safety.
• Tire type and condition may also af-
fect braking effectiveness.
– When replacing tires, install the
specified size of tires on all four
wheels.
–
When installing a spare tire, make sure that it is the proper size and
type as specified on the Tire and
Loading Information label. For addi-
tional information, see “Tire and
Loading Information label” (P. 8-35).
– For additional information, see
“Wheels and tires” (P. 8-33)
BRAKE SYSTEM
Starting and driving5-117
Page 444 of 635

The ABS controls the brakes so the wheels
do not lock during hard braking or when
braking on slippery surfaces. The system
detects the rotation speed at each wheel
and varies the brake fluid pressure to pre-
vent each wheel from locking and sliding.
By preventing each wheel from locking, the
system helps the driver maintain steering
control and helps to minimize swerving
and spinning on slippery surfaces.
Using the system
Depress the brake pedal and hold it down.
Depress the brake pedal with firm steady
pressure, but do not pump the brakes. The
Anti-lock Braking System will operate to
prevent the wheels from locking up. Steer
the vehicle to avoid obstacles.
WARNING
Do not pump the brake pedal. Doing so
may result in increased stopping
distances.
Self-test feature
The Anti-lock Braking System (ABS) in-
cludes electronic sensors, electric pumps,
hydraulic solenoids and a computer. The
computer has a built-in diagnostic feature
that tests the system each time you start
the engine and move the vehicle at a low
speed in forward or reverse. When the self-
test occurs, you may hear a “clunk” noise
and/or feel a pulsation in the brake pedal.
This is normal and does not indicate a mal-
function. If the computer senses a mal-
function, it switches the ABS off and illumi-
nates the ABS warning light on the
instrument panel. The brake system then
operates normally, but without anti-lock
assistance.
If the ABS warning light illuminates during
the self-test or while driving, have the ve-
hicle checked. It is recommended that you
visit a NISSAN dealer for this service.
Normal operation
The Anti-lock Braking System (ABS) oper-
ates at speeds abov e3-6mph(5-10
km/h). The speed varies according to road
conditions. When the ABS senses that one or more
wheels are close to locking up, the actuator
rapidly applies and releases hydraulic pres-
sure. This action is similar to pumping the
brakes very quickly. You may feel a pulsa-
tion in the brake pedal and hear a noise
from under the hood or feel a vibration
from the actuator when it is operating. This
is normal and indicates that the ABS is op-
erating properly. However, the pulsation
may indicate that road conditions are haz-
ardous and extra care is required while
driving.
BRAKE ASSIST
When the force applied to the brake pedal
exceeds a certain level, the Brake Assist is
activated generating greater braking force
than a conventional brake booster even
with light pedal force.
WARNING
The Brake Assist is only an aid to assist
braking operation and is not a collision
warning or avoidance device. It is the
driver’s responsibility to stay alert,
drive safely and be in control of the ve-
hicle at all times.
5-118Starting and driving
Page 459 of 635

TIRE PRESSURE MONITORING
SYSTEM (TPMS)
This vehicle is equipped with TPMS. It moni-
tors tire pressure of all tires except the
spare. When the low tire pressure warning
light is lit, and the Tire Pressure Low — Add
Air warning appears in the vehicle informa-
tion display, one or more of your tires is
significantly under-inflated. If equipped, the
system also displays pressure of all tires
(except the spare tire) on the display screen
by sending a signal from a sensor that is
installed in each wheel. If the vehicle is be-
ing driven with low tire pressure, the TPMS
will activate and warn you of it by the low
tire pressure warning light. This system will
activate only when the vehicle is driven at
speeds above 16 mph (25 km/h). For addi-
tional information, see “Warning lights, indi-
cator lights and audible reminders” (P. 2-12)
and “Tire Pressure Monitoring System
(TPMS)” (P. 5-5).
WARNING
• Radio waves could adversely affect
electric medical equipment. Those
who use a pacemaker should contact
the electric medical equipment
manufacturer for the possible influ-
ences before use. •
If the low tire pressure warning light
illuminates while driving, avoid sud-
den steering maneuvers or abrupt
braking, reduce vehicle speed, pull
off the road to a safe location and
stop the vehicle as soon as possible.
Driving with under-inflated tires may
permanently damage the tires and
increase the likelihood of tire failure.
Serious vehicle damage could occur
and may lead to an accident and
could result in serious personal in-
jury. Check the tire pressure for all
four tires. Adjust the tire pressure to
the recommended COLD tire pres-
sure shown on the Tire and Loading
Information label to turn the low tire
pressure warning light OFF. If the
light still illuminates while driving af-
ter adjusting the tire pressure, a tire
may be flat or the TPMS may be mal-
functioning. If you have a flat tire, re-
place it with a spare tire as soon as
possible, If no tire is flat and all tires
are properly inflated, have the ve-
hicle checked. It is recom-
mended that you visit a NISSAN
dealer for this service •
When using a wheel without the
TPMS such as the spare tire, the TPMS
will not function and the low tire
pressure warning light will flash for
approximately one minute. The light
will remain on af ter one minute. Have
your tires replaced and/or TPMS sys-
tem reset as soon as possible. It is
recommended that you visit a
NISSAN dealer for these services.
• Replacing tires with those not origi-
nally specified by NISSAN could af-
fect the proper operation of the
TPMS.
• Do not inject any tire liquid or aerosol
tire sealant into the tires, as this may
cause a malfunction of the tire pres-
sure sensors.
CHANGING A FLAT TIRE
If you have a flat tire, follow the instructions
below:
Stopping the vehicle
1. Safely move the vehicle off the road and away from traffic.
2. Turn on the hazard warning flashers.
FLAT TIRE
In case of emergency6-3
Page 462 of 635
10. Securely store the flat tire beneath thevehicle, from where the full size spare
was removed. To reinstall the wheel, re-
move the center cap (if so equipped)
and insert the retainer chain through
the wheel. Be sure the rubber rim cover
(if so equipped) is centered on the
wheel before lif ting. Use the assembled
jacking rod to slowly rotate the winch
clockwise to raise the wheel to the
vehicle.
11. To reinstall the jack and tool kit, reverse steps 1 through 5.
NOTE:
Inspect the rubber rim cover every six
years and replace as necessary. It is rec-
ommended that you visit a NISSAN
dealer for this service.
CAUTION
• Be sure to center the spare tire sus-
pending plate on the wheel and then
lif t the spare tire.
• Failure to use the rubber rim cover
may allow the chain to get stuck in
the wheel nut holes when stowed.
Removing bolt-on wheel caps (if
so equipped)
CAUTION
Do not use your hands to pry off wheel
caps or wheel covers. Doing so could
result in personal injury.
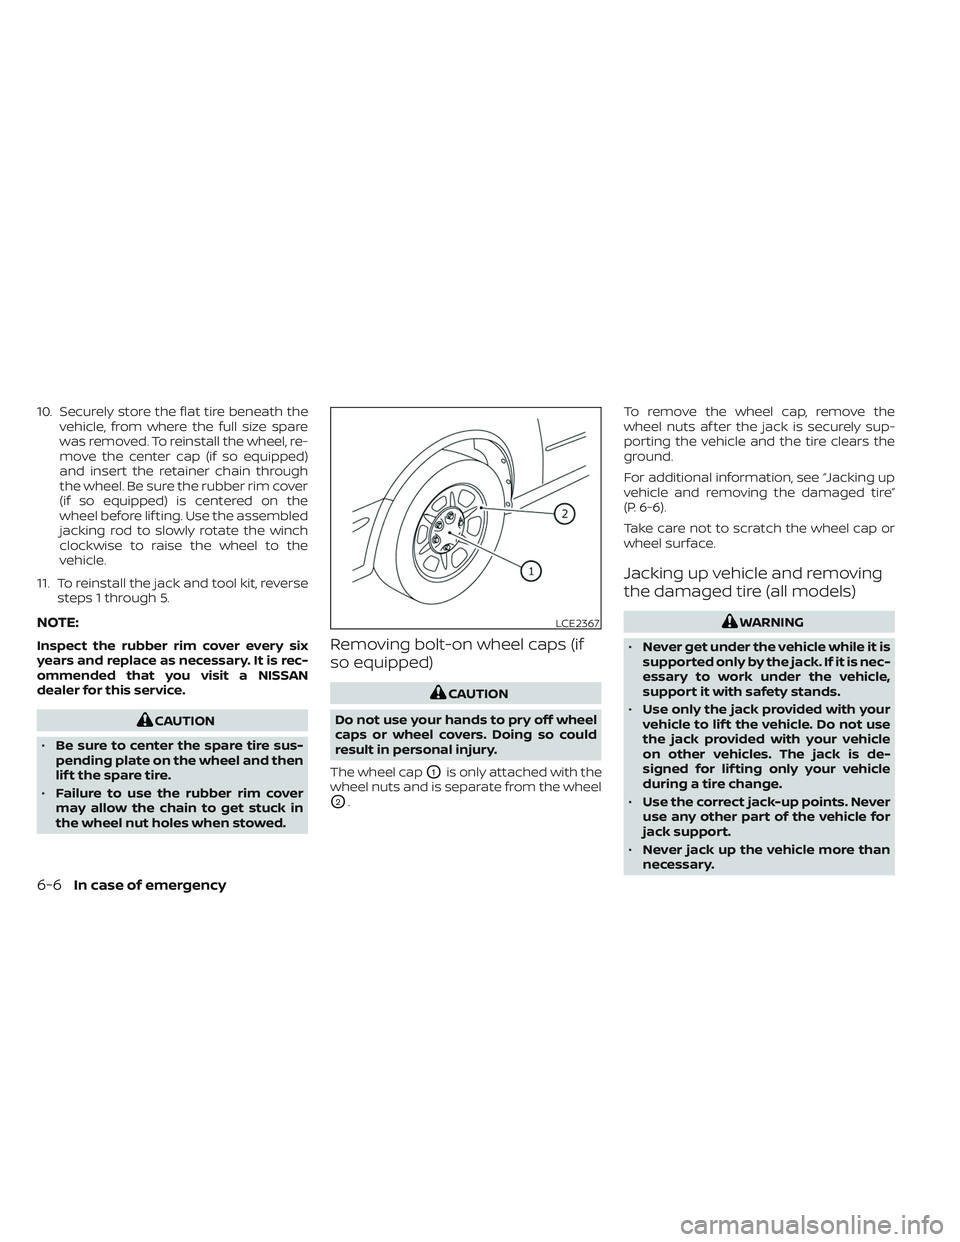
The wheel cap
O1is only attached with the
wheel nuts and is separate from the wheel
O2. To remove the wheel cap, remove the
wheel nuts af ter the jack is securely sup-
porting the vehicle and the tire clears the
ground.
For additional information, see “Jacking up
vehicle and removing the damaged tire”
(P. 6-6).
Take care not to scratch the wheel cap or
wheel surface.
Jacking up vehicle and removing
the damaged tire (all models)
WARNING
• Never get under the vehicle while it is
supported only by the jack. If it is nec-
essary to work under the vehicle,
support it with safety stands.
• Use only the jack provided with your
vehicle to lif t the vehicle. Do not use
the jack provided with your vehicle
on other vehicles. The jack is de-
signed for lif ting only your vehicle
during a tire change.
• Use the correct jack-up points. Never
use any other part of the vehicle for
jack support.
• Never jack up the vehicle more than
necessary.LCE2367
6-6In case of emergency