2022 LINCOLN CORSAIR lights
[x] Cancel search: lightsPage 192 of 676

Note:
Depending on your remote start
settings, the heated seats may remain on
after you remote start your vehicle. The
heated seats may also turn on when you
start your vehicle if they were on when your
vehicle was turned off.
Rear Seats (If Equipped) WARNING:
Persons who are unable
to feel pain to the skin because of
advanced age, chronic illness, diabetes,
spinal cord injury, medication, alcohol use,
exhaustion, or other physical conditions,
must exercise care when using the seat
heater. The seat heater may cause burns
even at low temperatures, especially if
used for long periods of time. Do not place
anything on the seat that insulates against
heat, such as a blanket or cushion,
because this may cause the seat heater to overheat. Do not puncture the seat with
pins, needles, or other pointed objects
because this may damage the heating
element which may cause the seat heater
to overheat. An overheated seat may
cause serious personal injury.
Do not do the following:
• Place heavy objects on the seat.
• Operate the seat heater if water or any
other liquid spills on the seat. Allow the
seat to dry thoroughly.
Note: The heated seats will only function
when the engine is running.
The rear seat heat controls are located on
the rear of the center console. Press the heated seat symbol to cycle
through the various heat settings and off.
More indicator lights indicate warmer
settings.
VENTILATED SEATS
(IF EQUIPPED)
Note: The ventilated seats switch on during
a remote start if they are enabled.
See
Enabling Remote Start (page 166). The
ventilated seats may also switch on when
you start your vehicle if they were on when
you previously switched your vehicle off.
Do not do the following:
• Spill liquid on the front seats. This may
cause the air vent holes to become
blocked and not work properly.
• Place cargo or objects under the seats.
They may block the air intake causing
the air vents to not work properly.
The ventilated seats only function when the
engine is running.
189
2022 Corsair (CTF) Canada/United States of America, enUSA, Edition date: 202106, First-Printing SeatsE146322
Page 193 of 676
Press this symbol to cycle through the
various ventilation settings and off. More
indicator lights indicate higher fan speeds.
If the engine falls below 350 RPM while the
ventilated seats are on, the feature turns
itself off. You need to reactivate it.
Note:
To improve comfort, use the ventilated
seats along with the vehicle ’s air
conditioning system.
190
2022 Corsair (CTF) Canada/United States of America, enUSA, Edition date: 202106, First-Printing SeatsE224689
Page 242 of 676
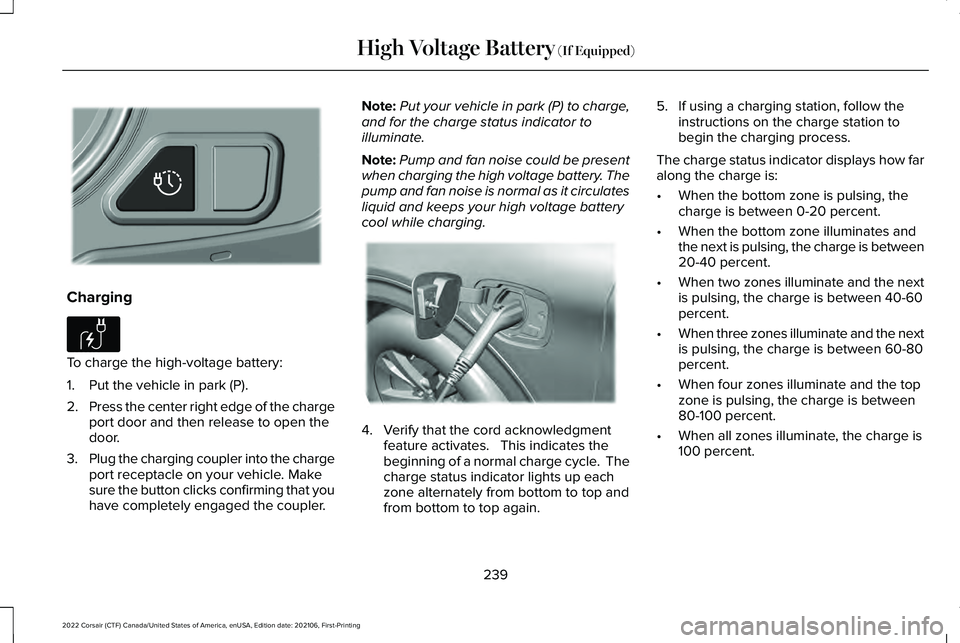
Charging
To charge the high-voltage battery:
1. Put the vehicle in park (P).
2.
Press the center right edge of the charge
port door and then release to open the
door.
3. Plug the charging coupler into the charge
port receptacle on your vehicle. Make
sure the button clicks confirming that you
have completely engaged the coupler. Note:
Put your vehicle in park (P) to charge,
and for the charge status indicator to
illuminate.
Note: Pump and fan noise could be present
when charging the high voltage battery. The
pump and fan noise is normal as it circulates
liquid and keeps your high voltage battery
cool while charging. 4. Verify that the cord acknowledgment
feature activates. This indicates the
beginning of a normal charge cycle. The
charge status indicator lights up each
zone alternately from bottom to top and
from bottom to top again. 5. If using a charging station, follow the
instructions on the charge station to
begin the charging process.
The charge status indicator displays how far
along the charge is:
• When the bottom zone is pulsing, the
charge is between 0-20 percent.
• When the bottom zone illuminates and
the next is pulsing, the charge is between
20-40 percent.
• When two zones illuminate and the next
is pulsing, the charge is between 40-60
percent.
• When three zones illuminate and the next
is pulsing, the charge is between 60-80
percent.
• When four zones illuminate and the top
zone is pulsing, the charge is between
80-100 percent.
• When all zones illuminate, the charge is
100 percent.
239
2022 Corsair (CTF) Canada/United States of America, enUSA, Edition date: 202106, First-Printing High Voltage Battery (If Equipped)E301111 E306676 E295257
Page 243 of 676
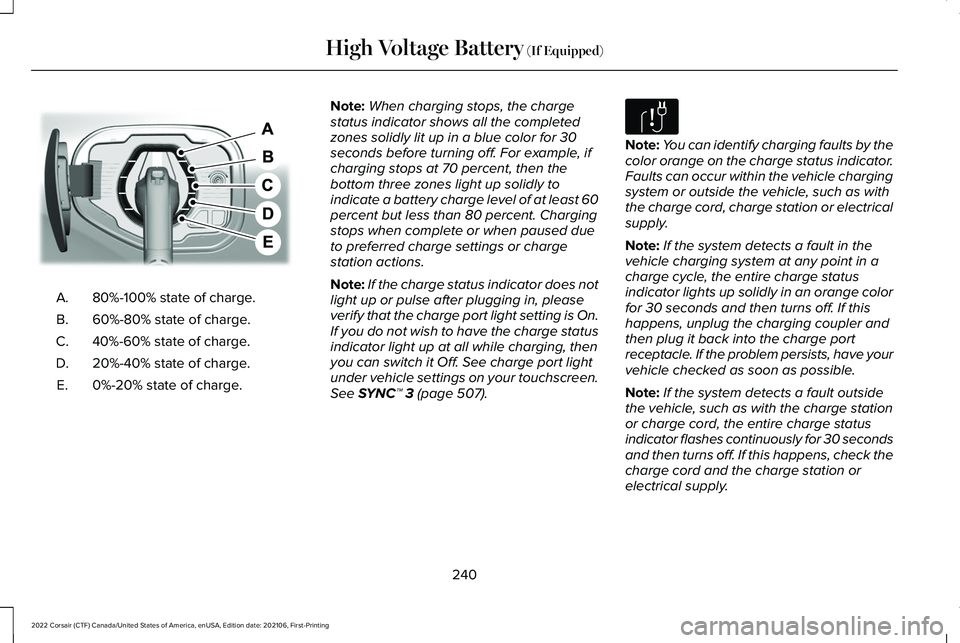
80%-100% state of charge.
A.
60%-80% state of charge.
B.
40%-60% state of charge.
C.
20%-40% state of charge.
D.
0%-20% state of charge.
E. Note:
When charging stops, the charge
status indicator shows all the completed
zones solidly lit up in a blue color for 30
seconds before turning off. For example, if
charging stops at 70 percent, then the
bottom three zones light up solidly to
indicate a battery charge level of at least 60
percent but less than 80 percent. Charging
stops when complete or when paused due
to preferred charge settings or charge
station actions.
Note: If the charge status indicator does not
light up or pulse after plugging in, please
verify that the charge port light setting is On.
If you do not wish to have the charge status
indicator light up at all while charging, then
you can switch it Off. See charge port light
under vehicle settings on your touchscreen.
See SYNC™ 3 (page 507). Note:
You can identify charging faults by the
color orange on the charge status indicator.
Faults can occur within the vehicle charging
system or outside the vehicle, such as with
the charge cord, charge station or electrical
supply.
Note: If the system detects a fault in the
vehicle charging system at any point in a
charge cycle, the entire charge status
indicator lights up solidly in an orange color
for 30 seconds and then turns off. If this
happens, unplug the charging coupler and
then plug it back into the charge port
receptacle. If the problem persists, have your
vehicle checked as soon as possible.
Note: If the system detects a fault outside
the vehicle, such as with the charge station
or charge cord, the entire charge status
indicator flashes continuously for 30 seconds
and then turns off. If this happens, check the
charge cord and the charge station or
electrical supply.
240
2022 Corsair (CTF) Canada/United States of America, enUSA, Edition date: 202106, First-Printing High Voltage Battery
(If Equipped)E301197 E306677
Page 249 of 676
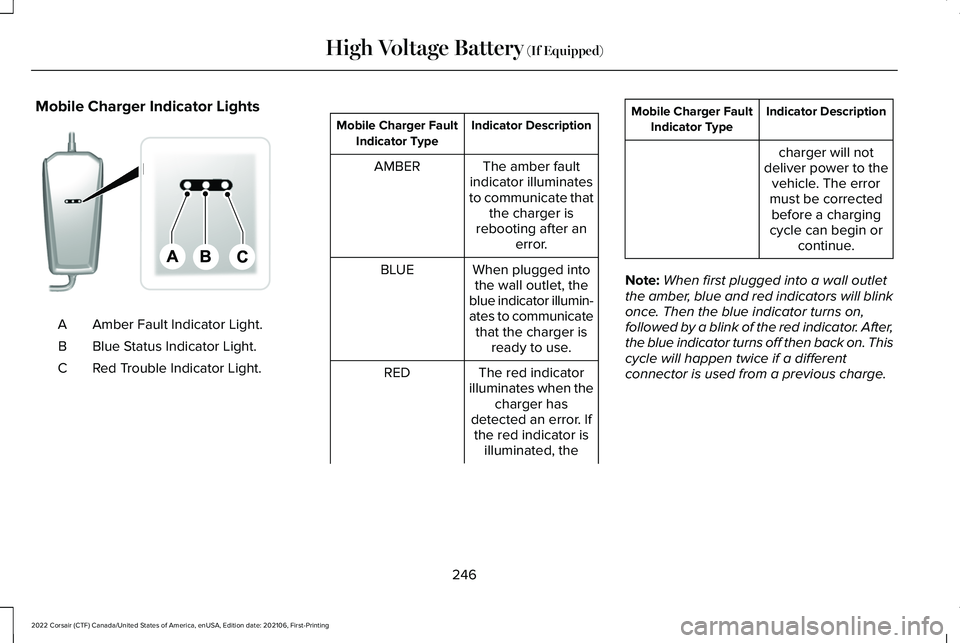
Mobile Charger Indicator Lights
Amber Fault Indicator Light.
A
Blue Status Indicator Light.
B
Red Trouble Indicator Light.
C Indicator Description
Mobile Charger Fault
Indicator Type
The amber fault
indicator illuminates
to communicate that the charger is
rebooting after an error.
AMBER
When plugged intothe wall outlet, the
blue indicator illumin-
ates to communicate that the charger is ready to use.
BLUE
The red indicator
illuminates when the charger has
detected an error. If the red indicator is illuminated, the
RED Indicator Description
Mobile Charger Fault
Indicator Type
charger will not
deliver power to the vehicle. The error
must be corrected before a charging
cycle can begin or continue.
Note: When first plugged into a wall outlet
the amber, blue and red indicators will blink
once. Then the blue indicator turns on,
followed by a blink of the red indicator. After,
the blue indicator turns off then back on. This
cycle will happen twice if a different
connector is used from a previous charge.
246
2022 Corsair (CTF) Canada/United States of America, enUSA, Edition date: 202106, First-Printing High Voltage Battery (If Equipped)E336515
Page 256 of 676
Note:
Put your vehicle in park (P) to charge,
and for the charge status indicator to
illuminate.
Note: Pump and fan noise could be present
when charging the high voltage battery. The
pump and fan noise is normal as it circulates
liquid and keeps your high voltage battery
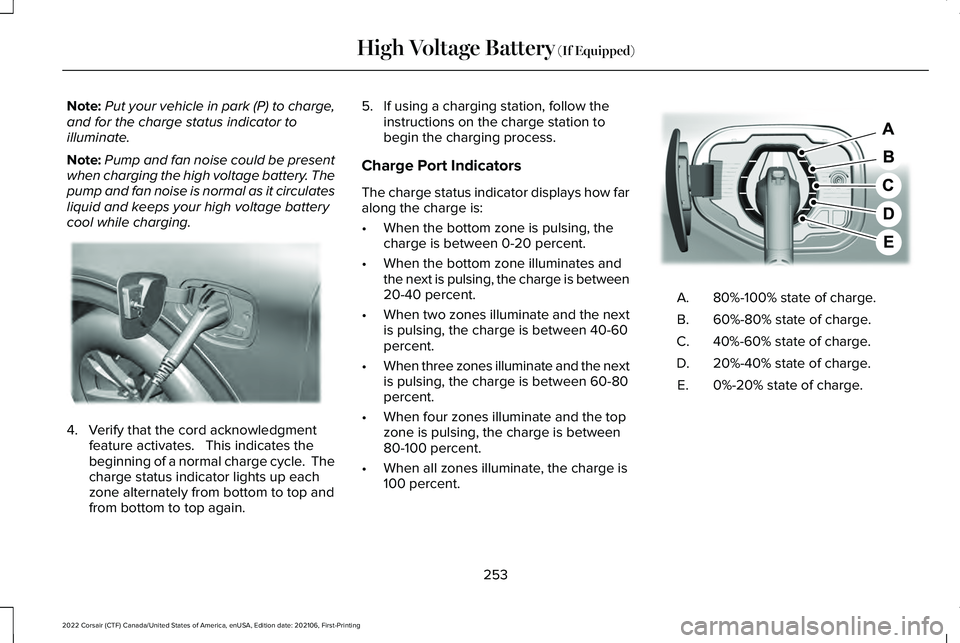
cool while charging. 4. Verify that the cord acknowledgment
feature activates. This indicates the
beginning of a normal charge cycle. The
charge status indicator lights up each
zone alternately from bottom to top and
from bottom to top again. 5. If using a charging station, follow the
instructions on the charge station to
begin the charging process.
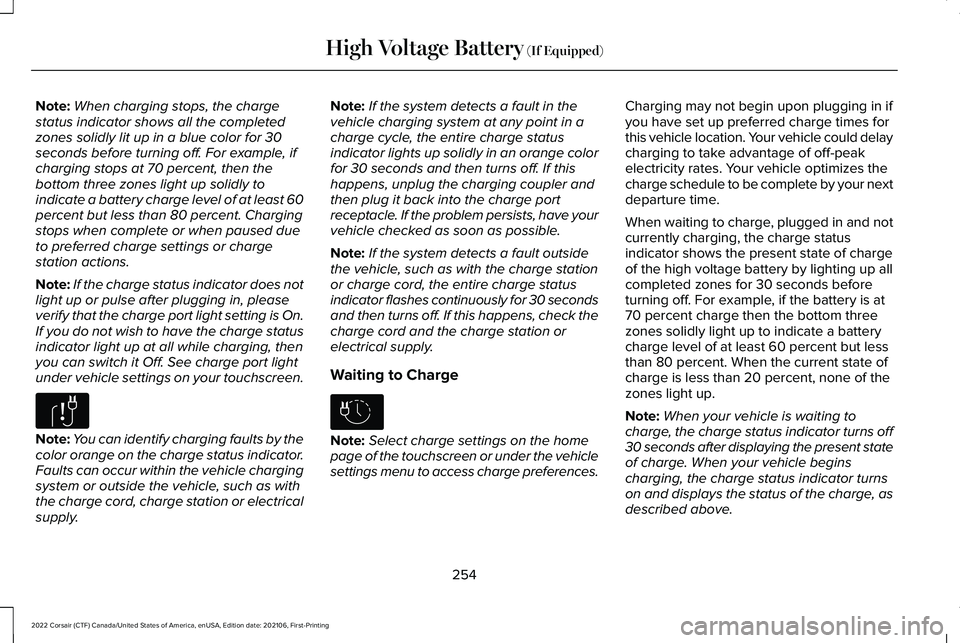
Charge Port Indicators
The charge status indicator displays how far
along the charge is:
• When the bottom zone is pulsing, the
charge is between 0-20 percent.
• When the bottom zone illuminates and
the next is pulsing, the charge is between
20-40 percent.
• When two zones illuminate and the next
is pulsing, the charge is between 40-60
percent.
• When three zones illuminate and the next
is pulsing, the charge is between 60-80
percent.
• When four zones illuminate and the top
zone is pulsing, the charge is between
80-100 percent.
• When all zones illuminate, the charge is
100 percent. 80%-100% state of charge.
A.
60%-80% state of charge.
B.
40%-60% state of charge.
C.
20%-40% state of charge.
D.
0%-20% state of charge.
E.
253
2022 Corsair (CTF) Canada/United States of America, enUSA, Edition date: 202106, First-Printing High Voltage Battery (If Equipped)E295257 E301197
Page 257 of 676
Note:
When charging stops, the charge
status indicator shows all the completed
zones solidly lit up in a blue color for 30
seconds before turning off. For example, if
charging stops at 70 percent, then the
bottom three zones light up solidly to
indicate a battery charge level of at least 60
percent but less than 80 percent. Charging
stops when complete or when paused due
to preferred charge settings or charge
station actions.
Note: If the charge status indicator does not
light up or pulse after plugging in, please
verify that the charge port light setting is On.
If you do not wish to have the charge status
indicator light up at all while charging, then
you can switch it Off. See charge port light
under vehicle settings on your touchscreen. Note:
You can identify charging faults by the
color orange on the charge status indicator.
Faults can occur within the vehicle charging
system or outside the vehicle, such as with
the charge cord, charge station or electrical
supply. Note:
If the system detects a fault in the
vehicle charging system at any point in a
charge cycle, the entire charge status
indicator lights up solidly in an orange color
for 30 seconds and then turns off. If this
happens, unplug the charging coupler and
then plug it back into the charge port
receptacle. If the problem persists, have your
vehicle checked as soon as possible.
Note: If the system detects a fault outside
the vehicle, such as with the charge station
or charge cord, the entire charge status
indicator flashes continuously for 30 seconds
and then turns off. If this happens, check the
charge cord and the charge station or
electrical supply.
Waiting to Charge Note:
Select charge settings on the home
page of the touchscreen or under the vehicle
settings menu to access charge preferences. Charging may not begin upon plugging in if
you have set up preferred charge times for
this vehicle location. Your vehicle could delay
charging to take advantage of off-peak
electricity rates. Your vehicle optimizes the
charge schedule to be complete by your next
departure time.
When waiting to charge, plugged in and not
currently charging, the charge status
indicator shows the present state of charge
of the high voltage battery by lighting up all
completed zones for 30 seconds before
turning off. For example, if the battery is at
70 percent charge then the bottom three
zones solidly light up to indicate a battery
charge level of at least 60 percent but less
than 80 percent. When the current state of
charge is less than 20 percent, none of the
zones light up.
Note:
When your vehicle is waiting to
charge, the charge status indicator turns off
30 seconds after displaying the present state
of charge. When your vehicle begins
charging, the charge status indicator turns
on and displays the status of the charge, as
described above.
254
2022 Corsair (CTF) Canada/United States of America, enUSA, Edition date: 202106, First-Printing High Voltage Battery (If Equipped)E306677 E306678
Page 273 of 676

GENERAL INFORMATION
Note:
Occasional brake noise is normal. If
a metal-to-metal, continuous grinding or
continuous squeal sound is present, the
brake linings may be worn-out, have an
authorized dealer check them. If your
vehicle has continuous vibration or shudder
in the steering wheel when braking, an
authorized dealer should check your vehicle.
Note: Brake dust may accumulate on the
wheels, even under normal driving
conditions. Some dust is inevitable as the
brakes wear and does not contribute to
brake noise. Wet brakes result in reduced
braking efficiency. Gently press the brake
pedal a few times when driving from a car
wash or standing water to dry the brakes.
See Cleaning the Wheels (page 419). Brake Over Accelerator
In the event the accelerator pedal becomes
stuck or entrapped, apply steady and firm
pressure to the brake pedal to slow the
vehicle and reduce engine power. If you
experience this condition, apply the brakes
and bring your vehicle to a safe stop. Move
the transmission to park (P), switch the
engine off and apply the parking brake.
Inspect the accelerator pedal for any
interference. If none are found and the
condition persists, have your vehicle towed
to the nearest authorized dealer.
Emergency Brake Assist
Emergency brake assist detects when you
brake heavily by measuring the rate at which
you press the brake pedal. It provides
maximum braking efficiency as long as you
press the pedal. Emergency brake assist
can reduce stopping distances in critical
situations. Note:
Depending on applicable laws and
regulations in the country for which your
vehicle was originally built, your brake lamps
may flash during heavy braking. Following
this, your hazard lights may also flash when
your vehicle comes to a stop.
Anti-lock Brake System
This system helps you maintain steering
control during emergency stops by keeping
the brakes from locking. If the light does not momentarily
illuminate, continues to flash or
remains on when you switch the
ignition on, the anti-lock brake system could
be disabled. Have the system checked. If
the anti-lock brake system is disabled,
normal braking is still effective. Have the
system checked.
See
Warning Lamps and Indicators (page
131).
Note: Indicators vary depending on region.
270
2022 Corsair (CTF) Canada/United States of America, enUSA, Edition date: 202106, First-Printing Brakes