2022 KIA SPORTAGE signal light
[x] Cancel search: signal lightPage 91 of 630
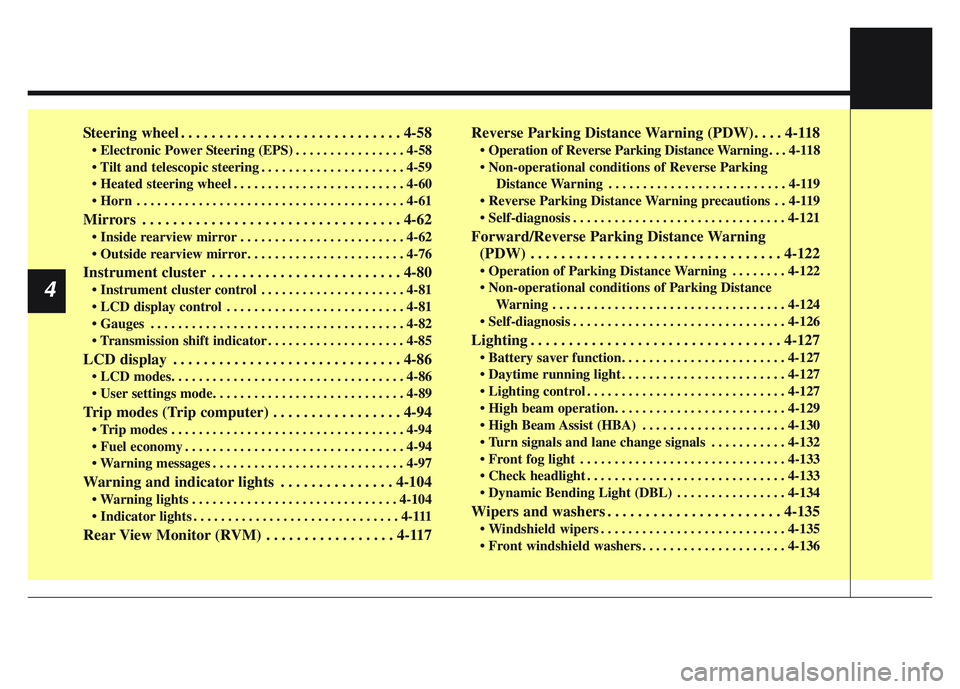
Steering wheel . . . . . . . . . . . . . . . . . . . . . . . . . . . . . 4-58
• Electronic Power Steering (EPS) . . . . . . . . . . . . . . . . 4-58
• Tilt and telescopic steering . . . . . . . . . . . . . . . . . . . . . 4-59
• Heated steering wheel . . . . . . . . . . . . . . . . . . . . . . . . . 4-60
• Horn . . . . . . . . . . . . . . . . . . . . . . . . . . . . . . . . . . . . \
. . . 4-61
Mirrors . . . . . . . . . . . . . . . . . . . . . . . . . . . . . . . . . . 4-62\
• Inside rearview mirror . . . . . . . . . . . . . . . . . . . . . . . . 4-62
• Outside rearview mirror. . . . . . . . . . . . . . . . . . . . . . . 4-76
Instrument cluster . . . . . . . . . . . . . . . . . . . . . . . . . 4-80
• Instrument cluster control . . . . . . . . . . . . . . . . . . . . . 4-81
• LCD display control . . . . . . . . . . . . . . . . . . . . . . . . . . 4-81
• Gauges . . . . . . . . . . . . . . . . . . . . . . . . . . . . . . . . . . . . \
. 4-82
• Transmission shift indicator . . . . . . . . . . . . . . . . . . . . 4-85
LCD display . . . . . . . . . . . . . . . . . . . . . . . . . . . . . . 4-86
• LCD modes. . . . . . . . . . . . . . . . . . . . . . . . . . . . . . . . . . 4-86\
• User settings mode. . . . . . . . . . . . . . . . . . . . . . . . . . . . 4-89
Trip modes (Trip computer) . . . . . . . . . . . . . . . . . 4-94
• Trip modes . . . . . . . . . . . . . . . . . . . . . . . . . . . . . . . . . . 4-94\
• Fuel economy . . . . . . . . . . . . . . . . . . . . . . . . . . . . . . . . 4-94
• Warning messages . . . . . . . . . . . . . . . . . . . . . . . . . . . . 4-97
Warning and indicator lights . . . . . . . . . . . . . . . 4-104
• Warning lights . . . . . . . . . . . . . . . . . . . . . . . . . . . . . . 4-104
• Indicator lights . . . . . . . . . . . . . . . . . . . . . . . . . . . . . . 4-111
Rear View Monitor (RVM) . . . . . . . . . . . . . . . . . 4-117Reverse Parking Distance Warning (PDW). . . . 4-118
• Operation of Reverse Parking Distance Warning . . . 4-118
• Non-operational conditions of Reverse Parking
Distance Warning . . . . . . . . . . . . . . . . . . . . . . . . . . 4-119
• Reverse Parking Distance Warning precautions . . 4-119
• Self-diagnosis . . . . . . . . . . . . . . . . . . . . . . . . . . . . . . . 4-121
Forward/Reverse Parking Distance Warning (PDW) . . . . . . . . . . . . . . . . . . . . . . . . . . . . . . . . . 4-122
• Operation of Parking Distance Warning . . . . . . . . 4-122
• Non-operational conditions of Parking Distance
Warning . . . . . . . . . . . . . . . . . . . . . . . . . . . . . . . . . . 4-12\
4
• Self-diagnosis . . . . . . . . . . . . . . . . . . . . . . . . . . . . . . . 4-126
Lighting . . . . . . . . . . . . . . . . . . . . . . . . . . . . . . . . . 4-127
• Battery saver function. . . . . . . . . . . . . . . . . . . . . . . . 4-127
• Daytime running light . . . . . . . . . . . . . . . . . . . . . . . . 4-127
• Lighting control . . . . . . . . . . . . . . . . . . . . . . . . . . . . . 4-127
• High beam operation. . . . . . . . . . . . . . . . . . . . . . . . . 4-129
• High Beam Assist (HBA) . . . . . . . . . . . . . . . . . . . . . 4-130
• Turn signals and lane change signals . . . . . . . . . . . 4-132
• Front fog light . . . . . . . . . . . . . . . . . . . . . . . . . . . . . . 4-133
• Check headlight . . . . . . . . . . . . . . . . . . . . . . . . . . . . . 4-133
• Dynamic Bending Light (DBL) . . . . . . . . . . . . . . . . 4-134
Wipers and washers . . . . . . . . . . . . . . . . . . . . . . . 4-135
• Windshield wipers . . . . . . . . . . . . . . . . . . . . . . . . . . . 4-135
• Front windshield washers . . . . . . . . . . . . . . . . . . . . . 4-136
4
Page 96 of 630
47
Features of your vehicle
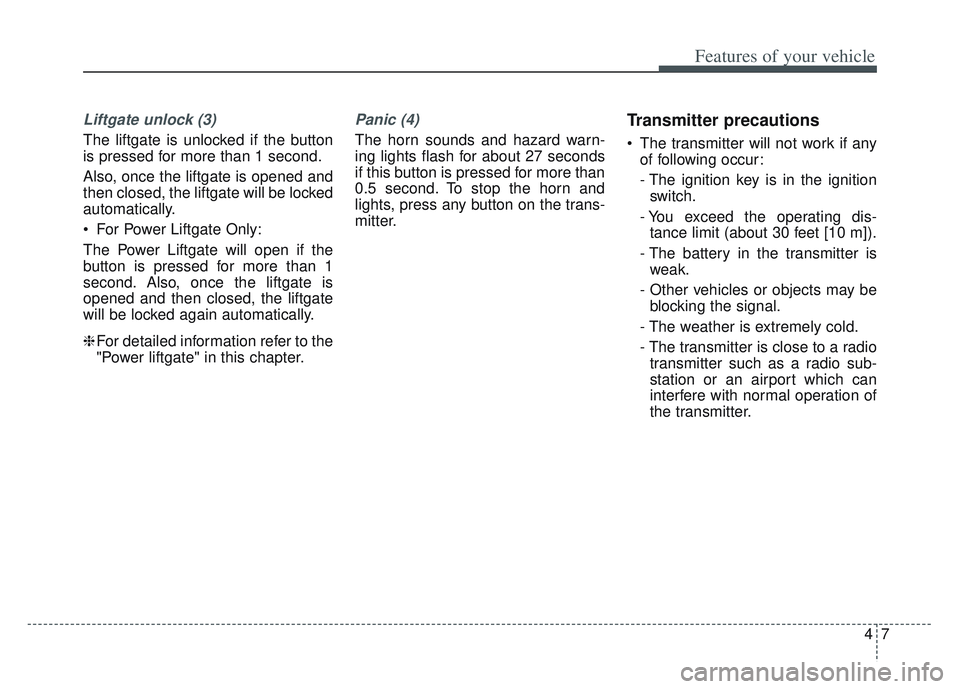
Liftgate unlock (3)
The liftgate is unlocked if the button
is pressed for more than 1 second.
Also, once the liftgate is opened and
then closed, the liftgate will be locked
automatically.
For Power Liftgate Only:
The Power Liftgate will open if the
button is pressed for more than 1
second. Also, once the liftgate is
opened and then closed, the liftgate
will be locked again automatically.
❈For detailed information refer to the
"Power liftgate" in this chapter.
Panic (4)
The horn sounds and hazard warn-
ing lights flash for about 27 seconds
if this button is pressed for more than
0.5 second. To stop the horn and
lights, press any button on the trans-
mitter.
Transmitter precautions
The transmitter will not work if any
of following occur:
- The ignition key is in the ignitionswitch.
- You exceed the operating dis- tance limit (about 30 feet [10 m]).
- The battery in the transmitter is weak.
- Other vehicles or objects may be blocking the signal.
- The weather is extremely cold.
- The transmitter is close to a radio transmitter such as a radio sub-
station or an airport which can
interfere with normal operation of
the transmitter.
Page 105 of 630
Features of your vehicle
16
4
If the smart key is in close proximi-
ty to your cell phone or smart
phone, the signal from the smart
key could be blocked by normal
operation of your cell phone or
smart phone. This is especially
important when the phone is active
such as making a call, receiving
calls, text messaging, and/or send-
ing/receiving emails. Avoid placing
the smart key and your cell phone
or smart phone in the same pants
or jacket pocket and maintain ade-
quate distance between the two
devices.
✽ ✽ NOTICE
If the keyless entry system is inoper-
ative due to exposure to water or liq-
uids, it will not be covered by your
manufacturer’s vehicle warranty.
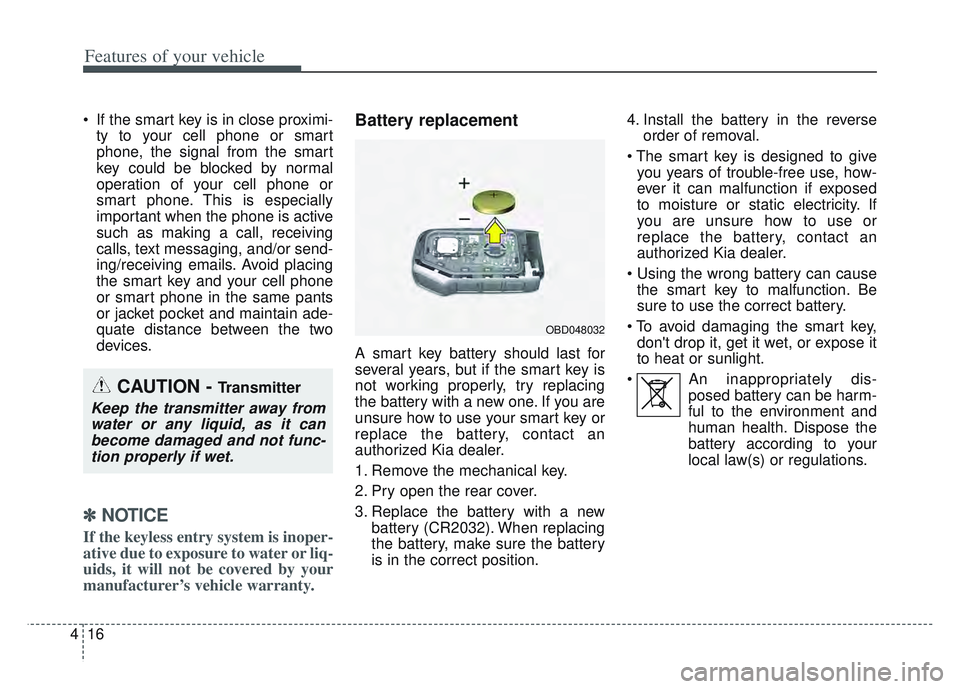
Battery replacement
A smart key battery should last for
several years, but if the smart key is
not working properly, try replacing
the battery with a new one. If you are
unsure how to use your smart key or
replace the battery, contact an
authorized Kia dealer.
1. Remove the mechanical key.
2. Pry open the rear cover.
3. Replace the battery with a new
battery (CR2032). When replacing
the battery, make sure the battery
is in the correct position. 4. Install the battery in the reverse
order of removal.
you years of trouble-free use, how-
ever it can malfunction if exposed
to moisture or static electricity. If
you are unsure how to use or
replace the battery, contact an
authorized Kia dealer.
the smart key to malfunction. Be
sure to use the correct battery.
don't drop it, get it wet, or expose it
to heat or sunlight.
An inappropriately dis- posed battery can be harm-
ful to the environment and
human health. Dispose the
battery according to your
local law(s) or regulations.
CAUTION - Transmitter
Keep the transmitter away fromwater or any liquid, as it canbecome damaged and not func-tion properly if wet.
OBD048032
Page 106 of 630
417
Features of your vehicle
Smart key immobilizer system
Your vehicle is equipped with an
electronic engine immobilizer system
to reduce the risk of unauthorized
vehicle use.
Your immobilizer system is com-
prised of a small transponder in the
smart key and electronic devices
inside the vehicle.
With the immobilizer system, whenev-
er you turn the ENGINE START/STOP
button to the ON position by pressing
the button while carrying the smart
key, it verifies if the smart key is valid.
If the key is determined to be valid,
the engine will start.
If the key is determined to be invalid,
the engine will not start.
✽ ✽ NOTICE
Do not put metal accessories near
the ignition switch.
Metal accessories may interrupt the
transponder signal and may prevent
the engine from being started.CAUTION - Smart key
damage
Do not drop, get wet or expose
the smart key to heat or sun-light, or it will be damaged.
Page 155 of 630
Features of your vehicle
66
4
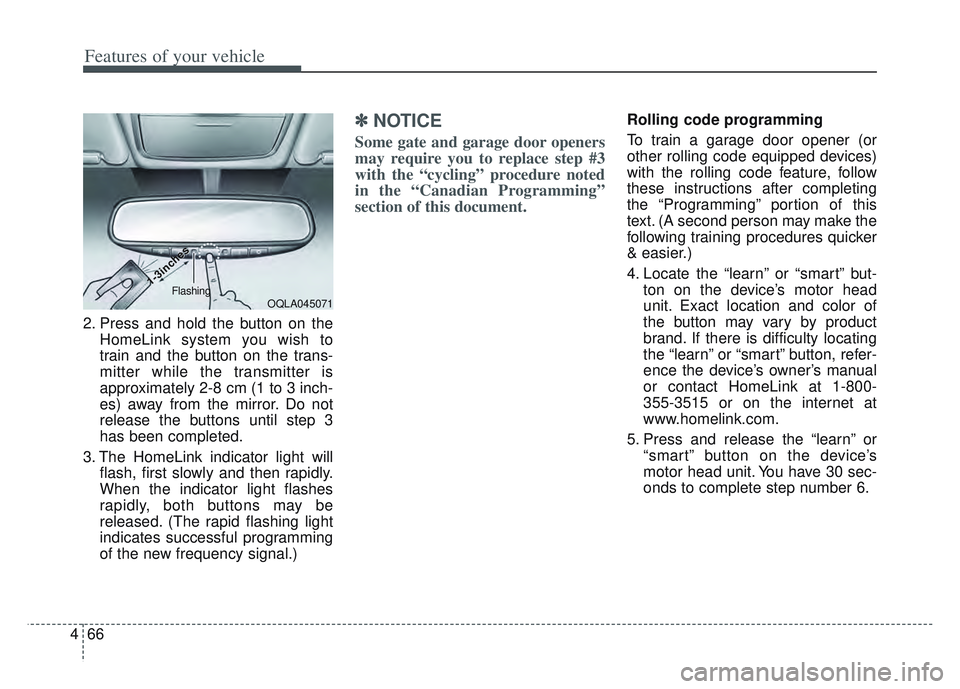
2. Press and hold the button on the
HomeLink system you wish to
train and the button on the trans-
mitter while the transmitter is
approximately 2-8 cm (1 to 3 inch-
es) away from the mirror. Do not
release the buttons until step 3
has been completed.
3. The HomeLink indicator light will flash, first slowly and then rapidly.
When the indicator light flashes
rapidly, both buttons may be
released. (The rapid flashing light
indicates successful programming
of the new frequency signal.)
✽ ✽NOTICE
Some gate and garage door openers
may require you to replace step #3
with the “cycling” procedure noted
in the “Canadian Programming”
section of this document.
Rolling code programming
To train a garage door opener (or
other rolling code equipped devices)
with the rolling code feature, follow
these instructions after completing
the “Programming” portion of this
text. (A second person may make the
following training procedures quicker
& easier.)
4. Locate the “learn” or “smart” but-
ton on the device’s motor head
unit. Exact location and color of
the button may vary by product
brand. If there is difficulty locating
the “learn” or “smart” button, refer-
ence the device’s owner’s manual
or contact HomeLink at 1-800-
355-3515 or on the internet at
www.homelink.com.
5. Press and release the “learn” or “smart” button on the device’s
motor head unit. You have 30 sec-
onds to complete step number 6.
OQLA045071
1-3inc
1-3inc
hes
hesFlashing
Page 156 of 630
467
Features of your vehicle
6. Return to the vehicle and firmlypress and release the pro-
grammed HomeLink button up to
three times. The rolling code
equipped device should now rec-
ognize the HomeLink signal and
activate when the HomeLink but-
ton is pressed. The remaining two
buttons may now be programmed
if this has not previously been
done. Refer to the “Programming”
portion of this text. Operating HomeLink
To operate, simply press the
programmed HomeLink button.
Activation will now occur for the
trained product (garage door, securi-
ty system, entry door lock, estate
gate, or home or office lighting). For
convenience, the hand-held trans-
mitter of the device may also be used
at any time. The HomeLink Wireless
Controls System (once programmed)
or the original hand-held transmitter
may be used to activate the device
(e.g. garage door, entry door lock,
etc.). In the event that there are still
programming difficulties, contact
HomeLink at 1-800-355-3515 or on
the internet at www.homelink.com. Erasing programmed HomeLink
buttons
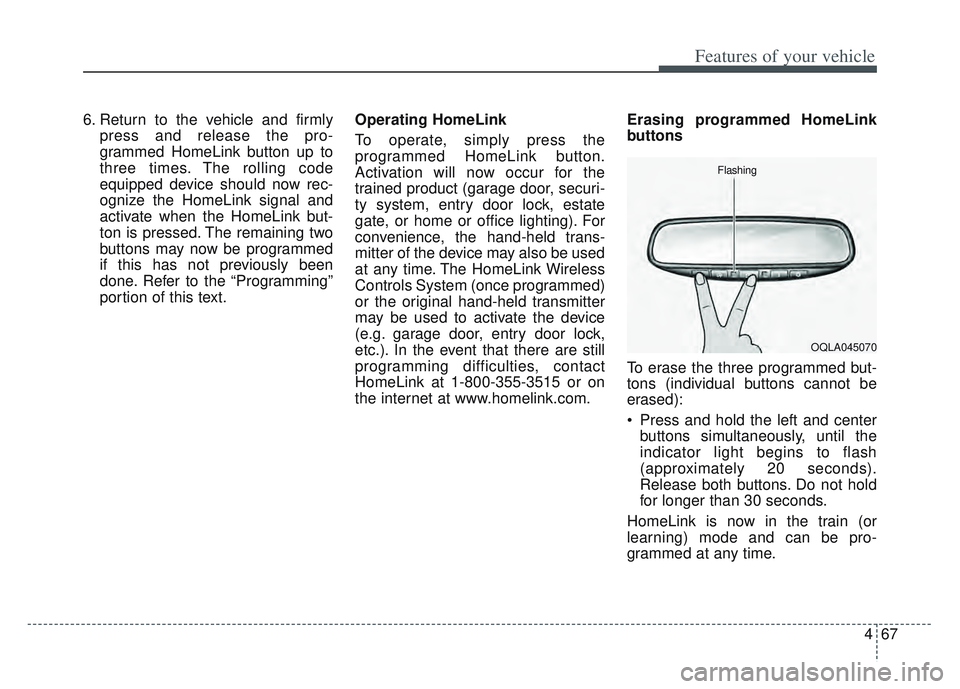
To erase the three programmed but-
tons (individual buttons cannot be
erased):
Press and hold the left and center
buttons simultaneously, until the
indicator light begins to flash
(approximately 20 seconds).
Release both buttons. Do not hold
for longer than 30 seconds.
HomeLink is now in the train (or
learning) mode and can be pro-
grammed at any time.
OQLA045070
Flashing
Page 157 of 630
Features of your vehicle
68
4
Reprogramming a single
HomeLink button
To program a device to HomeLink
using a HomeLink button previously
trained, follow these steps:
1. Press and hold the desired
HomeLink button. Do NOT release
until step 4 has been completed.
2. When the indicator light begins to flash slowly (after 20 seconds),
position the hand-held transmitter
2-8 cm (1 to 3 inches) away from
the HomeLink surface.
3. Press and hold the hand-held transmitter button (or press and
“cycle” - as described in “Canadian
Programming”).
4. The HomeLink indicator light will flash, first slowly and then rapidly.
When the indicator light begins to
flash rapidly, release both buttons.
The previous device has now been
erased and the new device can be
activated by pushing the HomeLink
button that has just been pro-
grammed. This procedure will not
affect any other programmed
HomeLink buttons. Canadian Programming
Garage & gate openers
During programming, your hand-held
transmitter may automatically stop
transmitting. Continue to press and
hold the HomeLink button (note
steps 2 through 4 in the
“Programming” portion of this text)
while you press and re-press
(“cycle”) your handheld transmitter
every two seconds until the frequen-
cy signal has been learned. The indi-
cator light will flash slowly and then
rapidly after several seconds upon
successful training.
Accessories
If you would like additional informa-
tion on the HomeLink Wireless
Control System, HomeLink compati-
ble products, or to purchase other
accessories such as the HomeLink
®
Lighting Package, please contact
HomeLink at 1-800-355-3515 or on
the internet at www.homelink.com.
Page 161 of 630
Features of your vehicle
72
4
If you need to recalibrate the com-
pass:
1. Press and hold the button for
more than 9 seconds. When the
compass memory is cleared a "C"
will appear in the display.
2. Drive the vehicle in 2 complete cir- cles at less than 5 mph (8 km/h). Integrated HomeLink®Wireless
Control System
The HomeLink
®Wireless Control
System can replace up to three
hand-held radio-frequency (RF)
transmitters with a single built-in
device. This innovative feature will
learn the radio frequency codes of
most current transmitters to operate
devices such as gate operators,
garage door openers, entry door
locks, security systems, even home
lighting. Both standard and rolling
code-equipped transmitters can be
programmed by following the out-
lined procedures.
Additional HomeLink
®information
can be found at: www.homelink.com
or by calling 1-800-355-3515.
Retain the original transmitter of the
RF device you are programming for
use in other vehicles as well as for
future HomeLink
®programming. It is
also suggested that upon the sale of
the vehicle, the programmed
HomeLink
®buttons be erased for
security purposes.
WARNING
Before programming
HomeLink®to a garage door
opener or gate operator, make
sure people and objects are out
of the way of the device to pre-
vent potential harm or damage.
Do not use the HomeLink
®with
any garage door opener that
lacks the safety stop and
reverse features required by
U.S. federal safety standards
(this includes any garage door
opener model manufactured
before April 1, 1982). A garage
door that cannot detect an
object - signaling the door to
stop and reverse - does not
meet current U.S. federal safety
standards. Using a garage door
opener without these features
increases the risk of serious
injury or death.