2022 KIA SPORTAGE signal light
[x] Cancel search: signal lightPage 162 of 630
473
Features of your vehicle
Programming HomeLink®
Please note the following:
When programming a garage dooropener, it is advised to park the
vehicle outside of the garage.
It is recommended that a new bat- tery be placed in the hand-held
transmitter of the device being pro-
grammed to HomeLink
®for quicker
training and accurate transmission
of the radio-frequency signal.
Some vehicles may require the ignition switch to be placed in the
ACC (or "Accessories") position for
programming and/or operation of
HomeLink
®.
In the event that there are still pro- gramming difficulties or questions
after following the programming
steps listed below, contact
HomeLink
®at: www.homelink.com
or by calling 1-800-355-3515.
Programming
To train most devices, follow these
instructions:
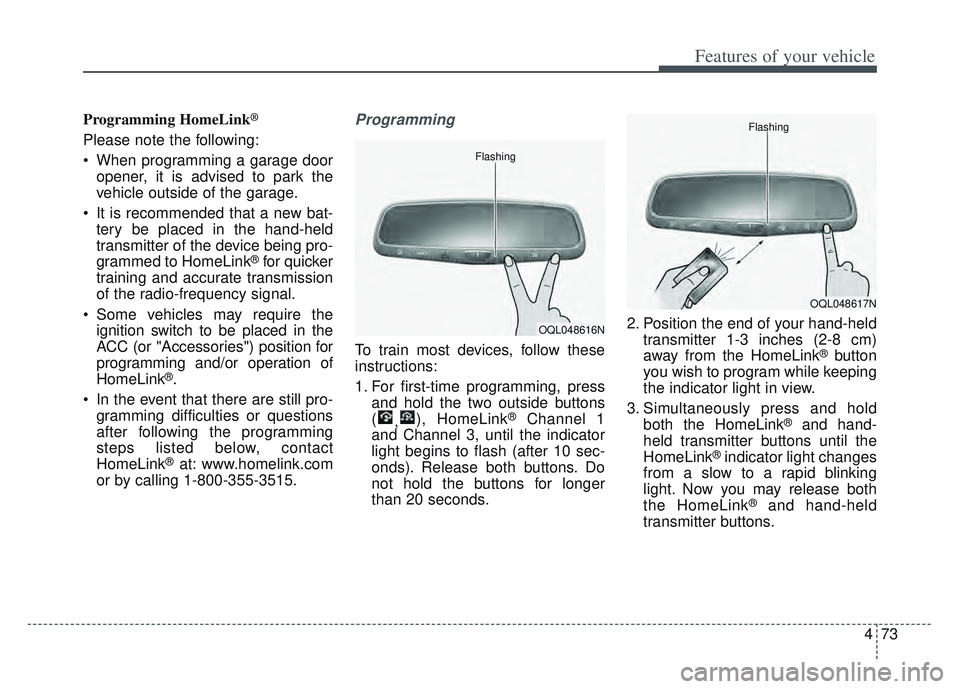
1. For first-time programming, press and hold the two outside buttons
( ,), HomeLink
®Channel 1
and Channel 3, until the indicator
light begins to flash (after 10 sec-
onds). Release both buttons. Do
not hold the buttons for longer
than 20 seconds. 2. Position the end of your hand-held
transmitter 1-3 inches (2-8 cm)
away from the HomeLink
®button
you wish to program while keeping
the indicator light in view.
3. Simultaneously press and hold both the HomeLink
®and hand-
held transmitter buttons until the
HomeLink
®indicator light changes
from a slow to a rapid blinking
light. Now you may release both
the HomeLink
®and hand-held
transmitter buttons.
OQL048616N
Flashing
OQL048617N
Flashing
Page 164 of 630
475
Features of your vehicle
Gate operator & Canadian pro-gramming
During programming, your handheld
transmitter may automatically stop
transmitting. Continue to press the
Integrated HomeLink
®Wireless
Control System button (note steps 2
through 3 in the Programming portion
of this document) while you press
and re-press ("cycle") your handheld
transmitter every two seconds until
the frequency signal has been
learned. The indicator light will flash
slowly and then rapidly after several
seconds upon successful training.
Operating HomeLink®
To operate, simply press and release
the programmed HomeLink®button.
Activation will now occur for the
trained device (i.e. garage door
opener, gate operator, security sys-
tem, entry door lock, home/office
lighting, etc.). For convenience, the
hand-held transmitter of the device
may also be used at any time.
Reprogramming a single
HomeLink®button
To program a device to HomeLink®
using a HomeLink®button previously
trained, follow these steps:
1.Press and hold the desired HomeLink
®button. DO NOT
release the button.
2.The indicator light will begin to flash after 20 seconds. Without releasing
the HomeLink
®button, proceed
with "Programming" step 2.
For questions or comments, contact
HomeLink
®at www.homelink.comor
1-800-355-3515.
Page 180 of 630
491
Features of your vehicle
Door
• Auto Lock :- Enable on Speed : All doors willbe automatically locked when the
vehicle speed exceeds 9.3 mph
(15 km/h).
- Enable on Shift (if equipped with Automatic transmission) : All
doors will be automatically locked
if the transmission shift lever is
shifted from the P (Park) position
to the R (Reverse), N (Neutral), or
D (Drive) position. (With the
Engine ON, it is activated.)
Auto Unlock : - Disable : The auto door unlockoperation will be canceled.
- Vehicle Off/On key out : All doors will be automatically unlocked
when the ignition key is removed
from the ignition switch or the
Engine Start/Stop button is set to
the OFF position. - On shift to P (if equipped with
Automatic transmission) : All
doors will be automatically
unlocked if the automatic trans-
mission shift lever is shifted to the
P (Park) position. (With the
Engine ON, it is activated.)
Two Press Unlock (if equipped) : - If this item is checked, the twopress unlock will be activated.
Press the door unlock button
once to unlock the driver's door,
and press the button once more
within 4 seconds to unlock the
rest of the doors.
Power Liftgate (if equipped) : - If this item is checked, the powerliftgate function will be activated.
❈ For more details, refer to “Power
Liftgate” in this chapter.
Smart Liftgate (if equipped) : - If this item is checked, the smartliftgate function will be activated.
❈ For more details, refer to “Smart
Liftgate” in this chapter. Lights
One Touch Turn Signal :
- Off: The one touch turn signalfunction will be deactivated.
- 3, 5, 7 Flashes : The lane change signals will blink 3, 5 or 7 times
when the turn signal lever is
moved slightly.
❈ For more details, refer to “Lighting”
in this chapter.
Headlight Delay : - If this item is checked, the headlamp delay function will be acti-
vated.
❈ For more details, refer to “Lighting”
in this chapter.
Page 203 of 630
Features of your vehicle
114
4
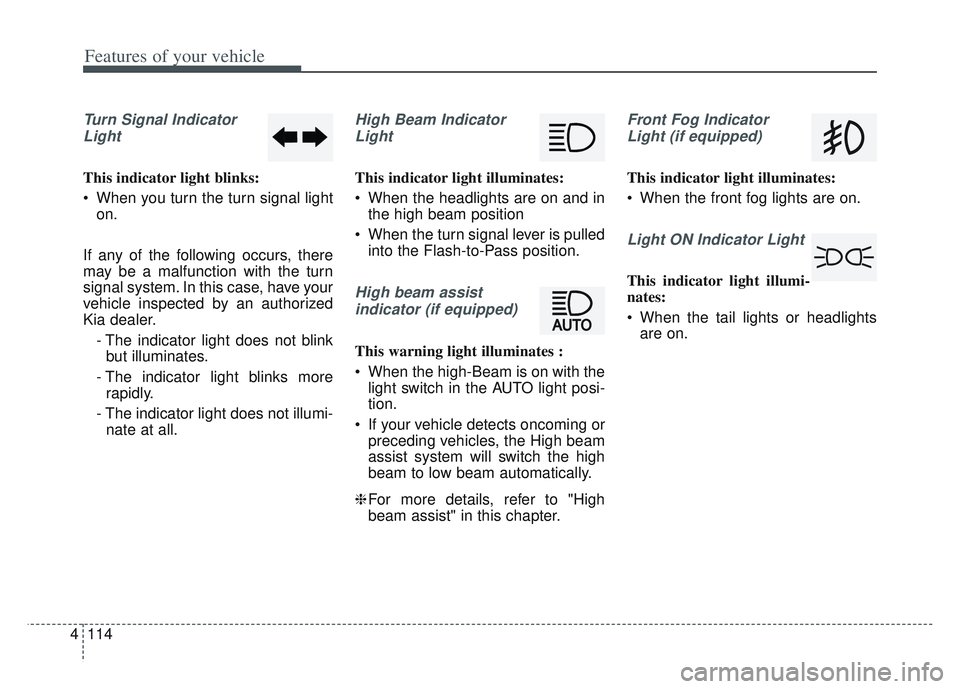
Turn Signal Indicator
Light
This indicator light blinks:
When you turn the turn signal light on.
If any of the following occurs, there
may be a malfunction with the turn
signal system. In this case, have your
vehicle inspected by an authorized
Kia dealer. - The indicator light does not blinkbut illuminates.
- The indicator light blinks more rapidly.
- The indicator light does not illumi- nate at all.
High Beam Indicator
Light
This indicator light illuminates:
When the headlights are on and in the high beam position
When the turn signal lever is pulled into the Flash-to-Pass position.
High beam assist
indicator (if equipped)
This warning light illuminates :
When the high-Beam is on with the light switch in the AUTO light posi-
tion.
If your vehicle detects oncoming or preceding vehicles, the High beam
assist system will switch the high
beam to low beam automatically.
❈ For more details, refer to "High
beam assist" in this chapter.
Front Fog Indicator
Light (if equipped)
This indicator light illuminates:
When the front fog lights are on.
Light ON Indicator Light
This indicator light illumi-
nates:
When the tail lights or headlights are on.
Page 221 of 630
Features of your vehicle
132
4
When driving downhill or uphill.
When only part of the vehicle in
front is visible on a crossroad or
curved road.
When there is a traffic light, reflect- ing sign, flashing sign or mirror.
When the road conditions are bad such as being wet or covered with
snow.
When the front vehicle’s head- lamps are off but the fog lamps on.
When a vehicle suddenly appears from a curve.
When the vehicle is tilted from a flat tire or being towed.
When the LKA (Lane Keeping Assist) warning light illuminates.✽ ✽ NOTICE
• Do not place any accessories,
stickers or tint the windshield.
• Have on the windshield glass replaced from an authorized deal-
er.
• Do not remove or damage related parts of the High Beam Assist sys-
tem.
• Be careful that water doesn’t get into the High Beam Assist unit.
• Do not place objects on the dash- board that reflect light such as
mirrors, white paper, etc. The sys-
tem may not function properly if
sunlight is reflected.
• At times, the Smart High Beam system may not operate due to sys-
tem limitations. Always check the
road conditions for your safety.
When the system does not operate
normally, manually change
between the high beam and low
beam.
• While other beeps such as the seat belt warning sound are in opera-
tion and override the LKA alarm-
ing system, LKA beeps may not
occur.
Turn signals and lane change
signals
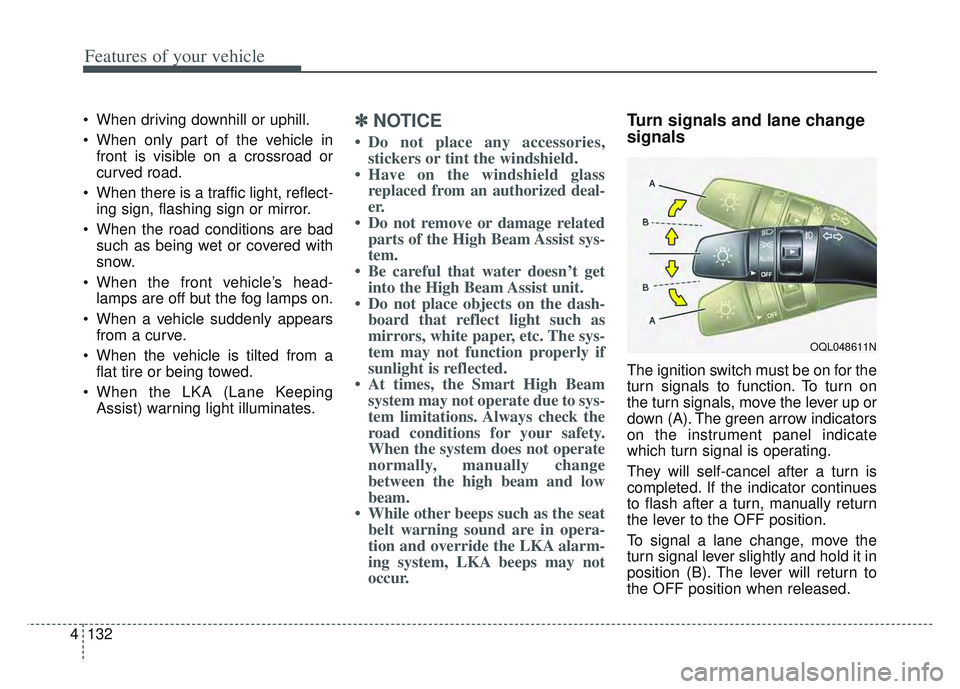
The ignition switch must be on for the
turn signals to function. To turn on
the turn signals, move the lever up or
down (A). The green arrow indicators
on the instrument panel indicate
which turn signal is operating.
They will self-cancel after a turn is
completed. If the indicator continues
to flash after a turn, manually return
the lever to the OFF position.
To signal a lane change, move the
turn signal lever slightly and hold it in
position (B). The lever will return to
the OFF position when released.
OQL048611N
Page 222 of 630
4133
Features of your vehicle
If an indicator stays on and does not
flash or if it flashes abnormally, one of
the turn signal bulbs may be burned
out and will require replacement.
✽ ✽NOTICE
If an indicator flash is abnormally
quick or slow, a bulb may be burned
out or have a poor electrical connec-
tion in the circuit.
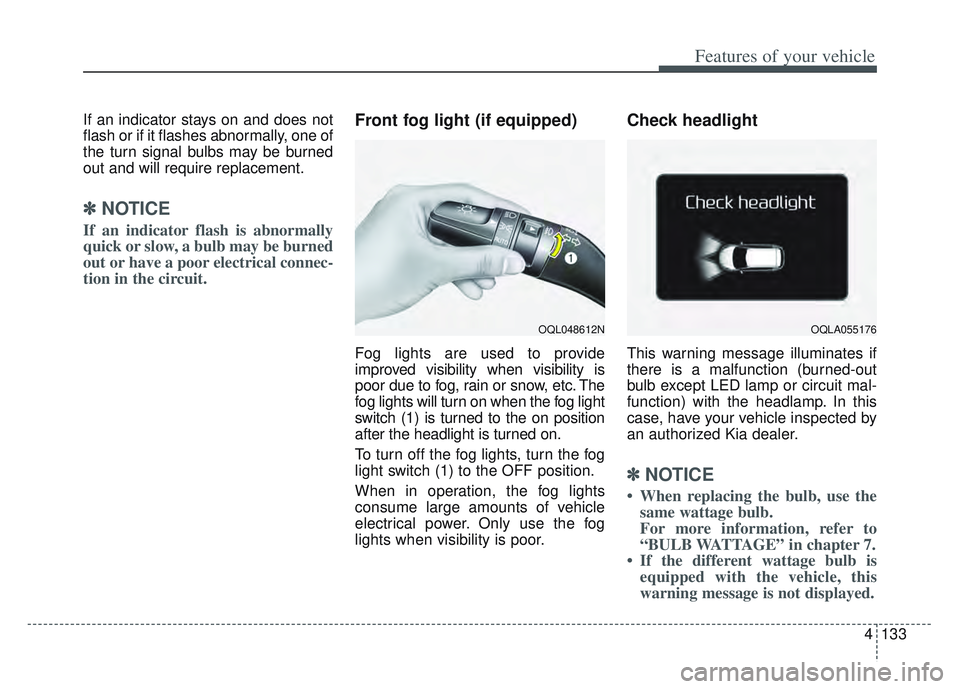
Front fog light (if equipped)
Fog lights are used to provide
improved visibility when visibility is
poor due to fog, rain or snow, etc. The
fog lights will turn on when the fog light
switch (1) is turned to the on position
after the headlight is turned on.
To turn off the fog lights, turn the fog
light switch (1) to the OFF position.
When in operation, the fog lights
consume large amounts of vehicle
electrical power. Only use the fog
lights when visibility is poor.
Check headlight
This warning message illuminates if
there is a malfunction (burned-out
bulb except LED lamp or circuit mal-
function) with the headlamp. In this
case, have your vehicle inspected by
an authorized Kia dealer.
✽ ✽NOTICE
• When replacing the bulb, use the
same wattage bulb.
For more information, refer to
“BULB WATTAGE” in chapter 7.
• If the different wattage bulb is equipped with the vehicle, this
warning message is not displayed.
OQL048612NOQLA055176
Page 386 of 630
5101
Driving your vehicle
Warning message
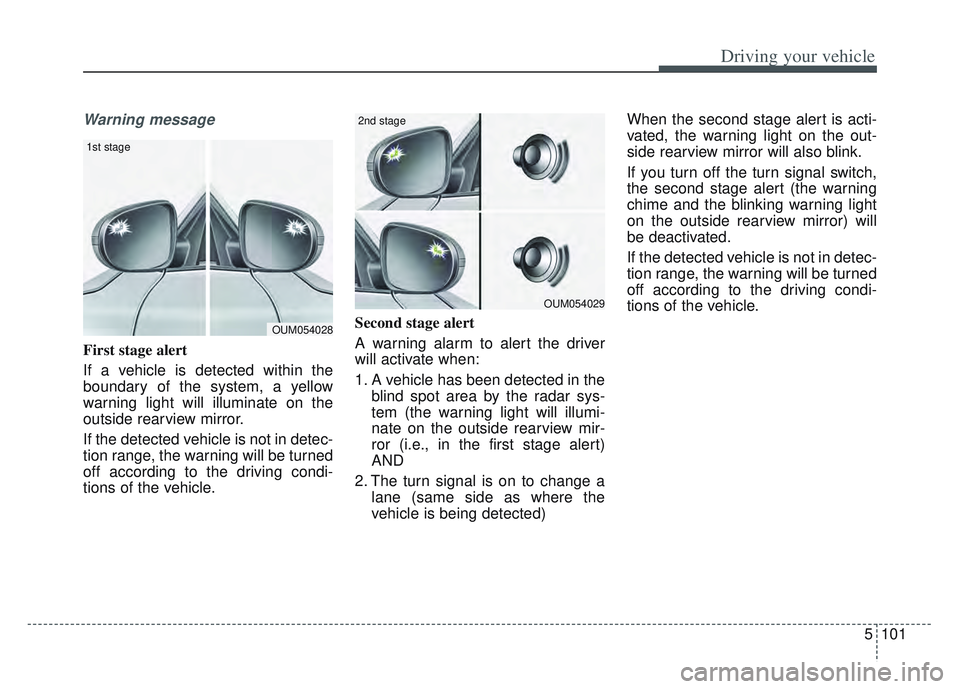
First stage alert
If a vehicle is detected within the
boundary of the system, a yellow
warning light will illuminate on the
outside rearview mirror.
If the detected vehicle is not in detec-
tion range, the warning will be turned
off according to the driving condi-
tions of the vehicle.Second stage alert
A warning alarm to alert the driver
will activate when:
1. A vehicle has been detected in the
blind spot area by the radar sys-
tem (the warning light will illumi-
nate on the outside rearview mir-
ror (i.e., in the first stage alert)
AND
2. The turn signal is on to change a lane (same side as where the
vehicle is being detected) When the second stage alert is acti-
vated, the warning light on the out-
side rearview mirror will also blink.
If you turn off the turn signal switch,
the second stage alert (the warning
chime and the blinking warning light
on the outside rearview mirror) will
be deactivated.
If the detected vehicle is not in detec-
tion range, the warning will be turned
off according to the driving condi-
tions of the vehicle.
OUM054028
1st stage
OUM054029
2nd stage
Page 448 of 630
5163
Driving your vehicle
Driving with a trailer
Towing a trailer requires a certain
amount of experience. Before setting
out for the open road, you must get
to know your trailer. Acquaint your-
self with the feel of handling and
braking with the added weight of the
trailer. And always keep in mind that
the vehicle you are driving is now a
good deal longer and not nearly so
responsive as your vehicle is by
itself.
Before you start, check the trailer
hitch and platform, safety chains,
electrical connector(s), lights, tires
and mirror adjustment. If the trailer
has electric brakes, start your vehicle
and trailer moving and then apply the
trailer brake controller by hand to be
sure the brakes are working. This lets
you check your electrical connection
at the same time.
During your trip, check occasionally
to be sure that the load is secure,
and that the lights and any trailer
brakes are still working.
Following distance
Stay at least twice as far behind the
vehicle ahead as you would when
driving your vehicle without a trailer.
This can help you avoid situations
that require heavy braking and sud-
den turns.
Passing
You’ll need more passing distance
up ahead when you’re towing a trail-
er. And, because of the increased
vehicle length, you’ll need to go
much farther beyond the passed
vehicle before you can return to your
lane. Due to the added load to the
engine when going uphill the vehicle
may also take longer to pass than it
would on flat ground.
Backing up
Hold the bottom of the steering
wheel with one hand. Then, to move
the trailer to the left, just move your
hand to the left. To move the trailer to
the right, move your hand to the
right. Always back up slowly and, if
possible, have someone guide you.
Making turns
When you’re turning with a trailer,
make wider turns than normal. Do
this so your trailer won’t strike soft
shoulders, curbs, road signs, trees,
or other objects near the edge of the
road. Avoid jerky or sudden maneu-
vers. Signal well in advance before
turning or lane changes.