Page 151 of 630
Features of your vehicle
62
4
MIRRORS
Inside rearview mirror
Adjust the rearview mirror so that the
center view through the rear window
is seen. Make this adjustment before
you start driving.
Do not place objects in the rear seat
or cargo area which would interfere
with your vision through the rear win-
dow.
Day/night rearview mirror
(if equipped)
Make this adjustment before you
start driving and while the day/night
lever (3) is in the day position.
Pull the day/night lever (3) toward
you to reduce the glare from the
headlights of the vehicles behind you
during night driving.
Remember that you lose somerearview clarity in the night position.
❈ (1) : Day, (2) : Night
WARNING- Mirror adjust-
ment
Do not adjust the rearview mir-
ror while the vehicle is moving.
This could result in loss of con-
trol.
WARNING
Do not modify the inside mirror
and don’t install a wide mirror. It
could result in injury during an
accident or deployment of the
air bag.
OQL045035
Page 152 of 630
463
Features of your vehicle
Electric chromatic mirror (ECM) (if equipped)
The electric rearview mirror automat-
ically controls the glare from the
headlights of the vehicles behind you
in nighttime or low light driving condi-
tions. The sensor mounted in the mir-
ror senses the light level around the
vehicle and automatically controls
the headlight glare from the vehicles
behind you.
When the engine is running, the
glare is automatically controlled by
the sensor mounted in the rearview
mirror.
Whenever the shift lever is shifted
into reverse (R), the mirror will auto-
matically go to the brightest setting in
order to improve the drivers view
behind the vehicle. To operate the electric rearview mirror:
The mirror defaults to the ON posi-
tion whenever the ignition switch is
turned on.
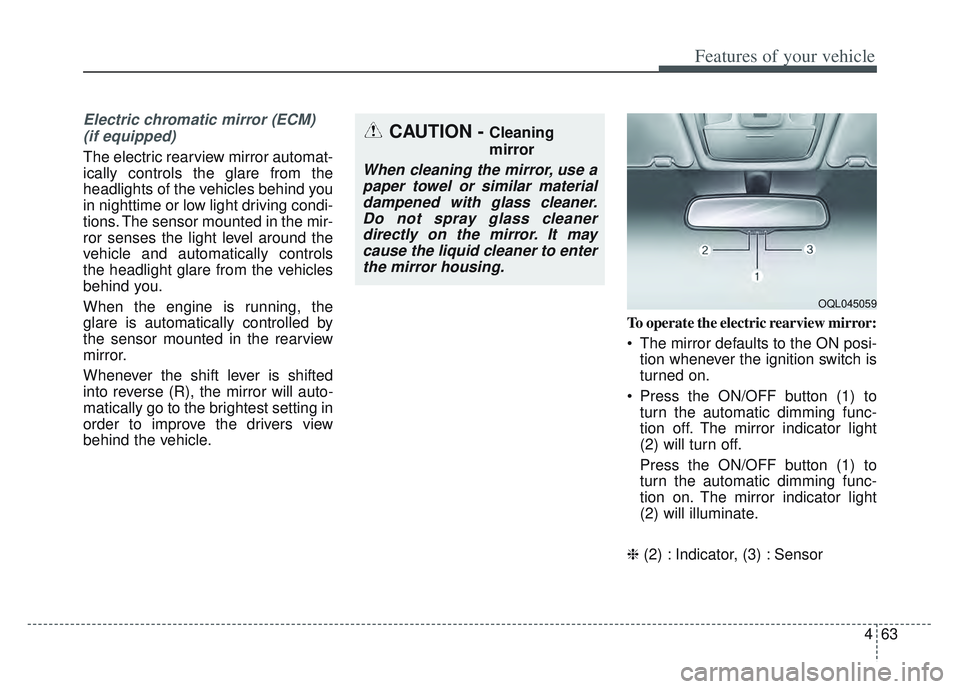
Press the ON/OFF button (1) to turn the automatic dimming func-
tion off. The mirror indicator light
(2) will turn off.
Press the ON/OFF button (1) to
turn the automatic dimming func-
tion on. The mirror indicator light
(2) will illuminate.
❈ (2) : Indicator, (3) : Sensor
CAUTION - Cleaning
mirror
When cleaning the mirror, use a
paper towel or similar materialdampened with glass cleaner.Do not spray glass cleanerdirectly on the mirror. It maycause the liquid cleaner to enterthe mirror housing.
OQL045059
Page 203 of 630
Features of your vehicle
114
4
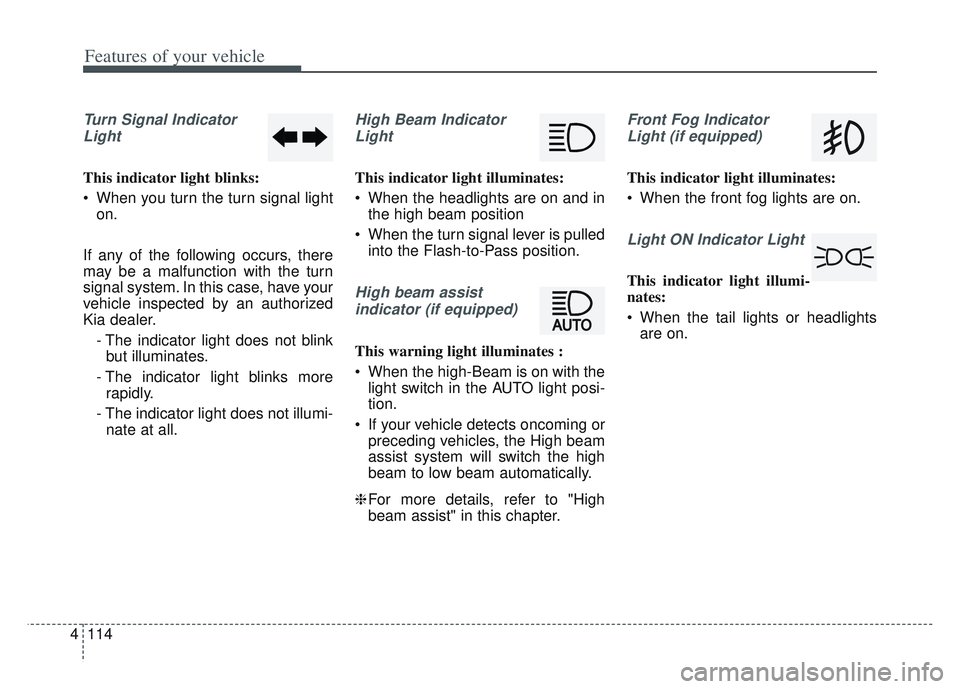
Turn Signal Indicator
Light
This indicator light blinks:
When you turn the turn signal light on.
If any of the following occurs, there
may be a malfunction with the turn
signal system. In this case, have your
vehicle inspected by an authorized
Kia dealer. - The indicator light does not blinkbut illuminates.
- The indicator light blinks more rapidly.
- The indicator light does not illumi- nate at all.
High Beam Indicator
Light
This indicator light illuminates:
When the headlights are on and in the high beam position
When the turn signal lever is pulled into the Flash-to-Pass position.
High beam assist
indicator (if equipped)
This warning light illuminates :
When the high-Beam is on with the light switch in the AUTO light posi-
tion.
If your vehicle detects oncoming or preceding vehicles, the High beam
assist system will switch the high
beam to low beam automatically.
❈ For more details, refer to "High
beam assist" in this chapter.
Front Fog Indicator
Light (if equipped)
This indicator light illuminates:
When the front fog lights are on.
Light ON Indicator Light
This indicator light illumi-
nates:
When the tail lights or headlights are on.
Page 217 of 630
Features of your vehicle
128
4
Parking & Tail light ( )
When the light switch is in the park-
ing light position, the tail, license and
instrument panel lights will turn ON.
Headlight position ( )
When the light switch is in the head-
light position, the head, tail, license
lights will turn ON.
✽ ✽
NOTICE
The ignition switch must be in the ON
position to turn on the headlights.
Auto light position
When the light switch is in the AUTO
light position, the taillights and head-
lights will turn ON or OFF automati-
cally depending on the amount of
light outside the vehicle.
When the light switch is positioned at
an auto light position, at first, the
wiper will turn on and then, after 5
seconds the head lamp will turn on
automatically.
If the head lamp has been turned on
due to this function of the vehicle, the
head lamp will turn off 60 seconds
after the wiper has been turned off.
OQL048606NOQL048607NOQL048605N
Page 219 of 630
Features of your vehicle
130
4
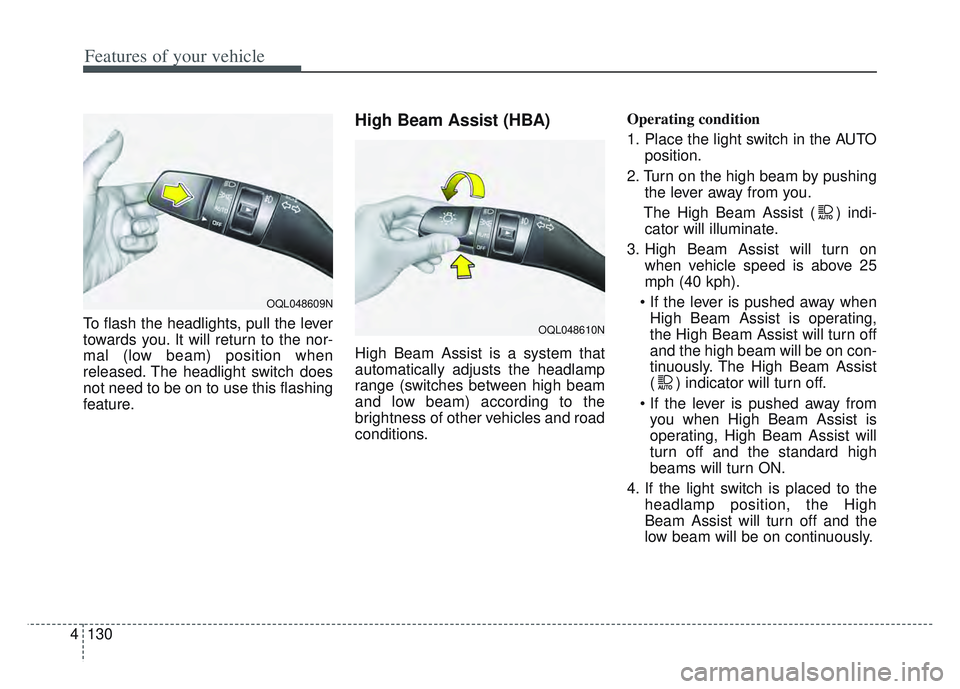
To flash the headlights, pull the lever
towards you. It will return to the nor-
mal (low beam) position when
released. The headlight switch does
not need to be on to use this flashing
feature.
High Beam Assist (HBA)
High Beam Assist is a system that
automatically adjusts the headlamp
range (switches between high beam
and low beam) according to the
brightness of other vehicles and road
conditions. Operating condition
1. Place the light switch in the AUTO
position.
2. Turn on the high beam by pushing the lever away from you.
The High Beam Assist ( ) indi- cator will illuminate.
3. High Beam Assist will turn on when vehicle speed is above 25
mph (40 kph).
High Beam Assist is operating,
the High Beam Assist will turn off
and the high beam will be on con-
tinuously. The High Beam Assist
( ) indicator will turn off.
you when High Beam Assist is
operating, High Beam Assist will
turn off and the standard high
beams will turn ON.
4. If the light switch is placed to the headlamp position, the High
Beam Assist will turn off and the
low beam will be on continuously.
OQL048609N
OQL048610N
Page 231 of 630
Features of your vehicle
142
4
WELCOME SYSTEM (IF EQUIPPED)
Headlight (Headlamp) escort
function
The headlights (and/or taillights)
remain on for approximately 5 min-
utes after the ignition key is removed
or turned to the ACC or LOCK posi-
tion. However, if the driver’s door is
opened and closed, the headlights
are turned off after 15 seconds.
The headlights can be turned off by
pressing the lock button on the trans-
mitter or smart key twice or turning
off the light switch from the headlight
or Auto light position.
Interior light
When the interior light switch is in the
DOOR position and all doors (and
trunk) are locked and closed, the
room lamp will come on for 30 sec-
onds if any of the below is performed.
Without smart key system
- When the door unlock button ispressed on the transmitter.
With the smart key system - When the door unlock button ispressed on the smart key.
- When the button of the outside door handle is pressed.
At this time, if you press the door lock
button, the lamps will turn off imme-
diately.
Pocket lamp (if equipped)
When all doors are locked and
closed, the pocket lamp will come on
for 15 seconds if any of the below is
performed.
With the smart key system - When the door unlock button ispressed on the smart key.
- When the button of the outside door handle is pressed.
At this time, if you press the door lock
button, the lamps will turn off imme-
diately.
Page 353 of 630
Driving your vehicle
68
5
The front view camera is damaged.
The brightness outside is too low
such as when the headlamps are
not on at night or the vehicle is
going through a tunnel.
The shadow is on the road by a median strip, trees, etc.
The vehicle drives through a toll- gate.
The windshield glass is fogged up; a clear view of the road is obstruct-
ed.
The rear part of the vehicle in front is not normally visible. (the vehicle
turns in other direction or the vehi-
cle is overturned.)
The adverse road conditions cause excessive vehicle vibrations while
driving
The sensor recognition changes suddenly when passing over a
The vehicle in front
is moving longitudinally to the driv-
ing direction The vehicle in front is stopped lon-
gitudinally
The vehicle in front is driving towards your vehicle or reversing
You are on a roundabout and the vehicle in front circles
It is difficult to secure the field of view of the front view camera such
as backlight, reflected light, and
darkness.
When the front camera is blocked by continuous washer spray and
wiper operation.
The vehicle in front is a special purpose vehicle, a trailer, or a truck
loading with unusual shape of lug-
gage.
The ambient light is too high or low.
The front view camera is contami- nated by front glass tinting, attach-
ing film, water proof coating, dam-
aged, foreign material such as a
sticker, worm, etc. If not using headlamp or using
weak light in the night or in a tun-
nel.
Backlight is shining in the driving direction of the vehicle. (Including
oncoming vehicle headlights.)
When the rear part of the front vehicle is small or low.
When a trailer or other vehicle is towing the front vehicle.
When the ground clearance of the front vehicle is high.
When a front vehicle makes sud- den lane changes unexpectedly.
Page 370 of 630
585
Driving your vehicle
If not using headlamp or usingweak light in the night or in a tun-
nel.
Backlight is shining in the driving direction of the vehicle. (Including
oncoming vehicle headlights.)
When the rear part of the front vehicle is small or low.
When a trailer or other vehicle is towing the front vehicle.
When the ground clearance of the front vehicle is high.
When a front vehicle makes sud- den lane changes unexpectedly.
- Driving on a curve
The performance of Forward
Collision-Avoidance Assist may be
limited when driving on a curved
road. The front camera or radar sensor
recognition system may not detect
the vehicle or pedestrian traveling in
front on a curved road.
This may result in no alarm and brak-
ing when necessary.
Always pay attention to road and
driving conditions, and if necessary,
depress the brake pedal to reduce
your driving speed in order to main-
tain a safe distance.
OHM059349L
OHM059350L