Page 126 of 630
437
Features of your vehicle
Smart Power Liftgate
(if equipped)
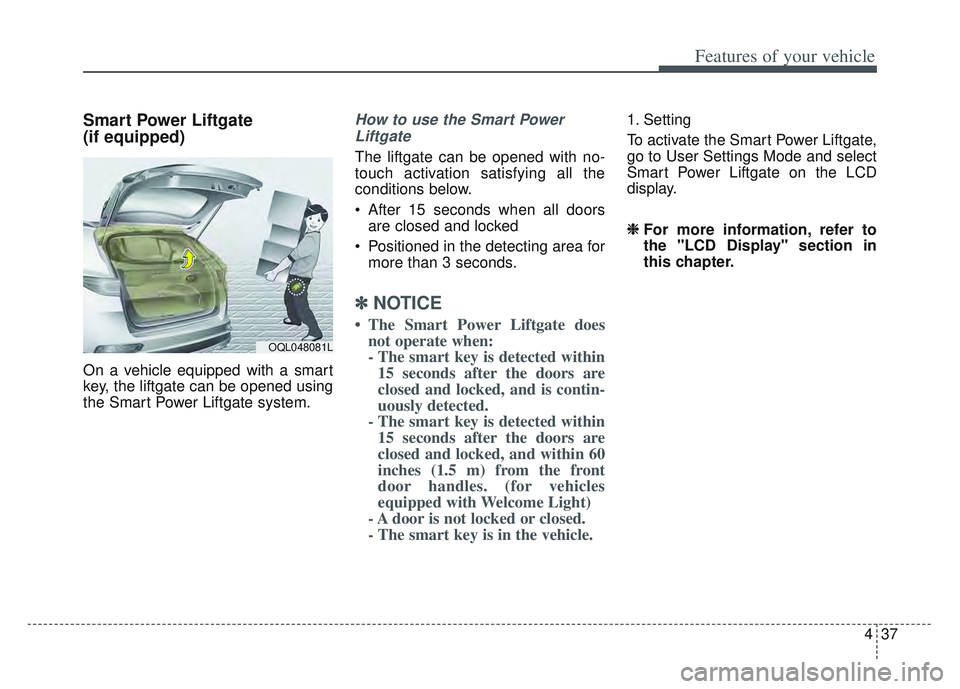
On a vehicle equipped with a smart
key, the liftgate can be opened using
the Smart Power Liftgate system.
How to use the Smart PowerLiftgate
The liftgate can be opened with no-
touch activation satisfying all the
conditions below.
After 15 seconds when all doors are closed and locked
Positioned in the detecting area for more than 3 seconds.
✽ ✽ NOTICE
• The Smart Power Liftgate does
not operate when:
- The smart key is detected within15 seconds after the doors are
closed and locked, and is contin-
uously detected.
- The smart key is detected within 15 seconds after the doors are
closed and locked, and within 60
inches (1.5 m) from the front
door handles. (for vehicles
equipped with Welcome Light)
- A door is not locked or closed.
- The smart key is in the vehicle.
1. Setting
To activate the Smart Power Liftgate,
go to User Settings Mode and select
Smart Power Liftgate on the LCD
display.
❈ ❈ For more information, refer to
the "LCD Display" section in
this chapter.
OQL048081L
Page 130 of 630
441
Features of your vehicle
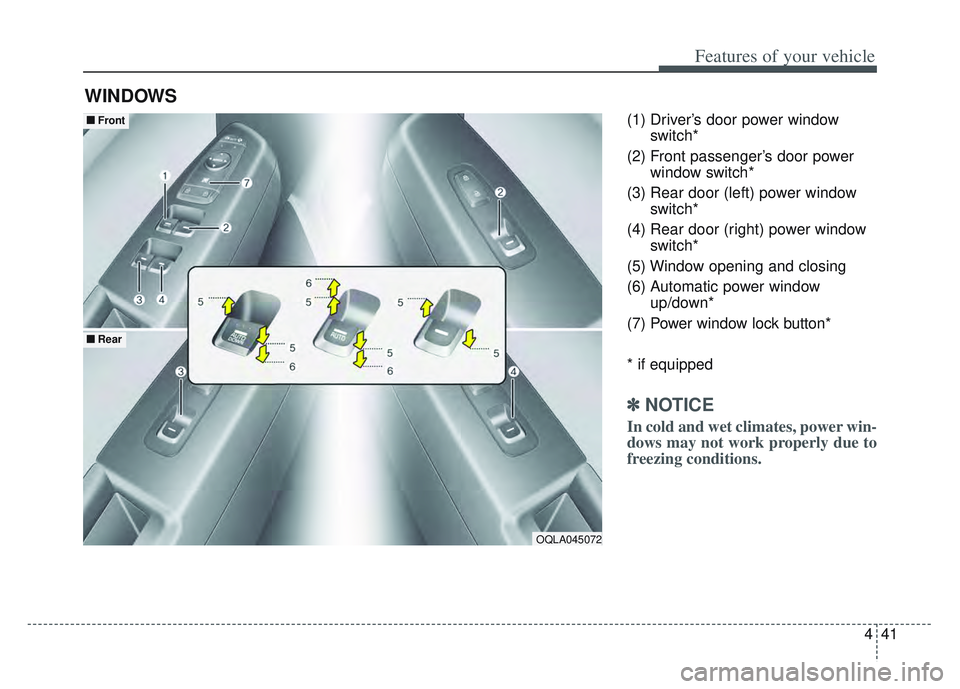
(1) Driver’s door power windowswitch*
(2) Front passenger’s door power window switch*
(3) Rear door (left) power window switch*
(4) Rear door (right) power window switch*
(5) Window opening and closing
(6) Automatic power window up/down*
(7) Power window lock button*
* if equipped
✽ ✽ NOTICE
In cold and wet climates, power win-
dows may not work properly due to
freezing conditions.
WINDOWS
OQLA045072
■ ■ Front
■ ■Rear
Page 131 of 630
Features of your vehicle
42
4
Power windows
The ignition switch must be in the ON
position for power windows to operate.
Each door has a power window
switch that controls the door's win-
dow. The driver has a power window
lock button which can block the oper-
ation of rear seat windows. The
power windows can be operated for
approximately 30 seconds after the
ignition key is removed or turned to
the ACC or LOCK (or OFF) position.
If the front doors are opened; howev-
er, the power windows cannot be
operated even within the 30 second
period.
If the window cannot be close
because it is blocked by objects,
remove the objects and close the
window.
✽ ✽
NOTICE
While driving with the rear windows
down or with the sunroof (if
equipped) in an open (or partially
open) position, your vehicle may
demonstrate a wind buffeting or
pulsation noise. This noise is a nor-
mal occurrence and can be reduced
or eliminated by taking the follow-
ing actions. If the noise occurs with
one or both of the rear windows
down, partially lower both front
windows approximately one inch. If
you experience the noise with the
sunroof open, slightly reduce the
size of the sunroof opening.
Window opening and closing
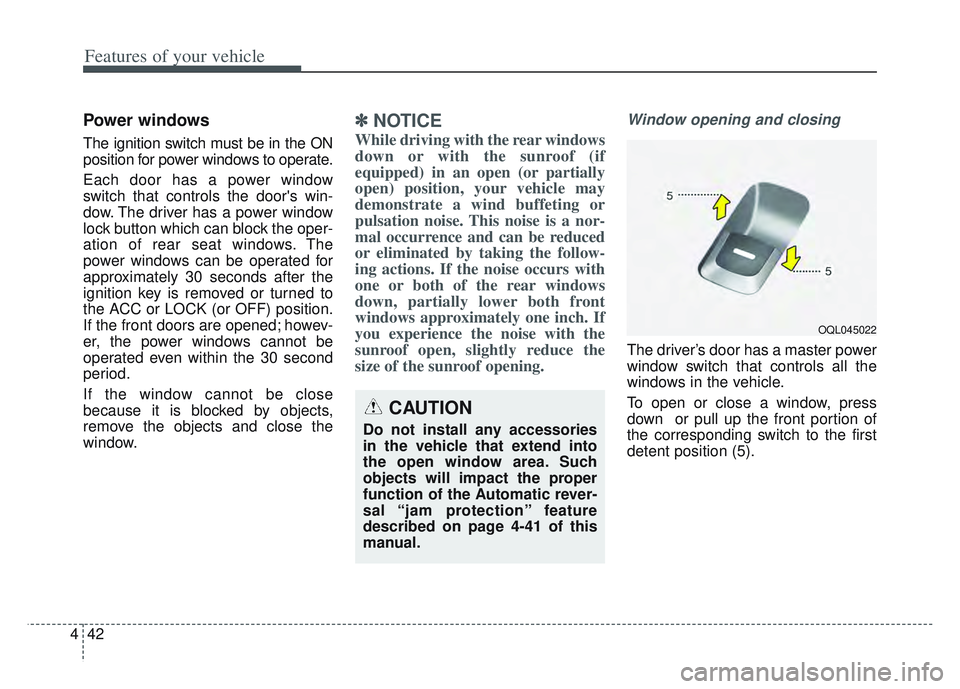
The driver’s door has a master power
window switch that controls all the
windows in the vehicle.
To open or close a window, press
down or pull up the front portion of
the corresponding switch to the first
detent position (5).
OQL045022
CAUTION
Do not install any accessories
in the vehicle that extend into
the open window area. Such
objects will impact the proper
function of the Automatic rever-
sal “jam protection” feature
described on page 4-41 of this
manual.
Page 134 of 630
445
Features of your vehicle
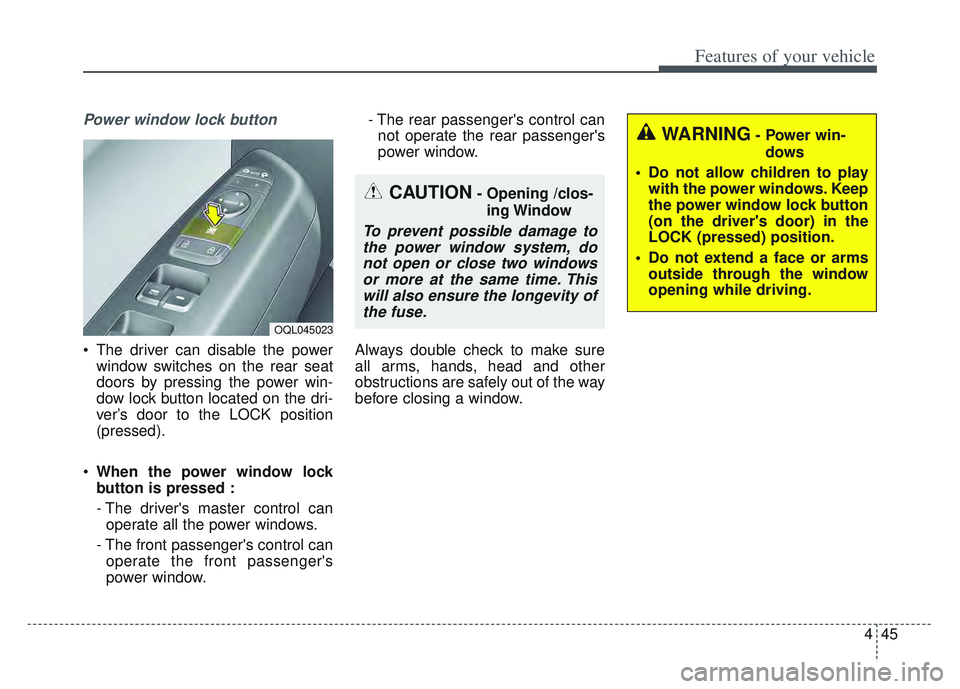
Power window lock button
The driver can disable the powerwindow switches on the rear seat
doors by pressing the power win-
dow lock button located on the dri-
ver’s door to the LOCK position
(pressed).
When the power window lock
button is pressed :
- The driver's master control can
operate all the power windows.
- The front passenger's control can operate the front passenger's
power window. - The rear passenger's control can
not operate the rear passenger's
power window.
Always double check to make sure
all arms, hands, head and other
obstructions are safely out of the way
before closing a window.
CAUTION- Opening /clos- ing Window
To prevent possible damage tothe power window system, donot open or close two windowsor more at the same time. Thiswill also ensure the longevity ofthe fuse.
OQL045023
WARNING- Power win-
dows
Do not allow children to play with the power windows. Keep
the power window lock button
(on the driver's door) in the
LOCK (pressed) position.
Do not extend a face or arms outside through the window
opening while driving.
Page 141 of 630

Features of your vehicle
52
4
If your vehicle is equipped with a
sunroof, you can slide or tilt your
sunroof with the sunroof control lever
located on the overhead console.
The sunroof can be operated for
approximately 30 seconds after the
ignition key is removed or turned to
the ACC or LOCK (or OFF) position.
However, if the front door is opened,
the sunroof cannot be operated even
within the 30 second period. In cold and wet climates, the sunroof
may not work properly due to freez-
ing conditions.
After the vehicle is washed or in a
rainstorm, be sure to wipe off any
water that is on the sunroof before
operating it.The sunroof cannot slide when it is in
the tilt position nor can it be tilted
while in an open or slide position.
PANORAMIC SUNROOF (IF EQUIPPED)
CAUTION- Sunroof
control lever
Do not continue to press the sun-
roof control lever after the sun-roof is fully opened, closed, ortilted. Damage to the motor orsystem components could occur.
CAUTION - Sunroof motor
damage
To prevent damage to the sun-roof, periodically remove anydirt that may accumulate on theguide rail.
WARNING- Roof cargo
Do not operate the sun roof
while using the roof rack to
transport cargo. This may cause
the cargo to come loose and
distract the driver.
OQL045028
WARNING
Never adjust the sunroof or
sunshade while driving. This
could result in loss of control
and an accident that may cause
death, serious injury, or proper-
ty damage.
Page 216 of 630
4127
Features of your vehicle
Battery saver function
The purpose of this feature is toprevent the battery from being dis-
charged if the lights are left in the
ON position. The system automati-
cally shuts off the parking lights 30
seconds after the ignition key is
removed and the driver’s door is
opened and closed.
With this feature, the parking lights will turn off automatically if the driver
parks on the side of the road at night
and opens the driver’s side door.
If necessary, to keep the parking
lights on when the ignition key is
removed, perform the following:
1) Open the driver-side door.
2) Turn the parking lights OFF and ON again using the light switch
on the steering column.
Daytime running light
(if equipped)
The Daytime Running Lights (DRL)
can make it easier for others to see the
front of your vehicle during the day.
DRL can be helpful in many different
driving conditions, and it is especially
helpful after dawn and before sunset.
The DRL system turns OFF when:
1. The headlight switch is ON.
2. The engine is OFF.
3. Engaging the Parking Brake
4. The front fog light is ON.
Lighting control
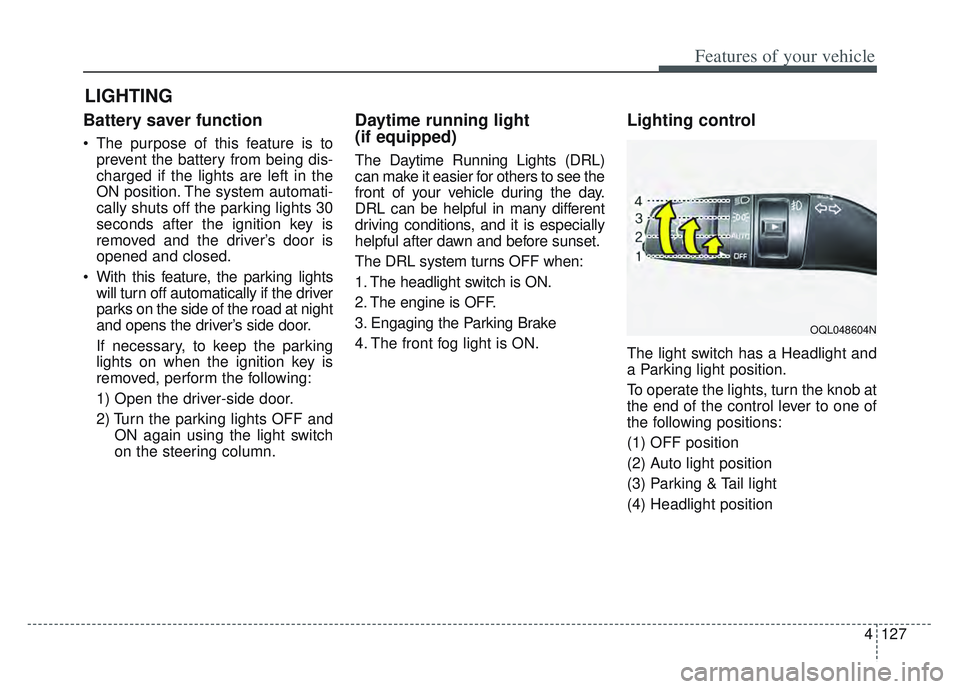
The light switch has a Headlight and
a Parking light position.
To operate the lights, turn the knob at
the end of the control lever to one of
the following positions:
(1) OFF position
(2) Auto light position
(3) Parking & Tail light
(4) Headlight position
LIGHTING
OQL048604N
Page 229 of 630
Features of your vehicle
140
4
Map lamp
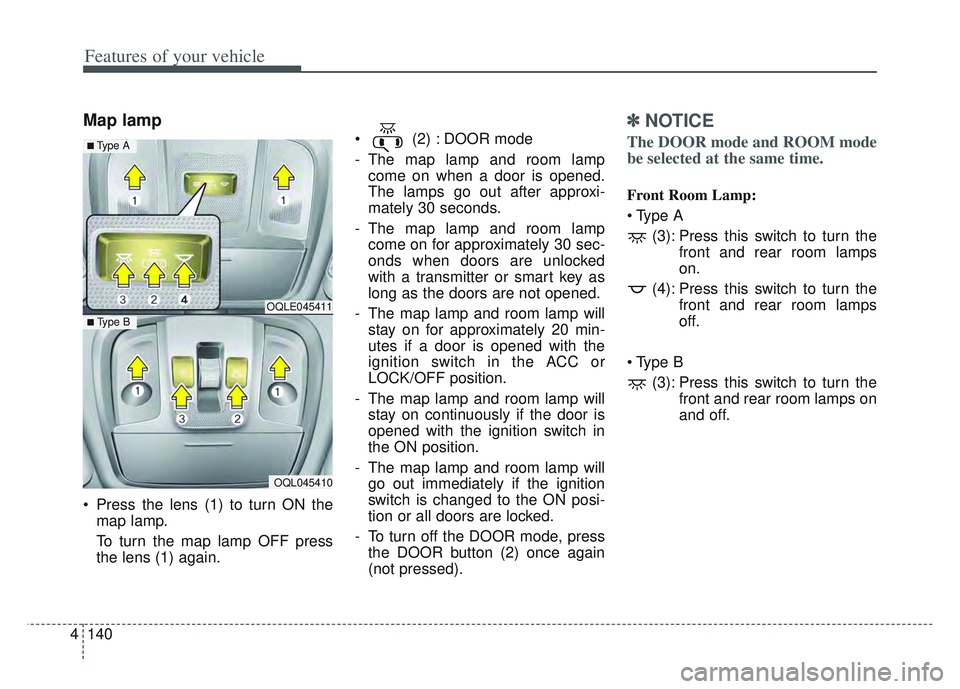
Press the lens (1) to turn ON the
map lamp.
To turn the map lamp OFF press
the lens (1) again. (2) : DOOR mode
- The map lamp and room lamp
come on when a door is opened.
The lamps go out after approxi-
mately 30 seconds.
- The map lamp and room lamp come on for approximately 30 sec-
onds when doors are unlocked
with a transmitter or smart key as
long as the doors are not opened.
- The map lamp and room lamp will stay on for approximately 20 min-
utes if a door is opened with the
ignition switch in the ACC or
LOCK/OFF position.
- The map lamp and room lamp will stay on continuously if the door is
opened with the ignition switch in
the ON position.
- The map lamp and room lamp will go out immediately if the ignition
switch is changed to the ON posi-
tion or all doors are locked.
- To turn off the DOOR mode, press the DOOR button (2) once again
(not pressed).
✽ ✽ NOTICE
The DOOR mode and ROOM mode
be selected at the same time.
Front Room Lamp:
(3): Press this switch to turn the front and rear room lamps
on.
(4): Press this switch to turn the front and rear room lamps
off.
(3): Press this switch to turn the front and rear room lamps on
and off.
OQLE045411
OQL045410
■ Type B
■ Type A
Page 270 of 630
4181
Features of your vehicle
Wireless smart phone charg-
ing system (if equipped)
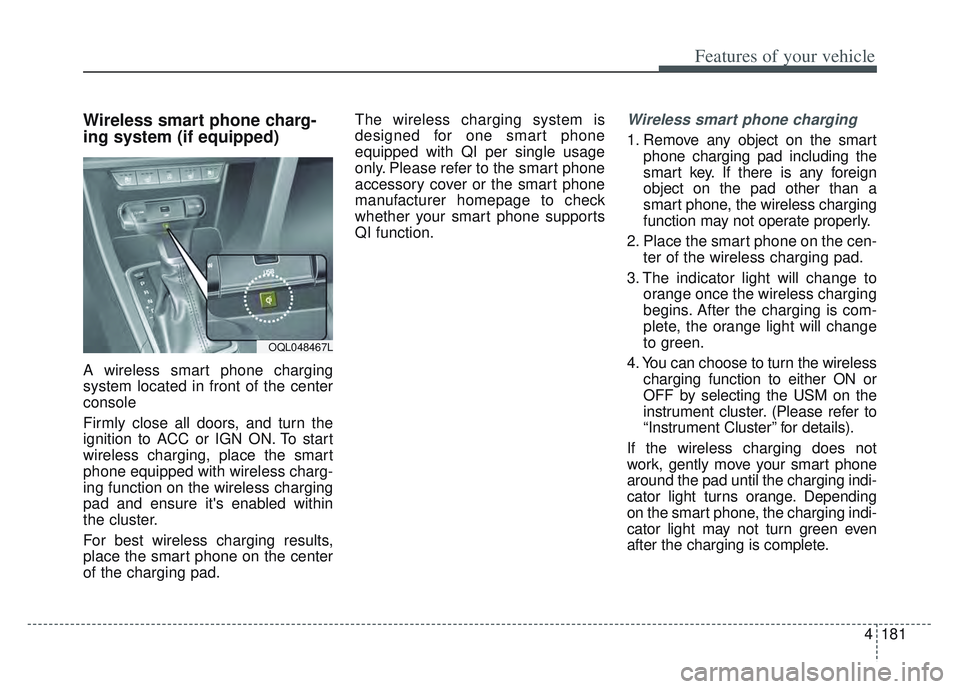
A wireless smart phone charging
system located in front of the center
console
Firmly close all doors, and turn the
ignition to ACC or IGN ON. To start
wireless charging, place the smart
phone equipped with wireless charg-
ing function on the wireless charging
pad and ensure it's enabled within
the cluster.
For best wireless charging results,
place the smart phone on the center
of the charging pad.The wireless charging system is
designed for one smart phone
equipped with QI per single usage
only. Please refer to the smart phone
accessory cover or the smart phone
manufacturer homepage to check
whether your smart phone supports
QI function.
Wireless smart phone charging
1. Remove any object on the smart
phone charging pad including the
smart key. If there is any foreign
object on the pad other than a
smart phone, the wireless charging
function may not operate properly.
2. Place the smart phone on the cen- ter of the wireless charging pad.
3. The indicator light will change to orange once the wireless charging
begins. After the charging is com-
plete, the orange light will change
to green.
4. You can choose to turn the wireless charging function to either ON or
OFF by selecting the USM on the
instrument cluster. (Please refer to
“Instrument Cluster” for details).
If the wireless charging does not
work, gently move your smart phone
around the pad until the charging indi-
cator light turns orange. Depending
on the smart phone, the charging indi-
cator light may not turn green even
after the charging is complete.
OQL048467L