Page 81 of 630
Safety features of your vehicle
64
3
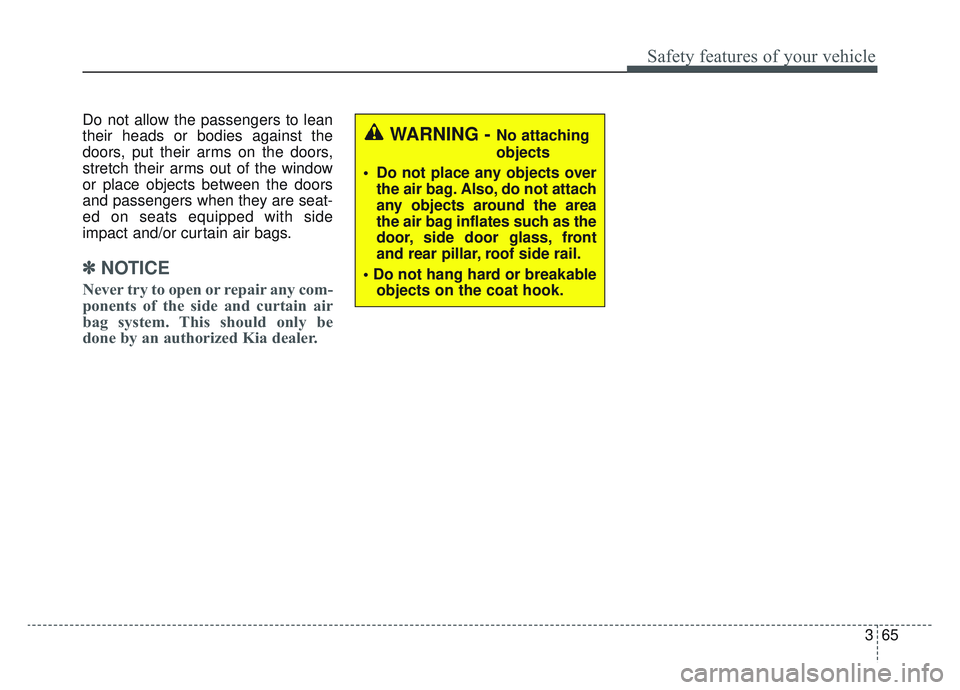
Curtain air bag
❈ The actual air bags in the vehicle may differ
from the illustration.
Curtain air bags are located along
both sides of the roof rails above the
front and rear doors.
They are designed to help protect
occupants in certain side impacts
and to help prevent them from eject-
ing out of the vehicle as a result of a
rollover, especially when the seat-
belts are also in use.
The curtain air bags are designed to deploy during certain side impact
collisions, depending on the crash
severity impact. However, when
side deployment threshold is satis-
fied at front-impact, curtain air bags
may deploy.
The curtain air bags may deploy on the side of the impact.
Also, the curtain air bags on both sides of the vehicle will deploy in
certain rollover situations.
The curtain air bags are not designed to deploy in all side
impact or rollover situations.
OQLA035042
OQLA035043
WARNING - No attaching
objects
Do not place any objects over the air bag or between the air
bag and yourself. Also, do not
attach any objects around the
area the air bag inflates such
as the door, side door glass,
front and rear pillar.
Do not place any objects between the door and the
seat. They may become dan-
gerous projectiles if the side
air bag inflates.
Never place or insert any object into any small opening
near side airbag labels
attached to the vehicle seats.
When the air bag deploys, the
object may affect the deploy-
ment and result in unexpected
accident or bodily harm.
Do not install any accessories on the side or near the side air
bags.
Page 82 of 630
365
Safety features of your vehicle
Do not allow the passengers to lean
their heads or bodies against the
doors, put their arms on the doors,
stretch their arms out of the window
or place objects between the doors
and passengers when they are seat-
ed on seats equipped with side
impact and/or curtain air bags.
✽ ✽NOTICE
Never try to open or repair any com-
ponents of the side and curtain air
bag system. This should only be
done by an authorized Kia dealer.
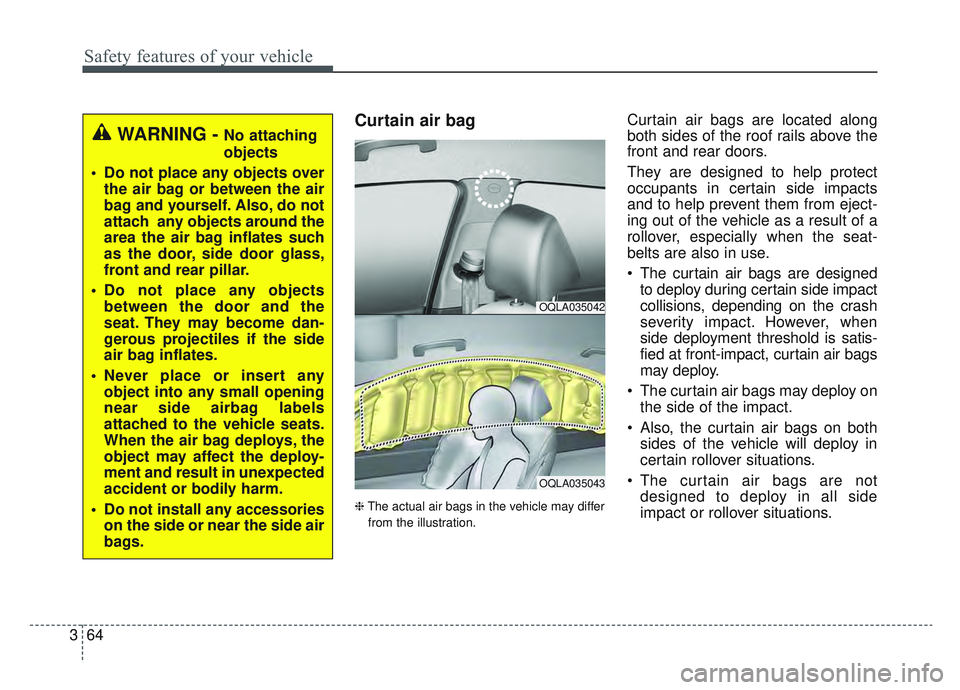
WARNING - No attaching
objects
Do not place any objects over the air bag. Also, do not attach
any objects around the area
the air bag inflates such as the
door, side door glass, front
and rear pillar, roof side rail.
objects on the coat hook.
Page 83 of 630
Safety features of your vehicle
66
3
Why didn’t my air bag go off in a
collision? (Inflation and non-infla-
tion conditions of the air bag)
There are many types of accidents in
which the air bag would not be
expected to provide additional pro-
tection.
These include rear impacts, second
or third collisions in multiple impact
accidents, as well as low speed
impacts.Air bag collision sensors
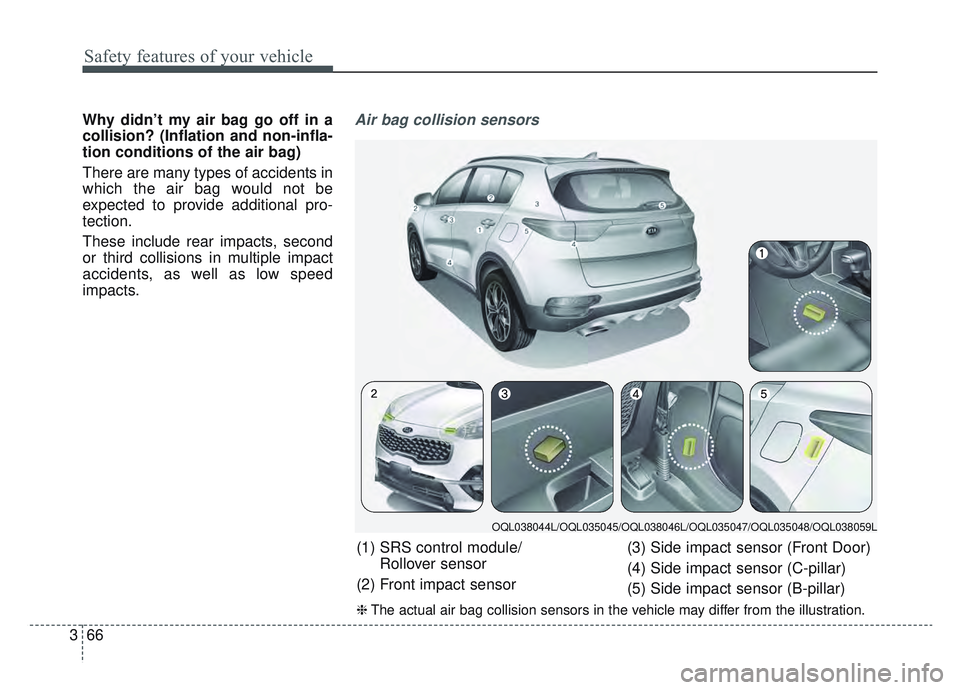
(1) SRS control module/
Rollover sensor
(2) Front impact sensor (3) Side impact sensor (Front Door)
(4) Side impact sensor (C-pillar)
(5) Side impact sensor (B-pillar)
❈
The actual air bag collision sensors in the vehicle may differ from the illustration.
OQL038044L/OQL035045/OQL038046L/OQL035047/OQL035048/OQL038059L
Page 84 of 630
367
Safety features of your vehicle
Problems may arise if the sensor
installation angles are changed due
to the deformation of the front
bumper, front end module, body or
front doors where side collision sen-
sors are installed. Have the vehicle
checked and repaired by an author-
ized Kia dealer.
Installing bumper guards (or side
step or running board) or replacing a
bumper (or front door module) with
non-genuine parts may adversely
affect your vehicle’s collision and air
bag deployment performance.Air bag inflation conditions
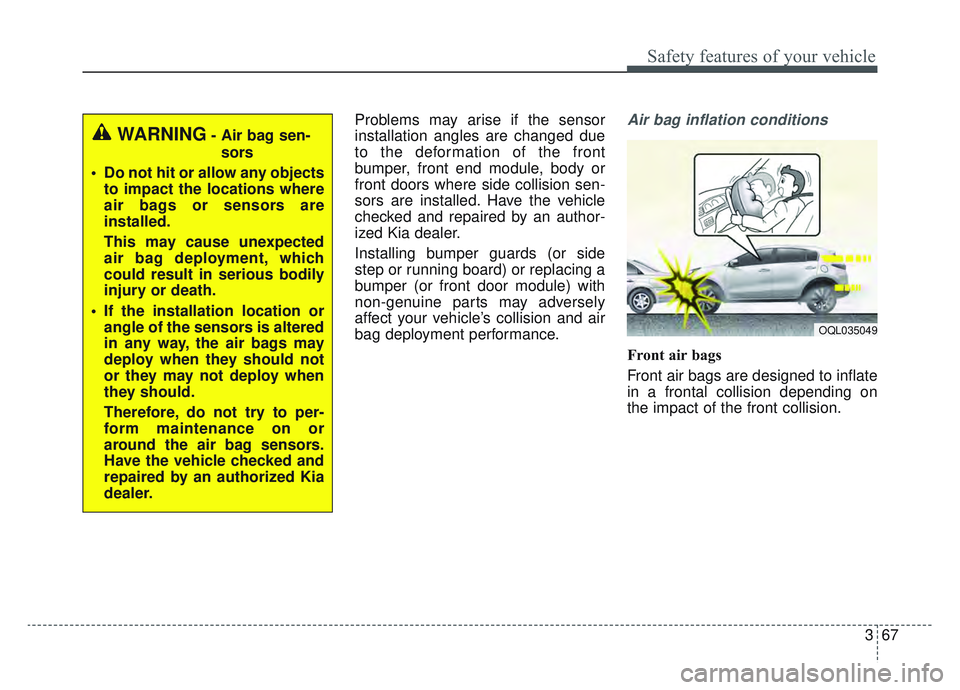
Front air bags
Front air bags are designed to inflate
in a frontal collision depending on
the impact of the front collision.
OQL035049
WARNING- Air bag sen-sors
Do not hit or allow any objects to impact the locations where
air bags or sensors are
installed.
This may cause unexpected
air bag deployment, which
could result in serious bodily
injury or death.
If the installation location or angle of the sensors is altered
in any way, the air bags may
deploy when they should not
or they may not deploy when
they should.
Therefore, do not try to per-
form maintenance on or
around the air bag sensors.
Have the vehicle checked and
repaired by an authorized Kia
dealer.
Page 102 of 630
413
Features of your vehicle
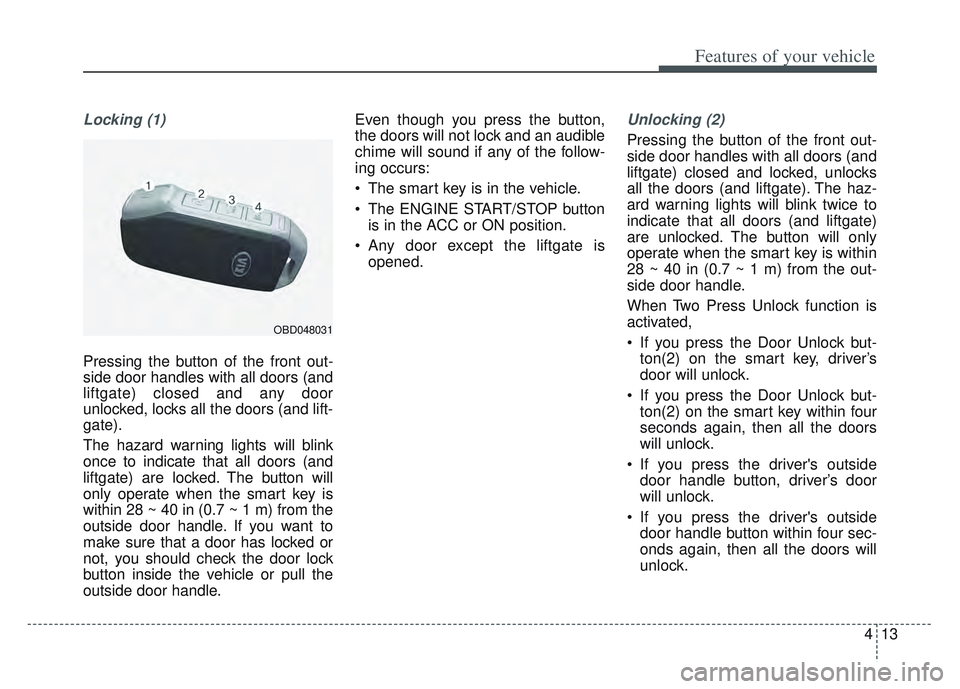
Locking (1)
Pressing the button of the front out-
side door handles with all doors (and
liftgate) closed and any door
unlocked, locks all the doors (and lift-
gate).
The hazard warning lights will blink
once to indicate that all doors (and
liftgate) are locked. The button will
only operate when the smart key is
within 28 ~ 40 in (0.7 ~ 1 m) from the
outside door handle. If you want to
make sure that a door has locked or
not, you should check the door lock
button inside the vehicle or pull the
outside door handle. Even though you press the button,
the doors will not lock and an audible
chime will sound if any of the follow-
ing occurs:
The smart key is in the vehicle.
The ENGINE START/STOP button
is in the ACC or ON position.
Any door except the liftgate is opened.
Unlocking (2)
Pressing the button of the front out-
side door handles with all doors (and
liftgate) closed and locked, unlocks
all the doors (and liftgate). The haz-
ard warning lights will blink twice to
indicate that all doors (and liftgate)
are unlocked. The button will only
operate when the smart key is within
28 ~ 40 in (0.7 ~ 1 m) from the out-
side door handle.
When Two Press Unlock function is
activated,
If you press the Door Unlock but-ton(2) on the smart key, driver’s
door will unlock.
If you press the Door Unlock but- ton(2) on the smart key within four
seconds again, then all the doors
will unlock.
If you press the driver's outside door handle button, driver’s door
will unlock.
If you press the driver's outside door handle button within four sec-
onds again, then all the doors will
unlock.
OBD048031
Page 109 of 630
Features of your vehicle
20
4
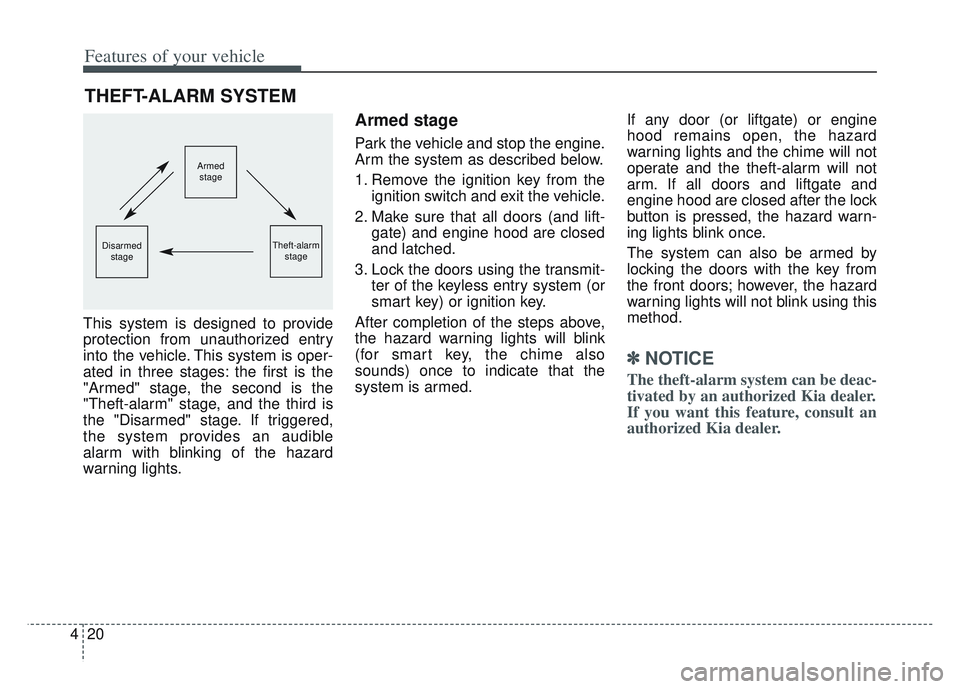
This system is designed to provide
protection from unauthorized entry
into the vehicle. This system is oper-
ated in three stages: the first is the
"Armed" stage, the second is the
"Theft-alarm" stage, and the third is
the "Disarmed" stage. If triggered,
the system provides an audible
alarm with blinking of the hazard
warning lights.
Armed stage
Park the vehicle and stop the engine.
Arm the system as described below.
1. Remove the ignition key from the
ignition switch and exit the vehicle.
2. Make sure that all doors (and lift- gate) and engine hood are closed
and latched.
3. Lock the doors using the transmit- ter of the keyless entry system (or
smart key) or ignition key.
After completion of the steps above,
the hazard warning lights will blink
(for smart key, the chime also
sounds) once to indicate that the
system is armed. If any door (or liftgate) or engine
hood remains open, the hazard
warning lights and the chime will not
operate and the theft-alarm will not
arm. If all doors and liftgate and
engine hood are closed after the lock
button is pressed, the hazard warn-
ing lights blink once.
The system can also be armed by
locking the doors with the key from
the front doors; however, the hazard
warning lights will not blink using this
method.
✽ ✽
NOTICE
The theft-alarm system can be deac-
tivated by an authorized Kia dealer.
If you want this feature, consult an
authorized Kia dealer.
THEFT-ALARM SYSTEM
Armed
stage
Theft-alarm stageDisarmedstage
Page 110 of 630
421
Features of your vehicle
Do not arm the system until all
passengers have left the vehicle. If
the system is armed while a pas-
senger(s) remains in the vehicle,
the alarm may be activated when
the remaining passenger(s) leave
the vehicle. If any door (or liftgate
) or engine hood is opened within
30 seconds after the system
enters the armed stage, the sys-
tem is disarmed to prevent an
unnecessary alarm.Theft-alarm stage
The alarm will be activated if any of
the following occurs while the system
is armed.
A front or rear door is opened with-out using the ignition key or trans-
mitter (or smart key).
The liftgate is opened without using the transmitter (or smart key).
The engine hood is opened.
The horn will sound and the hazard
warning lights will blink continuously
for approximately 27 seconds, and
repeat the horn 3 times unless the
system is disarmed. To turn off the
system, unlock the doors with the igni-
tion key or transmitter (or smart key).
Disarmed stage
The system will be disarmed when
The doors (and liftgate) are unlocked with the transmitter (or
smart key) or the ignition key.
After depressing the unlock button,
the hazard warning lights will blink
and the chime will sound twice (in
smart key) to indicate that the sys-
tem is disarmed.
After depressing the unlock button, if
any door (or liftgate) is not opened
within 30 seconds, the system will be
rearmed.
Page 114 of 630
425
Features of your vehicle
To open a door, pull the door handle(2) outward.
If the inner door handle of the dri- ver’s (or front passenger’s) door is
pulled when the door lock button is
in the lock position, the button will
unlock and the door will open. (if
equipped)
Front doors cannot be locked if the ignition key is in the ignition switch
and any front door is opened.
Doors cannot be locked if the smart key is in the vehicle and an
door is open. If a power door lock ever fails to func-
tion while you are in the vehicle, try
one or more of the following tech-
niques to exit:
Operate the door unlock feature
repeatedly (both electronic and
manual) while simultaneously
pulling on the door handle.
Operate the other door locks and handles, front and rear.
Lower a front window and use the key to unlock the door from out-
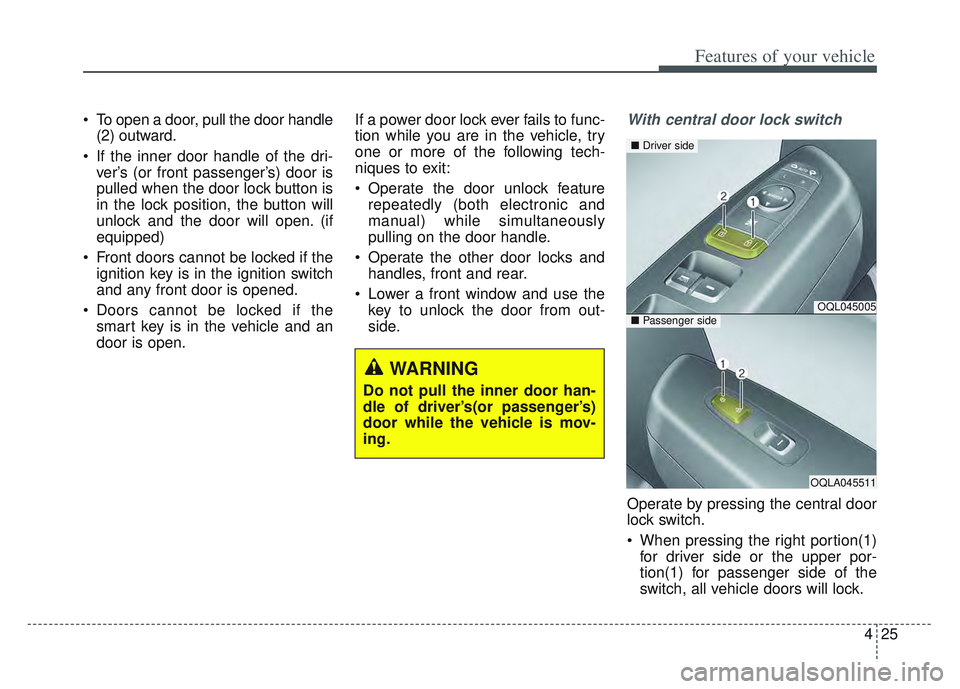
side.With central door lock switch
Operate by pressing the central door
lock switch.
When pressing the right portion(1)for driver side or the upper por-
tion(1) for passenger side of the
switch, all vehicle doors will lock.
OQL045005
OQLA045511
■ Driver side
■Passenger side
WARNING
Do not pull the inner door han-
dle of driver’s(or passenger’s)
door while the vehicle is mov-
ing.