2022 KIA RIO headlight
[x] Cancel search: headlightPage 81 of 528
Instrument cluster . . . . . . . . . . . . . . . . . . . . . . . . . 4-51
• Instrument Cluster Control . . . . . . . . . . . . . . . . . . . . 4-52
• LCD Display Control . . . . . . . . . . . . . . . . . . . . . . . . . 4-52
• Gauges . . . . . . . . . . . . . . . . . . . . . . . . . . . . . . . . . . . . \
. 4-53
• Transmission Shift Indicator . . . . . . . . . . . . . . . . . . . 4-57
Trip computer . . . . . . . . . . . . . . . . . . . . . . . . . . . . . 4-58
• Trip information (Trip computer) . . . . . . . . . . . . . . . 4-58
• Service Mode (For type A cluster) . . . . . . . . . . . . . . . 4-63
LCD display (For Type B cluster) . . . . . . . . . . . . 4-64
• LCD Display Mode . . . . . . . . . . . . . . . . . . . . . . . . . . . 4-64
• Driving Assist mode. . . . . . . . . . . . . . . . . . . . . . . . . . . 4-65
• User Settings Mode (For type B cluster) . . . . . . . . . 4-66
• Warning messages (For type B cluster) . . . . . . . . . . 4-74
Warning and indicator lights . . . . . . . . . . . . . . . . 4-78
• Warning lights . . . . . . . . . . . . . . . . . . . . . . . . . . . . . . . 4-78
• Indicator Lights . . . . . . . . . . . . . . . . . . . . . . . . . . . . . . 4-86
Rear View Monitor (RVM) . . . . . . . . . . . . . . . . . . 4-90
• Rear View Monitor malfunction and limitations . . . 4-90
Lighting . . . . . . . . . . . . . . . . . . . . . . . . . . . . . . . . . . 4-92\
• Battery saver function. . . . . . . . . . . . . . . . . . . . . . . . . 4-92
• Headlight escort function . . . . . . . . . . . . . . . . . . . . . . 4-92
• Headlight welcome function . . . . . . . . . . . . . . . . . . . . 4-92
• Lighting control . . . . . . . . . . . . . . . . . . . . . . . . . . . . . . 4-93
• High beam operation. . . . . . . . . . . . . . . . . . . . . . . . . . 4-95
• High Beam Assist (HBA) . . . . . . . . . . . . . . . . . . . . . . 4-96• Turn signals and lane change signals . . . . . . . . . . . . 4-97
• Front fog light . . . . . . . . . . . . . . . . . . . . . . . . . . . . . . . 4-98
Wipers and washers . . . . . . . . . . . . . . . . . . . . . . . . 4-99
• Windshield wipers . . . . . . . . . . . . . . . . . . . . . . . . . . . 4-100
• Windshield washers (front) . . . . . . . . . . . . . . . . . . . 4-101
• Rear window wiper and washer switch (for 5 door) .
4-103
Interior light . . . . . . . . . . . . . . . . . . . . . . . . . . . . . 4-104
• Automatic turn off function . . . . . . . . . . . . . . . . . . . 4-104
• Map lamp . . . . . . . . . . . . . . . . . . . . . . . . . . . . . . . . . 4-104
• Room lamp . . . . . . . . . . . . . . . . . . . . . . . . . . . . . . . . . 4-105
• Trunk/Liftgate room lamp . . . . . . . . . . . . . . . . . . . . 4-107
• Glove box lamp . . . . . . . . . . . . . . . . . . . . . . . . . . . . . 4-107
• Vanity mirror lamp . . . . . . . . . . . . . . . . . . . . . . . . . . 4-108
Defroster . . . . . . . . . . . . . . . . . . . . . . . . . . . . . . . . 4-109
• Rear window defroster . . . . . . . . . . . . . . . . . . . . . . . 4-109
Manual climate control system . . . . . . . . . . . . . . 4-110
• Heating and air conditioning . . . . . . . . . . . . . . . . . . 4-111
• System operation . . . . . . . . . . . . . . . . . . . . . . . . . . . . 4-116
• Climate control air filter . . . . . . . . . . . . . . . . . . . . . . 4-118
• Checking the amount of air conditioner refrigerant
and compressor lubricant . . . . . . . . . . . . . . . . . . . . 4-119
• Air Conditioning refrigerant label . . . . . . . . . . . . . 4-120
• Activate upon Washer Fluid Use . . . . . . . . . . . . . . 4-121
4
SC PE USA 4.QXP 9/9/2021 6:01 PM Page 2
Page 127 of 528
Features of your vehicle
48
4
Inside rearview mirror
Adjust the rearview mirror so that the
center view through the rear window
is seen. Make this adjustment before
you start driving.
Do not place objects in the rear seat
which would interfere with your vision
through the rear window.
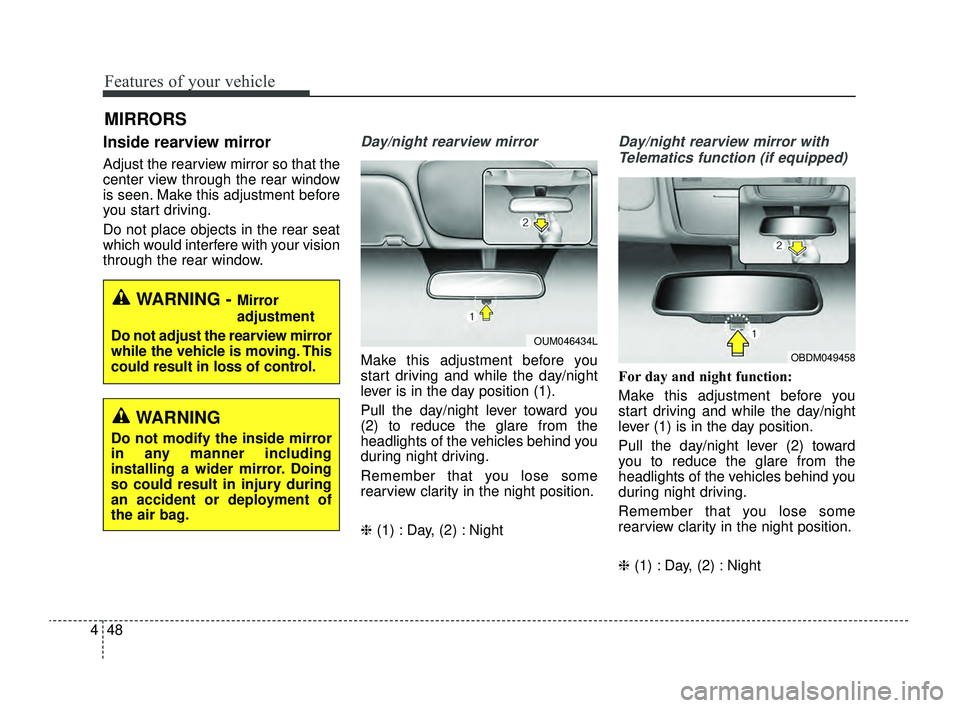
Day/night rearview mirror
Make this adjustment before you
start driving and while the day/night
lever is in the day position (1).
Pull the day/night lever toward you
(2) to reduce the glare from the
headlights of the vehicles behind you
during night driving.
Remember that you lose some
rearview clarity in the night position.
❈ (1) : Day, (2) : Night
Day/night rearview mirror with
Telematics function (if equipped)
For day and night function:
Make this adjustment before you
start driving and while the day/night
lever (1) is in the day position.
Pull the day/night lever (2) toward
you to reduce the glare from the
headlights of the vehicles behind you
during night driving.
Remember that you lose some
rearview clarity in the night position.
❈ (1) : Day, (2) : Night
MIRRORS
WARNING - Mirror
adjustment
Do not adjust the rearview mirror
while the vehicle is moving. This
could result in loss of control.
OUM046434L
WARNING
Do not modify the inside mirror
in any manner including
installing a wider mirror. Doing
so could result in injury during
an accident or deployment of
the air bag.
OBDM049458
SC PE USA 4.QXP 9/9/2021 6:03 PM Page 48
Page 131 of 528

Features of your vehicle
52
4
Instrument Cluster Control
Adjusting Instrument Cluster
Illumination
The instrument panel illumination
intensity can be adjusted by pressing
the control switch with the headlight
switch in any position when the igni-
tion switch or ENGINE
START/STOP button is in the ON
position. If you hold the illumination control
button (“+” or “-”), the brightness
will be changed continuously.
If the brightness reaches the maxi- mum or minimum level, an alarm
will sound.
LCD Display Control
The LCD Display modes can be
changed by using the control buttons
on the steering wheel.
OSC041047N
OJA040571L
OSC047127N
■ Type A
■ Type B
OSC041049N
OSC041048N
■ Type A
■ Type B
SC PE USA 4.QXP 9/9/2021 6:04 PM Page 52
Page 147 of 528
Features of your vehicle
68
4
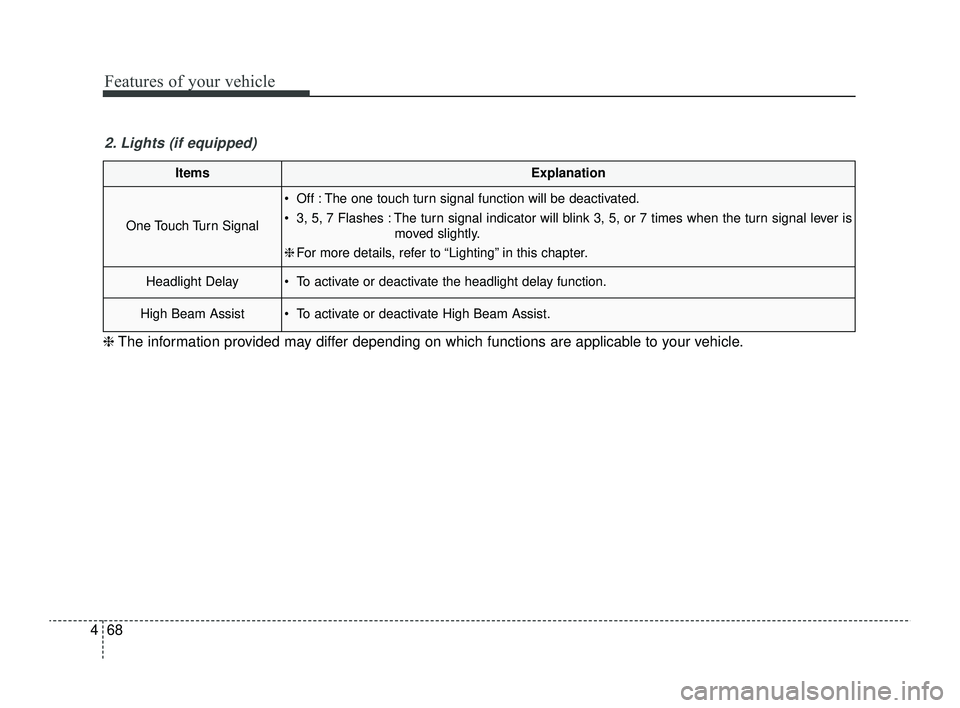
ItemsExplanation
One Touch Turn Signal
Off : The one touch turn signal function will be deactivated.
3, 5, 7 Flashes : The turn signal indicator will blink 3, 5, or 7 times when the turn signal lever is
moved slightly.
❈ For more details, refer to “Lighting” in this chapter.
Headlight Delay To activate or deactivate the headlight delay function.
High Beam Assist To activate or deactivate High Beam Assist.
2. Lights (if equipped)
❈ The information provided may differ depending on which functions are applicable to your vehicle.
SC PE USA 4.QXP 9/9/2021 6:05 PM Page 68
Page 156 of 528
477
Features of your vehicle
Shift to P or N to start engine (forsmart key system)
This warning message illuminates if you try to start the engine with
the shift lever not in the P (Park) or
N (Neutral) position.
✽ ✽ NOTICE
You can start the engine with the
shift lever in the N (Neutral) posi-
tion. But, for your safety, we recom-
mend that you start the engine with
the shift lever in the P (Park) posi-
tion.
Check headlight LED
(if equipped)
This warning message is displayed if there is a problem with the LED
headlight.
In this case, have your vehicle
inspected by an authorized Kia deal-
er.
SC PE USA 4.QXP 9/9/2021 6:05 PM Page 77
Page 167 of 528
Features of your vehicle
88
4
This indicator light illuminates for 2
seconds and goes off:
When the vehicle can not detect a
smart key which is in the vehicle
while the ENGINE START/STOP
Button is ON.
In this situation, have your vehicle
inspected by an authorized Kia
dealer.
This indicator light blinks:
When the battery of the smart key is weak.
- In this situation, you can not startthe engine. However, you can
start the engine if you press the
ENGINE START/STOP Button
with the smart key. (For more
details, refer to the “Starting the
Engine” section in Chapter 5.).
When there is a malfunction with the immobilizer system.
In this situation, have your vehicle
inspected by an authorized Kia
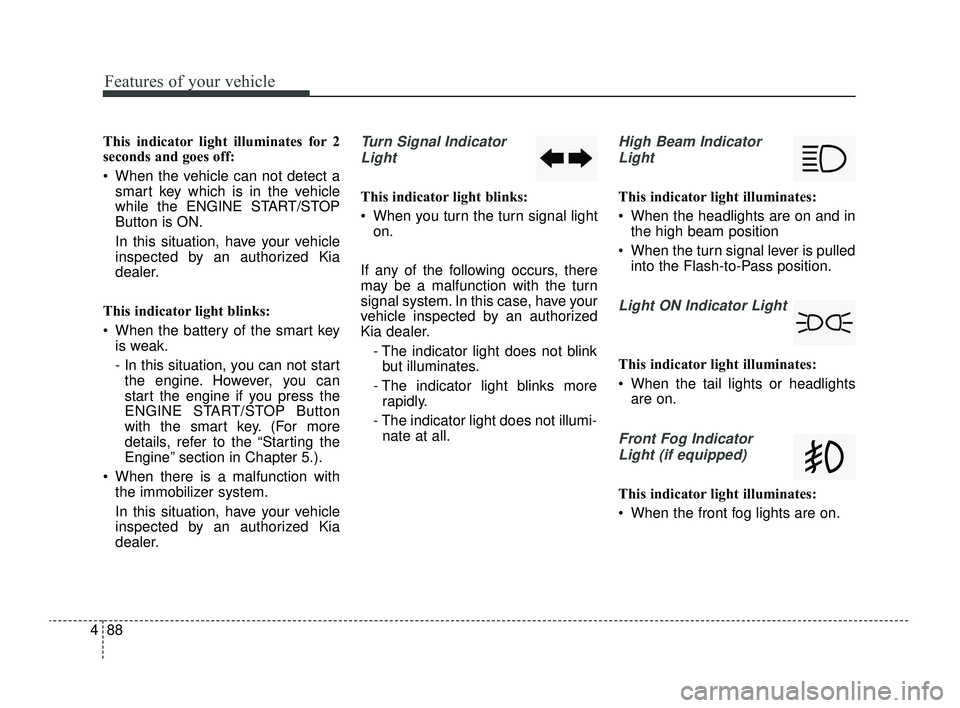
dealer.Turn Signal Indicator
Light
This indicator light blinks:
When you turn the turn signal light on.
If any of the following occurs, there
may be a malfunction with the turn
signal system. In this case, have your
vehicle inspected by an authorized
Kia dealer. - The indicator light does not blinkbut illuminates.
- The indicator light blinks more rapidly.
- The indicator light does not illumi- nate at all.
High Beam Indicator
Light
This indicator light illuminates:
When the headlights are on and in the high beam position
When the turn signal lever is pulled into the Flash-to-Pass position.
Light ON Indicator Light
This indicator light illuminates:
When the tail lights or headlightsare on.
Front Fog Indicator
Light (if equipped)
This indicator light illuminates:
When the front fog lights are on.
SC PE USA 4.QXP 9/9/2021 6:05 PM Page 88
Page 171 of 528
Features of your vehicle
92
4
Battery saver function
The purpose of this feature is to pre-
vent the battery from being dis-
charged if the lights are left in the ON
position.
The system automatically shuts off
the parking lights after the engine is
off and the driver's door is opened.
However, the position lamps stay ON
even when the driver-side door is
opened if the light switch is operated
after the engine is turned off.
If necessary, to keep the lamps on
turn the position lamps OFF and ON
again using the headlamp switch on
the steering column after the engine
is turned off.
Headlight escort function
(if equipped)
The headlights (and/or taillights) will
remain on for approximately 5 min-
utes after the ignition key is removed
or turned to the ACC or LOCK posi-
tion. However, if the driver’s door is
opened and closed, the headlights
are turned off after 15 seconds.
The headlights can be turned off by
pressing the lock button on the trans-
mitter twice or turning off the light
switch from the headlight or Auto
light position.
If the driver gets out of the vehicle
through other doors (except driver's
door), the battery saver function
does not operate and the headlight
escort function does not turn off
automatically. Therefore, causing the
battery to be discharged. In this
case, make sure to turn off the lamp
before getting out of the vehicle.
If the headlights are not working
properly have your vehicle inspected
by an authorized Kia dealer.
Don't attempt to inspect or replace
the wiring yourself to prevent mal-
function.
Headlight welcome function
(if equipped)
When the headlight switch is in the
ON or AUTO position and all doors
(and liftgate) are closed and locked,
if you press the door unlock button
on the transmitter, the headlights will
come on for about 15 seconds.
If the headlight switch is in the AUTO
position, the function can only oper-
ate at night.
At this time, if you press the door
unlock button again or door lock but-
ton on the transmitter, the headlights
will turn off immediately.
LIGHTING
SC PE USA 4.QXP 9/9/2021 6:05 PM Page 92
Page 172 of 528
493
Features of your vehicle
Lighting control
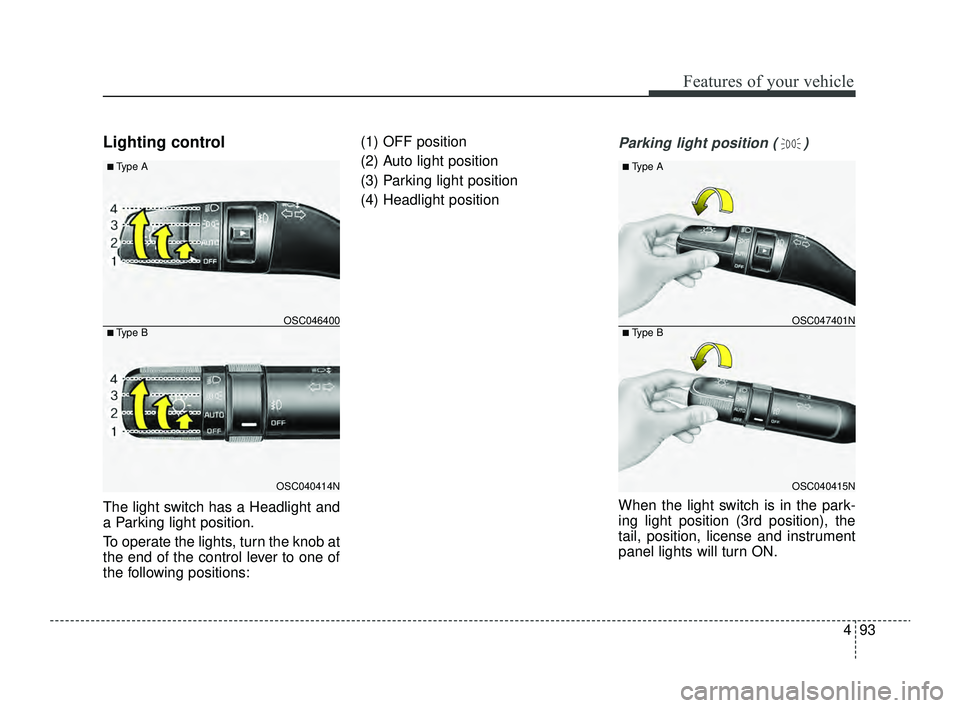
The light switch has a Headlight and
a Parking light position.
To operate the lights, turn the knob at
the end of the control lever to one of
the following positions:(1) OFF position
(2) Auto light position
(3) Parking light position
(4) Headlight position
Parking light position ( )
When the light switch is in the park-
ing light position (3rd position), the
tail, position, license and instrument
panel lights will turn ON.
OSC040414N
OSC046400
■ Type A
■ Type B
OSC040415N
OSC047401N
■ Type A
■ Type B
SC PE USA 4.QXP 9/9/2021 6:05 PM Page 93