2022 KIA EV6 instrument cluster
[x] Cancel search: instrument clusterPage 38 of 70
36†LEGAL DISCL AIMERS ON BACK INSIDE COVER | *IF EQUIPPEDEV6 FEATURES & FUNCTIONS GUIDE
Refer to the inside front cover for more information on QR codes.www.youtube.com/KiaFeatureVideos
Head-Up Display Video
QR CODE
REMINDERS:
•
The HUD image on the windshield glass may not be visible in these cases:
-
The driver has poor sit ting posture
-The driver is wearing polarized sunglasses
-There is an object covering the HUD
-Driving on a wet road
-Excessive lighting inside or outside the vehicle
-
Modifications made to the windshield, such as tinting or other aftermarket treatments, could affect the HUD. When replacing the front windshield glass of vehicles equipped with the HUD, owners must replace it with windshield glass designed for HUD operation. Other wise, duplicated images may be displayed on the windshield glass
-If Turn By Turn (TBT) navigation information is selected as HUD content, TBT information will not be displayed on the LCDWhen engaged, HUD is a supplemental system. Do not solely rely on the system, always drive safely, and pay at tention to the driving conditions on the road.
Images are for illustrative purposes only and may not reflect actual feature or operation.
See section 5 in the Owner ’s Manual for more information.
ADVANCED DRIVER ASSISTANCE SYSTEMS (ADAS)
ADAS
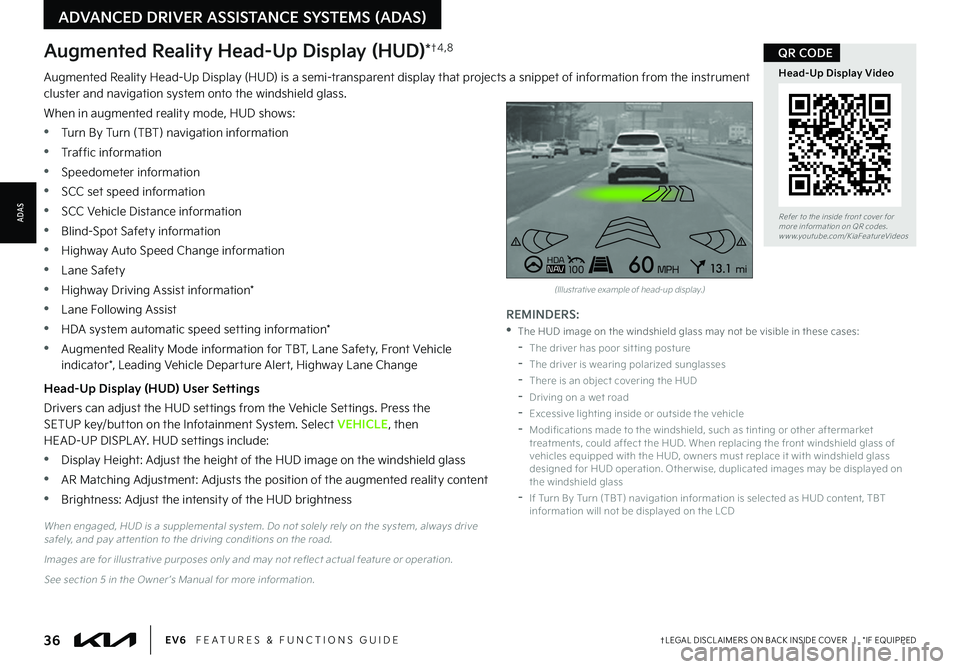
Augmented Reality Head-Up Display (HUD) is a semi-transparent display that projects a snippet of information from the instrument cluster and navigation system onto the windshield glass.
When in augmented reality mode, HUD shows:
•Turn By Turn (TBT) navigation information
•Traffic information
•Speedometer information
•SCC set speed information
•SCC Vehicle Distance information
•Blind-Spot Safety information
•Highway Auto Speed Change information
•Lane Safety
•Highway Driving Assist information*
•Lane Following Assist
•HDA system automatic speed setting information*
•Augmented Reality Mode information for TBT, Lane Safety, Front Vehicle indicator*, Leading Vehicle Departure Alert, Highway Lane Change
Head-Up Display (HUD) User Settings
Drivers can adjust the HUD settings from the Vehicle Settings. Press the SETUP key/button on the Infotainment System. Select VEHICLE, then HEAD-UP DISPL AY. HUD settings include:
•Display Height: Adjust the height of the HUD image on the windshield glass
•AR Matching Adjustment: Adjusts the position of the augmented reality content
•Brightness: Adjust the intensity of the HUD brightness
Augmented Reality Head-Up Display (HUD)*†4 , 8
0mph
0 KMH020 4060
202 m100 kWh/ 100m96%Lv 1READY66°F
2 72mCHG
PWR
Leading vehicle
is driving away
HD AN AV1006013 .1mi
MPH
(Illustrative example of head-up display.)
Page 40 of 70
38†LEGAL DISCL AIMERS ON BACK INSIDE COVER | *IF EQUIPPEDEV6 FEATURES & FUNCTIONS GUIDE
Reverse Parking Collision-Avoidance Assist (PCA)†4
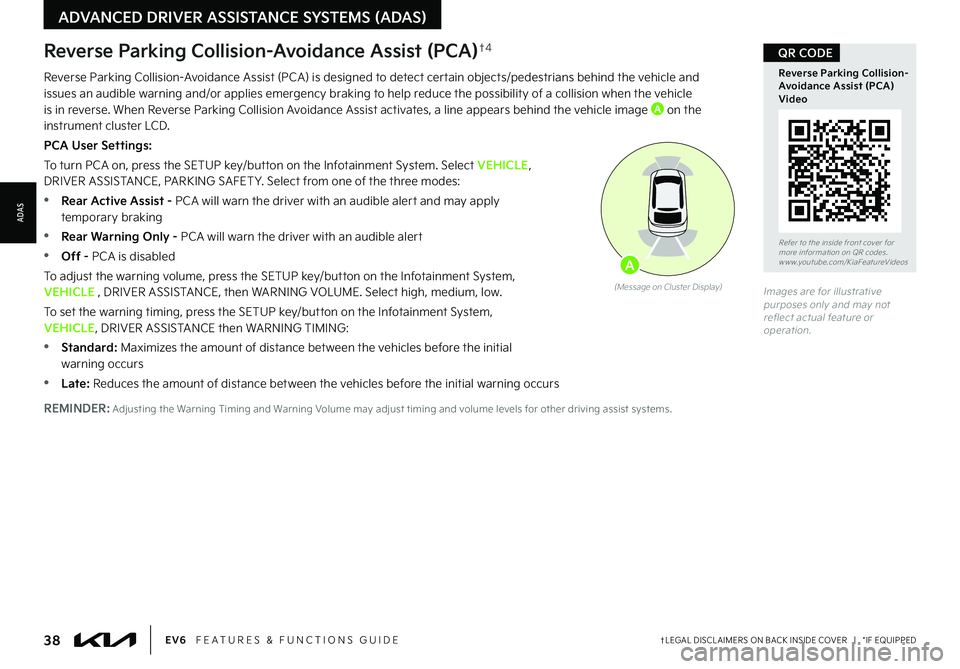
Reverse Parking Collision-Avoidance Assist (PCA) is designed to detect certain objects/pedestrians behind the vehicle and issues an audible warning and/or applies emergency braking to help reduce the possibility of a collision when the vehicle is in reverse. When Reverse Parking Collision Avoidance Assist activates, a line appears behind the vehicle image A on the instrument cluster LCD.
PCA User Settings:
To turn PCA on, press the SETUP key/button on the Infotainment System. Select VEHICLE, DRIVER ASSISTANCE, PARKING SAFET Y. Select from one of the three modes:
•Rear Active Assist - PCA will warn the driver with an audible alert and may apply temporary braking
•Rear Warning Only - PCA will warn the driver with an audible alert
•Off - PCA is disabled
To adjust the warning volume, press the SETUP key/button on the Infotainment System, VEHICLE , DRIVER ASSISTANCE, then WARNING VOLUME. Select high, medium, low.
To set the warning timing, press the SETUP key/button on the Infotainment System, VEHICLE, DRIVER ASSISTANCE then WARNING TIMING:
•
Standard: Maximizes the amount of distance between the vehicles before the initial warning occurs
•Late: Reduces the amount of distance between the vehicles before the initial warning occurs
Images are for illustrative purposes only and may not reflect actual feature or operation.
(Message on Cluster Display)
A
Refer to the inside front cover for more information on QR codes.www.youtube.com/KiaFeatureVideos
Reverse Parking Collision-Avoidance Assist (PCA) Video
QR CODE
REMINDER: Adjusting the Warning Timing and Warning Volume may adjust timing and volume levels for other driving assist systems.
ADVANCED DRIVER ASSISTANCE SYSTEMS (ADAS)
ADAS
Page 41 of 70
39†LEGAL DISCL AIMERS ON BACK INSIDE COVER | *IF EQUIPPEDALWAYS CHECK THE OWNER ’S MANUAL FOR COMPLETE OPER ATING INFORMATION AND SAFET Y WARNINGS.
Electronic Stability Control (ESC)†6
The ESC system is designed to help stabilize the vehicle during certain cornering maneuvers. It is a good idea to keep ESC turned ON whenever possible.
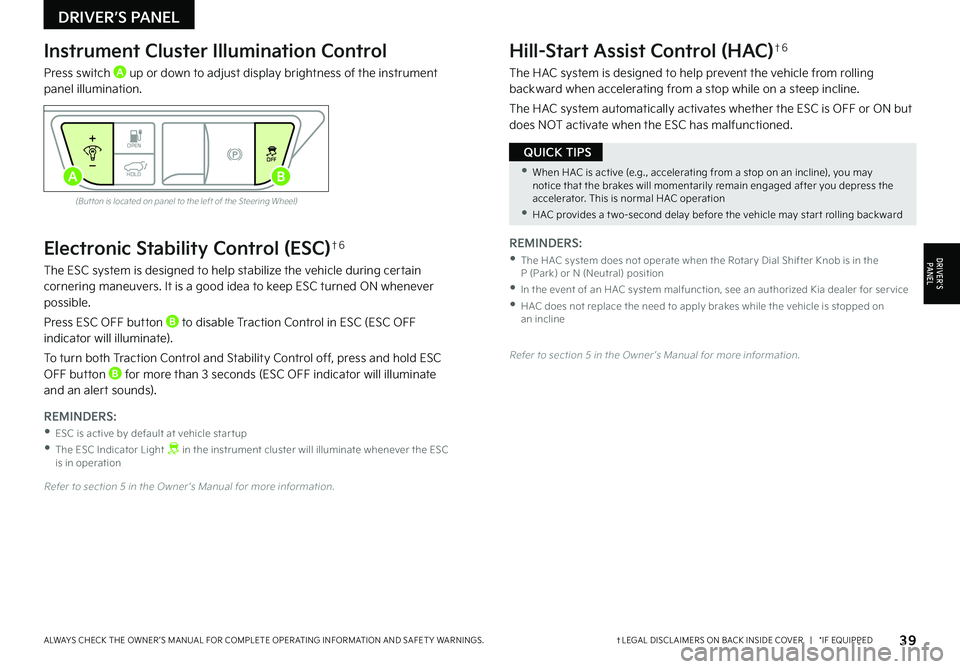
Press ESC OFF button B to disable Traction Control in ESC (ESC OFF indicator will illuminate).
To turn both Traction Control and Stability Control off, press and hold ESC OFF button B for more than 3 seconds (ESC OFF indicator will illuminate and an alert sounds).
REMINDERS:
•ESC is active by default at vehicle star tup
•
The ESC Indicator Light in the instrument cluster will illuminate whenever the ESC is in operation
Refer to section 5 in the Owner ’s Manual for more information.
Instrument Cluster Illumination Control
Press switch A up or down to adjust display brightness of the instrument panel illumination.
Hill-Start Assist Control (HAC)†6
The HAC system is designed to help prevent the vehicle from rolling backward when accelerating from a stop while on a steep incline.
The HAC system automatically activates whether the ESC is OFF or ON but does NOT activate when the ESC has malfunctioned.
(But ton is located on panel to the left of the Steering Wheel)
Refer to section 5 in the Owner ’s Manual for more information.
REMINDERS:
•
The HAC system does not operate when the Rotar y Dial Shifter Knob is in the P (Park) or N (Neutral) position
•
In the event of an HAC system malfunction, see an authorized Kia dealer for ser vice
•
HAC does not replace the need to apply brakes while the vehicle is stopped on an incline
•When HAC is active (e.g., accelerating from a stop on an incline), you may notice that the brakes will momentarily remain engaged after you depress the accelerator. This is normal HAC operation
•HAC provides a t wo-second delay before the vehicle may star t rolling backward
QUICK TIPS
DRIVER’S PANEL
DRIVER’SPA N EL
OPENOFF
HOLDAB
Page 44 of 70
42*IF EQUIPPEDEV6 FEATURES & FUNCTIONS GUIDE
STEERING WHEEL CONTROLS
STEERING
WHEEL CONTROLS
OFFAUTO
AUTO
OFFAUTO
AUTO
OFFAUTO
AUTO
OFFAUTO
AUTO
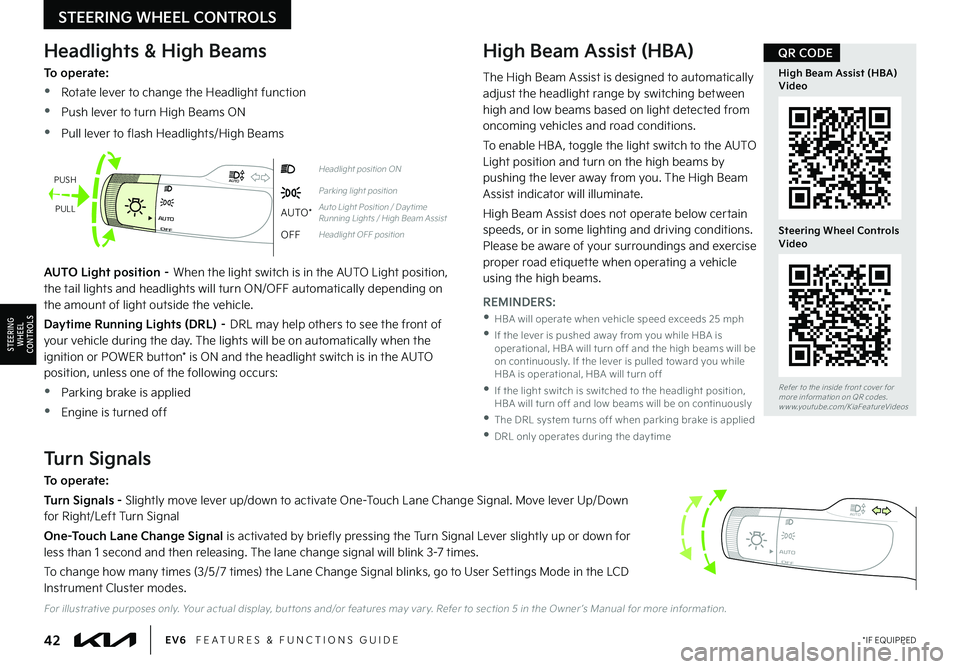
Headlight position ON
Parking light position
AUTO*Auto Light Position / Day time Running Lights / High Beam Assist
OFFHeadlight OFF position
Headlights & High Beams
To operate:
•Rotate lever to change the Headlight function
•Push lever to turn High Beams ON
•Pull lever to flash Headlights/High Beams
High Beam Assist (HBA)
AUTO Light position – When the light switch is in the AUTO Light position, the tail lights and headlights will turn ON/OFF automatically depending on the amount of light outside the vehicle.
Daytime Running Lights (DRL) – DRL may help others to see the front of your vehicle during the day. The lights will be on automatically when the ignition or POWER button* is ON and the headlight switch is in the AUTO position, unless one of the following occurs:
•Parking brake is applied
•Engine is turned off
Turn Signals
To operate:
Turn Signals - Slightly move lever up/down to activate One-Touch Lane Change Signal. Move lever Up/Down for Right/Left Turn Signal
One-Touch Lane Change Signal is activated by briefly pressing the Turn Signal Lever slightly up or down for less than 1 second and then releasing. The lane change signal will blink 3-7 times.
To change how many times (3/5/7 times) the Lane Change Signal blinks, go to User Settings Mode in the LCD Instrument Cluster modes.
PUSH
PULL
For illustrative purposes only. Your actual display, but tons and/or features may var y. Refer to section 5 in the Owner ’s Manual for more information.
REMINDERS:
•
HBA will operate when vehicle speed exceeds 25 mph
•
If the lever is pushed away from you while HBA is operational, HBA will turn off and the high beams will be on continuously. If the lever is pulled toward you while HBA is operational, HBA will turn off
•
If the light switch is switched to the headlight position, HBA will turn off and low beams will be on continuously
•The DRL system turns off when parking brake is applied
•DRL only operates during the day time
The High Beam Assist is designed to automatically adjust the headlight range by switching between high and low beams based on light detected from oncoming vehicles and road conditions.
To enable HBA , toggle the light switch to the AUTO Light position and turn on the high beams by pushing the lever away from you. The High Beam Assist indicator will illuminate.
High Beam Assist does not operate below certain speeds, or in some lighting and driving conditions. Please be aware of your surroundings and exercise proper road etiquette when operating a vehicle
using the high beams.
Refer to the inside front cover for more information on QR codes.www.youtube.com/KiaFeatureVideos
High Beam Assist (HBA) Video
Steering Wheel Controls Video
QR CODE
Page 56 of 70
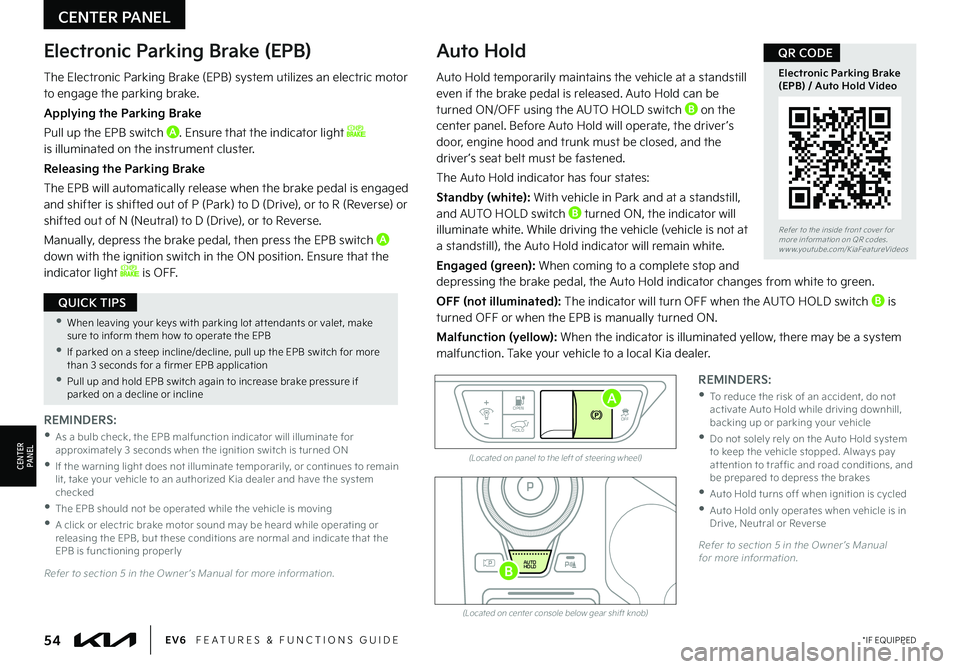
(Located on panel to the left of steering wheel)
(Located on center console below gear shift knob)
Electronic Parking Brake (EPB)Auto Hold
REMINDERS:
•
As a bulb check, the EPB malfunction indicator will illuminate for approximately 3 seconds when the ignition switch is turned ON
•
If the warning light does not illuminate temporarily, or continues to remain lit, take your vehicle to an authorized Kia dealer and have the system checked
•The EPB should not be operated while the vehicle is moving
•
A click or electric brake motor sound may be heard while operating or releasing the EPB, but these conditions are normal and indicate that the EPB is functioning properly
REMINDERS:
•
To reduce the risk of an accident, do not activate Auto Hold while driving downhill, backing up or parking your vehicle
•
Do not solely rely on the Auto Hold system to keep the vehicle stopped. Always pay at tention to traf fic and road conditions, and be prepared to depress the brakes
•Auto Hold turns off when ignition is cycled
•
Auto Hold only operates when vehicle is in Drive, Neutral or Reverse
EV
RN
P
AUTO
HOLD
DOPEN
OFF
HOLD
Auto Hold temporarily maintains the vehicle at a standstill even if the brake pedal is released. Auto Hold can be turned ON/OFF using the AUTO HOLD switch B on the center panel. Before Auto Hold will operate, the driver ’s door, engine hood and trunk must be closed, and the driver ’s seat belt must be fastened.
The Auto Hold indicator has four states:
Standby (white): With vehicle in Park and at a standstill, and AUTO HOLD switch B turned ON, the indicator will illuminate white. While driving the vehicle (vehicle is not at a standstill), the Auto Hold indicator will remain white.
Engaged (green): When coming to a complete stop and depressing the brake pedal, the Auto Hold indicator changes from white to green.
OFF (not illuminated): The indicator will turn OFF when the AUTO HOLD switch B is turned OFF or when the EPB is manually turned ON.
Malfunction (yellow): When the indicator is illuminated yellow, there may be a system malfunction. Take your vehicle to a local Kia dealer.
Refer to section 5 in the Owner ’s Manual for more information.
Refer to section 5 in the Owner ’s Manual for more information.
A
B
CENTER PANEL
CENTERPA N EL
•When leaving your keys with parking lot at tendants or valet, make sure to inform them how to operate the EPB
•If parked on a steep incline/decline, pull up the EPB switch for more than 3 seconds for a firmer EPB application
•Pull up and hold EPB switch again to increase brake pressure if parked on a decline or incline
QUICK TIPS
The Electronic Parking Brake (EPB) system utilizes an electric motor to engage the parking brake.
Applying the Parking Brake
Pull up the EPB switch A. Ensure that the indicator light is illuminated on the instrument cluster.
Releasing the Parking Brake
The EPB will automatically release when the brake pedal is engaged and shifter is shifted out of P (Park) to D (Drive), or to R (Reverse) or shifted out of N (Neutral) to D (Drive), or to Reverse.
Manually, depress the brake pedal, then press the EPB switch A
down with the ignition switch in the ON position. Ensure that the indicator light is OFF.
54*IF EQUIPPEDEV6 FEATURES & FUNCTIONS GUIDE
Refer to the inside front cover for more information on QR codes.www.youtube.com/KiaFeatureVideos
Electronic Parking Brake (EPB) / Auto Hold Video
QR CODE
Page 59 of 70
57 *IF EQUIPPEDALWAYS CHECK THE OWNER ’S MANUAL FOR COMPLETE OPER ATING INFORMATION AND SAFET Y WARNINGS.
Refer to the inside front cover for more information on QR codes.www.youtube.com/KiaFeatureVideos
2nd-Row Seats Video
Rear Occupant Alert with Door Monitoring Video
QR CODE
Rear Occupant Alert (ROA) with Door Monitoring†1 1
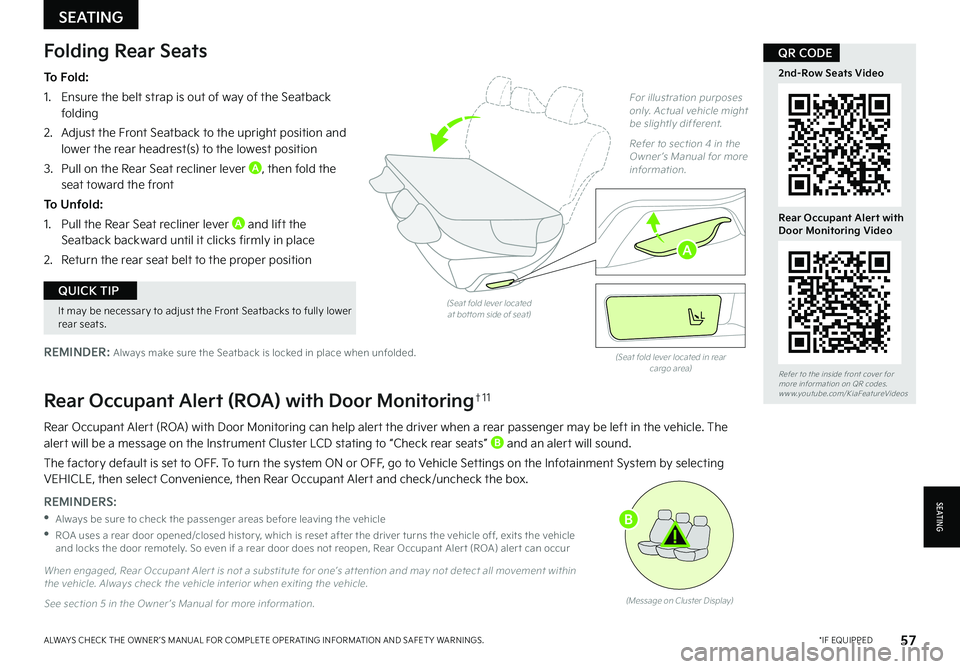
Rear Occupant Alert (ROA) with Door Monitoring can help alert the driver when a rear passenger may be left in the vehicle. The alert will be a message on the Instrument Cluster LCD stating to “Check rear seats” B and an alert will sound.
The factory default is set to OFF. To turn the system ON or OFF, go to Vehicle Settings on the Infotainment System by selecting VEHICLE, then select Convenience, then Rear Occupant Alert and check/uncheck the box.
REMINDERS:
•
Always be sure to check the passenger areas before leaving the vehicle
•
ROA uses a rear door opened/closed histor y, which is reset after the driver turns the vehicle off, exits the vehicle and locks the door remotely. So even if a rear door does not reopen, Rear Occupant Aler t (ROA) aler t can occur
(Message on Cluster Display)
When engaged, Rear Occupant Aler t is not a substitute for one’s at tention and may not detect all movement within the vehicle. Always check the vehicle interior when exiting the vehicle.
See section 5 in the Owner ’s Manual for more information.
(Seat fold lever located in rear cargo area)
(Seat fold lever located at bot tom side of seat)
Folding Rear Seats
To Fold:
1. Ensure the belt strap is out of way of the Seatback folding
2. Adjust the Front Seatback to the upright position and lower the rear headrest(s) to the lowest position
3. Pull on the Rear Seat recliner lever A, then fold the seat toward the front
To Unfold:
1. Pull the Rear Seat recliner lever A and lift the Seatback backward until it clicks firmly in place
2. Return the rear seat belt to the proper position
REMINDER: Always make sure the Seatback is locked in place when unfolded.
For illustration purposes only. Actual vehicle might be slightly different.
Refer to section 4 in the Owner ’s Manual for more information.
SEATING
S E AT I N G
It may be necessar y to adjust the Front Seatbacks to fully lower rear seats.
QUICK TIP
B
A
Page 67 of 70

Climate Control System* – page 52
Demonstrate Defrost and Defog Windshield
EV Mode on the Infotainment System – page 17
Instrument Cluster / EV Displays – page 3-5
Windshield Wipers & Washers – page 43 Windshield: Move lever Up/Down to change Wiper modes. Rotate lever to adjust Intermit tent Wipe Speed.
WindshieldMIST: Single wipeOFF: Wipe offINT: Intermit tent wipeLO: Slow wipeHI: Fast wipe
Pull to spray and wipe.
Owner ’s Name:
VIN:
Mileage:
Dealership Name:
Sales Consultant:
Date:
BEFORE DELIVERY Test and confirm “Good Battery” using a Kia battery tester and affix Results Label Verify all tire pressures are to spec (see driver ’s door label) LF
LR
RF
RR
Verify proper operation of Remote Keyless Entry and Smart Key lock/unlock Ensure floor mats are snapped into place (if applicable) Verify vehicle is clean (interior and exterior), in good condition and free of chips and scratches Ensure all key documents are in the vehicle (Owner ’s Manual, Warranty and Consumer Information booklet, Tire Warranty booklet and Features & Functions Guide and any Audio System User ’s Manual)KEY FEATURE WALKTHROUGH
EV6
DELIVERY CHECKLIST
*IF EQUIPPED
CHG
PWR
EPB
1
00 kWh/ 100m
6202 mABS
0 20 4060
0mph0 KMH
268m268
m
96%
Lv 1
READY
P
1 0: 51
AM
Tue, Oct. 26
490
m
445
m
459m
IRVINE CO OFC/JBC
2855 02
N ext Departure
Departure Time must be set first to use
Scheduled Charging/Climate Control.
Electric Vehicle
Driving
Convenience Forward Safety
Speed Limit
Lane Safety
Blind-Spot Safety
Parking Safety
Driver Attention
Warning
Smart Cruise Control
�����
�������
Battery
S cheduled Charging and Climate
E V Charge Transfer
V 2L
O n
Off
Off Off
96%
AUTO
SYNC
A/C 1
75°F
76°F
HEAT
DRIVER
AUTO
PWR
AUTOCLIMATE
ONLY