Page 133 of 446
3-55
Convenient features of your vehicle
3
LCD Display Modes
Modes SymbolExplanation
Sport The Sport menu displays Gauge, Lap Timer and G-Force.
For more details, refer to the following pages.
Trip Computer The Trip Computer menu displays driving information such as the tripmeter,
fuel economy, etc.For more details, refer to "Trip Computer" in this chapter.
Driving AssistThe Driving Assist mode displays the status of Tire Pressure.
For more details, refer to "Tire Pressure Monitoring System (TPMS)" in chapter 6.
User SettingsThe User Settings menu provides user options for a variety of settings including door
lock/unlock features, convenience features, driver assistance settings, etc.
Master WarningThe Master Warning mode displays warning messages related to the vehicle when one or
more systems is not operating normally.
The information provided may differ depending on which functions are applicable to your vehicle.
Page 136 of 446

3-58
Master warning mode
This warning light informs the driver
the following situations.
- Lamp malfunction
- Tire Pressure Monitoring System
(TPMS) malfunction
The Master Warning Light illumi-
nates if one or more of the above
warning situations occur. At this time,
the LCD Modes Icon will change
from ( ) to ( ).
If the warning situation is solved, the
master warning light will be turned
off and the LCD Modes Icon will be
changed back to its previous icon
().
User settings mode
In this mode, you can change the
settings of the instrument cluster,
doors, lamps, etc.
1. Driver Assistance
2. Door
3. Lights
4. Sound
5. Convenience
6. Service interval
7. Other
8. Language
9. Reset
The information provided may dif-
fer depending on which functions
are applicable to your vehicle.Information
Settings only available with parking
brake engaged and gear in neutral.
This warning message illuminates if you
try to select an item from the User
Settings mode while driving.
For your safety, change the User
Settings after engaging the parking
brake and shifting the gear to neutral.
i
Convenient features of your vehicle
Page 147 of 446
3-69
Convenient features of your vehicle
3
Parking lamp position ( )
The parking lamp, license plate lamp
and instrument panel lamp are turned
ON.
Headlamp position ( )
The headlamp, parking lamp, license
plate lamp and instrument panel lamp
are turned ON.
Information
The ignition switch must be in the ON
position to turn on the headlamp.
High beam operation
To turn on the high beam headlamp,
push the lever away from you. The
lever will return to its original position.
The high beam indicator will light
when the headlamp high beams are
switched on.
To turn off the high beam headlamp,
pull the lever towards you. The low
beams will turn on.
i
OOS047405NOOS047406N
Do not use high beam when there
are other vehicles approaching
you. Using high beam could
obstruct the other driver's vision.
WARNING
OOS047407N
Page 150 of 446

3-72
Daytime running light (DRL)
The Daytime Running Lights (DRL)
can make it easier for others to see
the front of your vehicle during the
day, especially after dawn and before
sunset.
The DRL system will turn the dedi-
cated lamp OFF when :
• The headlamps are ON.
• The parking lamps are ON.
• The vehicle is turned off.
• The parking brake is engaged.
Interior Lights
Do not use the interior lights for
extended periods when the vehi-
cle is turned off or the battery will
discharge.
Interior lamp AUTO cut
The interior lamps will automatically
go off approximately 20 minutes after
the engine is turned off and the
doors are closed. If a door is opened,
the lamp will go off 40 minutes after
the engine is turned off. If the doors
are locked by the smart key and the
vehicle enters the armed stage of the
theft alarm system, the lamps will go
off five seconds later.
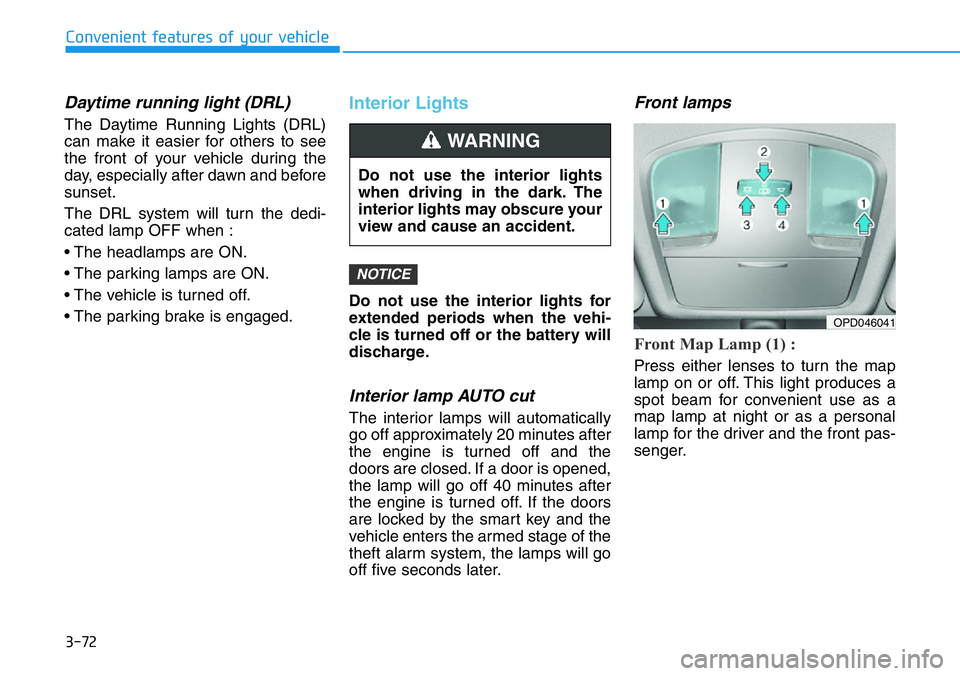
Front lamps
Front Map Lamp (1) :
Press either lenses to turn the map
lamp on or off. This light produces a
spot beam for convenient use as a
map lamp at night or as a personal
lamp for the driver and the front pas-
senger.
NOTICE
Convenient features of your vehicle
Do not use the interior lights
when driving in the dark. The
interior lights may obscure your
view and cause an accident.
WARNING
OPD046041
Page 155 of 446

3-77
Convenient features of your vehicle
3
System malfunction and limi-
tations
System malfunction
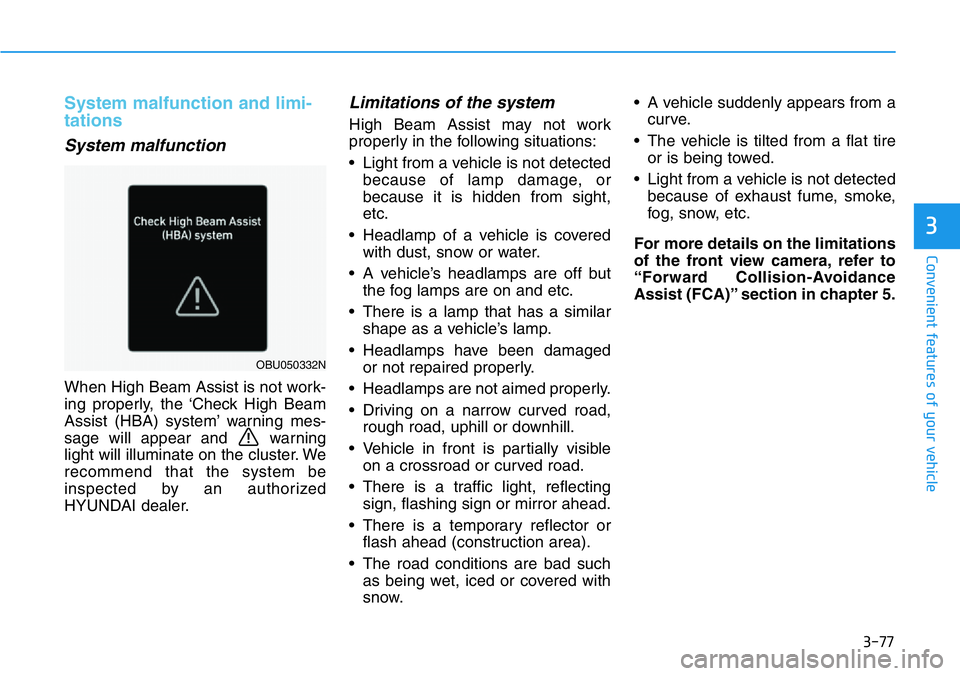
When High Beam Assist is not work-
ing properly, the ‘Check High Beam
Assist (HBA) system’ warning mes-
sage will appear and warning
light will illuminate on the cluster. We
recommend that the system be
inspected by an authorized
HYUNDAI dealer.
Limitations of the system
High Beam Assist may not work
properly in the following situations:
• Light from a vehicle is not detected
because of lamp damage, or
because it is hidden from sight,
etc.
• Headlamp of a vehicle is covered
with dust, snow or water.
• A vehicle’s headlamps are off but
the fog lamps are on and etc.
• There is a lamp that has a similar
shape as a vehicle’s lamp.
• Headlamps have been damaged
or not repaired properly.
• Headlamps are not aimed properly.
• Driving on a narrow curved road,
rough road, uphill or downhill.
• Vehicle in front is partially visible
on a crossroad or curved road.
• There is a traffic light, reflecting
sign, flashing sign or mirror ahead.
• There is a temporary reflector or
flash ahead (construction area).
• The road conditions are bad such
as being wet, iced or covered with
snow.• A vehicle suddenly appears from a
curve.
• The vehicle is tilted from a flat tire
or is being towed.
• Light from a vehicle is not detected
because of exhaust fume, smoke,
fog, snow, etc.
For more details on the limitations
of the front view camera, refer to
“Forward Collision-Avoidance
Assist (FCA)” section in chapter 5.
OBU050332N
Page 156 of 446
3-78
Convenient features of your vehicle
•At times, High Beam Assist
may not work properly. It is
the responsibility of the driver
for safe driving practices and
always check the road condi-
tions for your safety.
•When High Beam Assist does
not operate normally, change
the headlamp position manu-
ally between high beam and
low beam.
WARNING
Page 158 of 446
3-80
Convenient features of your vehicle
Information
If there is heavy accumulation of snow
or ice on the windshield, defrost the
windshield for about 10 minutes, or
until the snow and/or ice is removed
before using the windshield wipers to
ensure proper operation.
If you do not remove the snow and/or
ice before using the wiper and washer,
it may damage the wiper and washer
system.
Windshield Washers
In the OFF position, pull the lever
gently toward you to spray washer
fluid on the windshield and to run the
wipers 1-3 cycles. The spray and
wiper operation will continue until
you release the lever. If the washer
does not work, you may need to add
washer fluid to the washer fluid
reservoir.
i
When the outside temperature
is below freezing, ALWAYS
warm the windshield using the
defroster to help prevent the
washer fluid from freezing on
the windshield and obscuring
your vision which could result
in an accident and serious
injury or death.
WARNING
Page 160 of 446
3-82
Convenient features of your vehicle
Rear View Monitor will activate when
the engine is running and the shift
lever is in the R (Reverse) position.
This is a supplemental function that
helps provide a view of the area
behind the vehicle through the audio
display while the vehicle is in the R
(Reverse) position.Always keep the rear view camera
lens clean. The rear view camera
may not work normally if the lens
is covered with dirt, water or
snow.
NOTICE
REAR VIEW MONITOR (RVM)
Rear View Monitor is not a safe-
ty device. It only serves to
assist the driver in identifying
objects directly behind the mid-
dle of the vehicle. The camera
does NOT cover the complete
area behind the vehicle.
WARNING