2022 HYUNDAI TUCSON engine
[x] Cancel search: enginePage 170 of 638
![HYUNDAI TUCSON 2022 Owners Manual Convenient features
5-26
ONX4050002
[1] : Door handle authentication pad,
[2]: NFC Antenna
NFC door lock/unlock
To unlock your vehicle using the NFC
card key, touch the card key near the
door han HYUNDAI TUCSON 2022 Owners Manual Convenient features
5-26
ONX4050002
[1] : Door handle authentication pad,
[2]: NFC Antenna
NFC door lock/unlock
To unlock your vehicle using the NFC
card key, touch the card key near the
door han](/manual-img/35/41173/w960_41173-169.png)
Convenient features
5-26
ONX4050002
[1] : Door handle authentication pad,
[2]: NFC Antenna
NFC door lock/unlock
To unlock your vehicle using the NFC
card key, touch the card key near the
door handle NFC touch sensor of either
the driver side or passenger side door.
Hold the card key near the touch sensor
area for about 2 seconds. You will hear
the doors lock or unlock.
If you unlock your vehicle from the
passenger side door handle, then all the
doors will unlock. If you unlock your
vehicle from the driver side door handle,
then either the driver door only or all
the doors will unlock depending on the
setting of the Two Press Unlock feature.
Refer to User Settings to change the
Driver Door unlock mode.
To lock your vehicle using the NFC card
key, touch the card key near the door
handle NFC touch sensor of either the
driver side or passenger side door.
Before you leave your vehicle, verify
that your vehicle is locked. When using
your NFC card key on the front door
handle, listen to hear that the door lock
has actuated, and then pull the handle
within 3 seconds to confirm the doors
are locked.
Inoperable condition
When using the NFC card key to lock or
unlock your vehicle, be sure to touch
the card key near the center of the door
handle to enable the sensor to activate.
Note that you must take the card out of
your wallet or purse to use the card key
correctly. If the card key is not touching
the door handle sensor or is in close
proximity to other NFC-enabled cards, it
may not work.
Note that if you attempt to use the
NFC card key to lock the doors, the
doors will not lock under the following
circumstances:
•
The Smart Key is in the vehicle
• The Engine Start/Stop button is in the
ACC or ON position
• Any of the doors are open (except for
the liftgate)
If this occurs, then a chime will sound
for about 3 seconds. Check the vehicle
before attempting to lock the car again.
If you have difficulty locking or unlocking
the vehicle using the NFC card key,
remove the card key away from the door
handle sensor for a few seconds (card
key must be more than 4 inches away)
and then retry.
If the card key is damaged or bent, the
sensor on the door handle may not
properly detect the card key. If this
occurs contact your authorized Hyundai
dealer for a card key replacement.
Be careful not to damage the card
key or expose the card key to extreme
temperatures or direct sunlight for long
periods of time.
Note that when the doors have been
unlocked using the NFC digital card key,
the Lock/Unlock switch on the driver
door may not be immediately available.
(If you attempt to lock the doors using
the driver door lock switch, the doors will
lock and then immediately unlock when
you close the door.)
Page 171 of 638
05
5-27
Start-up with Card key
After placing your registered card key
onto the interior authentication pad
(wireless charger), step on the brake and
press the Engine Start/Stop button.
WARNING
• If you do not place the digital key
(card key) onto the center of the
interior authentication pad (wireless
charger) exactly, the card key may
not be recognized. If the engine is
not turned on, adjust and place the
key again.
• If you overlap and use the key
with NFC-enabled cards such as
transportation card or credit card,
the card key may not be recognized.
• If the digital key (card key) does not
work, please detach the key around
4 inches (0.1 m) from the handle
authentication pad and retry to
contact.
• The card key may be damaged due to
impact. It would not work properly if
the key is damaged. You should buy a
new card and register again.
For more information, refer to the
Engine Start/Stop button in chapter 6.
„„Type A
ODN8A059133
„„Type B
ODN8A059247
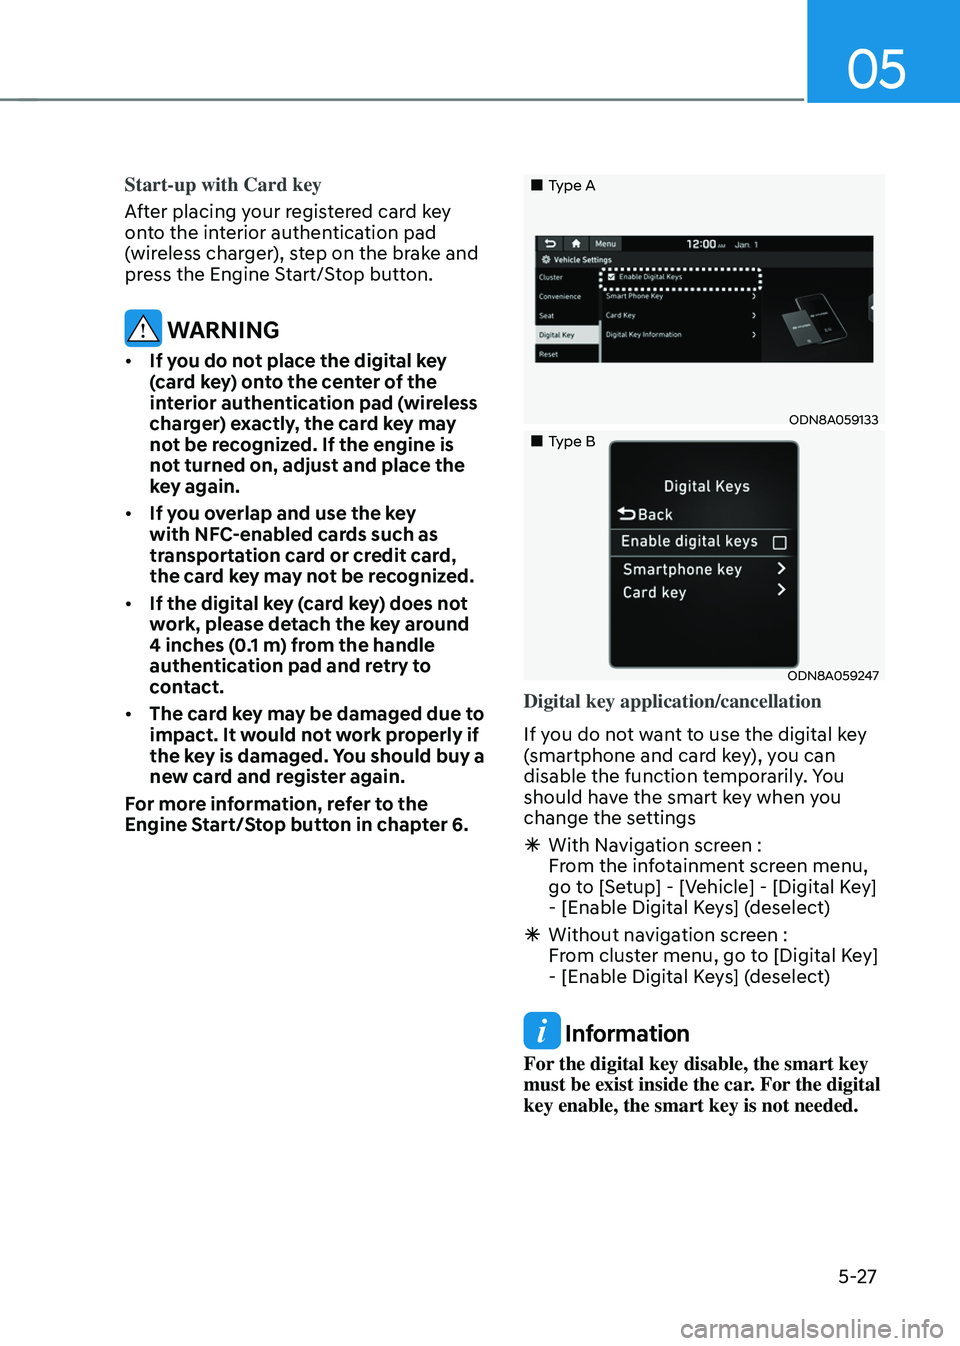
Digital key application/cancellation
If you do not want to use the digital key
(smartphone and card key), you can
disable the function temporarily. You
should have the smart key when you
change the settings
à With Navigation screen :
From the infotainment screen menu,
go to [Setup] - [Vehicle] - [Digital Key]
- [Enable Digital Keys] (deselect)
ÃWithout navigation screen :
From cluster menu, go to [Digital Key]
- [Enable Digital Keys] (deselect)
Information
For the digital key disable, the smart key
must be exist inside the car. For the digital
key enable, the smart key is not needed.
Page 178 of 638
Convenient features
5-34
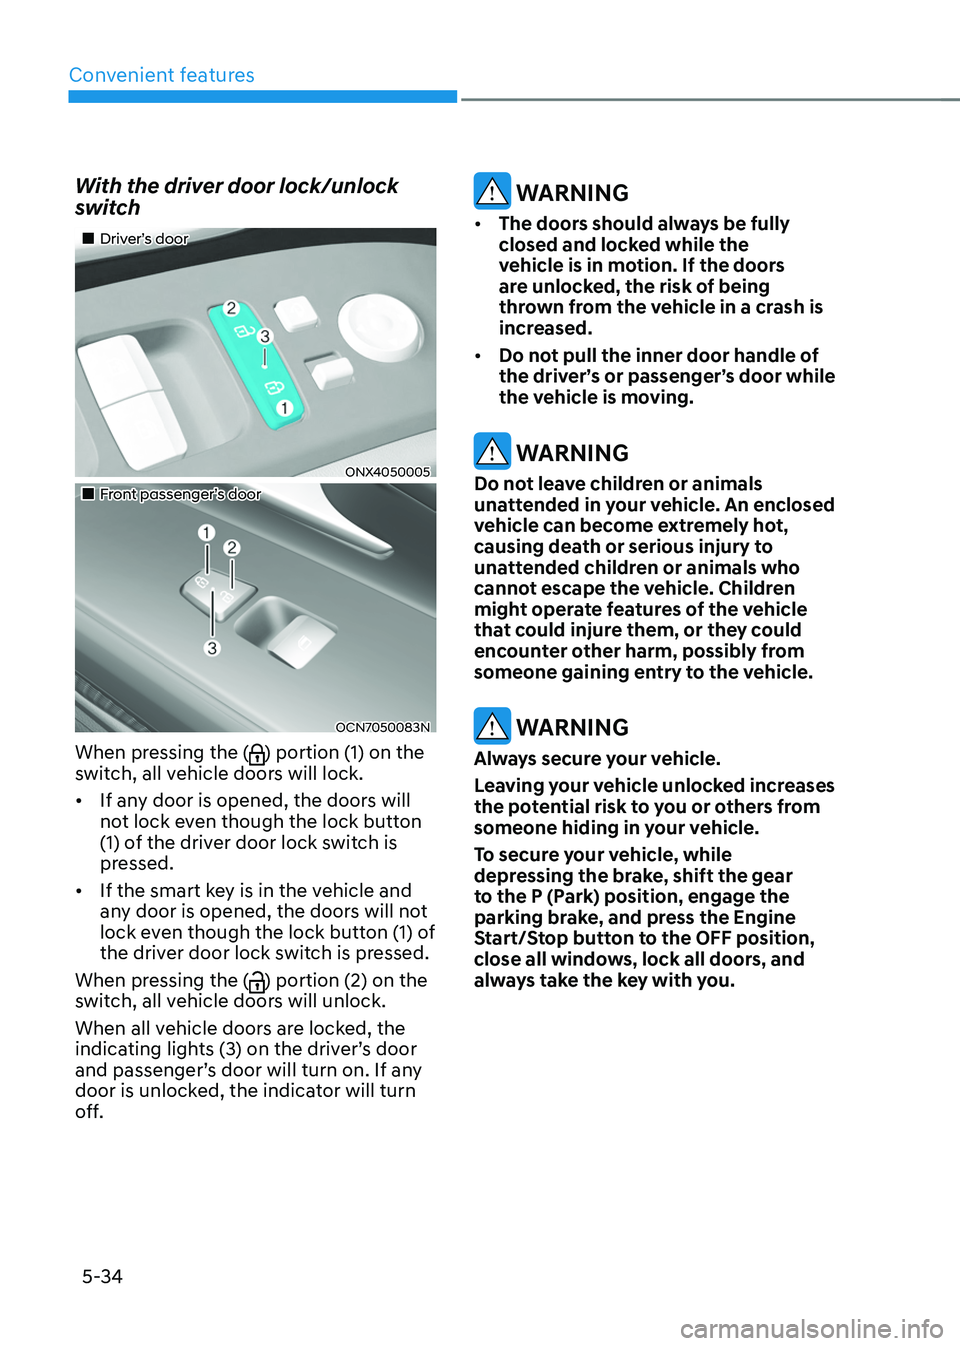
With the driver door lock/unlock
switch
„„Driver’s door
ONX4050005
„„Front passenger’s door
OCN7050083N
When pressing the () portion (1) on the
switch, all vehicle doors will lock.
• If any door is opened, the doors will
not lock even though the lock button
(1) of the driver door lock switch is
pressed.
• If the smart key is in the vehicle and
any door is opened, the doors will not
lock even though the lock button (1) of
the driver door lock switch is pressed.
When pressing the (
) portion (2) on the
switch, all vehicle doors will unlock.
When all vehicle doors are locked, the
indicating lights (3) on the driver’s door
and passenger’s door will turn on. If any
door is unlocked, the indicator will turn
off.
WARNING
• The doors should always be fully
closed and locked while the
vehicle is in motion. If the doors
are unlocked, the risk of being
thrown from the vehicle in a crash is
increased.
• Do not pull the inner door handle of
the driver’s or passenger’s door while
the vehicle is moving.
WARNING
Do not leave children or animals
unattended in your vehicle. An enclosed
vehicle can become extremely hot,
causing death or serious injury to
unattended children or animals who
cannot escape the vehicle. Children
might operate features of the vehicle
that could injure them, or they could
encounter other harm, possibly from
someone gaining entry to the vehicle.
WARNING
Always secure your vehicle.
Leaving your vehicle unlocked increases
the potential risk to you or others from
someone hiding in your vehicle.
To secure your vehicle, while
depressing the brake, shift the gear
to the P (Park) position, engage the
parking brake, and press the Engine
Start/Stop button to the OFF position,
close all windows, lock all doors, and
always take the key with you.
Page 180 of 638
Convenient features
5-36
This system helps to protect your vehicle
and valuables. The horn will sound and
the hazard warning lights will blink
continuously if any of the following
occur:
-A door is opened without using the
smart key.
-The liftgate is opened without using
the smart key.
-The engine hood is opened.
The alarm continues for 30 seconds, then
the system resets. To turn off the alarm,
unlock the doors with the smart key.
The Theft Alarm System automatically
sets 30 seconds after you lock the
doors and the liftgate. For the system to
activate, you must lock the doors and
the liftgate from outside the vehicle with
the smart key or by touching the touch
sensor on the outside of the door handle
with the smart key in your possession.
The hazard warning lights will blink and
the chime will sound once to indicate the
system is armed.
Once the security system is set, opening
any door, the liftgate, or the hood
without using the smart key will cause
the alarm to activate.
The Theft Alarm System will not set if the
hood, the liftgate, or any door is not fully
closed. If the system will not set, check
the hood, the liftgate, or the doors are
fully closed.
Do not attempt to alter this system or
add other devices to it.
Information
• Do not lock the doors until all
passengers have left the vehicle. If the
remaining passenger leaves the vehicle
when the system is armed, the alarm
will be activated.
• If the vehicle is not disarmed with the
smart key, open the doors by using the
mechanical key and start the engine by
directly pressing the Engine Start/Stop
button with the smart key.
• If the system is disarmed by unlocking
the vehicle, but neither a door or the
liftgate is opened within 30 seconds, the
doors will relock and the system will
rearm automatically.
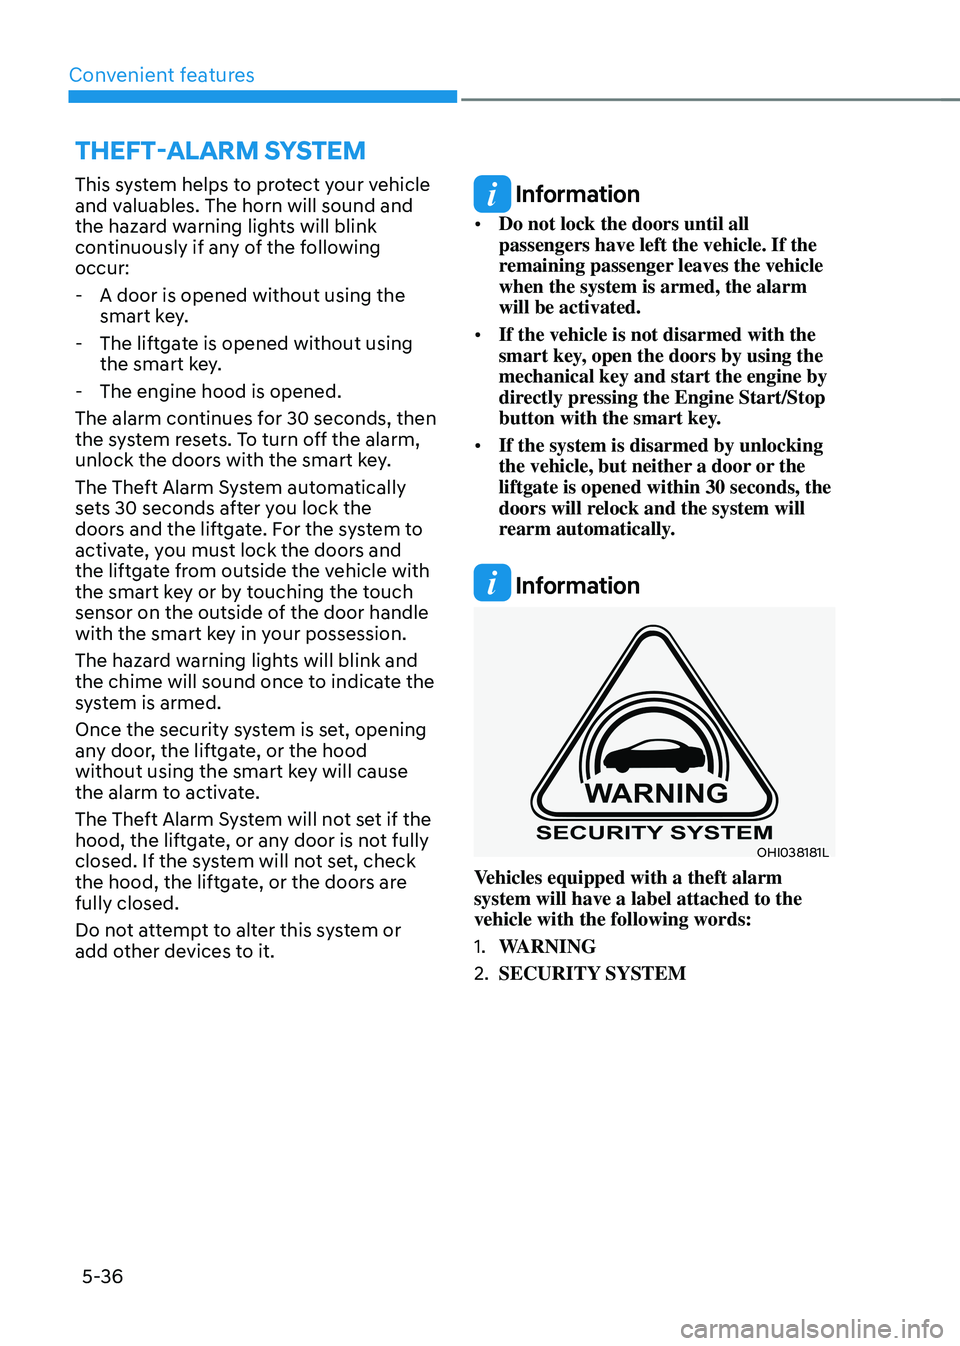
Information
OHI038181L
Vehicles equipped with a theft alarm
system will have a label attached to the
vehicle with the following words:
1. WARNING
2. SECURITY SYSTEM
THEFT-ALARM SYSTEM
Page 182 of 638
Convenient features
5-38
Recalling memory positions
1. Make sure that the vehicle is in the ON
position and the gear selector is in P
(Park).
2. Press the desired button (1 or 2). The
system will beep once and the driver’s
seat position and side view mirror
position will be automatically adjusted
to the stored positions.
3. ‘Driver 1 (or 2) settings applied’ will
appear on the cluster LCD display.
Information
• Note that while the memory settings
are being recalled, if you press the
SET button or the corresponding IMS
memory button (1 or 2) for which the
settings are being recalled, the IMS will
temporarily deactivate. If you select
the alternate IMS memory button (1 or
2), the IMS will activate according to
the settings of the alternate button.
For example, if you press the SET
button or the number 1 button with the
number 1 setting in operation, the IMS
will temporarily deactivate.
If you press the number 2 button, then
the IMS memory settings according to
number 2 will activate.
• If you adjust the driver seat settings
while the IMS is recalling the stored
positions, the memory settings will not
be applied.
Resetting the system
Follow the below procedures to reset the
Integrated Memory System (IMS) if it is
not operating properly:
Resetting the Integrated Memory
System (IMS)
1. Make sure that the vehicle is in Park
(P) and the engine is ON. Open the
driver’s door.
2. Adjust the driver’s seat and seatback
angle to the most forward positions.
3. Press the SET button and push
forward the driver’s seat movement
switch over 2 seconds simultaneously.
While resetting integrated memory
system
1. Resetting starts with a notification
sound.
2. The driver’s seat and seatback is
adjusted to the rearward position with
the notification sound.
3. The driver’s seat and seatback is
re-adjusted to the default position
(central position) with the notification
sound.
However, in the following cases, the
resetting procedure and the notification
sound may stop.
• The memory button is pressed.
• The seat control switch is operated.
• The gear is shifted out of P (Park).
• The driving speed exceeds
2 mph (3km/h).
• The driver’s door is closed.
Page 183 of 638
05
5-39
NOTICE
• While integrated memory system
is being reset, if the resetting
and notification sound stops
incompletely, restart the resetting
procedure again.
• Before performing the IMS memory
reset operation, make sure there are
no objects on or around the driver’s
seat.
Seat Easy Access Operation (if
equipped)
The system will move the driver’s seat
automatically as follows:
• Vehicles equipped with Driver’s Power
Seat and Smart Key
-The driver’s seat will move rearward
when the Engine Start/Stop button
is pressed to turn the engine OFF.
-The driver’s seat will move forward
when the Engine Start/Stop button
is pressed to the ACC or engine
START position.
Note that Seat Easy Access operation
may be limited when the driver’s seat
position setting is already close to the
maximum rearward travel position.
You can enable or disable the Seat Easy
Access feature in the User Settings menu
on the LCD display or the navigation
infotainment screen on some models.
‘Convenience → Seat Easy Access → Off/Normal/Extended’.
For more details, refer to “LCD Display”
In chapter 4.
CAUTION
The driver should be aware and be
cautious to avoid injury or damage
when using this feature if there are
objects or passengers in the driver’s
side rear seat or seat floor.
In case of emergency or to stop
movement of the front seat when the
Seat Easy Access is operating, press the
SET button or any of the driver’s seat
control switches.
Page 184 of 638
Convenient features
5-40
Electric Power Steering (EPS)
The system assists you with steering the
vehicle. If the vehicle is turned off or
if the power steering system becomes
inoperative, you may still steer the
vehicle, but it will require increased
steering effort.
Should you notice any change in the
effort required to steer during normal
vehicle operation, we recommend that
you have the system checked by an
authorized HYUNDAI dealer.
CAUTION
If Electric Power Steering does not
operate normally, the warning light and the message ‘Check motor driven
power steering’ will illuminate on the
instrument cluster. You may steer the
vehicle, but it will require increased
steering efforts. We recommend that
you take your vehicle to an authorized
HYUNDAI dealer or to a service station
and have the system checked as soon as
possible.
Information
The following symptoms may occur during
normal vehicle operation:
• The steering effort may be high
immediately after pressing the Engine
Start/Stop button to the ON position.
This happens as the system performs
the EPS system diagnostics. When the
diagnostics are completed, the steering
wheel effort will return to its normal
condition.
• When the battery voltage is low, you
might have to put more steering effort.
However, it is a temporary condition so
that it will return to normal condition
after charging the battery.
• A click noise may be heard from the
EPS relay after the Engine Start/Stop
button is in the ON or OFF position.
• Motor noise may be heard when the
vehicle is at a stop or at a low driving
speed.
• When you operate the steering wheel
in low temperatures, abnormal noise
may occur. If the temperature rises, the
noise will disappear. This is a normal
condition.
• When an error is detected from EPS,
the steering effort assist function will
not be activated in order to prevent
fatal accidents. Instrument cluster
warning lights may be on or the
steering effort may be high. If these
symptoms occur, drive the vehicle
to a safe area as soon as it is safe to
do so. We recommend that you have
the system checked by an authorized
HYUNDAI dealer as soon as possible.
STEERING WHEEL
Page 185 of 638
05
5-41
Tilt / Telescopic steering
When adjusting the steering wheel to a
comfortable position, adjust the steering
wheel so that it points toward your chest,
not toward your face. Make sure you can
see the instrument cluster warning lights
and gauges. After adjusting, push the
steering wheel both up and down to be
certain it is locked in position.
Always adjust the position of the steering
wheel before driving.
WARNING
NEVER adjust the steering wheel while
driving. This may cause loss of vehicle
control resulting in an accident.
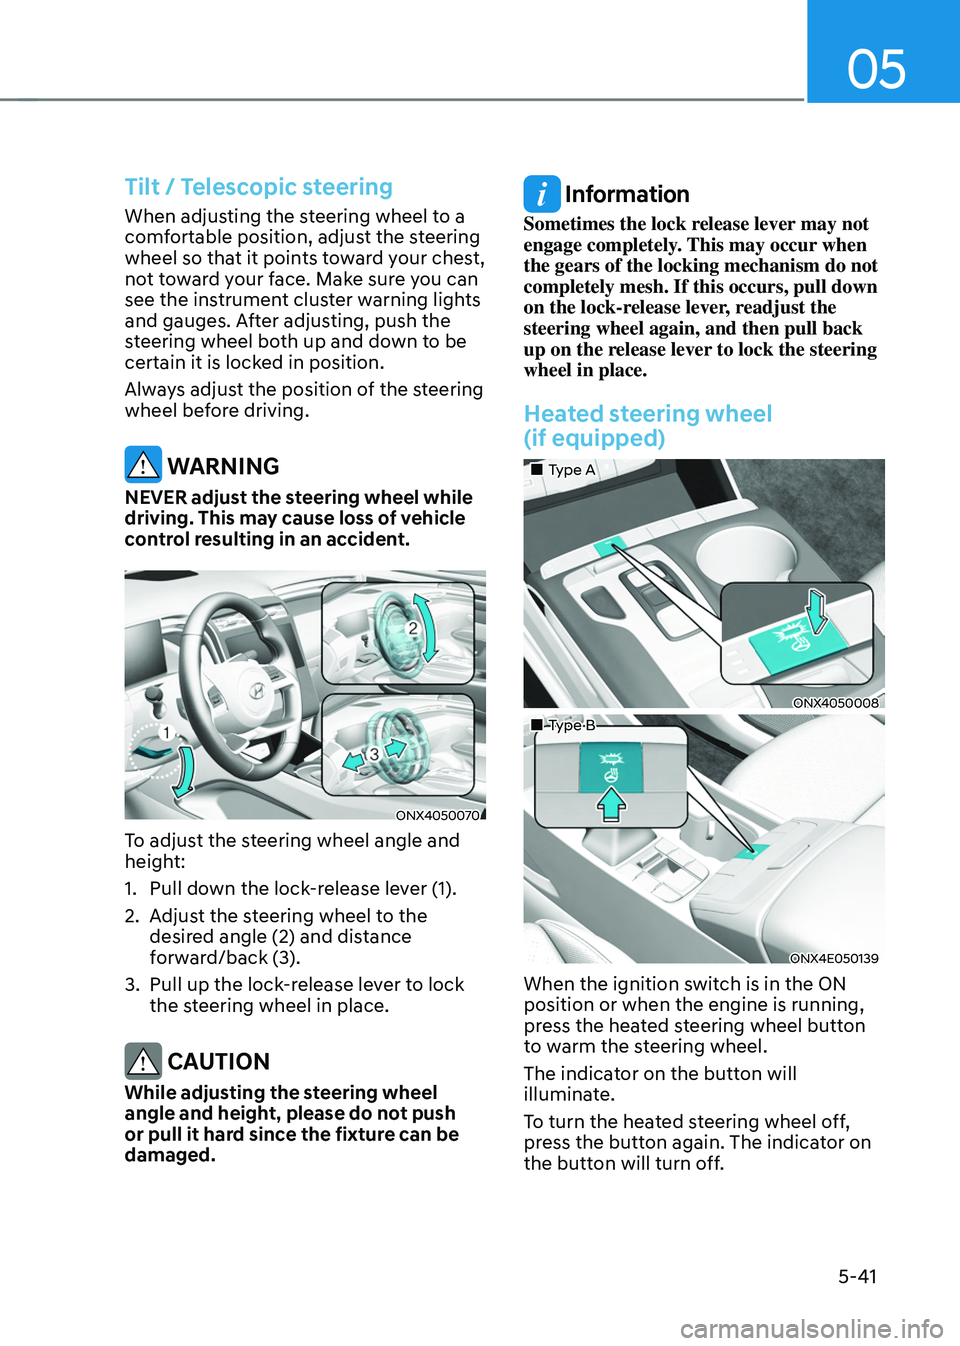
ONX4050070
To adjust the steering wheel angle and
height:
1. Pull down the lock-release lever (1).
2. Adjust the steering wheel to the
desired angle (2) and distance
forward/back (3).
3. Pull up the lock-release lever to lock
the steering wheel in place.
CAUTION
While adjusting the steering wheel
angle and height, please do not push
or pull it hard since the fixture can be
damaged.
Information
Sometimes the lock release lever may not
engage completely. This may occur when
the gears of the locking mechanism do not
completely mesh. If this occurs, pull down
on the lock-release lever, readjust the
steering wheel again, and then pull back
up on the release lever to lock the steering
wheel in place.
Heated steering wheel
(if equipped)
„„Type A
ONX4050008
„„Type B
ONX4E050139
When the ignition switch is in the ON
position or when the engine is running,
press the heated steering wheel button
to warm the steering wheel.
The indicator on the button will
illuminate.
To turn the heated steering wheel off,
press the button again. The indicator on
the button will turn off.