Page 186 of 638

Convenient features
5-42
• Auto Comfort Control for Driver (if
equipped)
The Automatic Comfort Control
feature can control the steering
wheel heater operation according
to the ambient temperature and
the set climate control temperature
while the engine is running.
If the heated steering wheel switch
is pressed while the Automatic
Comfort Control feature is
operating, then the heated steering
wheel operation will be controlled
manually.
The Auto Comfort Control feature
is enabled from the Vehicle
Settings menu on the navigation
infotainment screen.
-The heated steering wheel defaults
to the OFF position whenever the
ignition switch is ON. However, if
the Auto Comfort Control function
is ON, the heated steering wheel
will turn on and off depending on
the ambient temperature and the
set climate control temperature.
For more details, we recommend that
you contact an authorized HYUNDAI
dealer.
Information
The heated steering wheel will turn off
automatically approximately 30 minutes
after the heated steering wheel is turned
on.
NOTICE
Do not install any cover or accessory
on the steering wheel. This cover or
accessory could cause damage to the
heated steering wheel system.
Horn
OCN7050016
To sound the horn, press the area
indicated by the horn symbol on your
steering wheel (see illustration). The
horn will operate only when this area is
pressed.
NOTICE
Do not strike the horn severely to
operate it, or hit it with your fist. Do not
press on the horn with a sharp-pointed
object.
Page 188 of 638
Convenient features
5-44
Electrochromic Mirror
(if equipped)
ODN8059023LThe electric rearview mirror
automatically controls the glare from the
headlamp of the vehicle behind you in
nighttime or low light driving conditions.
When the engine is running, the glare is
automatically controlled by the sensor
mounted in the rearview mirror. The
sensor detects the light level around the
vehicle, and automatically adjusts to
control the headlamp glare from vehicles
behind you.
Whenever the the transmission is
shifted to R (Reverse), the mirror will
automatically go to the brightest setting
in order to improve the driver’s view
behind the vehicle.
Electrochromic Mirror with
Homelink System (if equipped)
Your vehicle may be equipped with
a Gentex Automatic-Dimming Mirror
with an Integrated HomeLink® Wireless
Control System.
During nighttime driving, this feature
will automatically detect and reduce
rearview mirror glare. The HomeLink®
Universal Transceiver allows you to
activate your garage door(s), electric
gate, home lighting, etc.
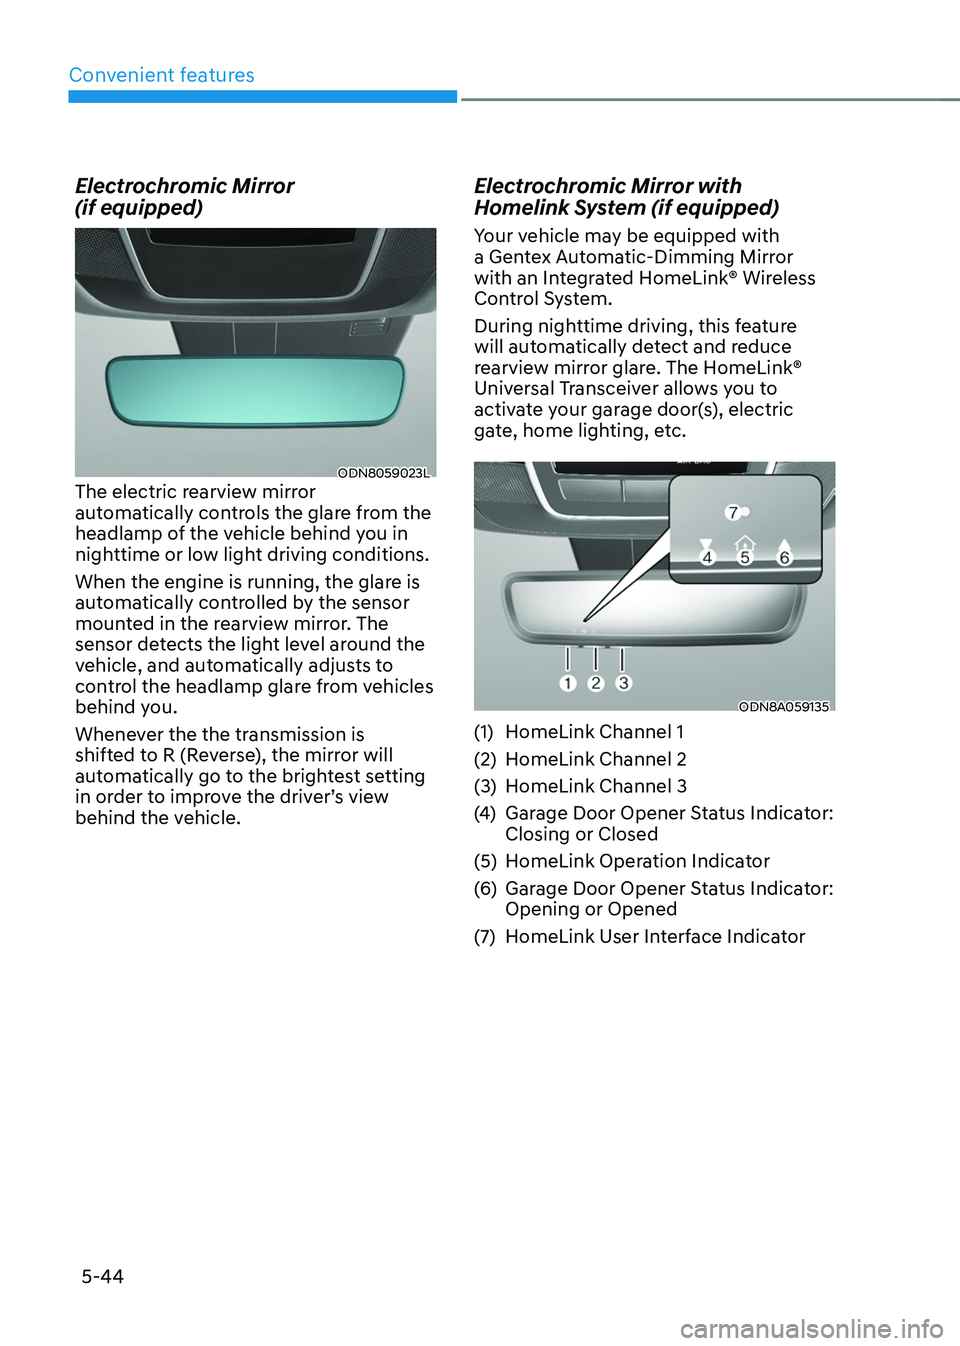
ODN8A059135
(1) HomeLink Channel 1
(2) HomeLink Channel 2
(3) HomeLink Channel 3
(4) Garage Door Opener Status Indicator:
Closing or Closed
(5) HomeLink Operation Indicator
(6) Garage Door Opener Status Indicator:
Opening or Opened
(7) HomeLink User Interface Indicator
Page 203 of 638
05
5-59
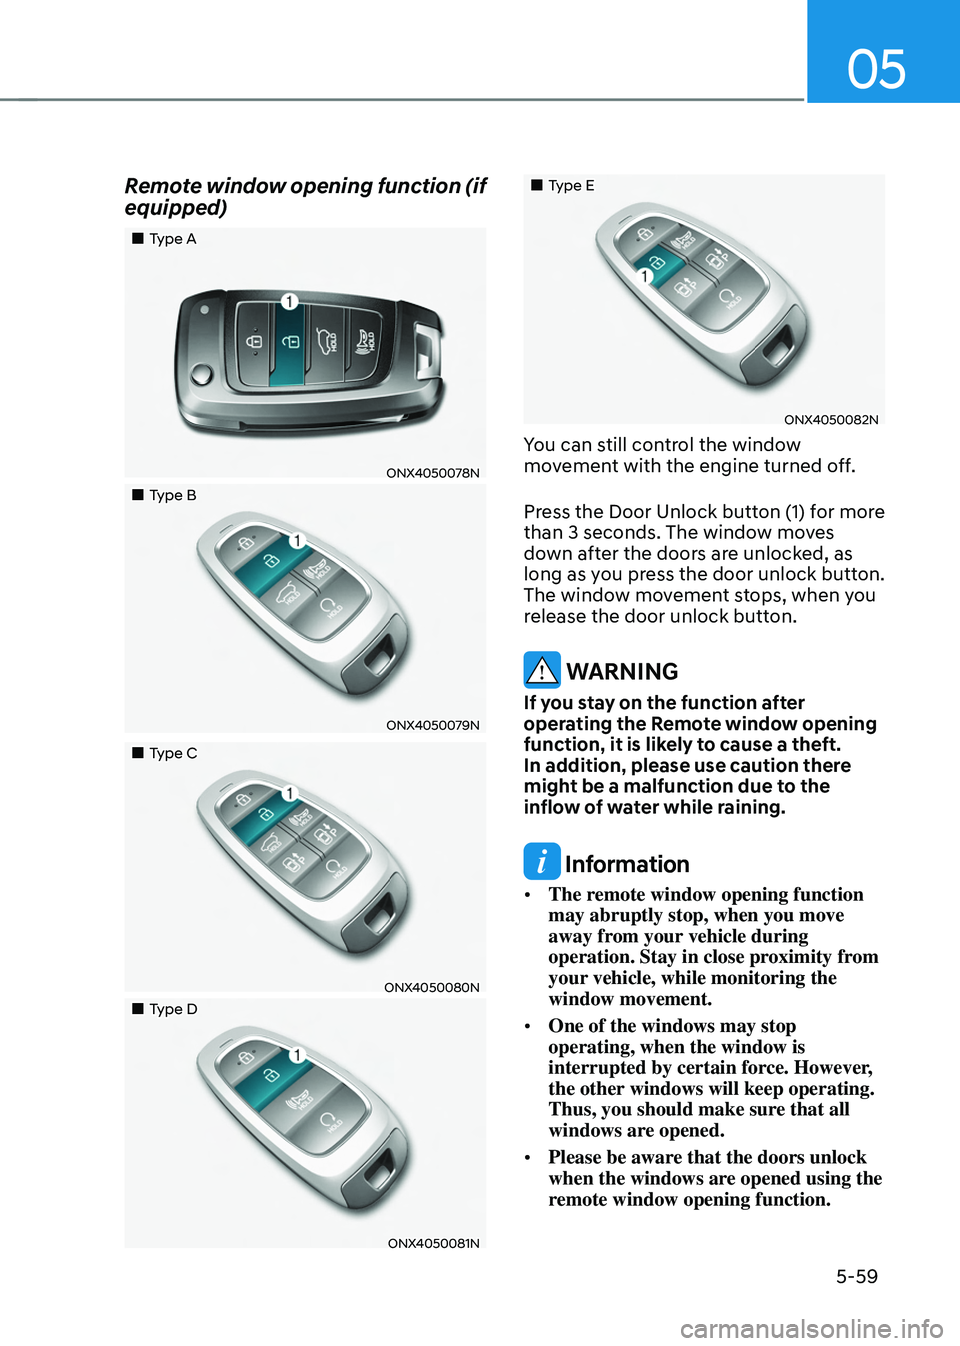
Remote window opening function (if
equipped)
„„Type A
ONX4050078N
„„Type B
ONX4050079N
„„Type C
ONX4050080N
„„Type D
ONX4050081N
„„Type E
ONX4050082N
You can still control the window
movement with the engine turned off.
Press the Door Unlock button (1) for more
than 3 seconds. The window moves
down after the doors are unlocked, as
long as you press the door unlock button.
The window movement stops, when you
release the door unlock button.
WARNING
If you stay on the function after
operating the Remote window opening
function, it is likely to cause a theft.
In addition, please use caution there
might be a malfunction due to the
inflow of water while raining.
Information
• The remote window opening function
may abruptly stop, when you move
away from your vehicle during
operation. Stay in close proximity from
your vehicle, while monitoring the
window movement.
• One of the windows may stop
operating, when the window is
interrupted by certain force. However,
the other windows will keep operating.
Thus, you should make sure that all
windows are opened.
• Please be aware that the doors unlock
when the windows are opened using the
remote window opening function.
Page 204 of 638
Convenient features
5-60
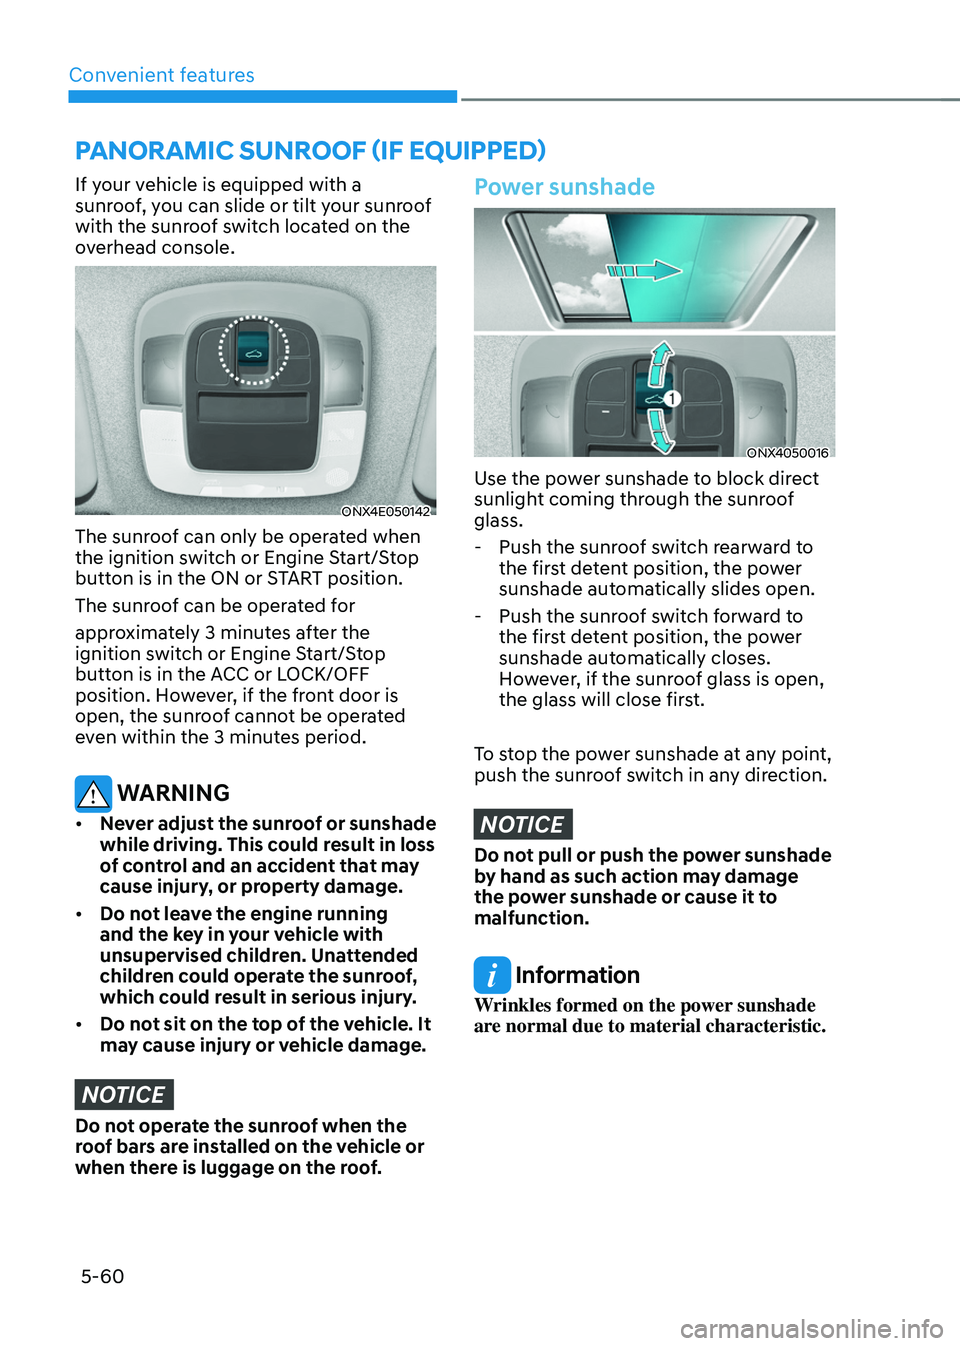
If your vehicle is equipped with a
sunroof, you can slide or tilt your sunroof
with the sunroof switch located on the
overhead console.
ONX4E050142
The sunroof can only be operated when
the ignition switch or Engine Start/Stop
button is in the ON or START position.
The sunroof can be operated for
approximately 3 minutes after the
ignition switch or Engine Start/Stop
button is in the ACC or LOCK/OFF
position. However, if the front door is
open, the sunroof cannot be operated
even within the 3 minutes period.
WARNING
• Never adjust the sunroof or sunshade
while driving. This could result in loss
of control and an accident that may
cause injury, or property damage.
• Do not leave the engine running
and the key in your vehicle with
unsupervised children. Unattended
children could operate the sunroof,
which could result in serious injury.
• Do not sit on the top of the vehicle. It
may cause injury or vehicle damage.
NOTICE
Do not operate the sunroof when the
roof bars are installed on the vehicle or
when there is luggage on the roof.
Power sunshade
ONX4050016
Use the power sunshade to block direct
sunlight coming through the sunroof
glass.
-Push the sunroof switch rearward to
the first detent position, the power
sunshade automatically slides open.
-Push the sunroof switch forward to
the first detent position, the power
sunshade automatically closes.
However, if the sunroof glass is open,
the glass will close first.
To stop the power sunshade at any point,
push the sunroof switch in any direction.
NOTICE
Do not pull or push the power sunshade
by hand as such action may damage
the power sunshade or cause it to
malfunction.
Information
Wrinkles formed on the power sunshade
are normal due to material characteristic.
PANORAMIC SUNROOF (IF EQUIPPED)
Page 207 of 638
05
5-63
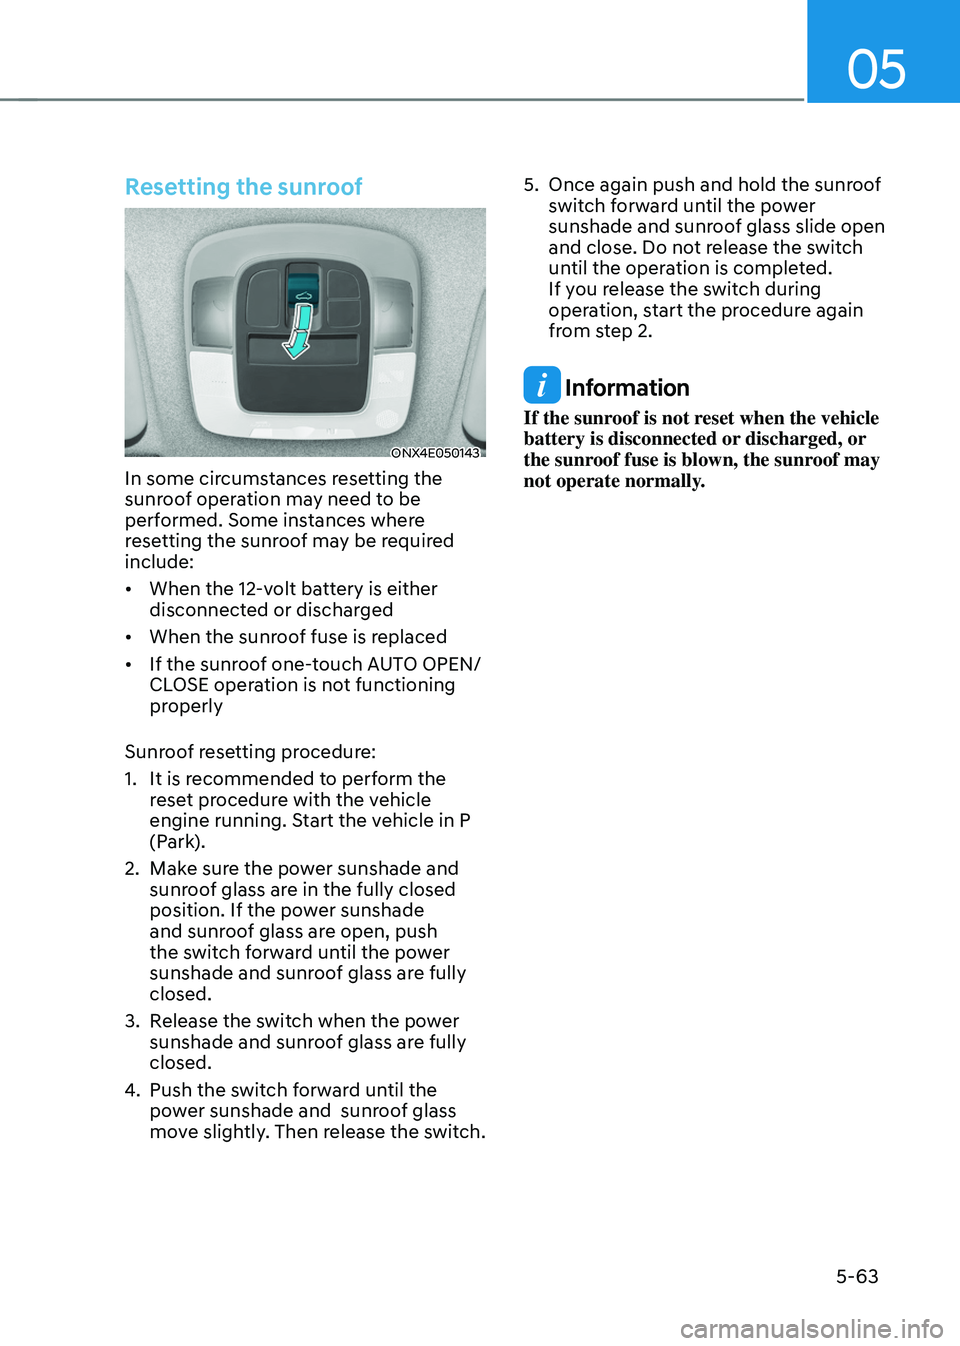
Resetting the sunroof
ONX4E050143
In some circumstances resetting the
sunroof operation may need to be
performed. Some instances where
resetting the sunroof may be required
include:
• When the 12-volt battery is either
disconnected or discharged
• When the sunroof fuse is replaced
• If the sunroof one-touch AUTO OPEN/
CLOSE operation is not functioning
properly
Sunroof resetting procedure:
1. It is recommended to perform the
reset procedure with the vehicle
engine running. Start the vehicle in P
(Park).
2. Make sure the power sunshade and
sunroof glass are in the fully closed
position. If the power sunshade
and sunroof glass are open, push
the switch forward until the power
sunshade and sunroof glass are fully
closed.
3. Release the switch when the power
sunshade and sunroof glass are fully
closed.
4. Push the switch forward until the
power sunshade and sunroof glass
move slightly. Then release the switch.
5. Once again push and hold the sunroof
switch forward until the power
sunshade and sunroof glass slide open
and close. Do not release the switch
until the operation is completed.
If you release the switch during
operation, start the procedure again
from step 2.
Information
If the sunroof is not reset when the vehicle
battery is disconnected or discharged, or
the sunroof fuse is blown, the sunroof may
not operate normally.
Page 208 of 638
Convenient features
5-64
Sunroof open warning
ONX4040010
If the driver turns off the engine
when the sunroof is not fully closed, the
warning chime will sound for several
seconds and the sunroof open warning
will appear on the cluster LCD display.
Close the sunroof securely when leaving
your vehicle.
CAUTION
Make sure the sunroof is closed fully
when leaving your vehicle.
If the sunroof is left open, rain or snow
may wet the interior of the vehicle.
Also, leaving the sunroof open when the
vehicle is unattended may invite theft.
Page 209 of 638
05
5-65
Hood
Opening the hood
ONX4050020
1. Park the vehicle and set the parking
brake.
2. Pull the release lever to unlatch the
hood. The hood should pop open
slightly.
ONX4050021
3. Go to the front of the vehicle, raise the
hood slightly, push up the secondary
latch (1) inside of the hood center and
lift the hood.
ONX4050022
4. Pull up on the hood support rod.
5. Install the end of the hood support rod
into the slot located on the hood (3).
WARNING
• Grasp the hood support rod in the
area wrapped in rubber when the
engine is hot. The rubber portion will
insulate the heat and protect you
from burn or injury.
• The end of the hood support rod
must be inserted fully into the hood
slot whenever you inspect the engine
compartment. This will prevent
the hood from falling and possibly
injuring you.
EXTERIOR FEATURES
Page 210 of 638
Convenient features
5-66
Closing the hood
1. Before closing the hood, check in and
around the engine compartment to
ensure the following:
-Any tools or other loose objects
are removed from the engine room
area or hood opening area
-All glove, rags, or other
combustible material is removed
from the engine compartment
-All filler caps are tightly and
correctly installed
2. Return the hood support rod to its clip
to prevent it from rattling.
3. Lower the hood until it is about 30 cm
(12in.) above the closed position and
let it drop. Make sure that it locks into
place.
4. Check that the hood has engaged
properly. If the hood can be raised
slightly, it is not properly engaged.
Open it again and close it with a little
more force.
WARNING
• Before closing the hood, ensure
all obstructions are removed from
around the hood opening.
• Always double check to be sure that
the hood is firmly latched before
driving away. Check there is no
hood open warning light or message
displayed on the instrument cluster.
Driving with the hood opened may
cause a total loss of visibility, which
might result in an accident.
• Do not move the vehicle with the
hood in the raised position, as vision
is obstructed, which might result in
an accident, and the hood could fall
or be damaged.
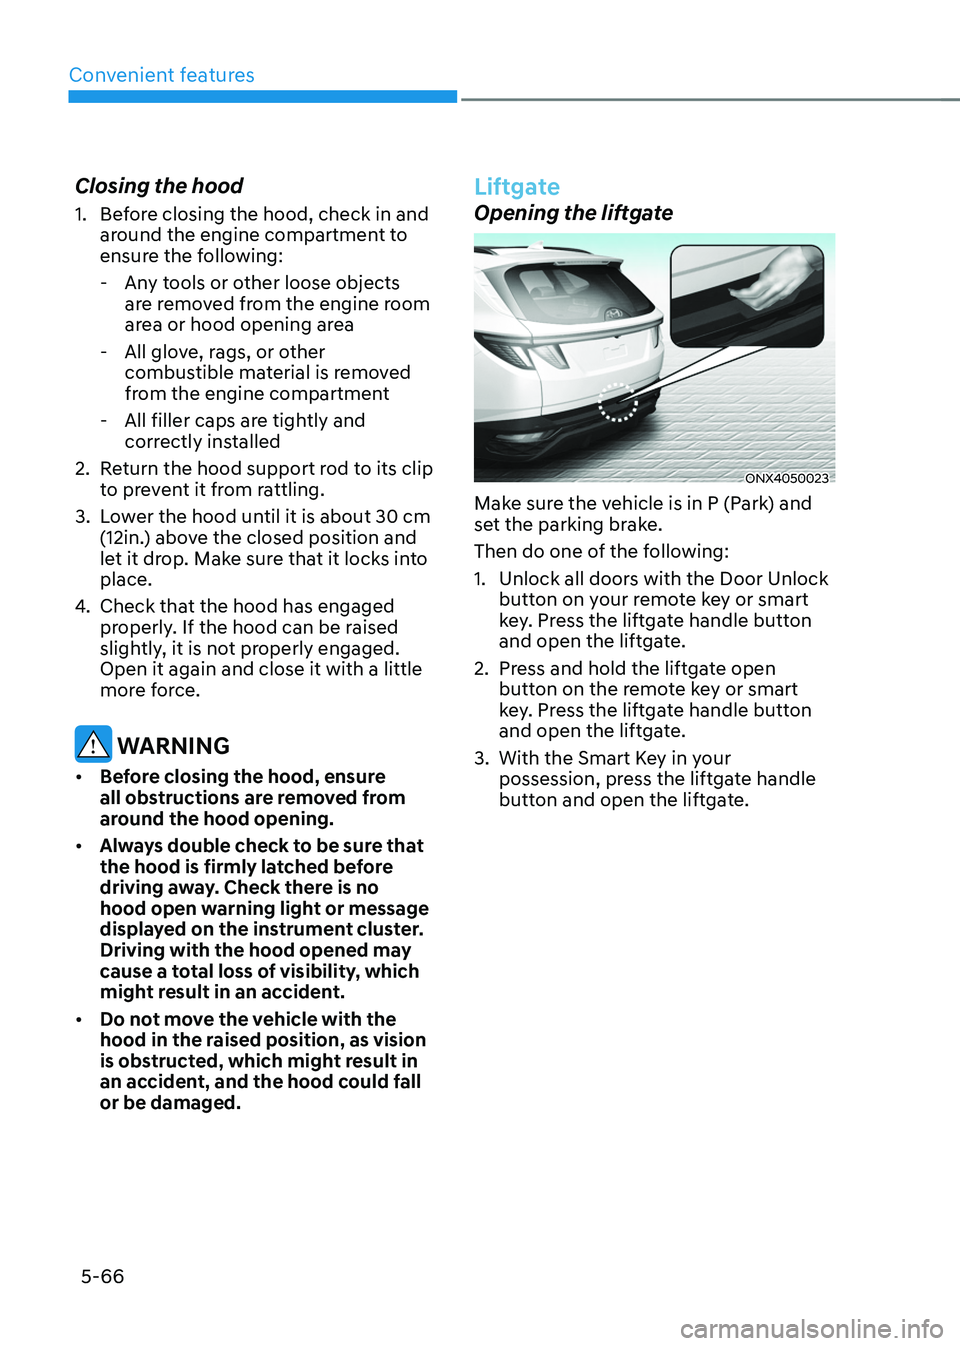
Liftgate
Opening the liftgate
ONX4050023
Make sure the vehicle is in P (Park) and
set the parking brake.
Then do one of the following:
1. Unlock all doors with the Door Unlock
button on your remote key or smart
key. Press the liftgate handle button
and open the liftgate.
2. Press and hold the liftgate open
button on the remote key or smart
key. Press the liftgate handle button
and open the liftgate.
3. With the Smart Key in your
possession, press the liftgate handle
button and open the liftgate.