2022 HYUNDAI SONATA HYBRID tow
[x] Cancel search: towPage 411 of 527
06
6-135
The severe weather conditions of winter
quickly wear out tires and cause other
problems. To minimize winter driving
problems, you should take the following
suggestions:
Snow or Icy Conditions
You need to keep sufficient distance
between your vehicle and the vehicle in
front of you.
Apply the brakes gently. Speeding, rapid
acceleration, sudden brake applications,
and sharp turns are potentially
very hazardous practices. During
deceleration, use engine braking to the
fullest extent. Sudden brake applications
on snowy or icy roads may cause the
vehicle to skid.
To drive your vehicle in deep snow, it
may be necessary to use snow tires or to
install tire chains on your tires.
Always carry emergency equipment.
Some of the items you may want to carry
include tire chains, tow straps or chains,
a flashlight, emergency flares, sand, a
shovel, jumper cables, a window scraper,
gloves, ground cloth, coveralls, a blanket,
etc.
Snow tires
WARNING
Snow tires should be equivalent in size
and type to the vehicle’s standard tires.
Otherwise, the safety and handling of
your vehicle may be adversely affected.
If you mount snow tires on your vehicle,
make sure to use radial tires of the same
size and load range as the original tires.
Mount snow tires on all four wheels
to balance your vehicle’s handling in
all weather conditions. The traction
provided by snow tires on dry roads
may not be as high as your vehicle's
original equipment tires. Check with
the tire dealer for maximum speed
recommendations.
Information
Do not install studded tires without
first checking local, state and municipal
regulations for possible restrictions against
their use.
WINTER DRIVING
Page 416 of 527
While Driving
6-140
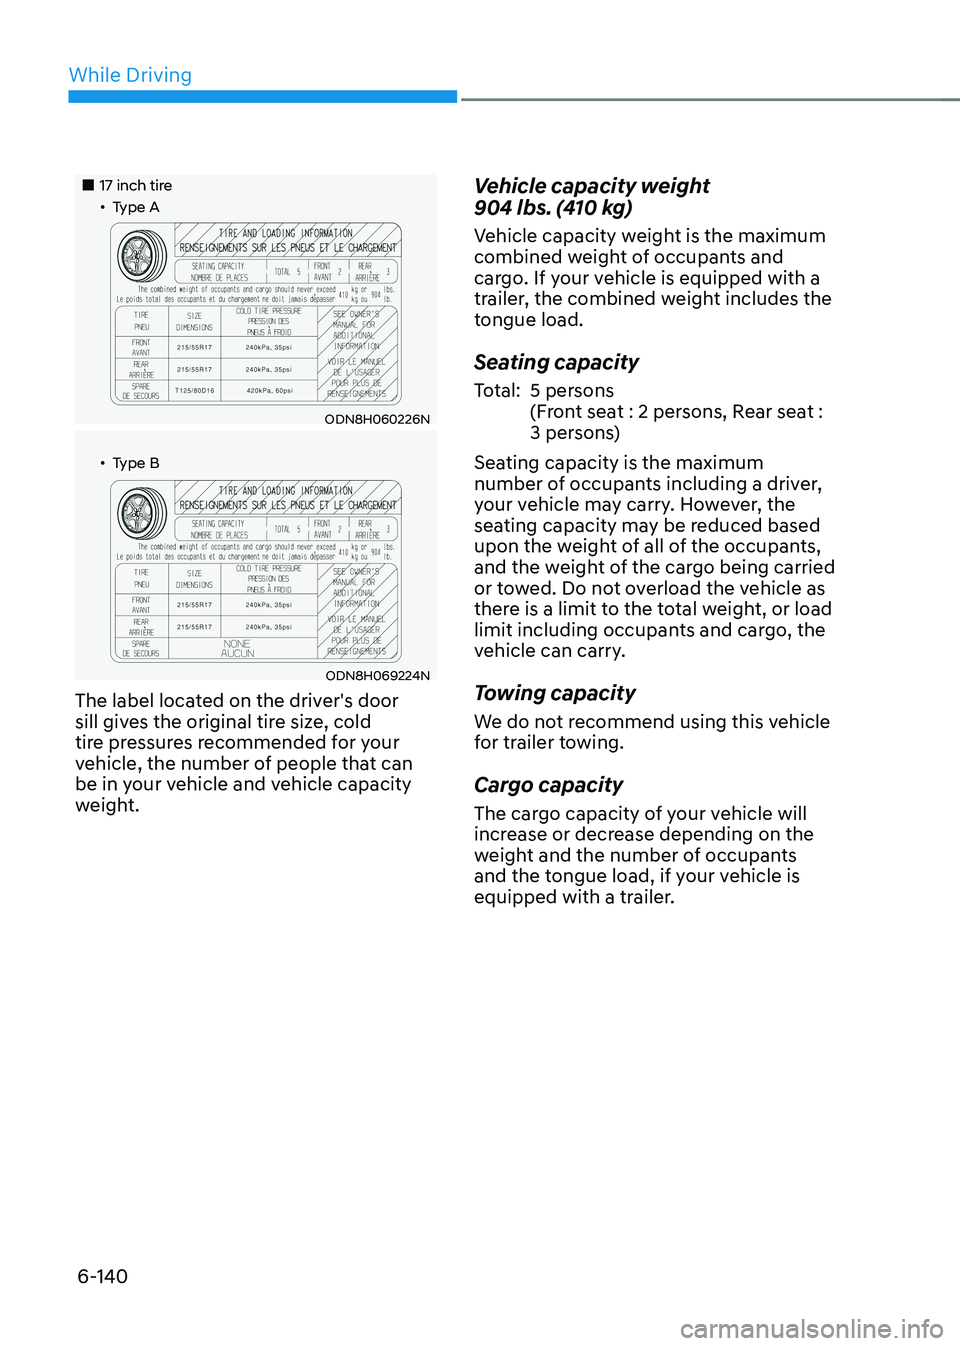
„„17 inch tire„ǴType A
ODN8H060226N
„ǴType B
ODN8H069224N
The label located on the driver's door
sill gives the original tire size, cold
tire pressures recommended for your
vehicle, the number of people that can
be in your vehicle and vehicle capacity
weight.
Vehicle capacity weight
904 lbs. (410 kg)
Vehicle capacity weight is the maximum
combined weight of occupants and
cargo. If your vehicle is equipped with a
trailer, the combined weight includes the
tongue load.
Seating capacity
Total:5 persons
(Front seat : 2 persons, Rear seat :
3 persons)
Seating capacity is the maximum
number of occupants including a driver,
your vehicle may carry. However, the
seating capacity may be reduced based
upon the weight of all of the occupants,
and the weight of the cargo being carried
or towed. Do not overload the vehicle as
there is a limit to the total weight, or load
limit including occupants and cargo, the
vehicle can carry.
Towing capacity
We do not recommend using this vehicle
for trailer towing.
Cargo capacity
The cargo capacity of your vehicle will
increase or decrease depending on the
weight and the number of occupants
and the tongue load, if your vehicle is
equipped with a trailer.
Page 417 of 527
06
6-141
Steps for determining correct load
limit
1. Locate the statement "The combined
weight of occupants and cargo should
never exceed XXX kg or XXX lbs." on
your vehicle's placard.
2. Determine the combined weight of
the driver and passengers that will be
riding in your vehicle.
3. Subtract the combined weight of the
driver and passengers from XXX kg or
XXX lbs.
4. The resulting figure equals the
available amount of cargo and
luggage load capacity. For example,
if the "XXX" amount equals 1400
lbs. and there will be five 150 lb.
passengers in your vehicle, the
amount of available cargo and
luggage load capacity is 650 lbs.
(1400 - 750 (5 x 150) = 650 lbs.)
5. Determine the combined weight of
luggage and cargo being loaded on
the vehicle. That weight may not
safely exceed the available cargo and
luggage load capacity calculated in
Step 4.
6. If your vehicle will be towing a
trailer, load from your trailer will be
transferred to your vehicle. Consult
this manual to determine how this
reduces the available cargo and
luggage load capacity of your vehicle.
WARNING
Do not overload the vehicle as there
is a limit to the total weight, or load
limit, including occupants and cargo,
the vehicle can carry. Overloading can
shorten the life of the vehicle. If the
GVWR or the GAWR is exceeded, parts
on the vehicle can break, and it can
change the handling of your vehicle.
These could cause you to lose control
and result in an accident.
Page 420 of 527
While Driving
6-144
We do not recommend using this vehicle
for trailer towing.
TRAILER TOWING
Page 421 of 527
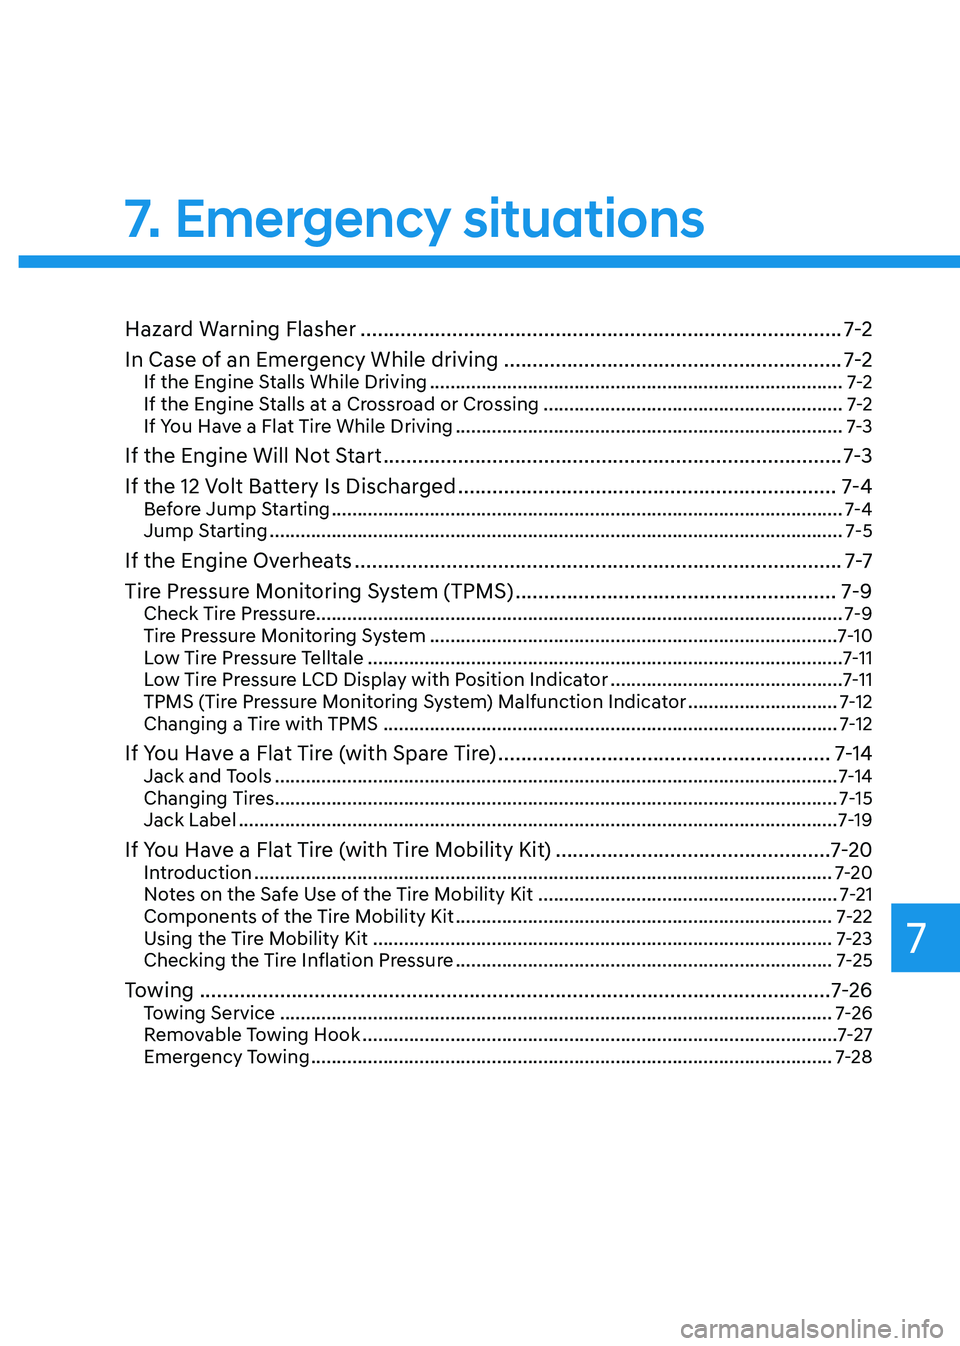
7. Emergency situations
Hazard Warning Flasher ........................................................................\
............7-2
In Case of an Emergency While driving
...........................................................7-2If the Engine Stalls While Driving ........................................................................\
........7-2
If the Engine Stalls at a Crossroad or Crossing ..........................................................7-2
If You Have a Flat Tire While Driving ........................................................................\
...7-3
If the Engine Will Not Start ........................................................................\
........7-3
If the 12 Volt Battery Is Discharged
..................................................................7-4Before Jump Starting ........................................................................\
...........................7-4
Jump Starting ........................................................................\
.......................................7-5
If the Engine Overheats ........................................................................\
.............7-7
Tire Pressure Monitoring System (TPMS)
........................................................7-9Check Tire Pressure ........................................................................\
..............................7-9
Tire Pressure Monitoring System ........................................................................\
.......7-10
Low Tire Pressure Telltale ........................................................................\
....................7-11
Low Tire Pressure LCD Display with Position Indicator .............................................7-11
TPMS (Tire Pressure Monitoring System) Malfunction Indicator .............................7-12
Changing a Tire with TPMS ........................................................................\
................7-12
If You Have a Flat Tire (with Spare Tire) ..........................................................7-14Jack and Tools ........................................................................\
.....................................7-14
Changing Tires ........................................................................\
.....................................7-15
Jack Label ........................................................................\
............................................7-19
If You Have a Flat Tire (with Tire Mobility Kit) ................................................7-20Introduction ........................................................................\
........................................7-20
Notes on the Safe Use of the Tire Mobility Kit ..........................................................7-21
Components of the Tire Mobility Kit ........................................................................\
.7-22
Using the Tire Mobility Kit ........................................................................\
.................7-23
Checking the Tire Inflation Pressure ........................................................................\
.7-25
Towing ........................................................................\
......................................7-26Towing Service ........................................................................\
...................................7-26
Removable Towing Hook ........................................................................\
....................7-27
Emergency Towing ........................................................................\
.............................7-28
Emergency situations
7
Page 425 of 527
07
7-5
NOTICE
External power source using 12V battery
The use of external power accessories
may reduce performance and function
of the vehicle. Especially, the use of
dash cameras may shut off the power of
the vehicle prior to the dash camera’s
automatic shut-down.
If the power of the vehicle is shut off,
start the vehicle as explained. (refer to
“Using the 12V Battery Reset Switch”)
Jump Starting
In the event vehicle still does not have a
functional 12V battery (check if interior
lights will not turn on) then you can try
a jump start to the engine compartment
jumper terminals using a 12V booster
pack or jumper cables from another
vehicle’s 12V battery according to the
following instructions.
CAUTION
Jump starting can be dangerous if
done incorrectly. Follow the jump
starting procedure in this section to
avoid serious injury or damage to
your vehicle. If in doubt about how to
properly jump start your vehicle, we
strongly recommend that you have a
service technician or towing service do
it for you.
1. Position the vehicles close enough
that the jumper cables will reach, but
do not allow the vehicles to touch.
Avoid fans or any moving parts in the
engine compartment at all times, even
when the vehicles are turned off.
2. Turn off all electrical devices such as
radios, lights, air conditioning, etc.
Put the vehicles in P (Park) and set the
parking brake. Turn both vehicles OFF.
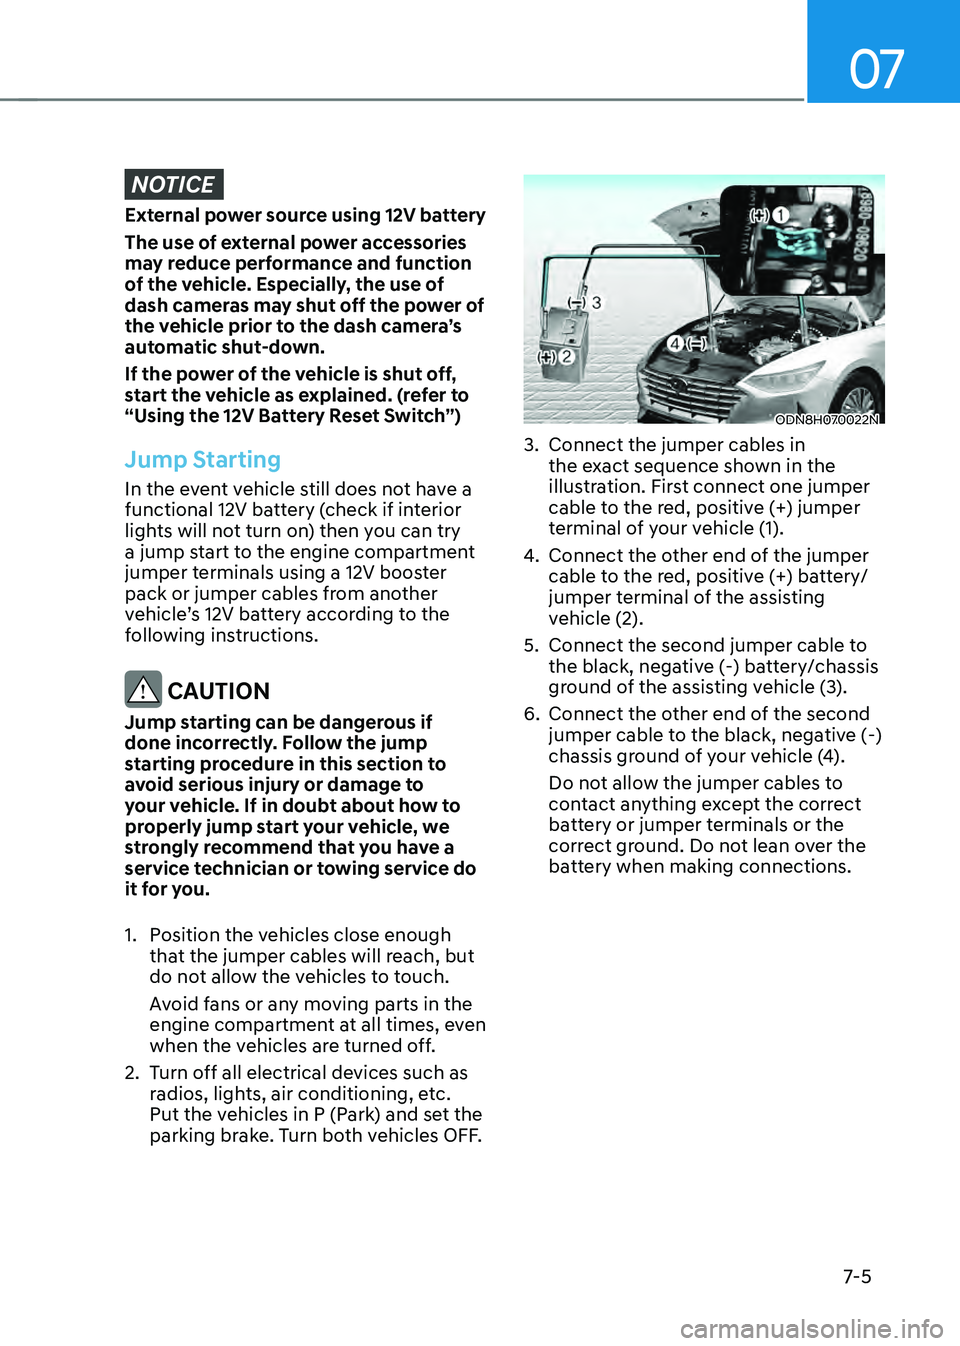
ODN8H070022N
3. Connect the jumper cables in
the exact sequence shown in the
illustration. First connect one jumper
cable to the red, positive (+) jumper
terminal of your vehicle (1).
4. Connect the other end of the jumper
cable to the red, positive (+) battery/
jumper terminal of the assisting
vehicle (2).
5. Connect the second jumper cable to
the black, negative (-) battery/chassis
ground of the assisting vehicle (3).
6. Connect the other end of the second
jumper cable to the black, negative (-)
chassis ground of your vehicle (4).
Do not allow the jumper cables to
contact anything except the correct
battery or jumper terminals or the
correct ground. Do not lean over the
battery when making connections.
Page 428 of 527
Emergency situations
7-8
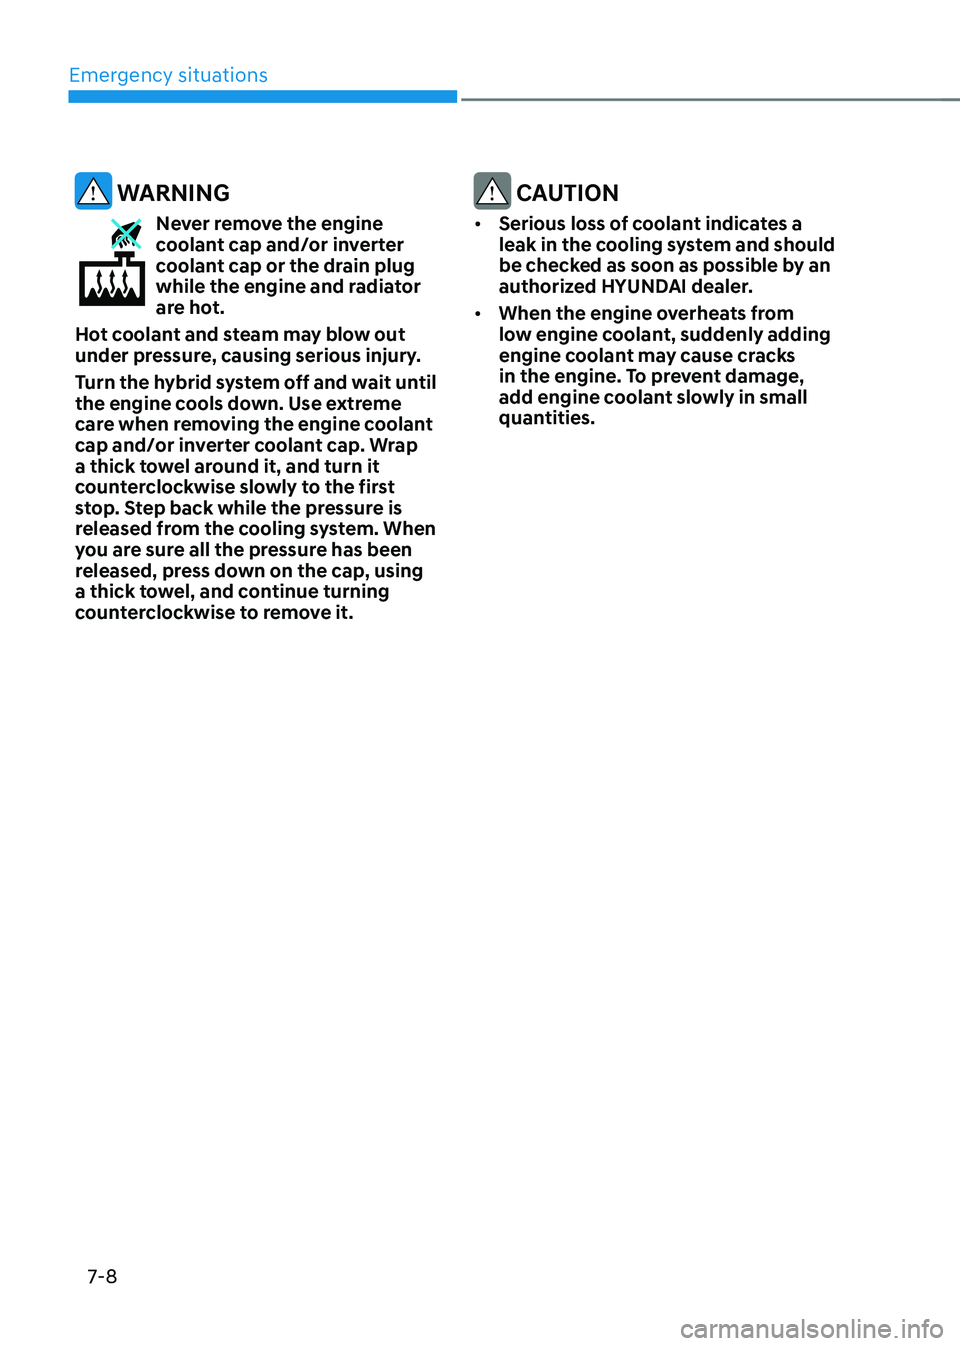
WARNING
Never remove the engine coolant cap and/or inverter
coolant cap or the drain plug
while the engine and radiator
are hot.
Hot coolant and steam may blow out
under pressure, causing serious injury.
Turn the hybrid system off and wait until
the engine cools down. Use extreme
care when removing the engine coolant
cap and/or inverter coolant cap. Wrap
a thick towel around it, and turn it
counterclockwise slowly to the first
stop. Step back while the pressure is
released from the cooling system. When
you are sure all the pressure has been
released, press down on the cap, using
a thick towel, and continue turning
counterclockwise to remove it.
CAUTION
• Serious loss of coolant indicates a
leak in the cooling system and should
be checked as soon as possible by an
authorized HYUNDAI dealer.
• When the engine overheats from
low engine coolant, suddenly adding
engine coolant may cause cracks
in the engine. To prevent damage,
add engine coolant slowly in small
quantities.
Page 432 of 527
Emergency situations
7-12
TPMS (Tire Pressure
Monitoring System)
Malfunction Indicator
The TPMS Malfunction Indicator
will illuminate after it blinks for
approximately one minute when there
is a problem with the Tire Pressure
Monitoring System.
Have the system checked by an
authorized HYUNDAI dealer as soon as
possible.
NOTICE
If there is a malfunction with the TPMS,
the Low Tire Pressure Position Telltale
will not be displayed even though the
vehicle has an under-inflated tire.
NOTICE
The TPMS Malfunction Indicator may
illuminate after blinking for one minute
if the vehicle is near electric power
supply cables or radio transmitters
such as police stations, government
and public offices, broadcasting
stations, military installations, airports,
transmitting towers, etc.
Additionally, the TPMS Malfunction
Indicator may illuminate if snow chains
are used or electronic devices such as
computers, chargers, remote starters,
navigation, etc. This may interfere with
normal operation of the TPMS.
Changing a Tire with TPMS
If you have a flat tire, the Low Tire
Pressure and Position telltales will come
on. Have the flat tire repaired by an
authorized HYUNDAI dealer as soon as
possible or replace the flat tire with the
spare tire (if equipped).
NOTICE
It is recommended that you do not use a
puncture-repairing agent not approved
by a HYUNDAI dealer to repair and/or
inflate a low pressure tire. Tire sealant
not approved by a HYUNDAI dealer may
damage the tire pressure sensor.
The spare tire (if equipped) does not
come with a tire pressure monitoring
sensor. When the low pressure tire or
the flat tire is replaced with the spare
tire, the Low Tire Pressure LCD position
indicator will remain on. Also, the TPMS
Malfunction Indicator will illuminate after
blinking for one minute if the vehicle
is driven at speed above 15.5 mph (25
km/h) for approximately 20 minutes.
Once the original tire equipped with
a tire pressure monitoring sensor is
reinflated to the recommended pressure
and reinstalled on the vehicle, the
Low Tire Pressure Telltale and TPMS
Malfunction Indicator will go off within a
few minutes of driving.
If the indicators do not extinguish after a
few minutes, please visit an authorized
HYUNDAI dealer.
Each wheel is equipped with a tire
pressure sensor mounted inside the tire
behind the valve stem (except for the
spare tire). You must use TPMS specific
wheels. It is recommended that you
always have your tires serviced by an
authorized HYUNDAI dealer.