2022 HYUNDAI SANTA FE Front
[x] Cancel search: FrontPage 199 of 637
Convenience features
5-58
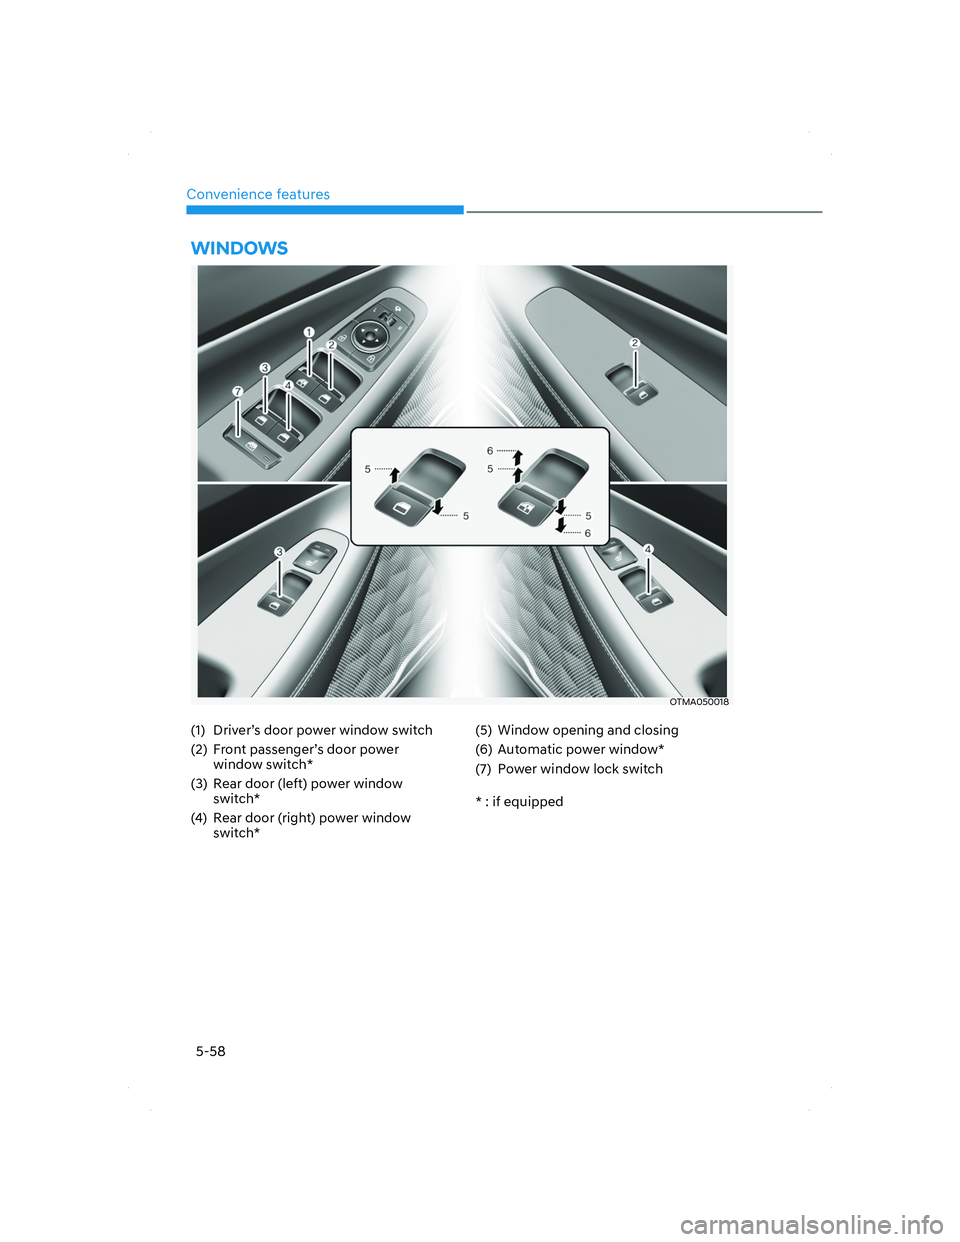
OTMA050018OTMA050018
WINDOWS
(1) Driver’s door power window switch
(2) Front passenger’s door power
window switch*
(3) Rear door (left) power window
switch*
(4) Rear door (right) power window
switch*(5) Window opening and closing
(6) Automatic power window*
(7) Power window lock switch
* : if equipped
005_TMa_HMA.indd 5-582021-10-28 10:15:03
Page 200 of 637
05
5-59
Power windows
The ignition switch must be in the ON
position to be able to raise or lower
the windows. Each door has a Power
Window switch to control that door’s
window. The driver has a Power Window
Lock switch which can block the
operation of rear passenger windows.
The power windows will operate for
approximately 3 minutes after the
ignition switch is placed in the ACC or
OFF position. However, if the front doors
are opened, the Power Windows cannot
be operated even within the 3 minutes
period.
Window opening and closing
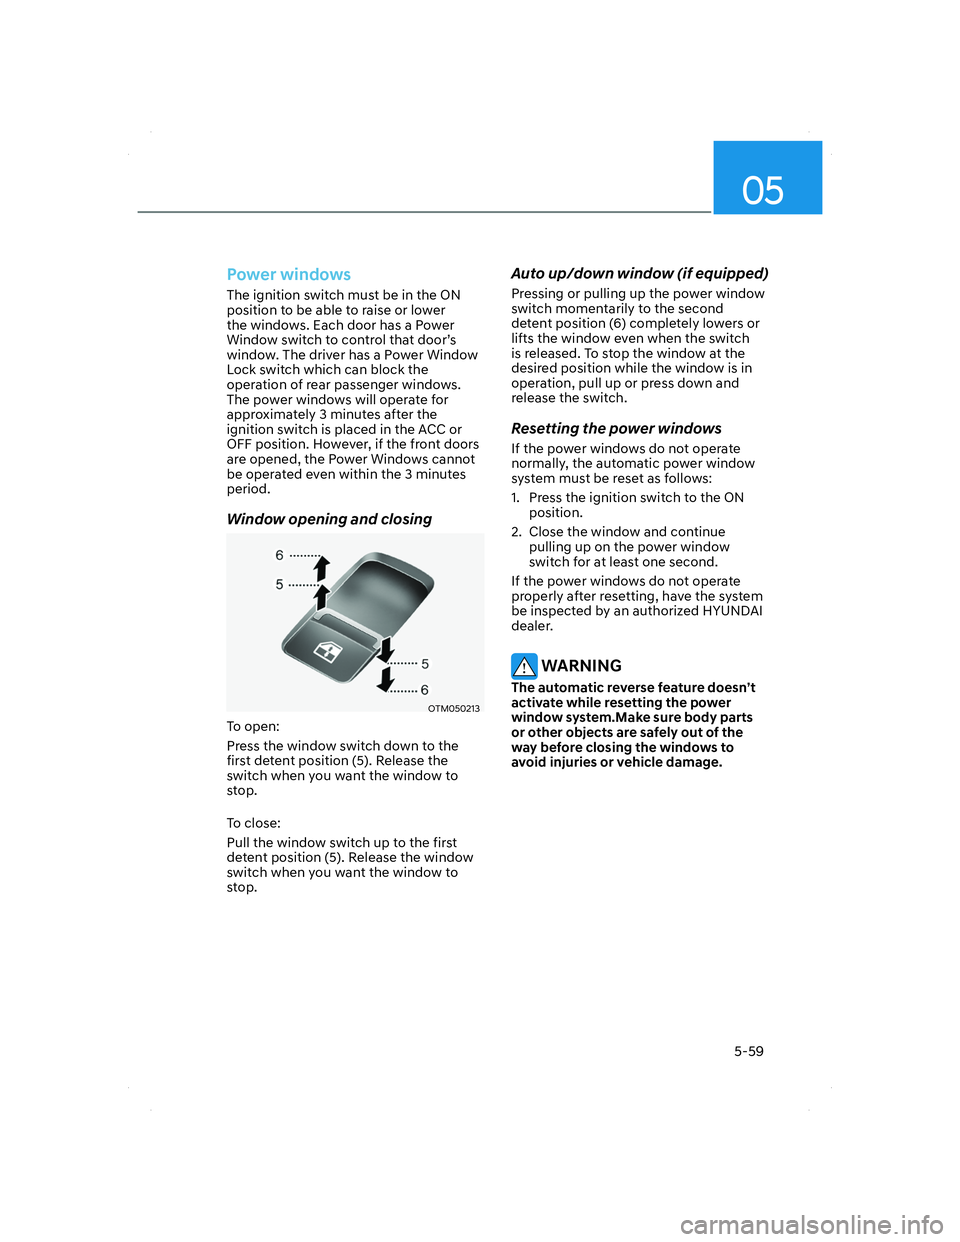
OTM050213OTM050213
To open:
Press the window switch down to the
first detent position (5). Release the
switch when you want the window to
stop.
To close:
Pull the window switch up to the first
detent position (5). Release the window
switch when you want the window to
stop.
Auto up/down window (if equipped)
Pressing or pulling up the power window
switch momentarily to the second
detent position (6) completely lowers or
lifts the window even when the switch
is released. To stop the window at the
desired position while the window is in
operation, pull up or press down and
release the switch.
Resetting the power windows
If the power windows do not operate
normally, the automatic power window
system must be reset as follows:
1. Press the ignition switch to the ON
position.
2. Close the window and continue
pulling up on the power window
switch for at least one second.
If the power windows do not operate
properly after resetting, have the system
be inspected by an authorized HYUNDAI
dealer.
WARNING
The automatic reverse feature doesn’t
activate while resetting the power
window system.Make sure body parts
or other objects are safely out of the
way before closing the windows to
avoid injuries or vehicle damage.
005_TMa_HMA.indd 5-592021-10-28 10:15:03
Page 201 of 637
Convenience features
5-60
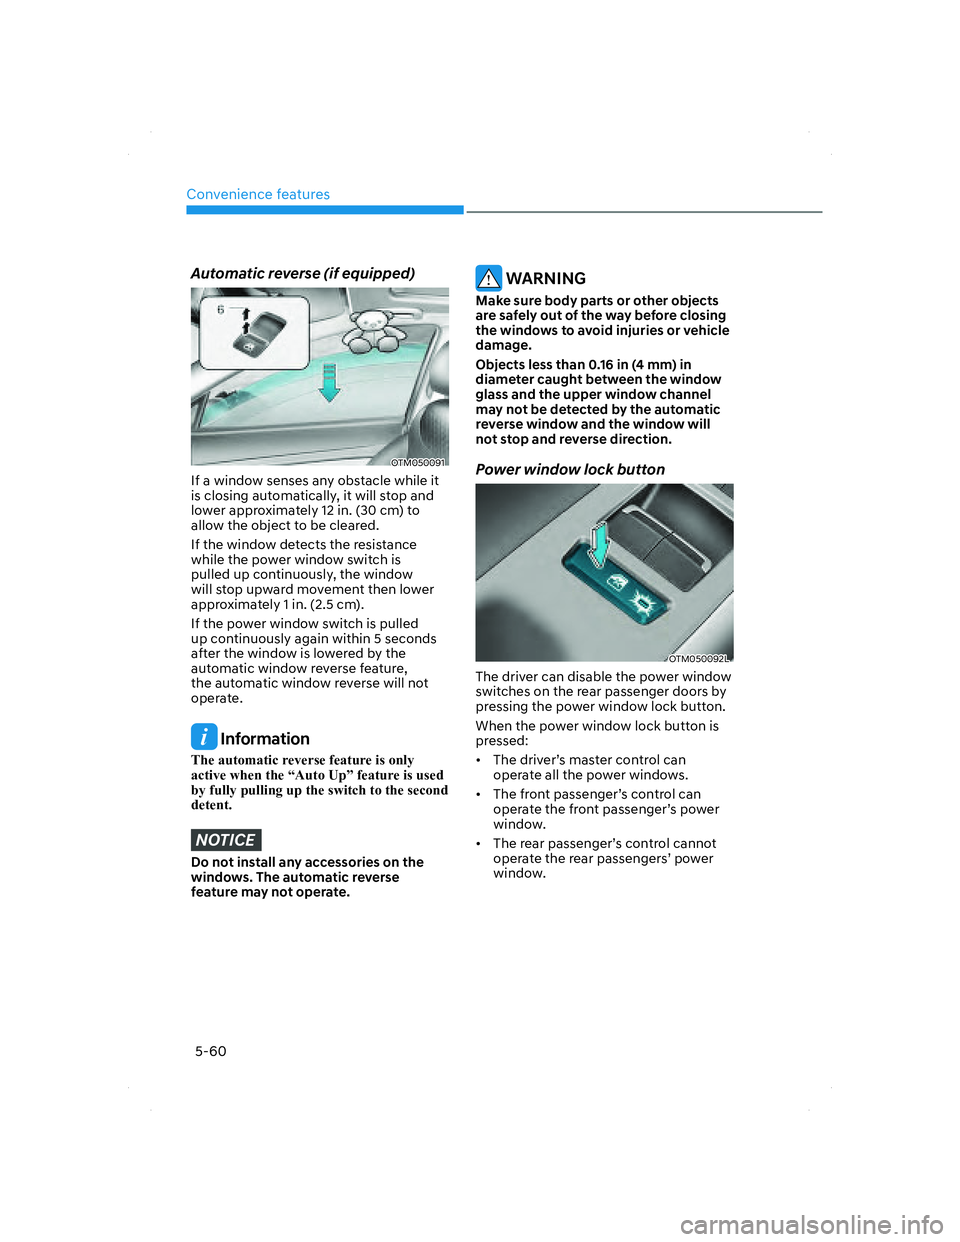
Automatic reverse (if equipped)
OTM050091OTM050091
If a window senses any obstacle while it
is closing automatically, it will stop and
lower approximately 12 in. (30 cm) to
allow the object to be cleared.
If the window detects the resistance
while the power window switch is
pulled up continuously, the window
will stop upward movement then lower
approximately 1 in. (2.5 cm).
If the power window switch is pulled
up continuously again within 5 seconds
after the window is lowered by the
automatic window reverse feature,
the automatic window reverse will not
operate.
Information
The automatic reverse feature is only
active when the “Auto Up” feature is used
by fully pulling up the switch to the second
detent.
NOTICE
Do not install any accessories on the
windows. The automatic reverse
feature may not operate.
WARNING
Make sure body parts or other objects
are safely out of the way before closing
the windows to avoid injuries or vehicle
damage.
Objects less than 0.16 in (4 mm) in
diameter caught between the window
glass and the upper window channel
may not be detected by the automatic
reverse window and the window will
not stop and reverse direction.
Power window lock button
OTM050092LOTM050092L
The driver can disable the power window
switches on the rear passenger doors by
pressing the power window lock button.
When the power window lock button is
pressed:
• The driver’s master control can
operate all the power windows.
• The front passenger’s control can
operate the front passenger’s power
window.
• The rear passenger’s control cannot
operate the rear passengers’ power
window.
005_TMa_HMA.indd 5-602021-10-28 10:15:04
Page 203 of 637
Convenience features
5-62
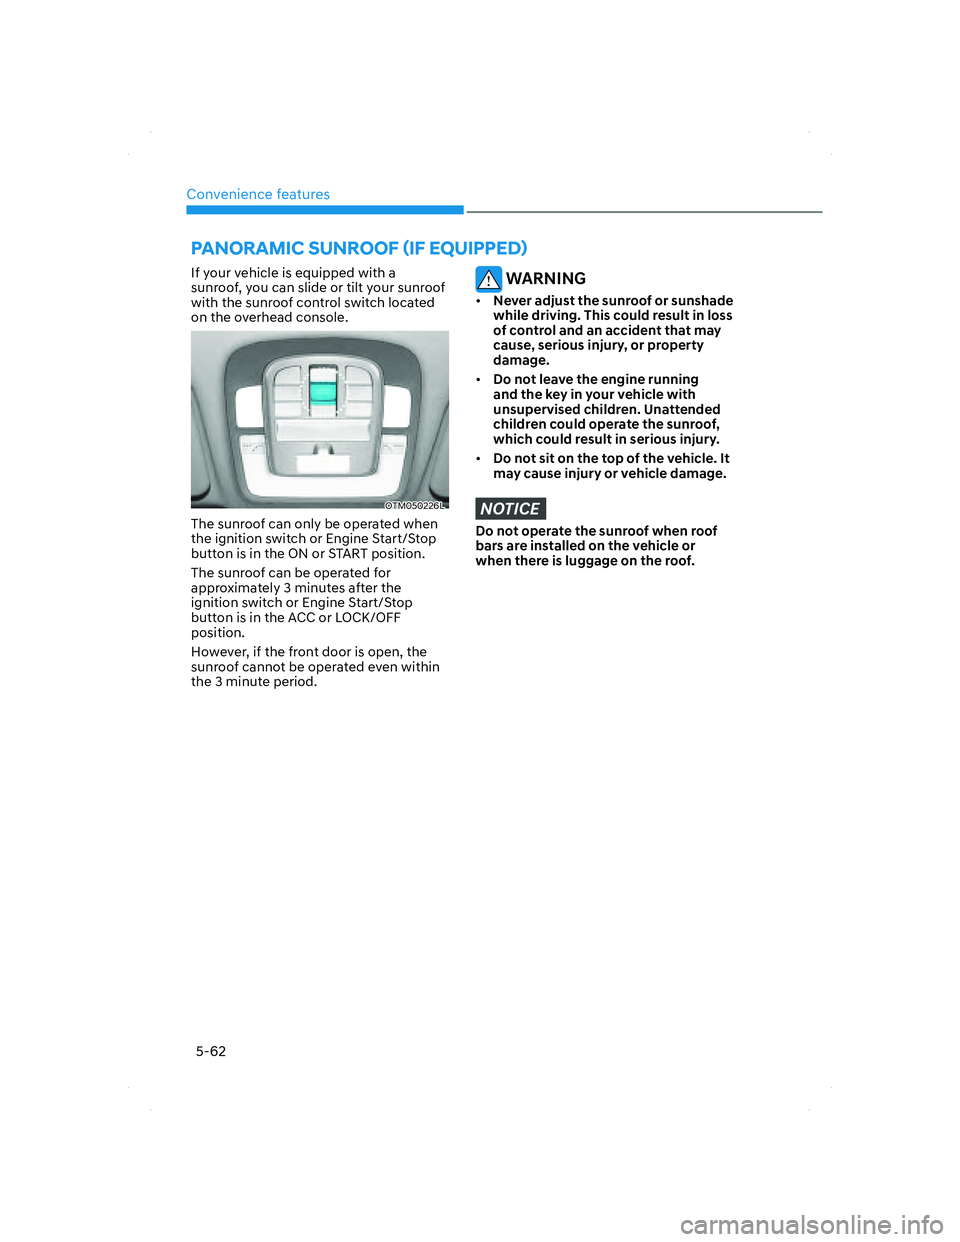
If your vehicle is equipped with a
sunroof, you can slide or tilt your sunroof
with the sunroof control switch located
on the overhead console.
OTM050226LOTM050226L
The sunroof can only be operated when
the ignition switch or Engine Start/Stop
button is in the ON or START position.
The sunroof can be operated for
approximately 3 minutes after the
ignition switch or Engine Start/Stop
button is in the ACC or LOCK/OFF
position.
However, if the front door is open, the
sunroof cannot be operated even within
the 3 minute period.
WARNING
• Never adjust the sunroof or sunshade
while driving. This could result in loss
of control and an accident that may
cause, serious injury, or property
damage.
• Do not leave the engine running
and the key in your vehicle with
unsupervised children. Unattended
children could operate the sunroof,
which could result in serious injury.
• Do not sit on the top of the vehicle. It
may cause injury or vehicle damage.
NOTICE
Do not operate the sunroof when roof
bars are installed on the vehicle or
when there is luggage on the roof.
PANORAMIC SUNROOF (IF EQUIPPED)
005_TMa_HMA.indd 5-622021-10-28 10:15:05
Page 208 of 637
05
5-67
Hood
Opening the hood
OTM050032 OTM050032
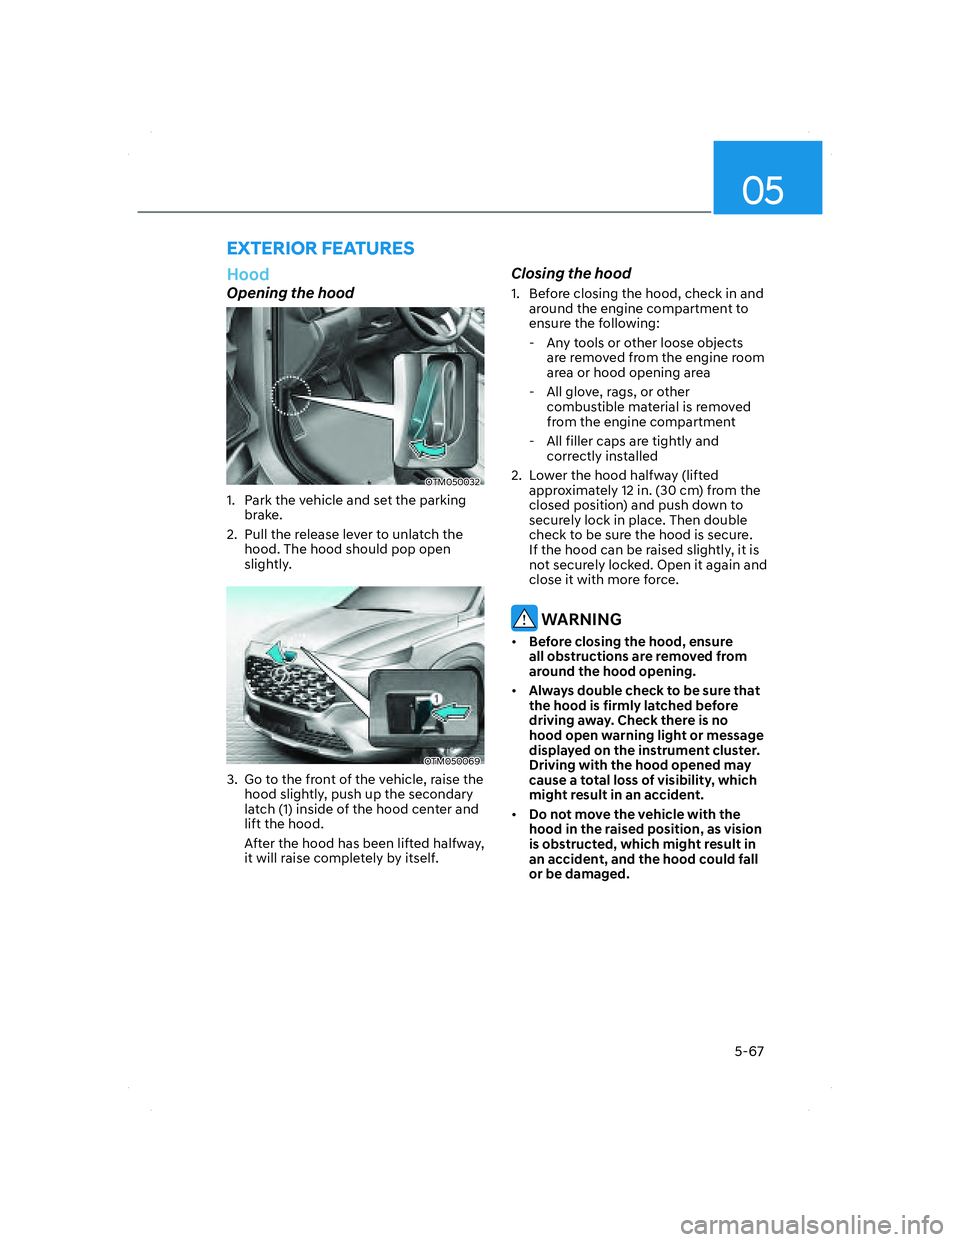
1. Park the vehicle and set the parking
brake.
2. Pull the release lever to unlatch the
hood. The hood should pop open
slightly.
OTM050069OTM050069
3. Go to the front of the vehicle, raise the
hood slightly, push up the secondary
latch (1) inside of the hood center and
lift the hood.
After the hood has been lifted halfway,
it will raise completely by itself.
Closing the hood
1. Before closing the hood, check in and
around the engine compartment to
ensure the following:
- Any tools or other loose objects
are removed from the engine room
area or hood opening area
- All glove, rags, or other
combustible material is removed
from the engine compartment
- All filler caps are tightly and
correctly installed
2. Lower the hood halfway (lifted
approximately 12 in. (30 cm) from the
closed position) and push down to
securely lock in place. Then double
check to be sure the hood is secure.
If the hood can be raised slightly, it is
not securely locked. Open it again and
close it with more force.
WARNING
• Before closing the hood, ensure
all obstructions are removed from
around the hood opening.
• Always double check to be sure that
the hood is firmly latched before
driving away. Check there is no
hood open warning light or message
displayed on the instrument cluster.
Driving with the hood opened may
cause a total loss of visibility, which
might result in an accident.
• Do not move the vehicle with the
hood in the raised position, as vision
is obstructed, which might result in
an accident, and the hood could fall
or be damaged.
EXTERIOR FEATURES
005_TMa_HMA.indd 5-672021-10-28 10:15:06
Page 216 of 637
05
5-75
Smart liftgate (if equipped)
OTMPH051010NOTMPH051010N
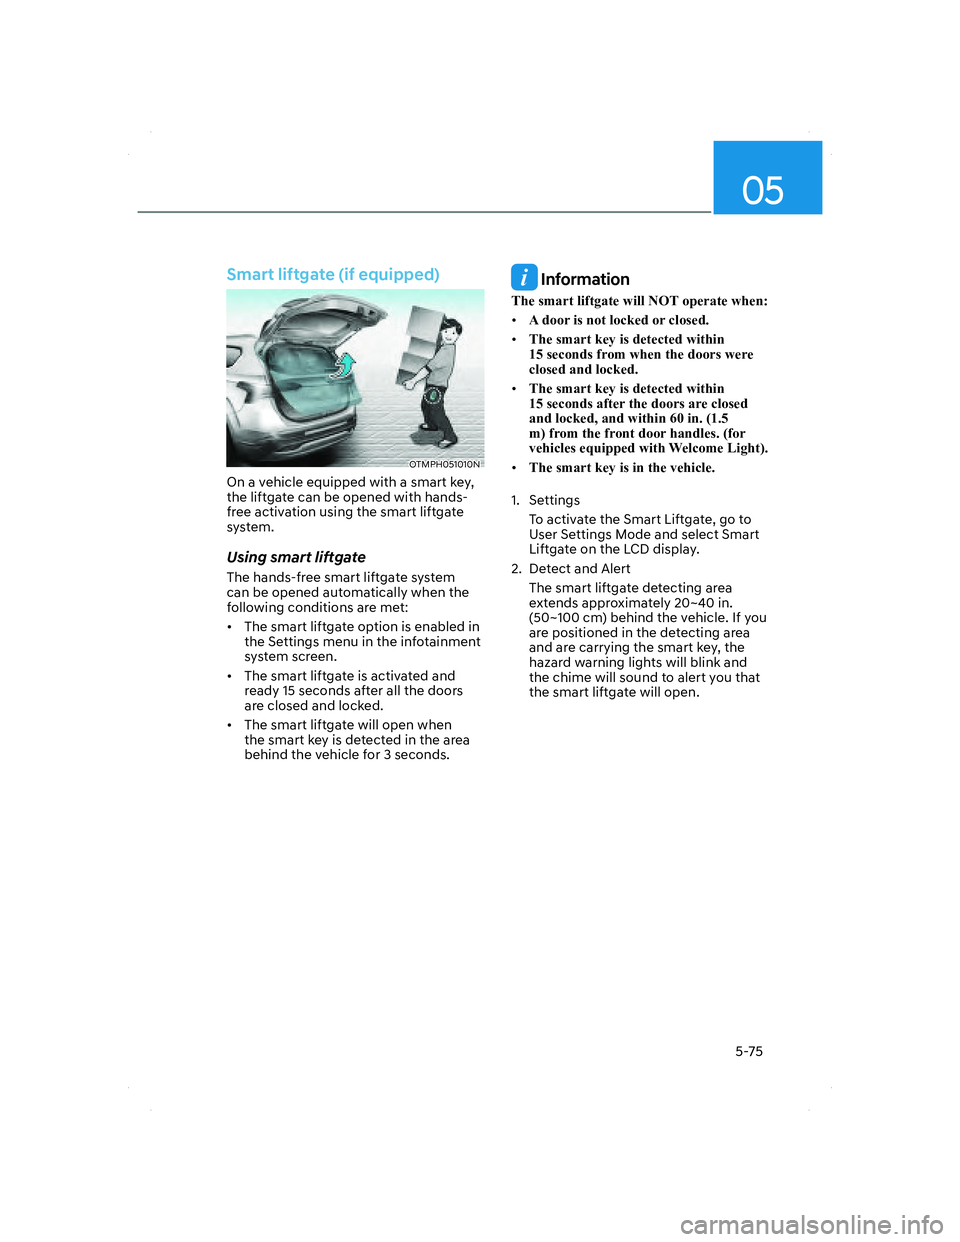
On a vehicle equipped with a smart key,
the liftgate can be opened with hands-
free activation using the smart liftgate
system.
Using smart liftgate
The hands-free smart liftgate system
can be opened automatically when the
following conditions are met:
• The smart liftgate option is enabled in
the Settings menu in the infotainment
system screen.
• The smart liftgate is activated and
ready 15 seconds after all the doors
are closed and locked.
• The smart liftgate will open when
the smart key is detected in the area
behind the vehicle for 3 seconds.
Information
The smart liftgate will NOT operate when:
• A door is not locked or closed.
• The smart key is detected within
15 seconds from when the doors were
closed and locked.
• The smart key is detected within
15 seconds after the doors are closed
and locked, and within 60 in. (1.5
m) from the front door handles. (for
vehicles equipped with Welcome Light).
• The smart key is in the vehicle.
1. Settings
To activate the Smart Liftgate, go to
User Settings Mode and select Smart
Liftgate on the LCD display.
2. Detect and Alert
The smart liftgate detecting area
extends approximately 20~40 in.
(50~100 cm) behind the vehicle. If you
are positioned in the detecting area
and are carrying the smart key, the
hazard warning lights will blink and
the chime will sound to alert you that
the smart liftgate will open.
005_TMa_HMA.indd 5-752021-10-28 10:15:10
Page 222 of 637
05
5-81
Precautions while using the
head-up display
• It may sometimes be difficult to read
information on the Head-Up Display in
the following situations.
- The driver is improperly positioned
in the driver’s seat
- The driver wears polarizing-filter
sunglasses
- An object is located above the
head-up display cover
- The vehicle is driven on a wet road
- Any improper lighting accessory is
installed inside the vehicle, or there
is incoming light from outside of the
vehicle
- The driver wears glasses
- The driver wears contact lenses
When it is difficult to read the Head-
Up Display information, adjust the
image height or brightness level from
the Settings menu in the infotainment
system screen.• For your safety, make sure to stop the
vehicle before adjusting the settings.
• Do not tint the front windshield glass
or add other types of metallic coating.
Otherwise, the Head-Up Display
image may be invisible.
• Do not place any accessories on the
crash pad or attach any objects on the
windshield glass.
• When replacing the front windshield
glass, replace it with a windshield
glass designed for Head-Up Display
operation. Otherwise, duplicated
images may be displayed on the
windshield glass.
WARNING
Blind-Spot Collision Warning
warnings on the Head-Up Display are
supplemental. Do not solely depend on
them to change lanes. Always take a
look around before changing lanes.
005_TMa_HMA.indd 5-812021-10-28 10:15:15
Page 223 of 637
Convenience features
5-82
Exterior lights
Lighting control
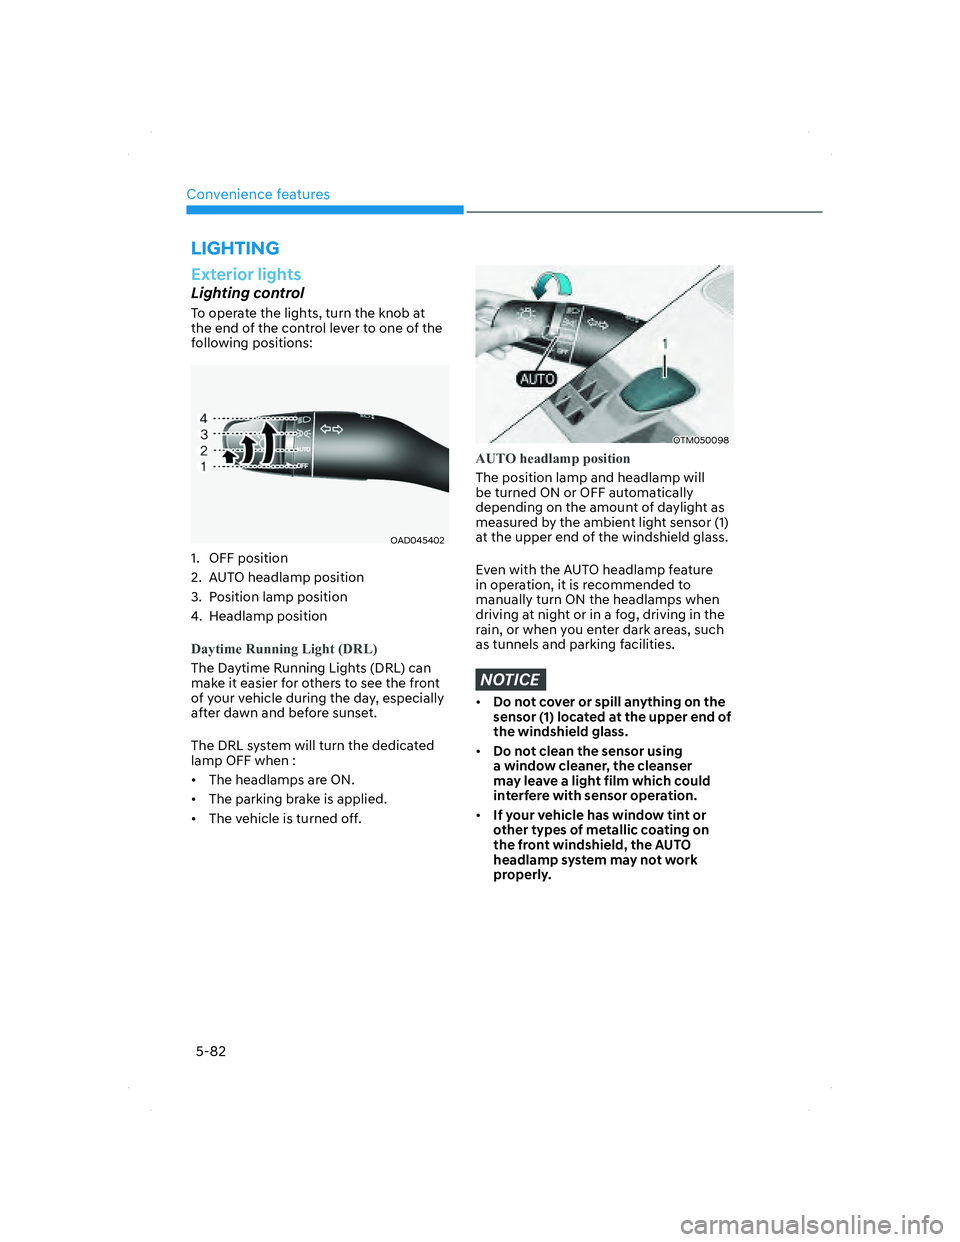
To operate the lights, turn the knob at
the end of the control lever to one of the
following positions:
OAD045402OAD045402
1. OFF position
2. AUTO headlamp position
3. Position lamp position
4. Headlamp position
Daytime Running Light (DRL)
The Daytime Running Lights (DRL) can
make it easier for others to see the front
of your vehicle during the day, especially
after dawn and before sunset.
The DRL system will turn the dedicated
lamp OFF when :
• The headlamps are ON.
• The parking brake is applied.
• The vehicle is turned off.
OTM050098OTM050098
AUTO headlamp position
The position lamp and headlamp will
be turned ON or OFF automatically
depending on the amount of daylight as
measured by the ambient light sensor (1)
at the upper end of the windshield glass.
Even with the AUTO headlamp feature
in operation, it is recommended to
manually turn ON the headlamps when
driving at night or in a fog, driving in the
rain, or when you enter dark areas, such
as tunnels and parking facilities.
NOTICE
• Do not cover or spill anything on the
sensor (1) located at the upper end of
the windshield glass.
• Do not clean the sensor using
a window cleaner, the cleanser
may leave a light film which could
interfere with sensor operation.
• If your vehicle has window tint or
other types of metallic coating on
the front windshield, the AUTO
headlamp system may not work
properly.
LIGHTING
005_TMa_HMA.indd 5-822021-10-28 10:15:15