Page 168 of 579
Convenient features
5-34
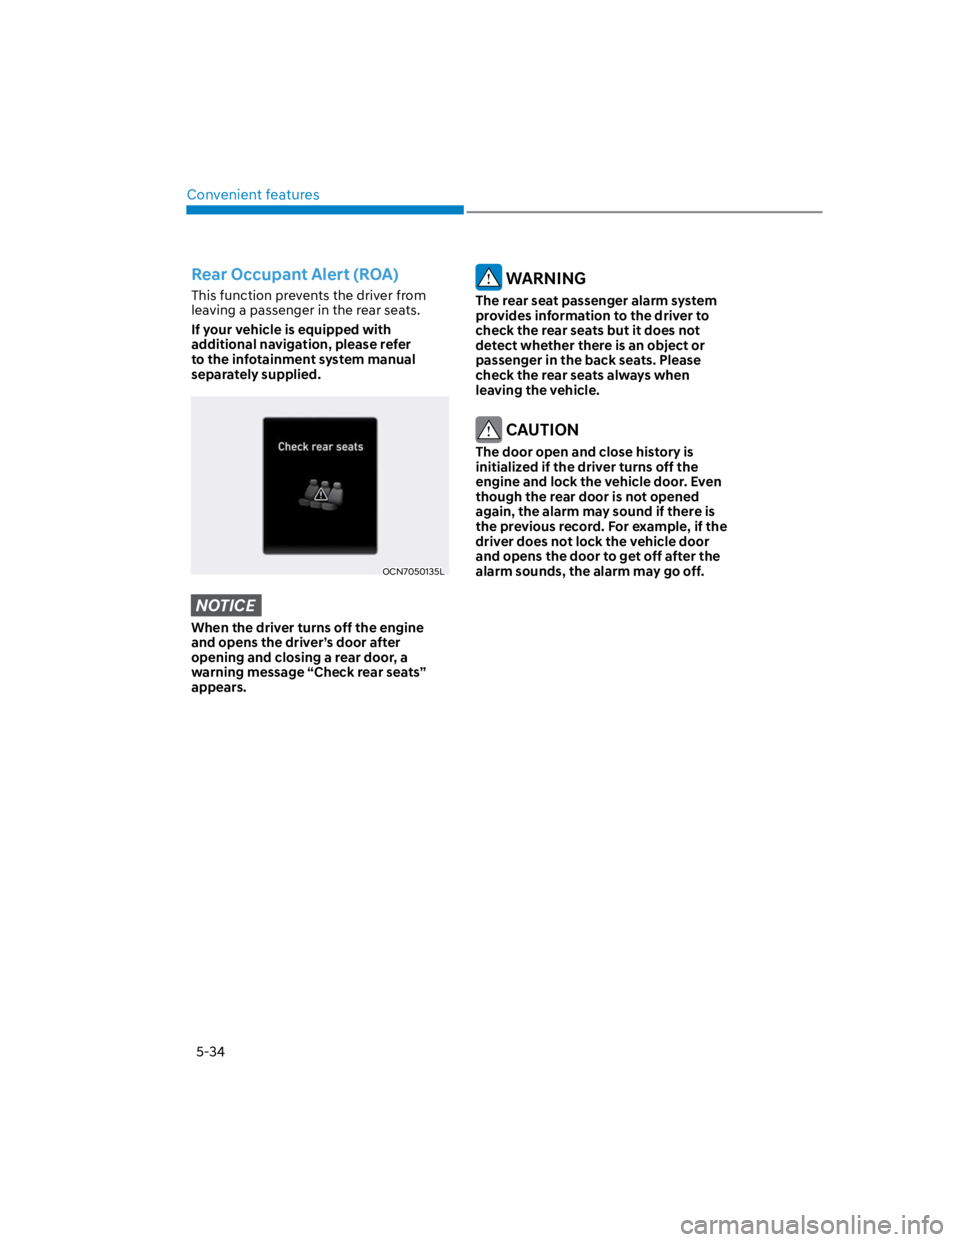
Rear Occupant Alert (ROA)
This function prevents the driver from
leaving a passenger in the rear seats.
If your vehicle is equipped with
additional navigation, please refer
to the infotainment system manual
separately supplied.
OCN7050135L
NOTICE
When the driver turns off the engine
and opens the driver’s door after
opening and closing a rear door, a
warning message “Check rear seats”
appears.
WARNING
The rear seat passenger alarm system
provides information to the driver to
check the rear seats but it does not
detect whether there is an object or
passenger in the back seats. Please
check the rear seats always when
leaving the vehicle.
CAUTION
The door open and close history is
initialized if the driver turns off the
engine and lock the vehicle door. Even
though the rear door is not opened
again, the alarm may sound if there is
the previous record. For example, if the
driver does not lock the vehicle door
and opens the door to get off after the
alarm sounds, the alarm may go off.
Page 169 of 579

05
5-35
This system helps to protect your vehicle
and valuables. The horn will sound and
the hazard warning lights will blink
continuously if any of the following
occur:
- A door is opened without using the
smart key.
- The liftgate is opened without using
the smart key.
- The engine hood is opened.
The alarm continues for 30 seconds, then
the system resets. To turn off the alarm,
unlock the doors with the smart key.
The Theft Alarm System automatically
sets 30 seconds after you lock the
doors and the liftgate. For the system to
activate, you must lock the doors and
the liftgate from outside the vehicle with
the smart key or by touching the touch
sensor on the outside of the door handle
with the smart key in your possession.
The hazard warning lights will blink and
the chime will sound once to indicate the
system is armed.
Once the security system is set, opening
any door, the liftgate, or the hood
without using the smart key will cause
the alarm to activate.
The Theft Alarm System will not set if the
hood, the liftgate, or any door is not fully
closed. If the system will not set, check
the hood, the liftgate, or the doors are
fully closed.
Do not attempt to alter this system or
add other devices to it.
Information
Page 172 of 579
Convenient features
5-38
Heated steering wheel
(if equipped)
OOS050003K
When the ignition switch is in the ON
position or when the engine is running,
press the heated steering wheel button
to warm the steering wheel.
The indicator on the button will
illuminate.
To turn the heated steering wheel off,
press the button again. The indicator on
the button will turn off.
Information
NOTICE
Do not install any cover or accessory
on the steering wheel. This cover or
accessory could cause damage to the
heated steering wheel system.
Horn
OOS047008
To sound the horn, press the area
indicated by the horn symbol on your
steering wheel (see illustration). The
horn will operate only when this area is
pressed.
NOTICE
Do not strike the horn severely to
operate it, or hit it with your fist. Do not
press on the horn with a sharp-pointed
object.
Page 191 of 579
05
5-57
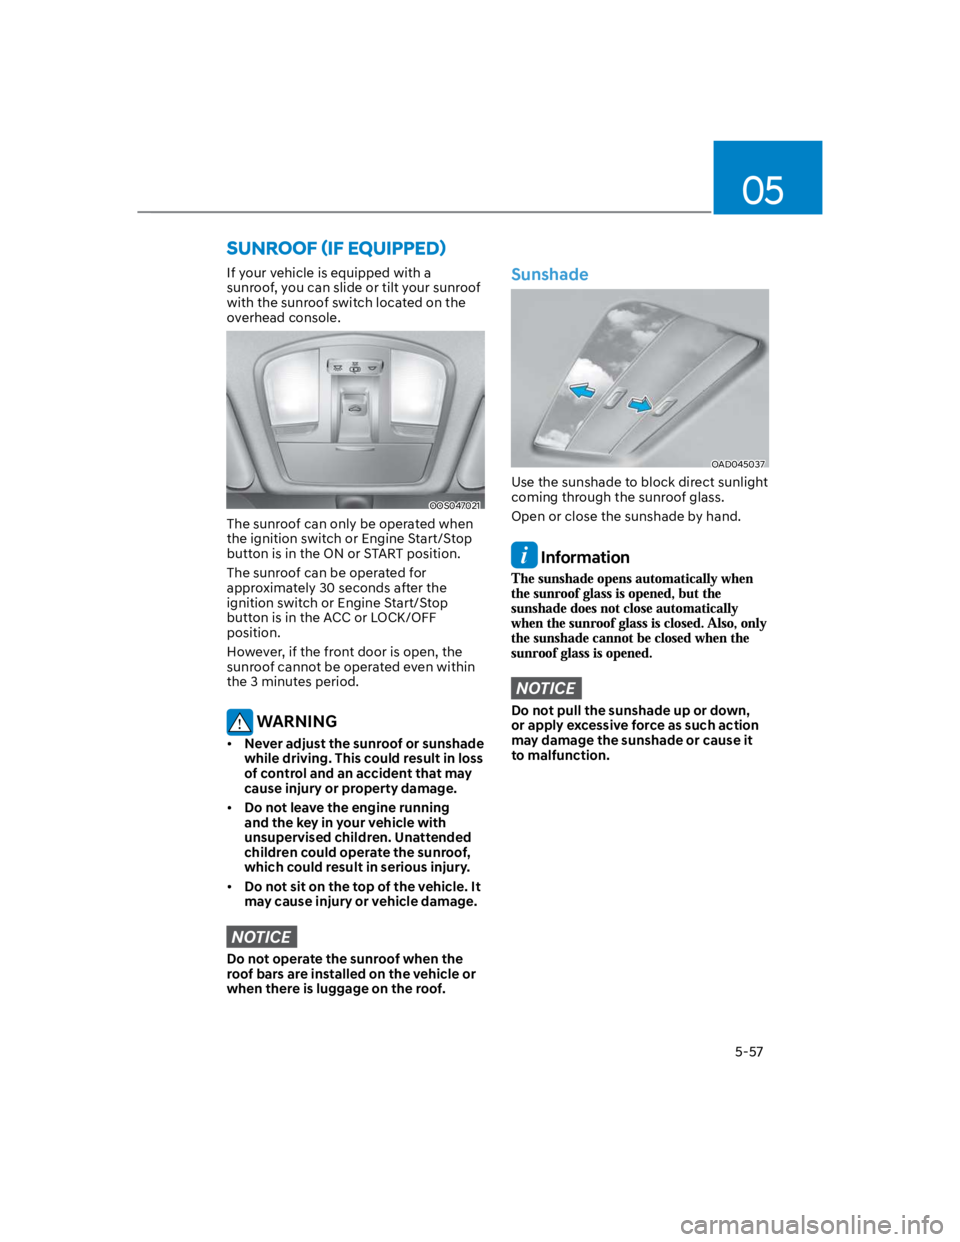
If your vehicle is equipped with a
sunroof, you can slide or tilt your sunroof
with the sunroof switch located on the
overhead console.
OOS047021
The sunroof can only be operated when
the ignition switch or Engine Start/Stop
button is in the ON or START position.
The sunroof can be operated for
approximately 30 seconds after the
ignition switch or Engine Start/Stop
button is in the ACC or LOCK/OFF
position.
However, if the front door is open, the
sunroof cannot be operated even within
the 3 minutes period.
WARNING
Never adjust the sunroof or sunshade
while driving. This could result in loss
of control and an accident that may
cause injury or property damage.
Do not leave the engine running
and the key in your vehicle with
unsupervised children. Unattended
children could operate the sunroof,
which could result in serious injury.
Do not sit on the top of the vehicle. It
may cause injury or vehicle damage.
NOTICE
Do not operate the sunroof when the
roof bars are installed on the vehicle or
when there is luggage on the roof.
Sunshade
OAD045037
Use the sunshade to block direct sunlight
coming through the sunroof glass.
Open or close the sunshade by hand.
Information
NOTICE
Do not pull the sunshade up or down,
or apply excessive force as such action
may damage the sunshade or cause it
to malfunction.
Page 194 of 579
Convenient features
5-60
Resetting the sunroof
In some circumstances resetting the
sunroof operation may need to be
performed. Some instances where
resetting the sunroof may be required
include:
- When the 12-volt battery is either
disconnected or discharged
- When the sunroof fuse is replaced
- If the sunroof one-touch AUTO OPEN/
CLOSE operation is not functioning
properly
Sunroof resetting procedure:
1. It is recommended to perform the
reset procedure with the vehicle
engine running. Start the vehicle in P
(Park).
2. Make sure the sunroof glass is in the
fully closed position. If the sunroof
glass is open, push the switch forward
until the sunroof glass is fully closed.
3. Release the switch when the sunroof
glass is fully closed.
4. Push the switch forward until the
sunroof glass moves slightly. Then
release the switch.
5. Once again push and hold the sunroof
switch forward until the sunroof glass
slides open and close. Do not release
the switch until the operation is
completed. If you release the switch
during operation, start the procedure
again from step 2.
Information
Sunroof Open Warning
(if equipped)
If the driver turns off the engine when
the sunroof is not fully closed, the
warning chime will sound for several
seconds and the sunroof open warning
will appear on the LCD display.
Close the sunroof securely when leaving
your vehicle.
CAUTION
Make sure the sunroof is closed fully
when leaving your vehicle.
If the sunroof is left open, rain or snow
may wet the interior of the vehicle.
Also, leaving the sunroof open when the
vehicle is unattended may invite theft.
Page 195 of 579
05
5-61
Hood
Opening the hood
OOS040024
1. Park the vehicle and set the parking
brake.
2. Pull the release lever to unlatch the
hood. The hood should pop open
slightly.
OOS050005N
3. Go to the front of the vehicle, raise the
hood slightly, push up the secondary
latch (1) inside of the hood center and
lift the hood (2).
OOS047026
4. Pull out the support rod and hold the
hood open with the support rod (1).
WARNING
When handling the support rod,
grasp the rod in the area wrapped
with rubber only. In some cases
where the engine has been running
the support rod may be hot. Caution
should be taken to avoid getting
burned by the support rod.
The support rod must be inserted
completely into the hole provided
whenever you inspect the engine
compartment. This will prevent the
hood from becoming dislodged and
falling and causing potential injury.
EXTERIOR FEATURES
Page 196 of 579
Convenient features
5-62
Closing the hood
1. Before closing the hood, check in and
around the engine compartment to
ensure the following:
- Any tools or other loose objects
are removed from the engine room
area or hood opening area
- All glove, rags, or other
combustible material is removed
from the engine compartment
- All filler caps are tightly and
correctly installed
2. Lower the hood halfway (lifted
approximately 12 in. (30 cm) from the
closed position) and push down to
securely lock in place. Then double
check to be sure the hood is secure.
If the hood can be raised slightly, it is
not securely locked. Open it again and
close it with more force.
WARNING
Before closing the hood, ensure
all obstructions are removed from
around the hood opening.
Always double check to be sure that
the hood is firmly latched before
driving away. Check there is no
hood open warning light or message
displayed on the instrument cluster.
Driving with the hood opened may
cause a total loss of visibility, which
might result in an accident.
Do not move the vehicle with the
hood in the raised position, as vision
is obstructed, which might result in
an accident, and the hood could fall
or be damaged.
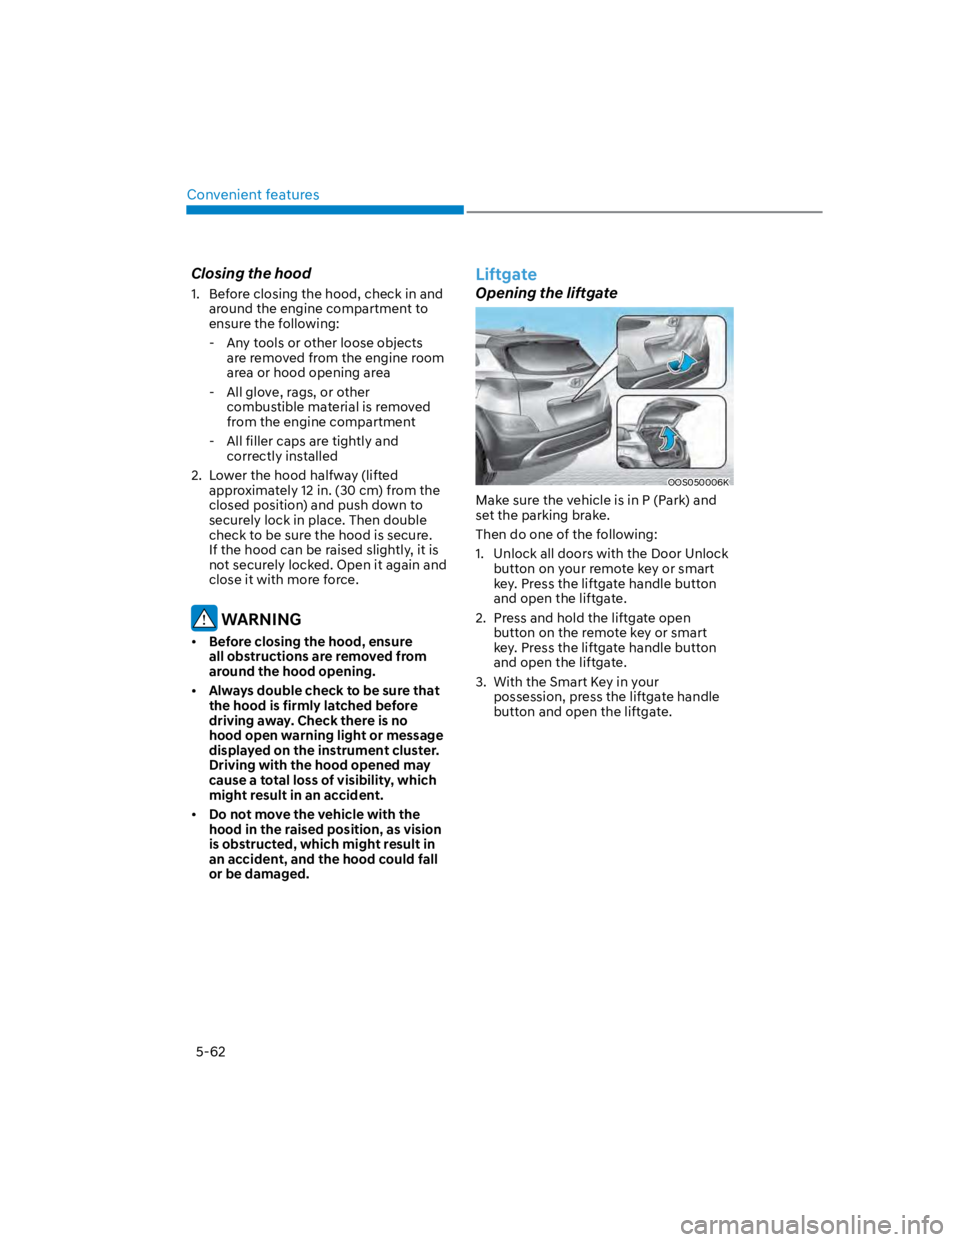
Liftgate
Opening the liftgate
OOS050006K
Make sure the vehicle is in P (Park) and
set the parking brake.
Then do one of the following:
1. Unlock all doors with the Door Unlock
button on your remote key or smart
key. Press the liftgate handle button
and open the liftgate.
2. Press and hold the liftgate open
button on the remote key or smart
key. Press the liftgate handle button
and open the liftgate.
3. With the Smart Key in your
possession, press the liftgate handle
button and open the liftgate.
Page 198 of 579
Convenient features
5-64
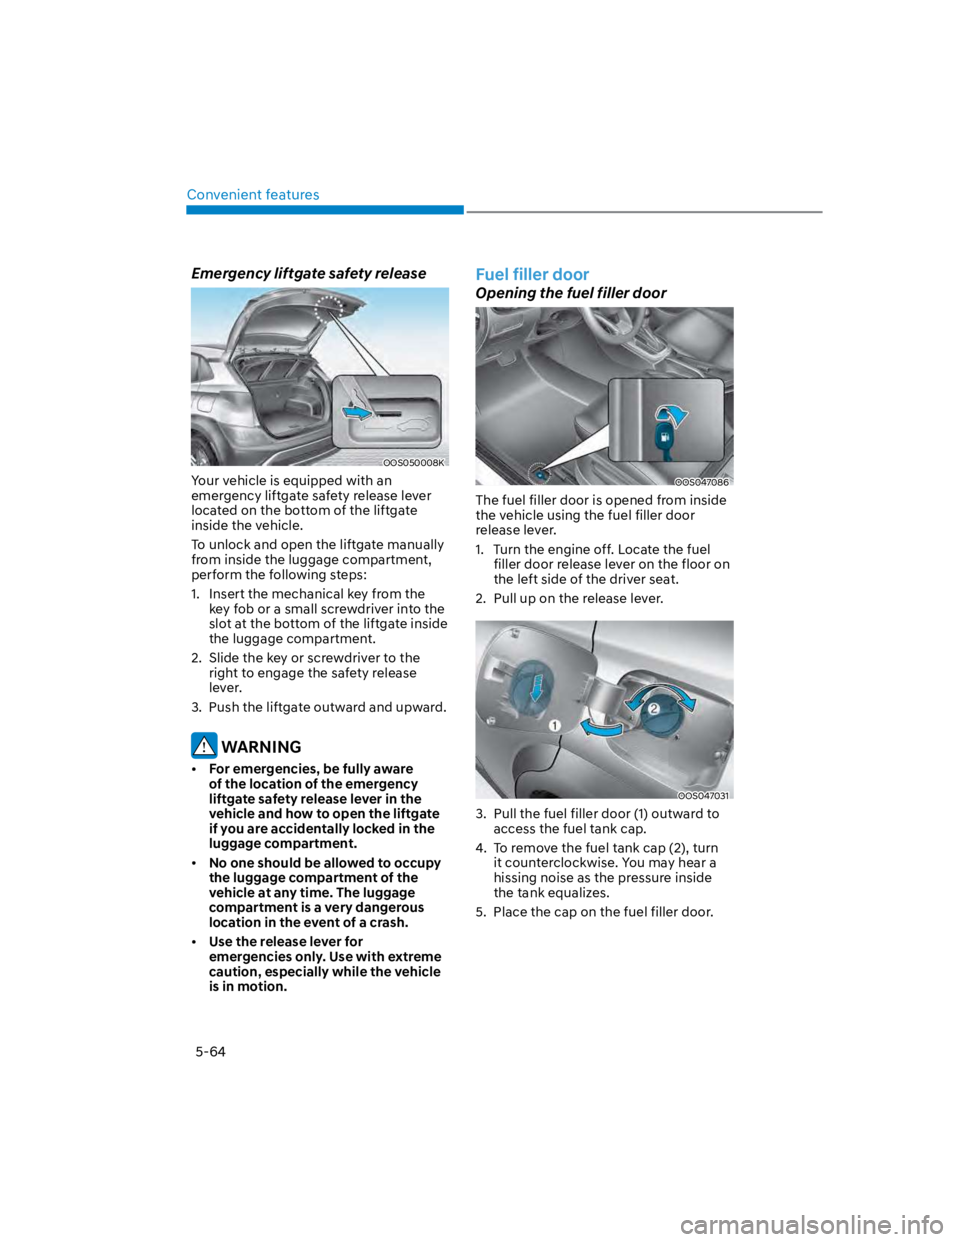
Emergency liftgate safety release
OOS050008K
Your vehicle is equipped with an
emergency liftgate safety release lever
located on the bottom of the liftgate
inside the vehicle.
To unlock and open the liftgate manually
from inside the luggage compartment,
perform the following steps:
1. Insert the mechanical key from the
key fob or a small screwdriver into the
slot at the bottom of the liftgate inside
the luggage compartment.
2. Slide the key or screwdriver to the
right to engage the safety release
lever.
3. Push the liftgate outward and upward.
WARNING
For emergencies, be fully aware
of the location of the emergency
liftgate safety release lever in the
vehicle and how to open the liftgate
if you are accidentally locked in the
luggage compartment.
No one should be allowed to occupy
the luggage compartment of the
vehicle at any time. The luggage
compartment is a very dangerous
location in the event of a crash.
Use the release lever for
emergencies only. Use with extreme
caution, especially while the vehicle
is in motion.
Fuel filler door
Opening the fuel filler door
OOS047086
The fuel filler door is opened from inside
the vehicle using the fuel filler door
release lever.
1. Turn the engine off. Locate the fuel
filler door release lever on the floor on
the left side of the driver seat.
2. Pull up on the release lever.
OOS047031
3. Pull the fuel filler door (1) outward to
access the fuel tank cap.
4. To remove the fuel tank cap (2), turn
it counterclockwise. You may hear a
hissing noise as the pressure inside
the tank equalizes.
5. Place the cap on the fuel filler door.