2022 HYUNDAI KONA engine
[x] Cancel search: enginePage 224 of 579
Convenient features
5-90
Automatic heating and air
conditioning
The Automatic Climate Control System
is controlled by setting the desired
temperature.
1. Press the AUTO button. (3)
The modes, fan speeds, air intake and
air-conditioning will be controlled
automatically by the temperature
setting you select.
2. Turn the temperature control knob
(1) to the desired temperature. If
the temperature is set to the lowest
setting (Lo), the air conditioning
system will operate continuously.
After the interior has cooled
sufficiently, adjust the knob to
a higher temperature set point
whenever possible.
To turn the automatic operation off,
select any button of the following:
- Mode selection button
- Front windshield defroster button
(Press the button one more time
to deselect the front windshield
defroster function. The ‘AUTO’ sign
will illuminate on the information
display once again.)
- Fan speed control button
The selected function will be
controlled manually while other
functions operate automatically.
For your convenience and to improve
the effectiveness of the climate control,
use the AUTO button and set the
temperature to 72°F (22°C).
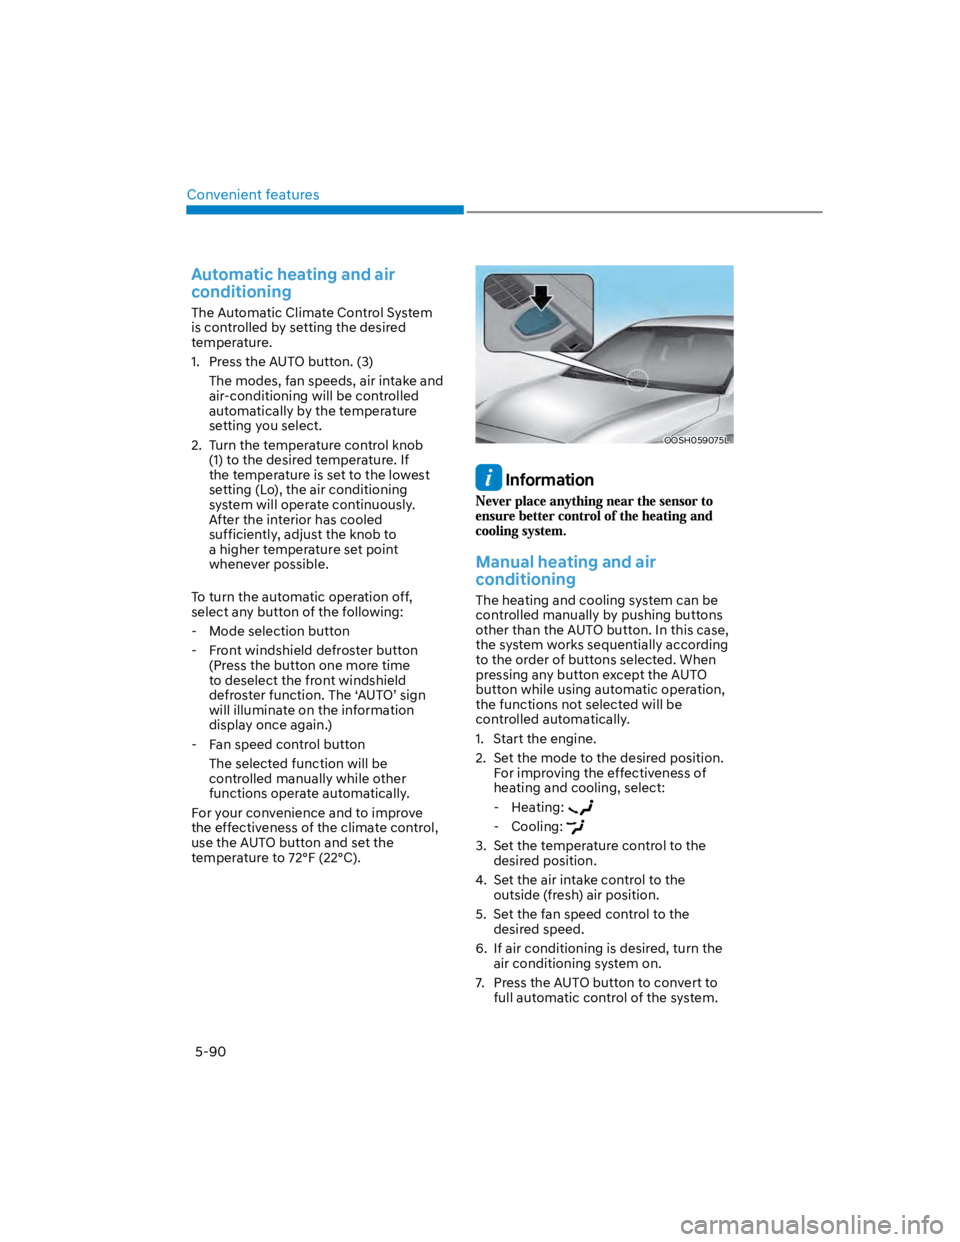
OOSH059075L
Information
Manual heating and air
conditioning
The heating and cooling system can be
controlled manually by pushing buttons
other than the AUTO button. In this case,
the system works sequentially according
to the order of buttons selected. When
pressing any button except the AUTO
button while using automatic operation,
the functions not selected will be
controlled automatically.
1. Start the engine.
2. Set the mode to the desired position.
For improving the effectiveness of
heating and cooling, select:
- Heating:
- Cooling:
3. Set the temperature control to the
desired position.
4. Set the air intake control to the
outside (fresh) air position.
5. Set the fan speed control to the
desired speed.
6. If air conditioning is desired, turn the
air conditioning system on.
7. Press the AUTO button to convert to
full automatic control of the system.
Page 229 of 579
05
5-95
Air conditioning
HYUNDAI Air Conditioning Systems are
filled with R-1234yf refrigerant.
1. Start the engine. Push the air
conditioning button.
2. Set the mode to the position.
3. Set the air intake control to the
outside air or recirculated air position.
4. Adjust the fan speed control and
temperature control to maintain
maximum comfort.
Information
NOTICE
The refrigerant system should only
be serviced by trained and certified
technicians to insure proper and safe
operation.
The refrigerant system should be
serviced in a well-ventilated place.
The air conditioning evaporator
(cooling coil) shall never be repaired
or replaced with one removed from
a used or salvaged vehicle and new
replacement MAC evaporators shall
be certified (and labeled) as meeting
SAE Standard J2842.
NOTICE
When using the air conditioning
system, monitor the temperature
gauge closely while driving up
hills or in heavy traffic when
outside temperatures are high.
Air conditioning system operation
may cause engine overheating.
Continue to use the fan but turn the
air conditioning system off if the
temperature gauge indicates engine
overheating.
When opening the windows in humid
weather air conditioning may create
water droplets inside the vehicle.
Since excessive water droplets
may cause damage to electrical
equipment, air conditioning should
only be used with the windows
closed.
Page 232 of 579
Convenient features
5-98
WINDSHIELD DEFROSTING AND DEFOGGING
WARNING
Windshield heating
Do not use the position during
cooling operation in extremely humid
weather. The difference between the
temperature of the outside air and that
of the windshield could cause the outer
surface of the windshield to fog up,
causing loss of visibility could cause
an accident resulting in serious injury
or death. In this case, set the mode
selection button to the position
and fan speed control knob to a lower
speed.
For maximum defrost performance,
set the temperature control to the
highest temperature setting and
the fan speed control to the highest
setting.
If warm air to the floor is desired while
defrosting or defogging, set the mode
to the floor-defrost position.
Before driving, clear all snow and ice
from the windshield, rear window,
side view mirrors, and all side
windows.
Clear all snow and ice from the
hood and air inlet in the cowl grill
to improve heater and defroster
efficiency and to reduce the
probability of fogging up the inside of
the windshield.
NOTICE
If the engine temperature is still cold
after starting, then a brief engine warm
up period may be required for the
vented air flow to become warm or hot.
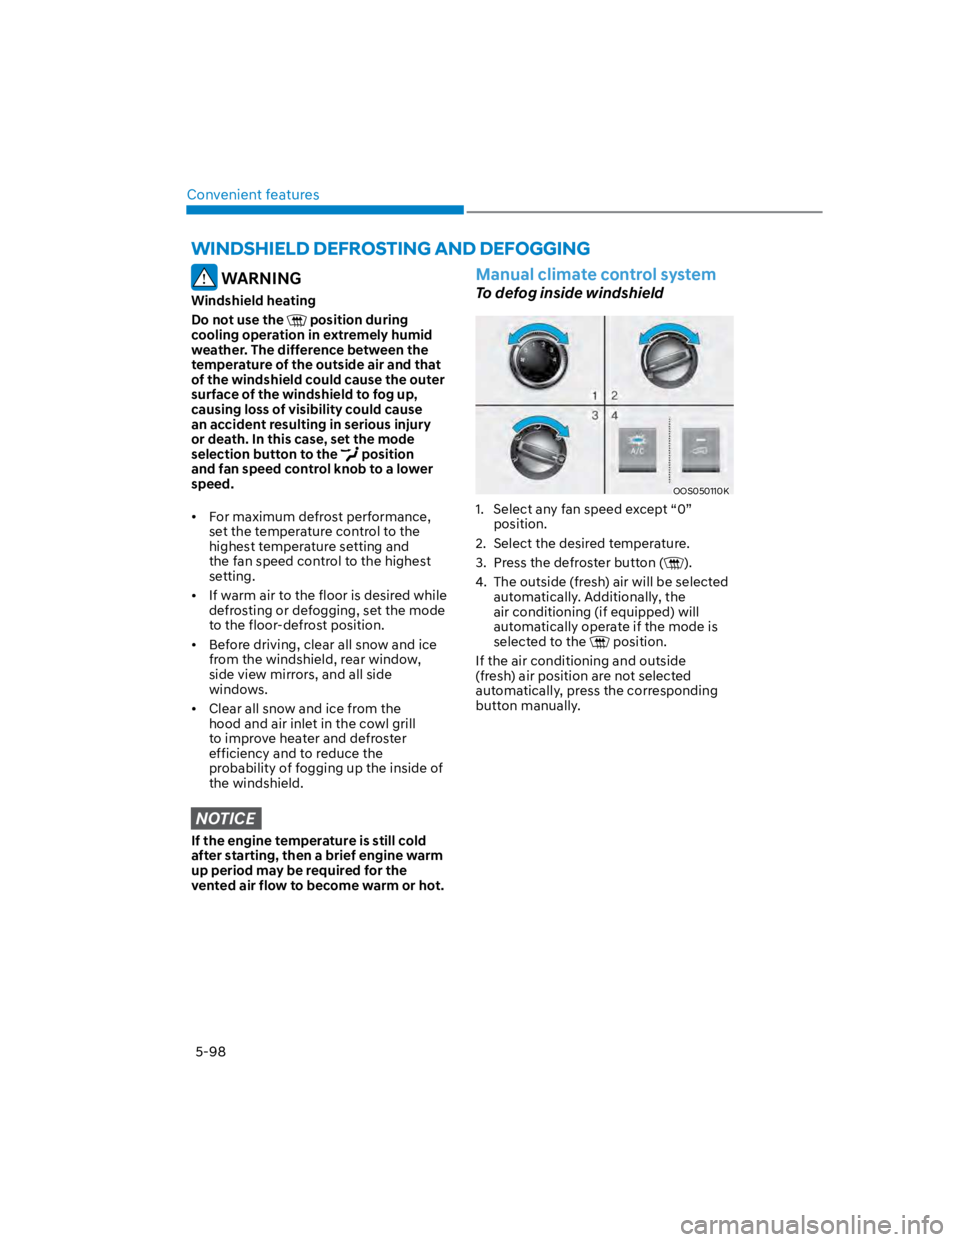
Manual climate control system
To defog inside windshield
OOS050110K
1. Select any fan speed except “0”
position.
2. Select the desired temperature.
3. Press the defroster button ().
4. The outside (fresh) air will be selected
automatically. Additionally, the
air conditioning (if equipped) will
automatically operate if the mode is
selected to the position.
If the air conditioning and outside
(fresh) air position are not selected
automatically, press the corresponding
button manually.
Page 236 of 579
Convenient features
5-102
Defroster
NOTICE
To prevent damage to the rear window
defroster conducting elements bonded
to the inside surface of the rear window,
never use sharp instruments or window
cleaners containing abrasives to clean
the window.
Information
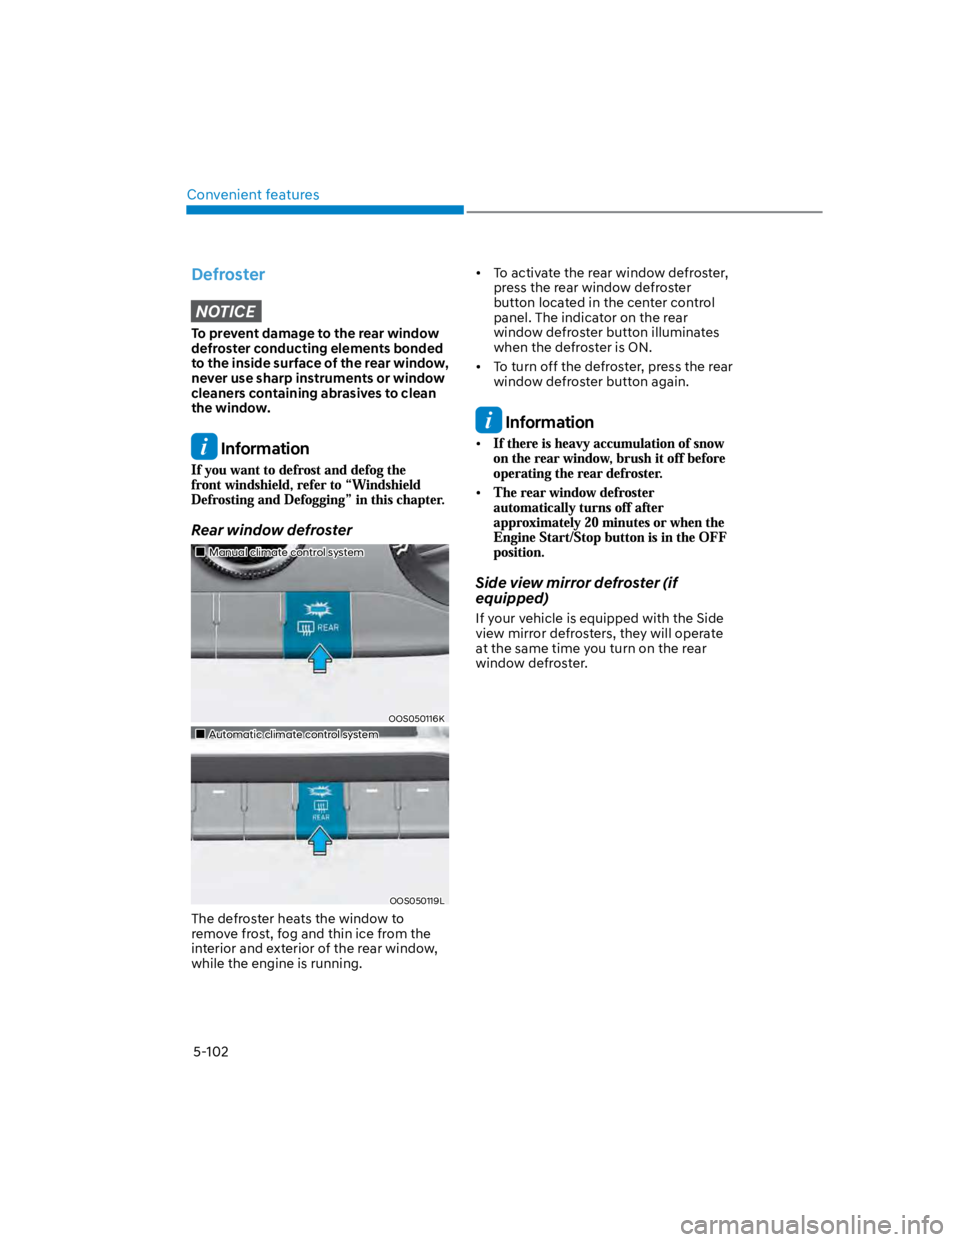
Rear window defroster
Manual climate control system
OOS050116K
Automatic climate control system
OOS050119L
The defroster heats the window to
remove frost, fog and thin ice from the
interior and exterior of the rear window,
while the engine is running.
To activate the rear window defroster,
press the rear window defroster
button located in the center control
panel. The indicator on the rear
window defroster button illuminates
when the defroster is ON.
To turn off the defroster, press the rear
window defroster button again.
Information
Side view mirror defroster (if
equipped)
If your vehicle is equipped with the Side
view mirror defrosters, they will operate
at the same time you turn on the rear
window defroster.
Page 237 of 579
05
5-103
Automatic Ventilation
When the ignition switch is in the ON
position or when the engine is running
and temperature is below 59°F (15°C)
with the recirculation mode selected
more than five minutes, the air intake
position will automatically change to
fresh mode.
When the air conditioning system is on,
press the mode selection button and
the recirculation mode button five times
within three seconds. (Automatic climate
control system)
When the air conditioning system is on,
press the recirculation mode button
for 3 seconds. (Manual climate control
system)
When the Automatic Ventilation feature
is enabled, the Recirculation button LED
indicator will blink 6 times.
When the Automatic Ventilation feature
is disabled, the Recirculation button LED
indicator will blink 3 times.
Sunroof Inside Air Recirculation
When the sunroof is opened, outside
(fresh) air will be automatically selected.
At this time, if you press the air intake
control button, recirculated air position
will be selected but will change back
to outside (fresh) air after 3 minutes.
When the sunroof is closed, the air
intake position will return to the original
position that was selected.
Inside air circulation while
operating the washer fluid
When the washer liquid is sprayed, it is
changed and maintained for a certain
period of time to prevent the smell of
washer liquid from entering the room.
However, in case of low outside
temperature, the outside (fresh) air mode
is maintained to prevent the cause of
window fogging.
Automatic heater and air
conditioner Function setting
1. Turn on the engine.
2. Set the mode to the () position.
3. When the air conditioning system
is on, press the recirculation mode
button more than 4 times within 2
seconds.
When the function is enabled, the
recirculation button LED indicator will
blink 6 times.
Function release
1. Turn on the engine.
2. Set the mode to the () position.
3. When the air conditioning system
is on, press the recirculation mode
button more than 4 times within 2
seconds.
When the function is disabled, the
recirculation button LED indicator will
blink 3 times.
Page 242 of 579
Convenient features
5-108
Sunvisor
OOS047062
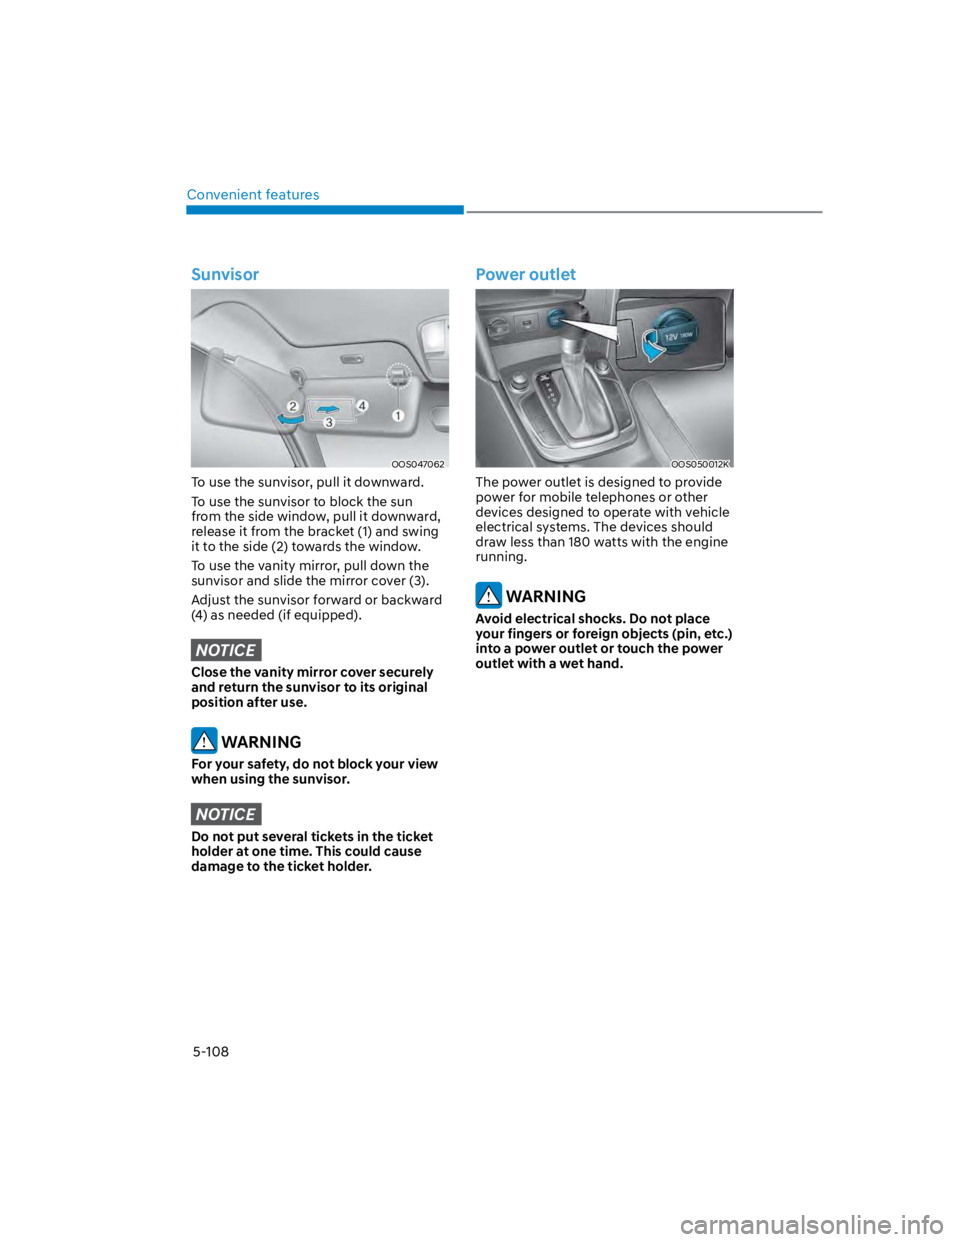
To use the sunvisor, pull it downward.
To use the sunvisor to block the sun
from the side window, pull it downward,
release it from the bracket (1) and swing
it to the side (2) towards the window.
To use the vanity mirror, pull down the
sunvisor and slide the mirror cover (3).
Adjust the sunvisor forward or backward
(4) as needed (if equipped).
NOTICE
Close the vanity mirror cover securely
and return the sunvisor to its original
position after use.
WARNING
For your safety, do not block your view
when using the sunvisor.
NOTICE
Do not put several tickets in the ticket
holder at one time. This could cause
damage to the ticket holder.
Power outlet
OOS050012K
The power outlet is designed to provide
power for mobile telephones or other
devices designed to operate with vehicle
electrical systems. The devices should
draw less than 180 watts with the engine
running.
WARNING
Avoid electrical shocks. Do not place
your fingers or foreign objects (pin, etc.)
into a power outlet or touch the power
outlet with a wet hand.
Page 243 of 579
05
5-109
CAUTION
To prevent damage to the power
outlets:
Use the power outlet only when the
engine is running and remove the
accessory plug after use. Using the
accessory plug for prolonged periods
of time with the engine off could
cause the battery to discharge.
Only use 12 volts electric accessories
which are less than 180 watts in
electric capacity.
Adjust the air-conditioner or heater
to the lowest operating level when
using the power outlet.
Close the cover when not in use.
Some electronic devices can
cause electronic interference
when plugged into a vehicle’s
power outlet. These devices may
cause excessive audio static and
malfunctions in other electronic
systems or devices used in your
vehicle.
Push the plug in as far as it will go. If
good contact is not made, the plug
may overheat and the fuse may open.
Plug in battery equipped electrical/
electronic devices with reverse
current protection. The current
from the battery may flow into the
vehicle’s electrical/electronic system
and cause system malfunction.
USB charger
OOS050014K
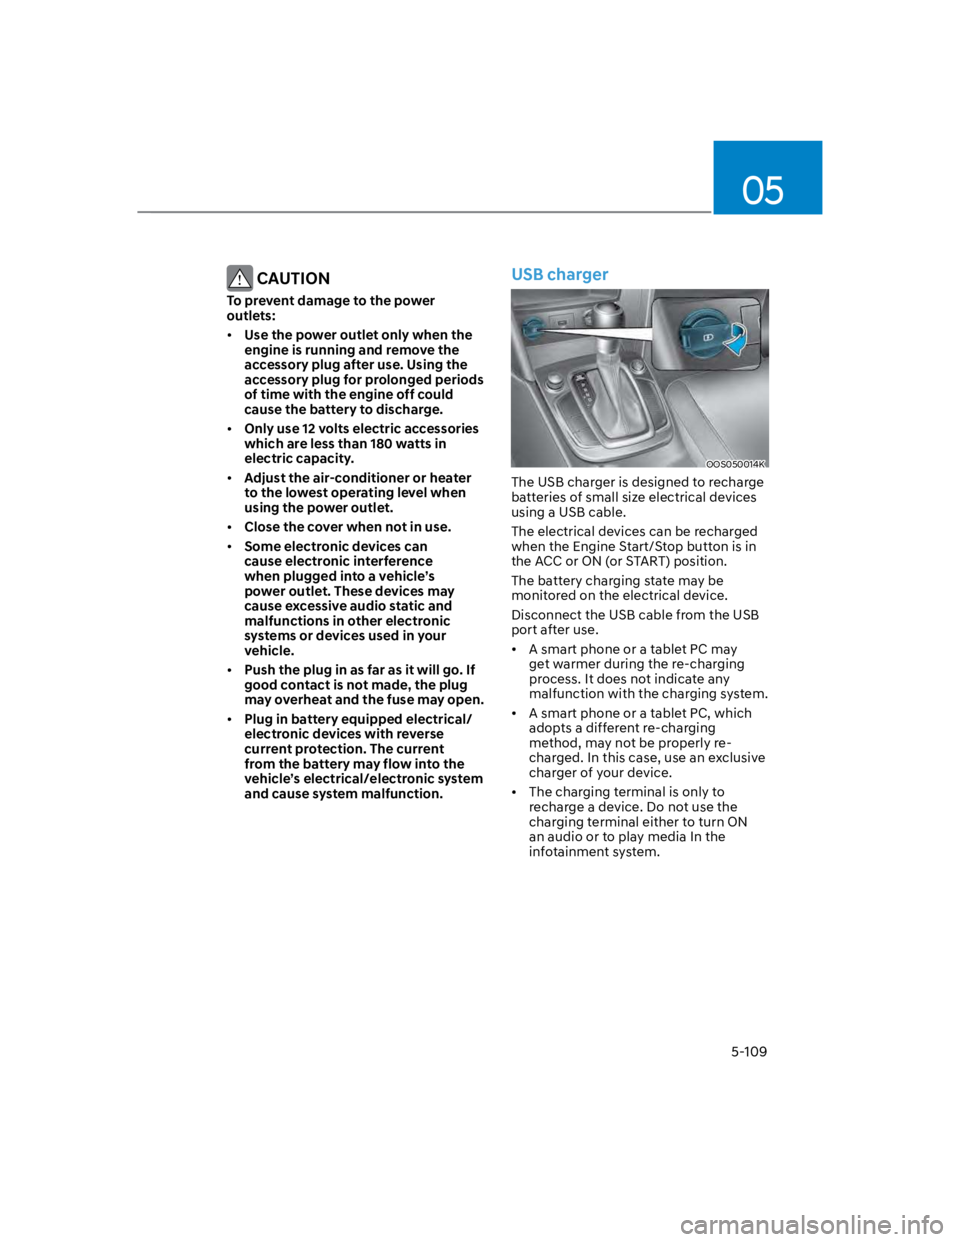
The USB charger is designed to recharge
batteries of small size electrical devices
using a USB cable.
The electrical devices can be recharged
when the Engine Start/Stop button is in
the ACC or ON (or START) position.
The battery charging state may be
monitored on the electrical device.
Disconnect the USB cable from the USB
port after use.
A smart phone or a tablet PC may
get warmer during the re-charging
process. It does not indicate any
malfunction with the charging system.
A smart phone or a tablet PC, which
adopts a different re-charging
method, may not be properly re-
charged. In this case, use an exclusive
charger of your device.
The charging terminal is only to
recharge a device. Do not use the
charging terminal either to turn ON
an audio or to play media In the
infotainment system.
Page 244 of 579
![HYUNDAI KONA 2022 Owners Manual Convenient features
5-110
Wireless smart phone charging
system (if equipped)
OOS050015K
[A] : Indicator light, [B] : Charging pad
On certain models, the vehicle comes
equipped with a wireless smart HYUNDAI KONA 2022 Owners Manual Convenient features
5-110
Wireless smart phone charging
system (if equipped)
OOS050015K
[A] : Indicator light, [B] : Charging pad
On certain models, the vehicle comes
equipped with a wireless smart](/manual-img/35/41169/w960_41169-243.png)
Convenient features
5-110
Wireless smart phone charging
system (if equipped)
OOS050015K
[A] : Indicator light, [B] : Charging pad
On certain models, the vehicle comes
equipped with a wireless smart phone
charger.
The system is available when all doors
are closed, and when the Engine Start/
Stop button is in the ACC or ON (or
START) position.
To charge a cellular phone
The wireless smart phone charging
system charges only the Qi-enabled
smart phones (). Read the label on
the smart phone accessory cover or
visit your smart phone manufacturer’s
website to check whether your smart
phone supports the Qi technology.
The wireless charging process starts
when you put a Qi-enabled smart phone
on the wireless charging unit.
1. Remove other items, including the
smart key, from the wireless charging
unit. If not, the wireless charging
process may be interrupted. Place
the smart phone on the center of the
charging pad.
2. The indicator light is orange when the
smart phone is charging. The indicator
light will turn blue when phone
charging is complete.
3. You can turn ON or OFF the wireless
charging function from the Settings
menu on the instrument cluster.
Select:
-
If your smart phone is not charging:
- Slightly change the position of the
smart phone on the charging pad.
- Make sure the indicator light is
orange.
The indicator light will blink orange for 10
seconds if there is a malfunction in the
wireless charging system.
In this case, temporarily stop the
charging process, and re-attempt to
charge your smart phone again.
The system warns you with a message on
the LCD display if the smart phone is still
on the wireless charging unit after the
vehicle is turned OFF and the front door
is opened.
For some manufacturer’s smart phones,
the system may not warn you even
though the smart phone is left on the
wireless charging unit. This is due to the
particular characteristic of the smart
phone and not a malfunction of the
wireless charging.
Information