2022 HYUNDAI KONA EV WALL
[x] Cancel search: WALLPage 37 of 548
Foreword / Electric Vehicle System Overview
1-32
How to Disconnect DC Charger
1. Refer to the instructions on the on-
screen display of the DC charging
station before disconnecting the
charging connector from the vehicle.
Once charging is stopped, remove the
charging connector.
OOSEV010015L
2. Make sure to re-install the charging port dust cover(s) before closing the
charging door.
3. The charging door must be fully closed before driving the vehicle.
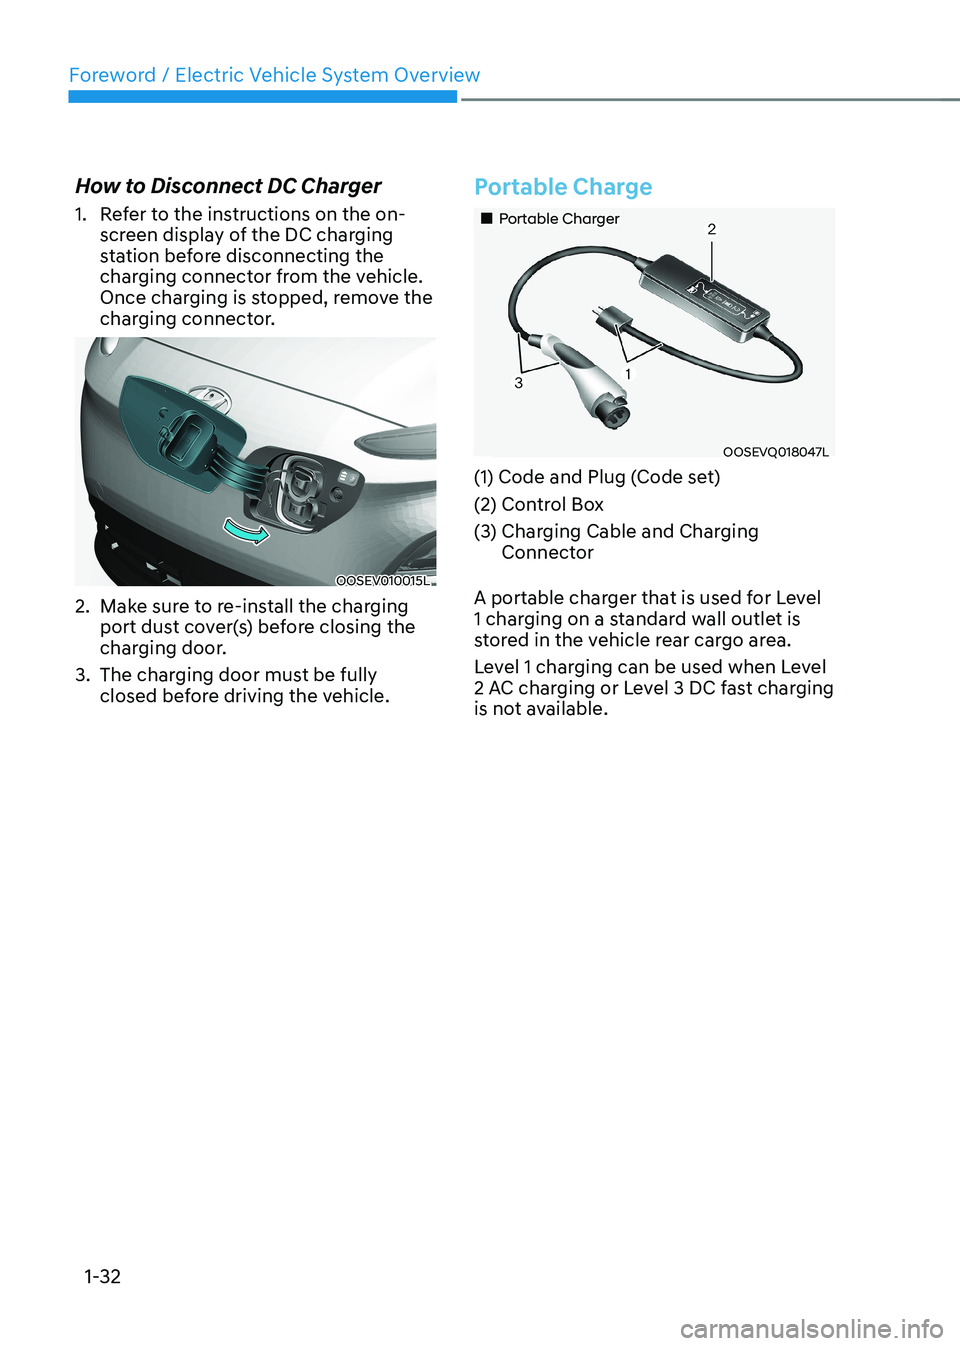
Portable Charge
„„Portable Charger
OOSEVQ018047L
(1) Code and Plug (Code set)
(2) Control Box
(3) Charging Cable and Charging Connector
A portable charger that is used for Level
1 charging on a standard wall outlet is
stored in the vehicle rear cargo area.
Level 1 charging can be used when Level
2 AC charging or Level 3 DC fast charging
is not available.
Page 325 of 548
06
6-45
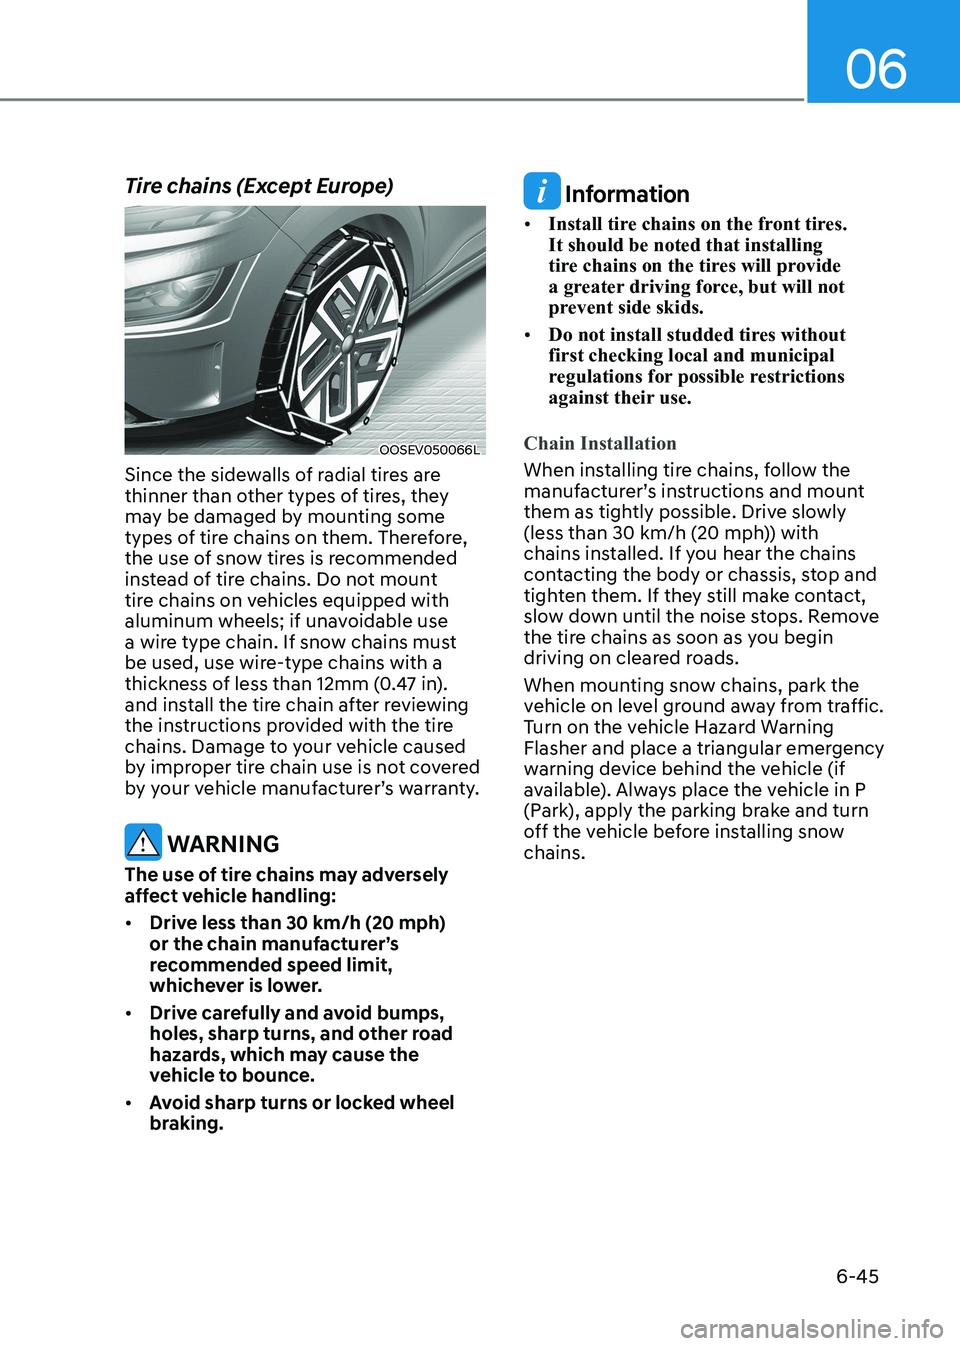
Tire chains (Except Europe)
OOSEV050066L
Since the sidewalls of radial tires are
thinner than other types of tires, they
may be damaged by mounting some
types of tire chains on them. Therefore,
the use of snow tires is recommended
instead of tire chains. Do not mount
tire chains on vehicles equipped with
aluminum wheels; if unavoidable use
a wire type chain. If snow chains must
be used, use wire-type chains with a
thickness of less than 12mm (0.47 in).
and install the tire chain after reviewing
the instructions provided with the tire
chains. Damage to your vehicle caused
by improper tire chain use is not covered
by your vehicle manufacturer’s warranty.
WARNING
The use of tire chains may adversely
affect vehicle handling: • Drive less than 30 km/h (20 mph)
or the chain manufacturer’s
recommended speed limit,
whichever is lower.
• Drive carefully and avoid bumps,
holes, sharp turns, and other road
hazards, which may cause the
vehicle to bounce.
• Avoid sharp turns or locked wheel
braking.
Information
• Install tire chains on the front tires. It should be noted that installing
tire chains on the tires will provide
a greater driving force, but will not
prevent side skids.
• Do not install studded tires without first checking local and municipal
regulations for possible restrictions
against their use.
Chain Installation
When installing tire chains, follow the
manufacturer’s instructions and mount
them as tightly possible. Drive slowly
(less than 30 km/h (20 mph)) with
chains installed. If you hear the chains
contacting the body or chassis, stop and
tighten them. If they still make contact,
slow down until the noise stops. Remove
the tire chains as soon as you begin
driving on cleared roads.
When mounting snow chains, park the
vehicle on level ground away from traffic.
Turn on the vehicle Hazard Warning
Flasher and place a triangular emergency
warning device behind the vehicle (if
available). Always place the vehicle in P
(Park), apply the parking brake and turn
off the vehicle before installing snow chains.
Page 378 of 548
07
7-45
•
There is a fixed object near the
vehicle, such as sound barriers,
guardrails, central dividers, entry
barriers, street lamps, signs,
tunnels, walls, etc. (including double
structures)
• Driving in large areas where there are
few vehicles or structures (i.e. desert,
meadow, suburb, etc.)
• Driving through a narrow road where
trees or grass are overgrown
• Driving on a wet road surface, such as
a puddle on the road
• The other vehicle drives very close
behind your vehicle, or the other
vehicle passes by your vehicle in close
proximity
• The speed of the other vehicle is very
fast that it passes by your vehicle in a short time
• Your vehicle passes by the other
vehicle
• Your vehicle changes lane
• Your vehicle has started at the same
time as the vehicle next to you and
has accelerated
• The vehicle in the next lane moves
two lanes away from you, or when the
vehicle two lanes away moves to the
next lane from you
• A trailer or carrier is installed around
the rear corner radar
• The bumper around the rear corner
radar is covered with objects, such as
a bumper sticker, bumper guard, bike
rack, etc.
• The bumper around the rear corner
radar is impacted, damaged or the
radar is out of position
• Your vehicle height is low or high
due to heavy loads, abnormal tire
pressure, etc. Blind-Spot Collision-Avoidance Assist
may not operate normally, or the
function may operate unexpectedly
when the following objects are detected: •
A motorcycle or bicycle is detected
• A vehicle such as a flat trailer is
detected
• A big vehicle such as a bus or truck is
detected
• A moving obstacle such as a
pedestrian, animal, shopping cart or a
baby stroller is detected
• A vehicle with low height such as a
sports car is detected
Braking control may not work, driver’s
attention is required in the following
circumstances: • The vehicle severely vibrates while
driving over a bumpy road, uneven
road or concrete patch
• Driving on a slippery surface due to
snow, water puddle, ice, etc.
• The tire pressure is low or a tire is damaged
• The brake is reworked
• The vehicle makes abrupt lane changes
Information
For more details on the limitations of the
front view camera, refer to “Forward
Collision-Avoidance Assist (FCA)” and
“Lane Keeping Assist (LKA)” section in
this chapter.
Page 444 of 548
![HYUNDAI KONA EV 2022 Owners Manual 07
7-111
•
Pulling into the parking space where
there is a structure
OJX1079115
[A] : Structure, [B] :Wall
Rear Cross-Traffic Collision-
Avoidance Assist may detect vehicles
passing by in fron HYUNDAI KONA EV 2022 Owners Manual 07
7-111
•
Pulling into the parking space where
there is a structure
OJX1079115
[A] : Structure, [B] :Wall
Rear Cross-Traffic Collision-
Avoidance Assist may detect vehicles
passing by in fron](/manual-img/35/56171/w960_56171-443.png)
07
7-111
•
Pulling into the parking space where
there is a structure
OJX1079115
[A] : Structure, [B] :Wall
Rear Cross-Traffic Collision-
Avoidance Assist may detect vehicles
passing by in front of you when
parking in reverse into a parking
space with a wall or structure in the
rear or side area. If this occurs, the
function may unnecessarily warn the
driver and control the brake.
Always check your surroundings while backing up.
• When the vehicle is parked rearward
OJX1079116
Rear Cross-Traffic Collision-
Avoidance Assist may detect vehicles
passing by behind you when parking
in reverse into a parking space.
If this occurs, the function may
unnecessarily warn the driver and
control the brake.
Always check your surroundings while backing up.
warning
• When you are towing a trailer or
another vehicle, we recommend
that Rear Cross-Traffic Collision-
Avoidance Assist is turned off due to
safety reasons.
• Rear Cross-Traffic Collision-
Avoidance Assist may not operate
normally if interfered by strong
electromagnetic waves.
• Rear Cross-Traffic Collision-
Avoidance Assist may not operate
for 15 seconds after the vehicle is
started, or the rear corner radars are
initialized.
Information
This device complies with Industry Canada RSS-210 standard.
Operation is subject to the following three conditions: 1. This device may not cause harmful
interference, and
2. This device must accept any
interference received, including
interference that may cause undesired operation.
3. Changes or modifications not expressly
approved by the party responsible
for compliance could void the user's authority to operate the device.
Information
Radio frequency radiation exposure information: This equipment complies with RSS- 210
radiation exposure limits set forth for an
uncontrolled environment. This equipment should be installed and operated with minimum distance of 20cm
(8 in.) between the radiator (antenna) and
your body.
This transmitter must not be co-located or
operating in conjunction with any other
antenna or transmitter.
Page 466 of 548
08
8-11
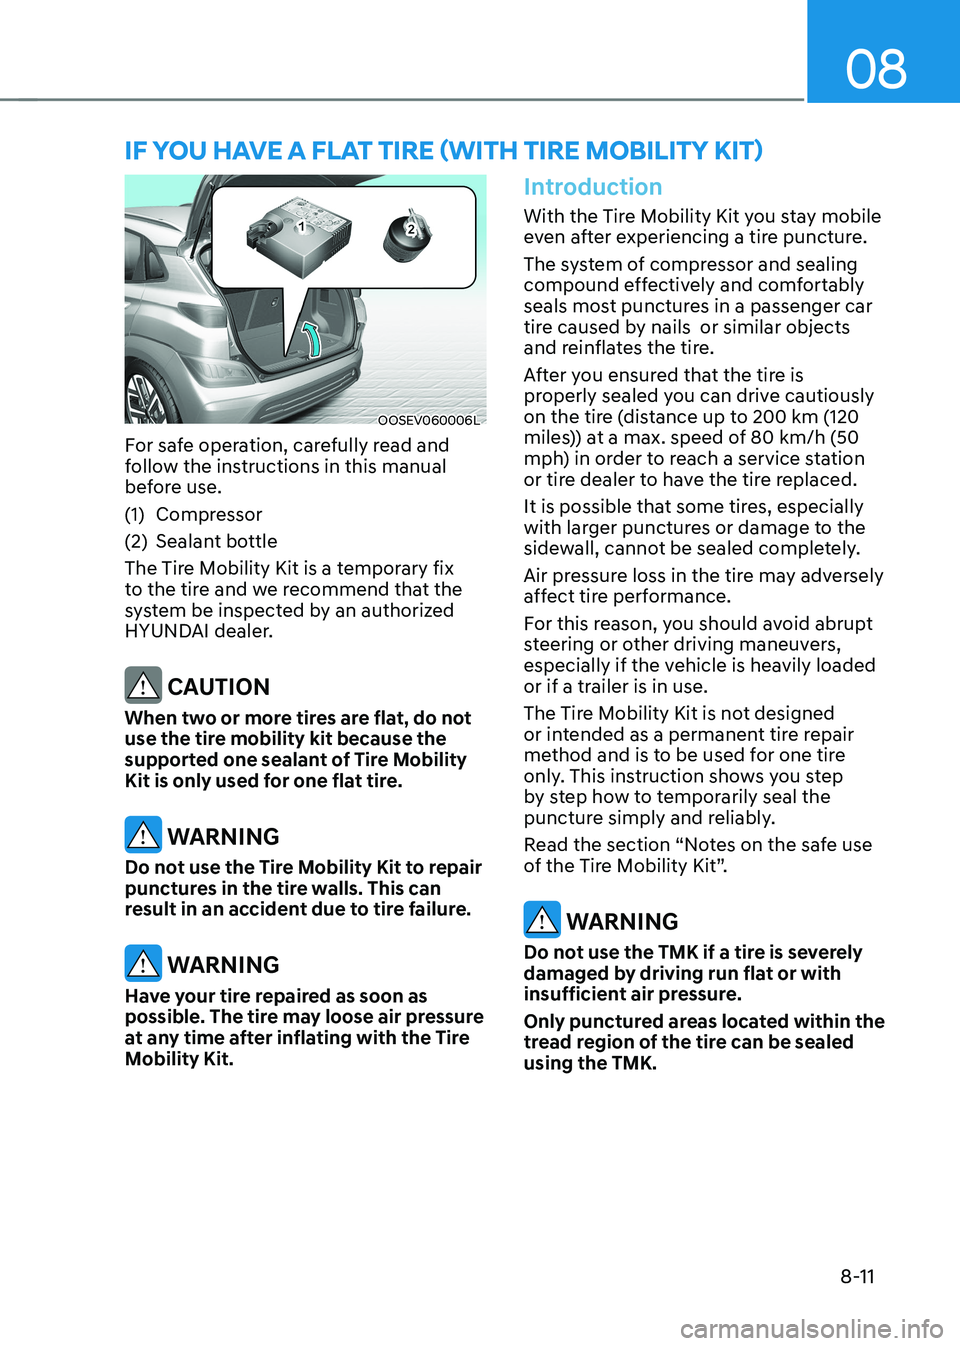
OOSEV060006L
For safe operation, carefully read and
follow the instructions in this manual
before use.
(1) Compressor
(2) Sealant bottle
The Tire Mobility Kit is a temporary fix
to the tire and we recommend that the
system be inspected by an authorized
HYUNDAI dealer.
CAUTION
When two or more tires are flat, do not
use the tire mobility kit because the
supported one sealant of Tire Mobility
Kit is only used for one flat tire.
WARNING
Do not use the Tire Mobility Kit to repair
punctures in the tire walls. This can
result in an accident due to tire failure.
WARNING
Have your tire repaired as soon as
possible. The tire may loose air pressure
at any time after inflating with the Tire
Mobility Kit.
Introduction
With the Tire Mobility Kit you stay mobile
even after experiencing a tire puncture.
The system of compressor and sealing
compound effectively and comfortably
seals most punctures in a passenger car
tire caused by nails or similar objects
and reinflates the tire.
After you ensured that the tire is
properly sealed you can drive cautiously
on the tire (distance up to 200 km (120
miles)) at a max. speed of 80 km/h (50
mph) in order to reach a service station
or tire dealer to have the tire replaced.
It is possible that some tires, especially
with larger punctures or damage to the
sidewall, cannot be sealed completely.
Air pressure loss in the tire may adversely
affect tire performance.
For this reason, you should avoid abrupt
steering or other driving maneuvers,
especially if the vehicle is heavily loaded
or if a trailer is in use.
The Tire Mobility Kit is not designed
or intended as a permanent tire repair
method and is to be used for one tire
only. This instruction shows you step
by step how to temporarily seal the
puncture simply and reliably.
Read the section “Notes on the safe use
of the Tire Mobility Kit”.
WARNING
Do not use the TMK if a tire is severely
damaged by driving run flat or with
insufficient air pressure.
Only punctured areas located within the
tread region of the tire can be sealed using the TMK.
IF YoU HAVE A FLAT TIRE (WITH TIRE MoBILITY KIT)
Page 468 of 548
08
8-13
WARNING
Sealant • Keep out of reach of children.
• Avoid contact with eyes.
• Do not swallow.
Using the Tire Mobility Kit When
a tire is flat
CAUTION
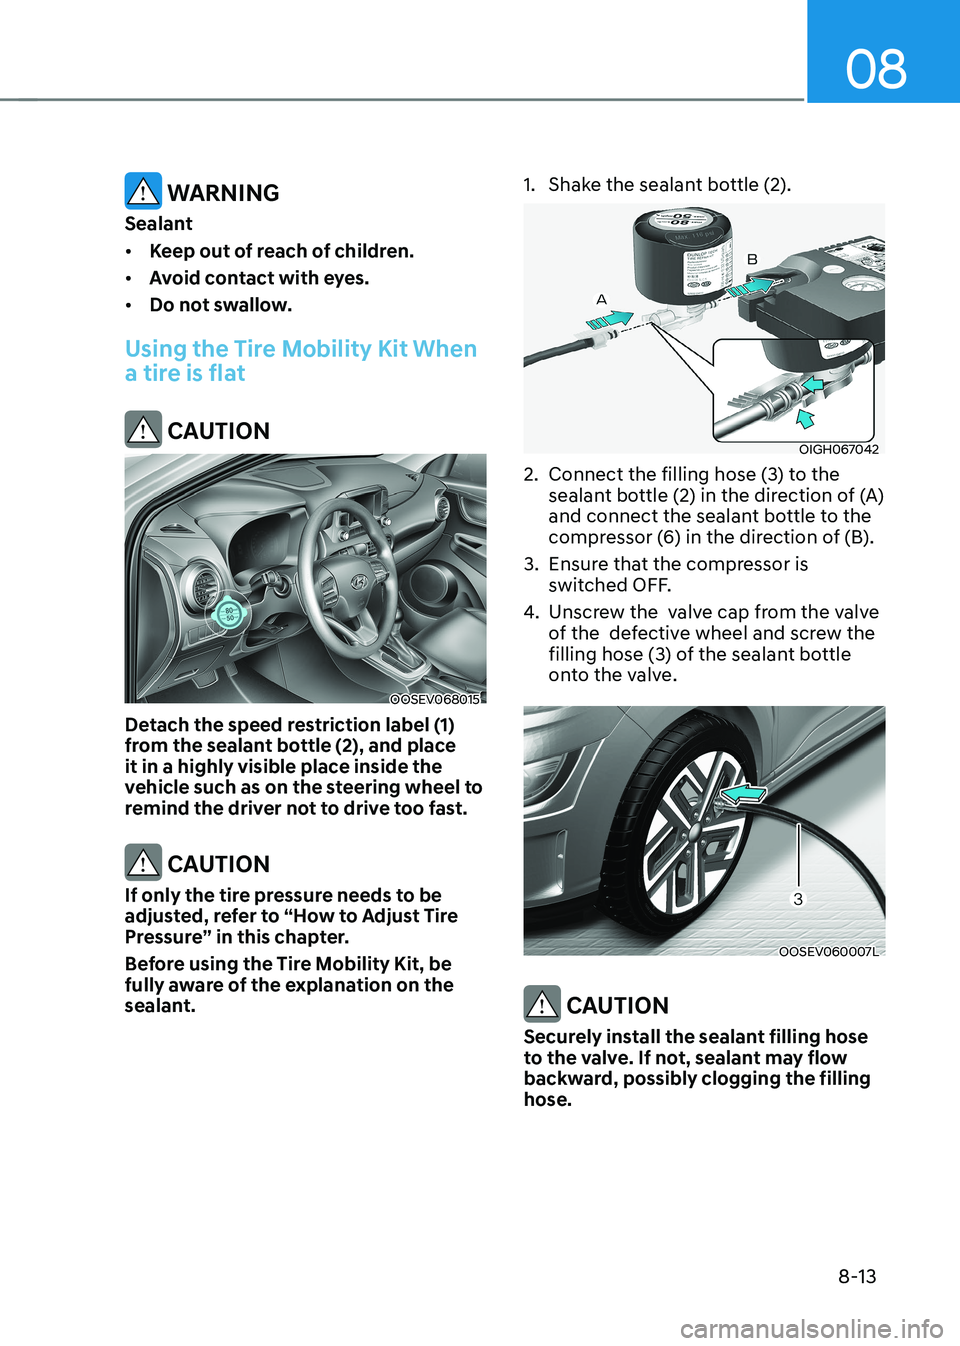
OOSEV068015
Detach the speed restriction label (1)
from the sealant bottle (2), and place
it in a highly visible place inside the
vehicle such as on the steering wheel to
remind the driver not to drive too fast.
CAUTION
If only the tire pressure needs to be
adjusted, refer to “How to Adjust Tire
Pressure” in this chapter.
Before using the Tire Mobility Kit, be
fully aware of the explanation on the
sealant. 1. Shake the sealant bottle (2).
OIGH067042
2. Connect the filling hose (3) to the sealant bottle (2) in the direction of (A)
and connect the sealant bottle to the
compressor (6) in the direction of (B).
3. Ensure that the compressor is switched OFF.
4. Unscrew the valve cap from the valve
of the defective wheel and screw the
filling hose (3) of the sealant bottle
onto the valve.
OOSEV060007L
CAUTION
Securely install the sealant filling hose
to the valve. If not, sealant may flow
backward, possibly clogging the filling hose.
Page 472 of 548
08
8-17
Notes on the safe use of the Tire
Mobility Kit
• Park your car at the side of the road
so that you can work with the Tire
Mobility Kit away from moving traffic.
• To be sure your vehicle will not move,
even when you’re on fairly level
ground, always set your parking brake.
• Only use the Tire Mobility Kit for
sealing/inflation passenger car tires.
Only punctured areas located within
the tread region of the tire can be
sealed using the tire mobility kit.
• Do not use on motorcycles, bicycles
or any other type of tires.
• When the tire and wheel are
damaged, do not use Tire Mobility Kit
for your safety.
• Use of the Tire Mobility Kit may not be
effective for tire damage larger than
approximately 6 mm (0.24 in).
• If the tire cannot be made roadworthy
with the Tire Mobility Kit, we
recommend that you contact an
authorized HYUNDAI dealer.
• Do not use the Tire Mobility Kit if a tire
is severely damaged by driving run flat
or with insufficient air pressure.
• Do not remove any foreign objects
such as nails or screws that have
penetrated the tire.
• Provided the car is outdoors, leave
the Vehicle is ON (
indicator ON).
Otherwise operating the compressor
may eventually drain the car battery. •
Never leave the Tire Mobility Kit
unattended while it is being used.
• Do not leave the compressor running
for more than 10 min. at a time or it
may overheat.
• Do not use the Tire Mobility Kit if the
ambient temperature is below -30°C
(-22°F).
• In case of skin contact with the
sealant, wash the area thoroughly
with plenty of water. If the irritation
persists, seek medical attention.
• In case of eye contact with the
sealant, flush your eyes for at least 15
minutes. If the irritation persists, seek
medical attention.
• In case of swallowing the sealant,
rinse the mouth and drink plenty of
water. However, never give anything
to an unconscious person and seek
medical attention immediately.
• Long time exposure to the sealant
may cause damage to bodily tissue
such as kidney, etc.
Page 478 of 548
9
Tire and wheels ............................................................................................... 9-20
Tire care ..................................................................................................................... 9-20
Recommended cold tire inflation pressures ..........................................................9-20
Check tire inflation pressure ..................................................................................... 9-21
Tire rotation ................................................................................................................ 9-22
Wheel alignment and tire balance ............................................................................ 9-22
Tire replacement ........................................................................................................ 9-23
Wheel replacement .................................................................................................... 9-24
Tire traction ................................................................................................................ 9-24
Tire maintenance ....................................................................................................... 9-24
Tire sidewall labeling .................................................................................................. 9-24
Tire Terminology and Definitions .............................................................................. 9-27
All season tires ........................................................................................................... 9-30
Summer tires ............................................................................................................. 9-30
Snow Tires.................................................................................................................. 9-30 Radial-ply Tires .......................................................................................................... 9-30
Low Aspect Ratio Tires ............................................................................................... 9-31
Fuses ................................................................................................................ 9-32
Instrument panel fuse replacement ........................................................................ 9-33
Motor compartment panel fuse replacement ..........................................................9-35
Light bulbs ....................................................................................................... 9-44
Headlamp, position lamp, turn signal lamp and
daytime running light bulb replacement .................................................................9-45
Side repeater lamp replacement .............................................................................. 9-47
Rear combination lamp bulb replacement ..............................................................9-47
High mounted stop lamp replacement ................................................................... 9-49
License plate light bulb replacement ...................................................................... 9-50
Interior light bulb replacement ................................................................................ 9-50
Appearance care ............................................................................................. 9-52
Exterior care ............................................................................................................... 9-52
Interior care ................................................................................................................ 9-57