Page 458 of 529
09
9-9
Normal Maintenance Schedule (CONT.)R : Replace or change. I : Inspect and if necessary, adjust, correct, clean or replace.
MAINTENANCE INTERVALS
MAINTENANCE ITEM Km X 1000
8 16 24 32 40 48 56 64 72 80 88 96 104 112 120 128 136 144 152 160
Months 6 12 18 24 30 36 42 48 54 60 66 72 78 84 90 96 102 108 114 120
Brake discs and pads I I I I I I I I I I
Steering gear rack, linkage and
boots IIIIIIII I I I I I I I I I I I I
Drive shafts and boots I I I I I I I I I I I I I I I I I I I I
Suspension mounting bolts I I I I I I I I I I
Cooling system I I I I I I I I I I I I I I I I I I I I
Air conditioning refrigerant I I I I I I I I I I
Exhaust system I I I I I I I I I I
Page 459 of 529
Maintenance
9-10
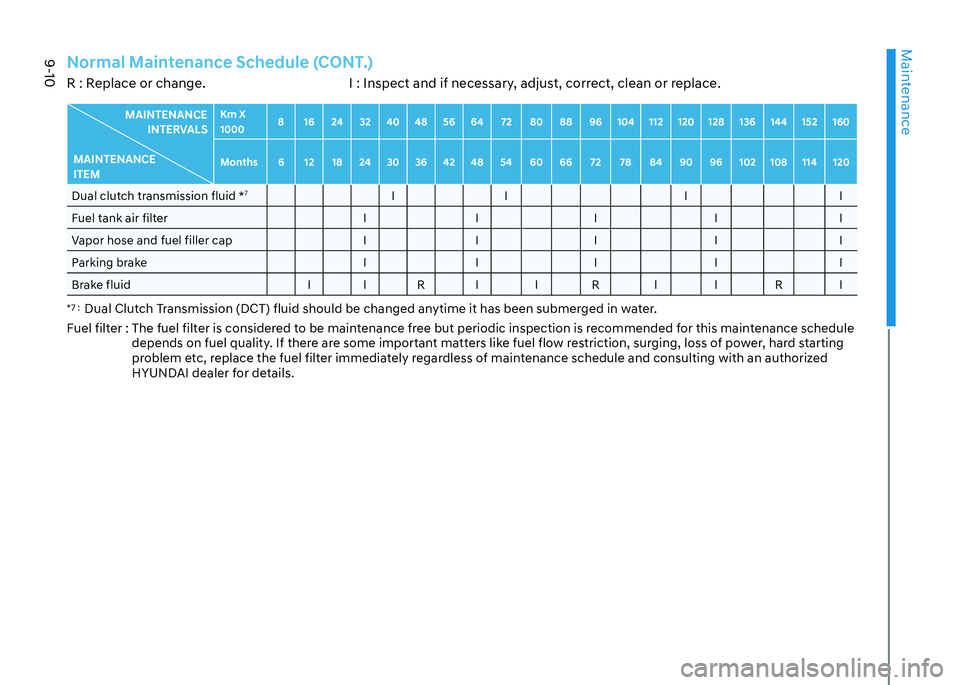
Normal Maintenance Schedule (CONT.)R : Replace or change. I : Inspect and if necessary, adjust, correct, clean or replace.
MAINTENANCE INTERVALS
MAINTENANCE ITEM Km X 1000
8 16 24 32 40 48 56 64 72 80 88 96 104 112 120 128 136 144 152 160
Months 6 12 18 24 30 36 42 48 54 60 66 72 78 84 90 96 102 108 114 120
Dual clutch transmission fluid * 7
II I I
Fuel tank air filter I I I I I
Vapor hose and fuel filler cap I I I I I
Parking brake I I I I I
Brake fluid I I R I I R I I R I
*7 : Dual Clutch Transmission (DCT) fluid should be changed anytime it has been submerged in water.
Fuel filter : The fuel filter is considered to be maintenance free but periodic inspection is recommended for this maintenance schedule
depends on fuel quality. If there are some important matters like fuel flow restriction, surging, loss of power, hard starting
problem etc, replace the fuel filter immediately regardless of maintenance schedule and consulting with an authorized
HYUNDAI dealer for details.
Page 460 of 529

09
9-11
Engine Oil and Filter
The engine oil and filter should be
changed at the intervals specified in the
maintenance schedule.
Drive Belts
Inspect all drive belts for evidence
of cuts, cracks, excessive wear or oil
saturation and replace if necessary. Drive
belts should be checked periodically
for proper tension and adjusted as
necessary.
Information
When you are inspecting the belt, turn the engine off.
Fuel Lines, Fuel Hoses and Connections
Check the fuel lines, fuel hoses and
connections for leakage and damage.
Have an authorized HYUNDAI dealer
replace any damaged or leaking parts
immediately.
HSG (Hybrid Starter & Generator) Belt
The HSG belt should be changed at the
intervals specified in the maintenance schedule.
Fuel Filter
A clogged-up fuel filter may limit the
vehicle driving speed, damage the
emission system, and cause the hard
starting. When a considerable amount
of foreign substances are accumulated
in the fuel tank, the fuel filter should be
replaced.
Upon installing a new fuel filter, operate
the engine for several minutes, and
check the connections for any leakages.
Fuel filters should be installed by an
authorized HYUNDAI dealer.
Vapor Hose and Fuel Filler Cap
The vapor hose and fuel filler cap should
be inspected at those intervals specified
in the maintenance schedule. Make sure
a new vapor hose or fuel filler cap is
correctly replaced.
Air Cleaner Filter
A genuine HYUNDAI air cleaner filter
is recommended when the filter is
replaced.
Spark Plugs
Make sure to install new spark plugs of
the correct heat range.
Cooling System
Check cooling system components, such
as radiator, coolant reservoir, hoses and
connections for leakage and damage.
Replace any damaged parts.
EXPLANATION OF SCHEDULED MAINTENANCE ITEMS
Page 461 of 529
Maintenance
9-12
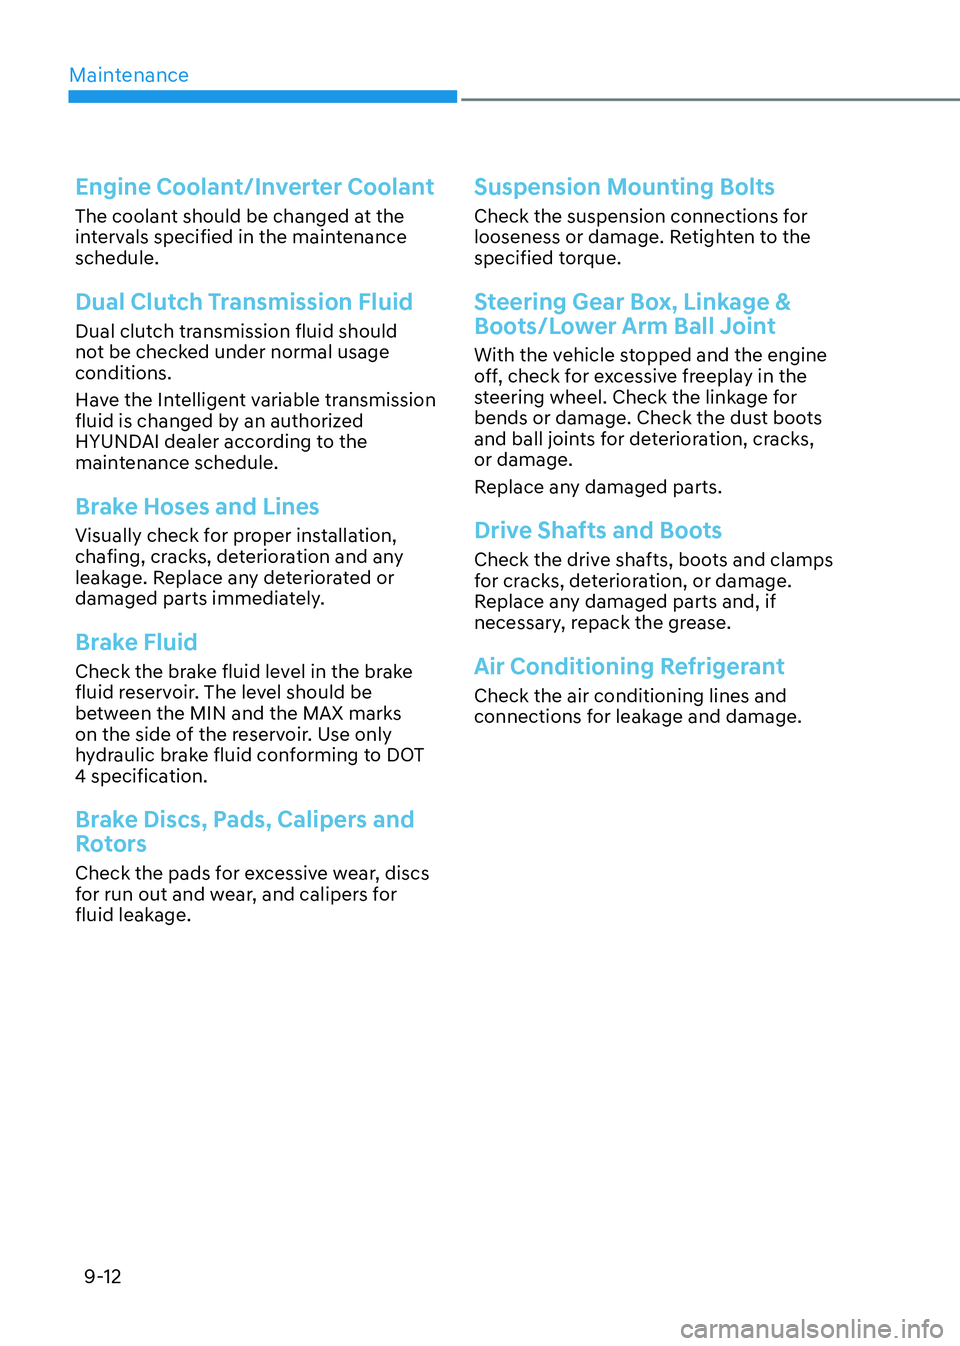
Engine Coolant/Inverter Coolant
The coolant should be changed at the
intervals specified in the maintenance schedule.
Dual Clutch Transmission Fluid
Dual clutch transmission fluid should
not be checked under normal usage conditions.
Have the Intelligent variable transmission
fluid is changed by an authorized
HYUNDAI dealer according to the
maintenance schedule.
Brake Hoses and Lines
Visually check for proper installation,
chafing, cracks, deterioration and any
leakage. Replace any deteriorated or
damaged parts immediately.
Brake Fluid
Check the brake fluid level in the brake
fluid reservoir. The level should be
between the MIN and the MAX marks
on the side of the reservoir. Use only
hydraulic brake fluid conforming to DOT
4 specification.
Brake Discs, Pads, Calipers and
Rotors
Check the pads for excessive wear, discs
for run out and wear, and calipers for
fluid leakage.
Suspension Mounting Bolts
Check the suspension connections for
looseness or damage. Retighten to the
specified torque.
Steering Gear Box, Linkage &
Boots/Lower Arm Ball Joint
With the vehicle stopped and the engine
off, check for excessive freeplay in the
steering wheel. Check the linkage for
bends or damage. Check the dust boots
and ball joints for deterioration, cracks, or damage.
Replace any damaged parts.
Drive Shafts and Boots
Check the drive shafts, boots and clamps
for cracks, deterioration, or damage.
Replace any damaged parts and, if
necessary, repack the grease.
Air Conditioning Refrigerant
Check the air conditioning lines and
connections for leakage and damage.
Page 462 of 529
09
9-13
Checking the Engine Oil Level
Engine oil is used for lubricating,
cooling, and operating various hydraulic
components in the engine. Engine oil
consumption while driving is normal,
and it is necessary to check and refill the
engine oil regularly. Also, check and refill
the oil level within the recommended
maintenance schedule to prevent
deterioration of oil performance.
Check the engine oil following the below
procedure.
1. Follow all of the oil manufacturer’s precautions.
2. Be sure the vehicle is on the level ground in P (Park) with the parking
brake set. If possible, block the wheels.
3. Turn the engine on and warm the engine up until the coolant
temperature reaches a constant
normal temperature.
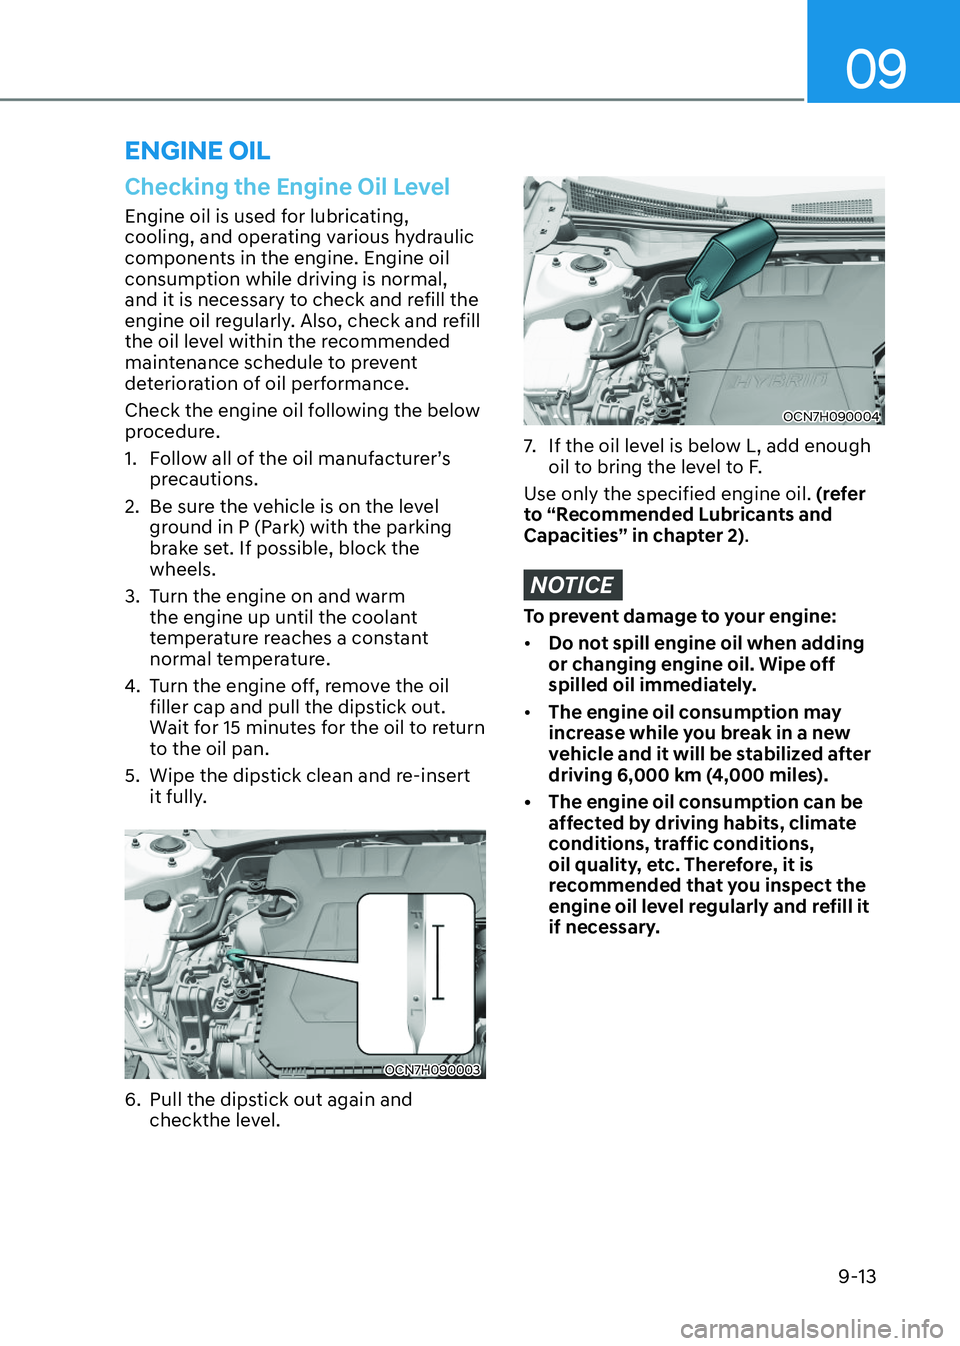
4. Turn the engine off, remove the oil filler cap and pull the dipstick out.
Wait for 15 minutes for the oil to return
to the oil pan.
5. Wipe the dipstick clean and re-insert it fully.
OCN7H090003OCN7H090003
6. Pull the dipstick out again and checkthe level.
OCN7H090004OCN7H090004
7. If the oil level is below L, add enough oil to bring the level to F.
Use only the specified engine oil. (refer
to “Recommended Lubricants and
Capacities” in chapter 2) .
NOTICE
To prevent damage to your engine:
Page 467 of 529
Maintenance
9-18
WARNING
The electric motor for the
cooling fan may continue to
operate or start up when the
engine is not running and can
cause serious injury. Keep
hands, clothing and tools away
from the rotating fan blades of
the cooling fan.
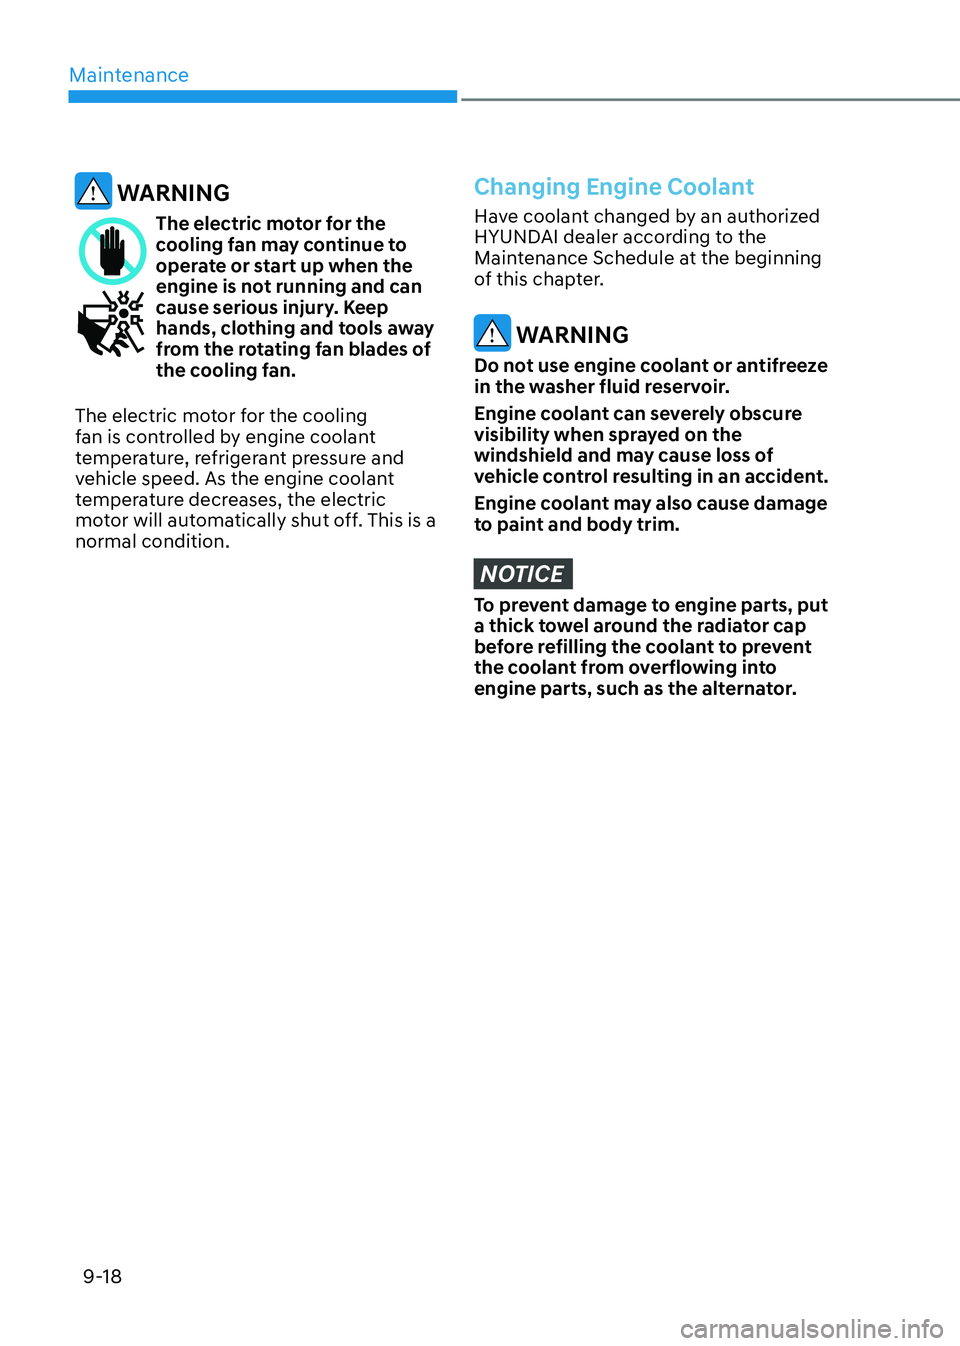
The electric motor for the cooling
fan is controlled by engine coolant
temperature, refrigerant pressure and
vehicle speed. As the engine coolant
temperature decreases, the electric
motor will automatically shut off. This is a normal condition.
Changing Engine Coolant
Have coolant changed by an authorized
HYUNDAI dealer according to the
Maintenance Schedule at the beginning
of this chapter.
WARNING
Do not use engine coolant or antifreeze
in the washer fluid reservoir.
Engine coolant can severely obscure
visibility when sprayed on the
windshield and may cause loss of
vehicle control resulting in an accident.
Engine coolant may also cause damage
to paint and body trim.
NOTICE
To prevent damage to engine parts, put
a thick towel around the radiator cap
before refilling the coolant to prevent
the coolant from overflowing into
engine parts, such as the alternator.
Page 468 of 529
09
9-19
Checking the Hybrid Starter &
Generator (HSG) Belt
Have the Hybrid Starter & Generator
(HSG) belt inspected or replaced
according to the Maintenance Schedule
in this chapter by an authorized
HYUNDAI dealer.
CAUTION
When the HSG belt is worn out or
damaged, replace the belt.
Otherwise, it may cause engine
overheating or battery discharge.
WARNING
Page 473 of 529
Maintenance
9-24
CABIN AIR FILTER
Filter Inspection
The cabin air filter should be replaced
according to the Maintenance Schedule.
If the vehicle is operated in severely
air-polluted cities or on dusty rough
roads for a long period, it should be
inspected more frequently and replaced
earlier. When you replace tthe cabin air
filter, replace it performing the following
procedure, and be careful to avoid
damaging other components.
Filter Replacement
OCN7080013OCN7080013
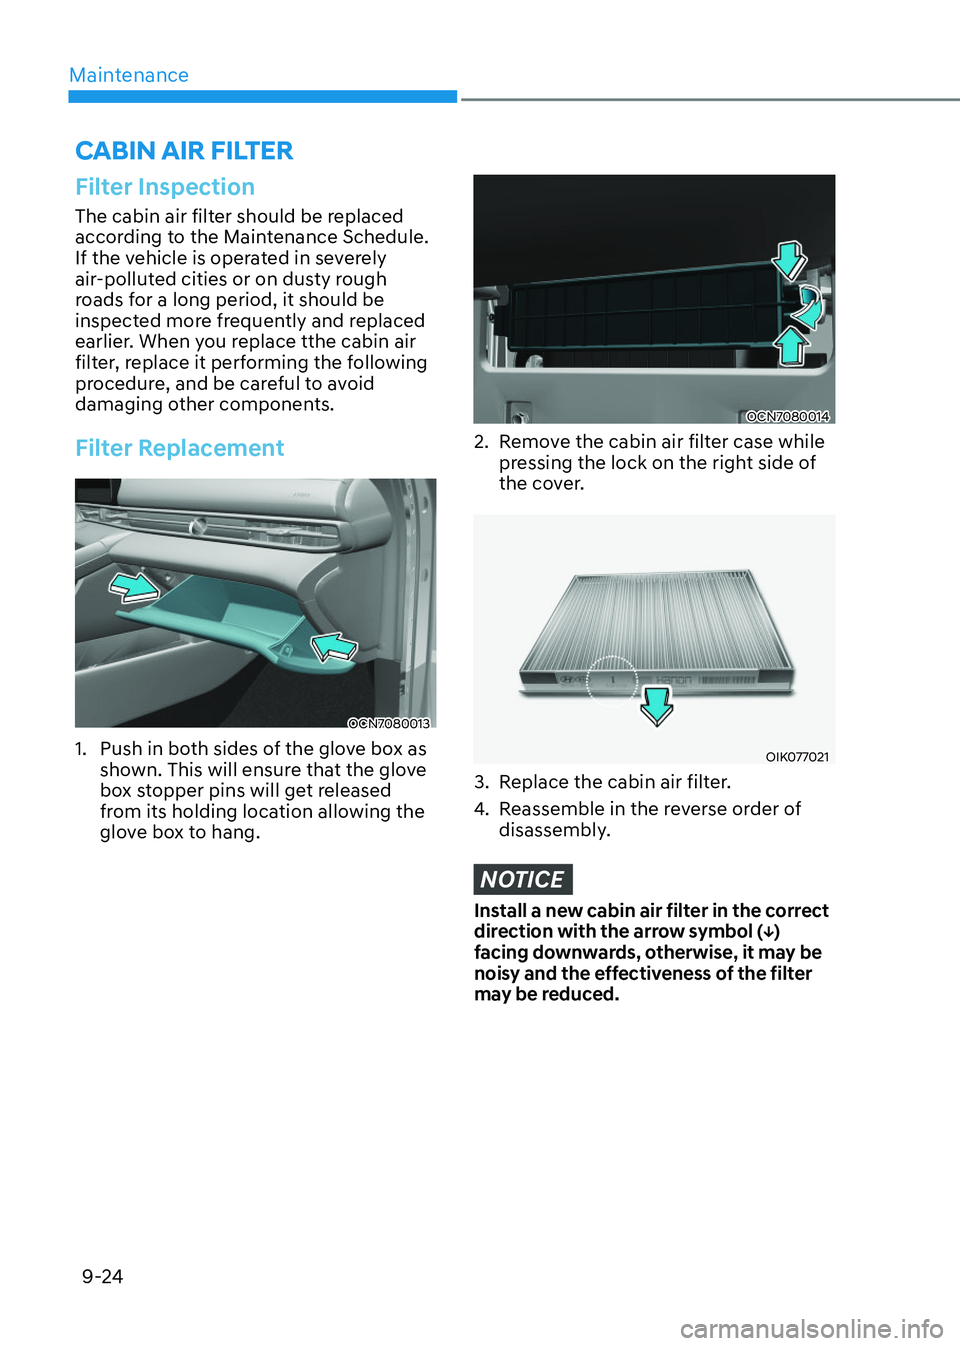
1. Push in both sides of the glove box as shown. This will ensure that the glove
box stopper pins will get released
from its holding location allowing the
glove box to hang.
OCN7080014OCN7080014
2. Remove the cabin air filter case while pressing the lock on the right side of
the cover.
OIK077021OIK077021
3. Replace the cabin air filter.
4. Reassemble in the reverse order of disassembly.
NOTICE
Install a new cabin air filter in the correct
direction with the arrow symbol ( ↓)
facing downwards, otherwise, it may be
noisy and the effectiveness of the filter
may be reduced.