2022 FORD F-650/750 ECO mode
[x] Cancel search: ECO modePage 241 of 379
It is very important to use prediluted
coolant approved to the correct
specification in order to avoid plugging the
small passageways in the engine cooling
system. See Cooling System Capacity
and Specification (page 296). Do not mix
different colors or types of coolant in your
vehicle. Mixing of engine coolants or using
an incorrect coolant may harm the engine
or cooling system components and may
not be covered by the vehicle Warranty.
Note: Coolants marketed for all makes and
models may not be approved to our
specifications and may cause damage to
the cooling system. Resulting component
damage may not be covered by the vehicle
Warranty.
If the coolant level is at or below the
minimum mark, add prediluted coolant
immediately.
For vehicles with overflow coolant systems
with a non-pressurized cap on the coolant
recovery system, add coolant to the
coolant recovery reservoir when the engine
is cool. Add prediluted coolant to the
maximum level. For all vehicles which have
a coolant degas system with a pressurized
cap, or if it is necessary to remove the
coolant pressure relief cap on the radiator,
follow these steps to add engine coolant:
1. Turn the engine off and let it cool.
2. Unscrew the cap slowly. Any pressure escapes as you unscrew the cap.
3. Fill the coolant reservoir slowly with prediluted engine coolant to within the
minimum and maximum range on the
engine coolant reservoir. If you
removed the radiator cap in an
overflow system, fill the radiator until
the coolant is visible and the radiator
is almost full. If coolant is added to
bring the level within the minimum and
maximum range when the engine is not
cold, the system may remain
underfilled. 4.
Replace the coolant reservoir cap. Turn
the cap clockwise until it contacts the
hard stop.
5. Check the coolant level in the coolant reservoir the next few times you drive
your vehicle. If necessary, add enough
prediluted engine coolant to bring the
coolant level to the proper level.
Note: If prediluted coolant is not available,
use the approved antifreeze concentrate
diluting it to 50/50 with distilled water. See
Cooling System Capacity and
Specification (page 296). Using water that
has not been deionized may contribute to
deposit formation, corrosion or plugging of
the small cooling system passageways.
If you have to add more than
1.1 qt (1 L) of
engine coolant per month, have your
vehicle checked as soon as possible.
Operating an engine with a low level of
coolant can result in engine overheating
and possible engine damage.
Note: During normal vehicle operation, the
coolant may change color from orange to
pink or light red. As long as the coolant is
clear and uncontaminated, this color change
does not indicate the coolant has degraded
nor does it require the coolant to be drained,
the system to be flushed, or the coolant to
be replaced.
Note: In case of emergency, you can add a
large amount of water without coolant in
order to reach a vehicle service location.
Water alone, without coolant, can cause
engine damage from corrosion, overheating
or freezing. When you reach a service
location, you must have the cooling system
drained, flushed and refilled using the
correct specification prediluted coolant or
antifreeze concentrate. See
Cooling
System Capacity and Specification (page
296
).
238
2022 F650750 (TBC) , enUSA, Edition date: 202010, Second-Printing Maintenance
Page 243 of 379
change as you drive. This is to be expected
as being normal to the operation of your
vehicle. High levels of fan noise might also
be heard when your engine is first started,
and should normally decrease after driving
for a short time.
Fail-Safe Cooling
Fail-safe cooling allows you to temporarily
drive your vehicle before any incremental
component damage occurs. The fail-safe
distance depends on ambient
temperature, vehicle load and terrain.
How Fail-Safe Cooling Works
If the engine begins to overheat, the
coolant temperature gauge moves toward
the red zone:
A warning lamp illuminates and
a message may appear in the
information display.
If the engine reaches a preset
over-temperature condition, the engine
switches to alternating cylinder operation.
Each disabled cylinder acts as an air pump
and cools the engine.
When this occurs, your vehicle still
operates, however:
• Engine power is limited.
• The air conditioning system turns off.
Continued operation increases the engine
temperature, causing the engine to
completely shut down. Your steering and
braking effort increases in this situation.
When the engine temperature cools, you
can re-start the engine. Have your vehicle
checked as soon as possible to minimize
engine damage. When Fail-Safe Mode Is Activated WARNING: Fail-safe mode is for
use during emergencies only. Operate
your vehicle in fail-safe mode only as
long as necessary to bring your vehicle
to rest in a safe location and seek
immediate repairs. When in fail-safe
mode, your vehicle will have limited
power, will not be able to maintain
high-speed operation, and may
completely shut down without warning,
potentially losing engine power, power
steering assist, and power brake assist,
which may increase the possibility of a
crash resulting in serious injury. WARNING:
Do not remove the
coolant reservoir cap when the engine is
on or the cooling system is hot. Wait 10
minutes for the cooling system to cool
down. Cover the coolant reservoir cap
with a thick cloth to prevent the
possibility of scalding and slowly remove
the cap. Failure to follow this instruction
could result in personal injury.
Your vehicle has limited engine power
when in the fail-safe mode, drive your
vehicle with caution. Your vehicle does not
maintain high-speed operation and the
engine may operate poorly.
Remember that the engine is capable of
shutting down to prevent engine damage.
In this situation:
1. Pull off the road as soon as safely possible and switch the engine off.
2. If you are a member of a roadside assistance program, we recommend
that you contact your roadside
assistance service provider.
3. If this is not possible, wait a short period for the engine to cool.
240
2022 F650750 (TBC) , enUSA, Edition date: 202010, Second-Printing Maintenance
Page 244 of 379

4. Check the coolant level. If the coolant
level is at or below the minimum mark,
add prediluted coolant immediately.
5. When the engine temperature cools, you can re-start the engine. Have your
vehicle checked as soon as possible to
minimize engine damage.
Note: Driving your vehicle without repair
increases the chance of engine damage.
Engine Coolant Temperature
Management (If Equipped) WARNING:
To reduce the risk of
crash and injury, be prepared that the
vehicle speed may reduce and the
vehicle may not be able to accelerate
with full power until the coolant
temperature reduces.
If you tow a trailer with your vehicle, the
engine may temporarily reach a higher
temperature during severe operating
conditions, for example ascending a long
or steep grade in high ambient
temperatures.
At this time, you may notice the coolant
temperature gauge moves toward the red
zone and a message may appear in the
information display.
You may notice a reduction in vehicle
speed caused by reduced engine power in
order to manage the engine coolant
temperature. Your vehicle may enter this
mode if certain high-temperature and
high-load conditions take place. The
amount of speed reduction depends on
vehicle loading, grade and ambient
temperature. If this occurs, there is no
need to pull off the road. You can continue
to drive your vehicle. The air conditioning may turn on and off
during severe operating conditions to
protect the engine from overheating. When
the coolant temperature decreases to the
normal operating temperature, the air
conditioning turns on.
If the coolant temperature gauge moves
fully into the red zone, or if the coolant
temperature warning or service engine
soon messages appear in your information
display, do the following:
1. Pull off the road as soon as safely
possible and shift the transmission into
park (P).
2. Leave the engine running until the coolant temperature gauge needle
returns to the normal position. After
several minutes, if the temperature
does not drop, follow the remaining
steps.
3. Switch the engine off and wait for it to
cool. Check the coolant level.
4. If the coolant level is at or below the minimum mark, add prediluted coolant
immediately.
5. If the coolant level is normal, restart the engine and continue.
AUTOMATIC TRANSMISSION
FLUID CHECK
The transmission does not consume fluid.
However, check the fluid level if the
transmission is not working properly, for
example if the transmission slips, shifts
slowly or if there are signs of fluid loss.
Replace the transmission fluid and filter
on your vehicle at the specified service
interval. See
Scheduled Maintenance
(page 321).
Automatic transmission fluid expands
when warmed. To check the fluid level
consistently and accurately, do the
following:
241
2022 F650750 (TBC) , enUSA, Edition date: 202010, Second-Printing Maintenance
Page 308 of 379
VEHICLE IDENTIFICATION
NUMBER
LOCATING THE VEHICLE
IDENTIFICATION NUMBER
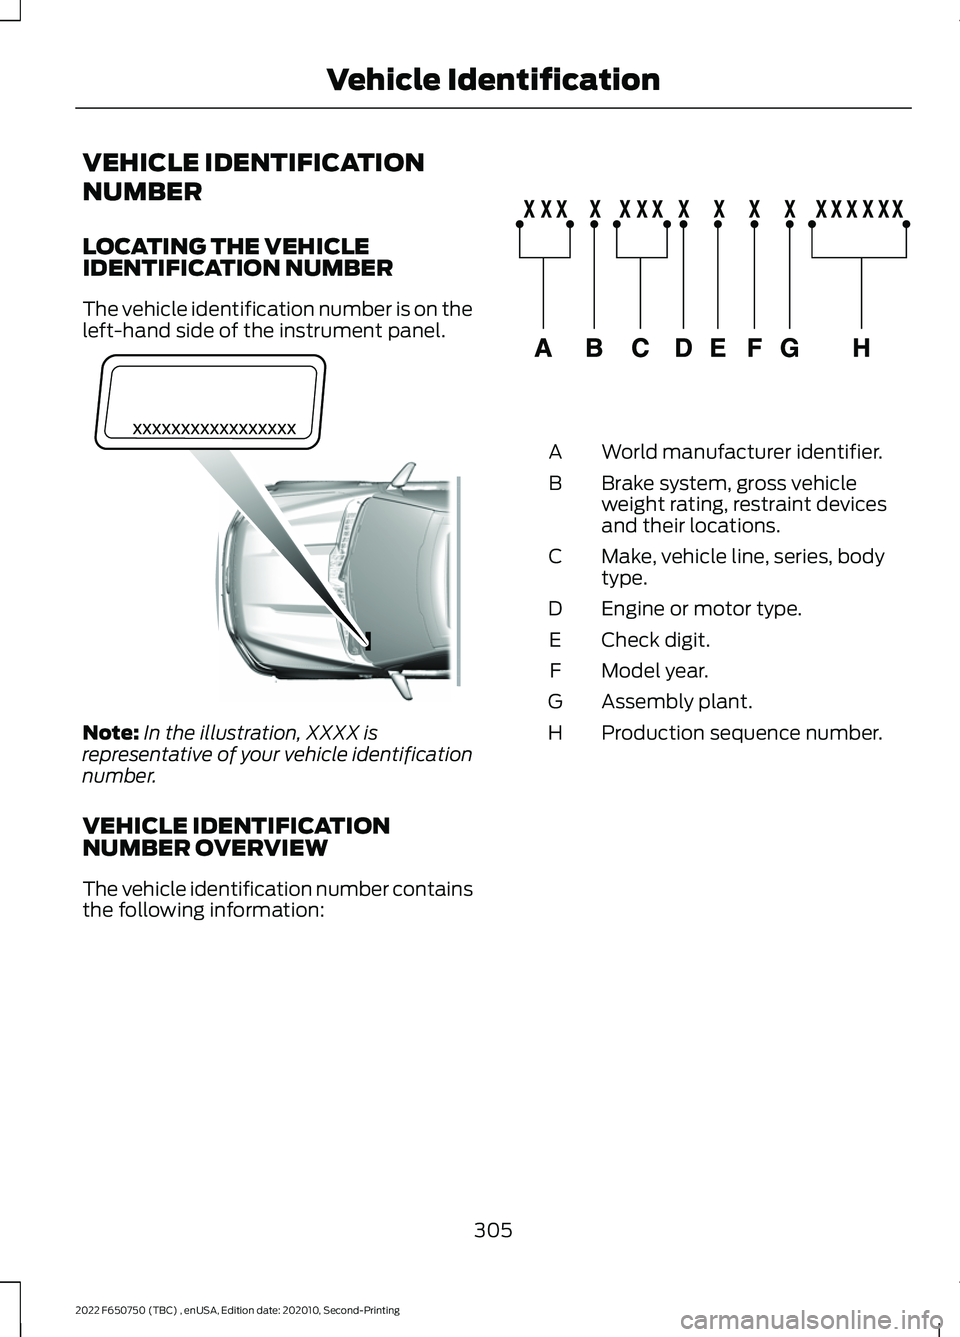
The vehicle identification number is on the
left-hand side of the instrument panel.
Note:
In the illustration, XXXX is
representative of your vehicle identification
number.
VEHICLE IDENTIFICATION
NUMBER OVERVIEW
The vehicle identification number contains
the following information: World manufacturer identifier.
A
Brake system, gross vehicle
weight rating, restraint devices
and their locations.
B
Make, vehicle line, series, body
type.
C
Engine or motor type.
D
Check digit.
E
Model year.
F
Assembly plant.
G
Production sequence number.
H
305
2022 F650750 (TBC) , enUSA, Edition date: 202010, Second-Printing Vehicle IdentificationE311767 E142477
Page 309 of 379
CONNECTED VEHICLE
REQUIREMENTS
Connected service and related feature
functionality requires a compatible vehicle
network.
Some remote features require additional
service activation. Log in to your Ford
account for details. Some restrictions, third
party terms and message or data rates
may apply.
CONNECTED VEHICLE
LIMITATIONS
Evolving technology, cellular networks, or
regulations could affect functionality and
availability, or continued provision of some
features. These changes could even stop
some features from functioning.
CONNECTING THE VEHICLE TO
A MOBILE NETWORK -
VEHICLES WITH: MODEM
WHAT IS THE MODEM
The modem allows access to a
range of features built into your
vehicle. ENABLING AND DISABLING THE
MODEM
1. Press Settings.
2. Press
FordPass Connect.
3. Press
Connectivity Settings.
4. Switch connectivity features on or off.
CONNECTING FORDPASS TO THE
MODEM
1. Make sure that the modem is enabled using the vehicle settings menu.
2. Open the FordPass app on your device
and log in.
3. Add your vehicle or select your vehicle if already added.
4. Select the option to activate your vehicle.
5. Make sure that the name on the screen
matches the name shown in your
FordPass account.
6. Confirm that FordPass account is connected to the modem.
306
2022 F650750 (TBC) , enUSA, Edition date: 202010, Second-Printing Connected Vehicle
(If Equipped)
Page 310 of 379
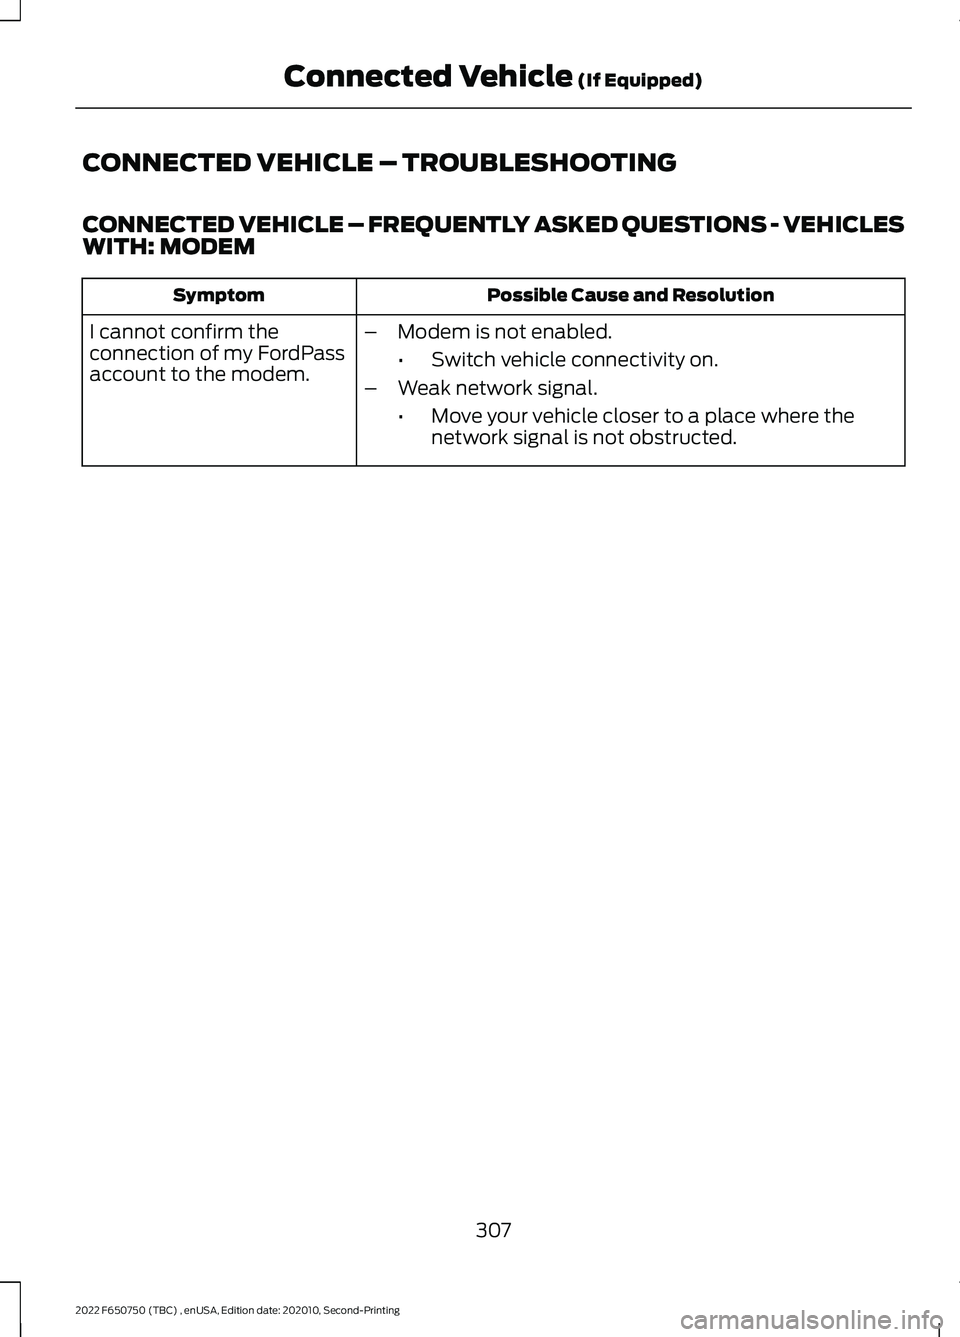
CONNECTED VEHICLE – TROUBLESHOOTING
CONNECTED VEHICLE – FREQUENTLY ASKED QUESTIONS - VEHICLES
WITH: MODEM
Possible Cause and Resolution
Symptom
I cannot confirm the
connection of my FordPass
account to the modem. –
Modem is not enabled.
•Switch vehicle connectivity on.
– Weak network signal.
•Move your vehicle closer to a place where the
network signal is not obstructed.
307
2022 F650750 (TBC) , enUSA, Edition date: 202010, Second-Printing Connected Vehicle (If Equipped)
Page 312 of 379
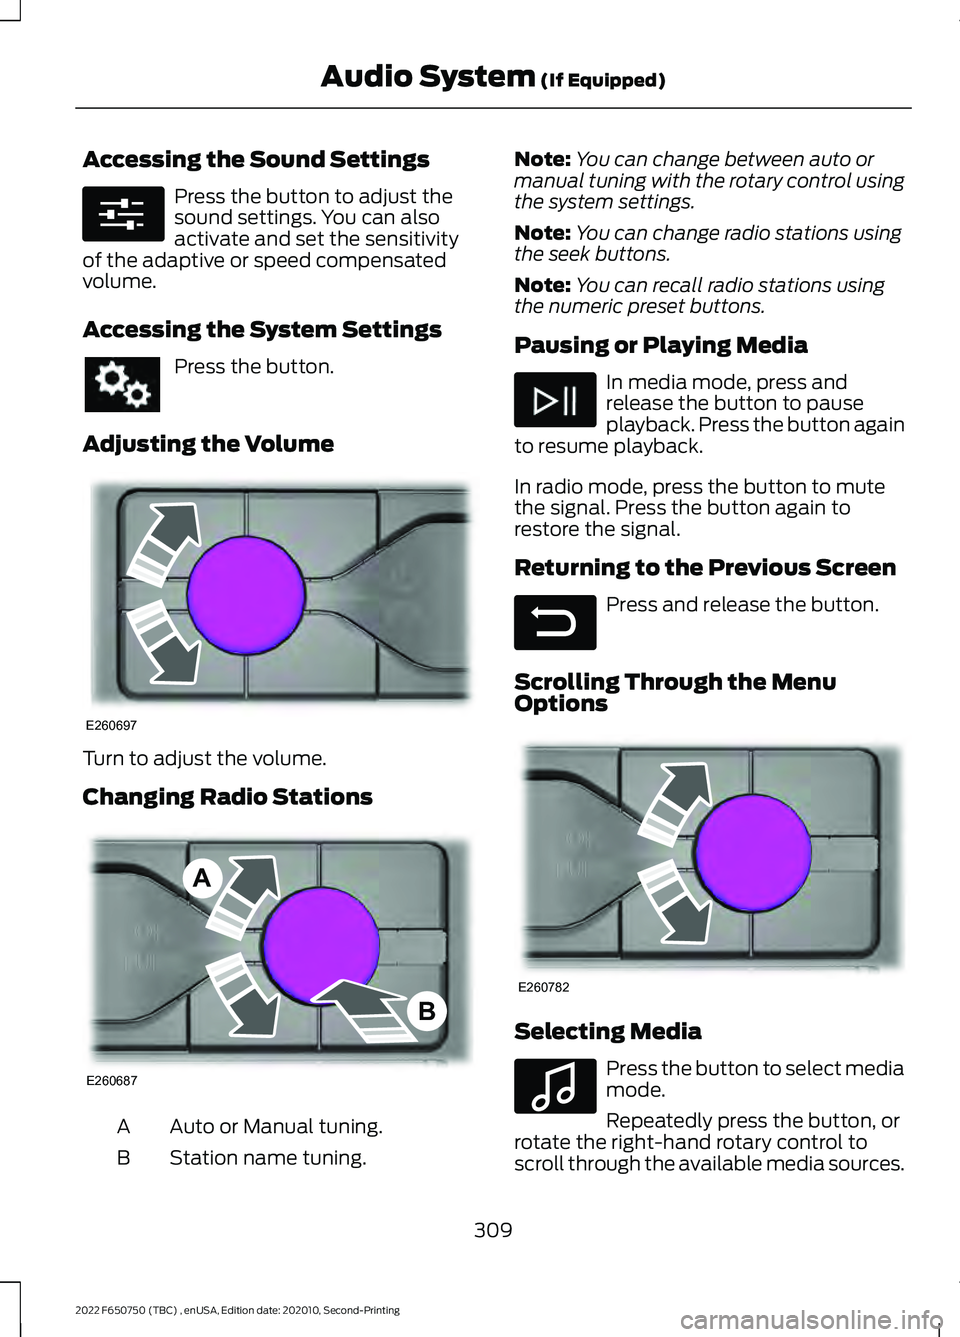
Accessing the Sound Settings
Press the button to adjust the
sound settings. You can also
activate and set the sensitivity
of the adaptive or speed compensated
volume.
Accessing the System Settings Press the button.
Adjusting the Volume Turn to adjust the volume.
Changing Radio Stations
Auto or Manual tuning.
A
Station name tuning.
B Note:
You can change between auto or
manual tuning with the rotary control using
the system settings.
Note: You can change radio stations using
the seek buttons.
Note: You can recall radio stations using
the numeric preset buttons.
Pausing or Playing Media In media mode, press and
release the button to pause
playback. Press the button again
to resume playback.
In radio mode, press the button to mute
the signal. Press the button again to
restore the signal.
Returning to the Previous Screen Press and release the button.
Scrolling Through the Menu
Options Selecting Media
Press the button to select media
mode.
Repeatedly press the button, or
rotate the right-hand rotary control to
scroll through the available media sources.
309
2022 F650750 (TBC) , enUSA, Edition date: 202010, Second-Printing Audio System (If Equipped)E280315 E260697 E260687
A
B E281480 E260782 E100027
Page 313 of 379
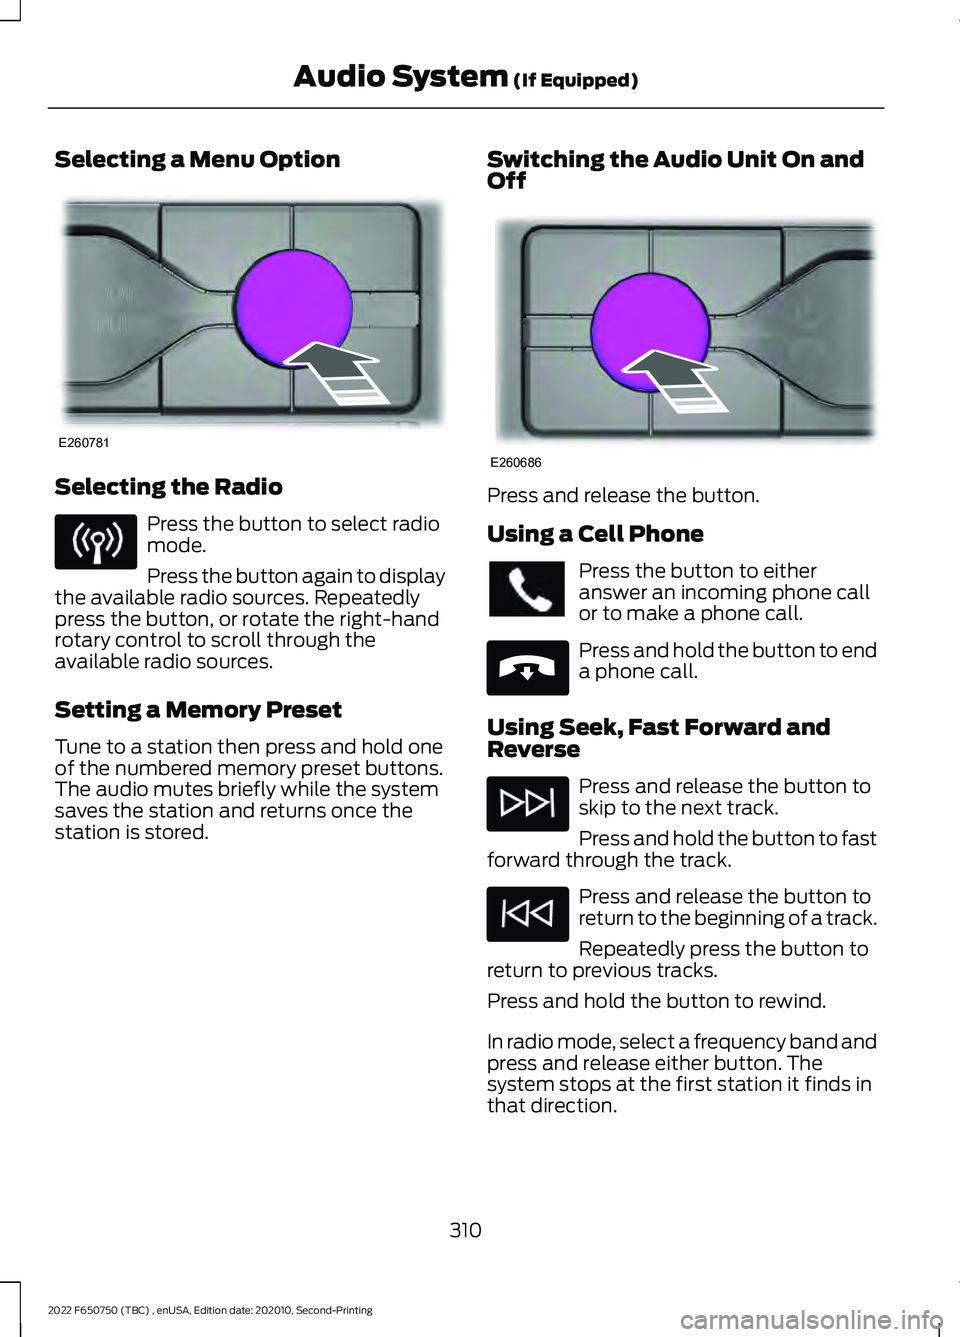
Selecting a Menu Option
Selecting the Radio
Press the button to select radio
mode.
Press the button again to display
the available radio sources. Repeatedly
press the button, or rotate the right-hand
rotary control to scroll through the
available radio sources.
Setting a Memory Preset
Tune to a station then press and hold one
of the numbered memory preset buttons.
The audio mutes briefly while the system
saves the station and returns once the
station is stored. Switching the Audio Unit On and
Off Press and release the button.
Using a Cell Phone
Press the button to either
answer an incoming phone call
or to make a phone call.
Press and hold the button to end
a phone call.
Using Seek, Fast Forward and
Reverse Press and release the button to
skip to the next track.
Press and hold the button to fast
forward through the track. Press and release the button to
return to the beginning of a track.
Repeatedly press the button to
return to previous tracks.
Press and hold the button to rewind.
In radio mode, select a frequency band and
press and release either button. The
system stops at the first station it finds in
that direction.
310
2022 F650750 (TBC) , enUSA, Edition date: 202010, Second-Printing Audio System (If Equipped)E260781 E260686 E265040