2022 FORD F-250 lock
[x] Cancel search: lockPage 211 of 740
Use Motorcraft® cetane booster or an
equivalent cetane booster additive if you
suspect fuel has low cetane. Use
Motorcraft® anti-gel and performance
improver or an equivalent additive if there
is fuel gelling.
Do not use alcohol-based additives to
improve cetane quality, to prevent fuel
gelling or any other use. The use of alcohol
additives could result in damage to the fuel
injectors and system.
Your Warranty may not cover repairs
needed to correct the effects of using an
aftermarket product that does not meet
our specifications in your fuel.
SWITCHING BETWEEN E85 AND
GASOLINE
We do not recommend repeatedly
alternating between E85 and gasoline. If
you switch from using E85 to gasoline, or
from gasoline to E85, add as much fuel as
possible, at least half a tank. Drive your
vehicle immediately for a minimum of 5 mi
(8 km) to allow it to adapt to the change
in ethanol concentration. If you use E85
exclusively, we recommend that you fill
the fuel tank with regular unleaded
gasoline at each scheduled oil change.
RUNNING OUT OF FUEL
FILLING A PORTABLE FUEL
CONTAINER WARNING:
Flow of fuel through a
fuel pump nozzle can produce static
electricity. This can cause a fire if you are
filling an ungrounded fuel container. Use the following guidelines to avoid
electrostatic charge build-up, which can
produce a spark, when filling an
ungrounded fuel container:
•
Only use an approved fuel container to
transfer fuel to your vehicle. Place the
container on the ground when filling it.
• Do not fill a fuel container when it is
inside your vehicle (including the cargo
area).
• Keep the fuel pump nozzle in contact
with the fuel container when filling it.
• Do not use a device that holds the fuel
pump nozzle lever in the fill position.
ADDING FUEL FROM A PORTABLE
FUEL CONTAINER WARNING: Do not insert the nozzle
of a fuel container or an aftermarket
funnel into the fuel filler neck. This may
damage the fuel system filler neck or its
seal and cause fuel to run onto the
ground. WARNING:
Do not pry open the
fuel tank filler valve. This could damage
the fuel system. Failure to follow this
instruction could result in fire, personal
injury or death. WARNING:
Do not dispose of fuel
in the household refuse or the public
sewage system. Use an authorized waste
disposal facility.
When refueling the vehicle fuel tank from
a fuel container, do the following:
1. Fully open the fuel filler door.
2. Turn the fuel filler cap counterclockwise and remove it.
3. Add fuel to your vehicle from the fuel container.
208
2022 Super Duty (TFE) Canada/United States of America, enUSA, Edition date: 202103, First-Printing Fuel and Refueling
Page 212 of 740

4. To replace the fuel filler cap, turn it
clockwise until you feel a strong
resistance and it clicks.
5. Fully close the fuel filler door.
Note: If your vehicle runs out of fuel add a
minimum of 1.3 gal (5 L) of fuel to restart
the engine.
Note: You may need to switch the ignition
from off to on several times after refueling
to allow the fuel system to pump the fuel
from the tank to the engine. When
restarting, cranking time takes a few
seconds longer than normal.
REFUELING
REFUELING SYSTEM OVERVIEW Fuel filler door.
A
Fuel tank filler valve.
B
Fuel tank filler pipe.
C REFUELING YOUR VEHICLE WARNING: When refueling always
shut the engine off and never allow
sparks or open flames near the fuel tank
filler valve. Never smoke or use a cell
phone while refueling. Fuel vapor is
extremely hazardous under certain
conditions. Avoid inhaling excess fumes. WARNING:
Fuel vapor burns
violently and a fuel fire can cause severe
injuries. WARNING:
The fuel system may
be under pressure. If you hear a hissing
sound near the fuel filler inlet, do not
refuel until the sound stops. Otherwise,
fuel may spray out, which could cause
serious personal injury. WARNING:
Keep children away
from the fuel pump. Never let children
pump fuel. WARNING:
Do not pry open the
fuel tank filler valve. This could damage
the fuel system. Failure to follow this
instruction could result in fire, personal
injury or death. WARNING:
Stay outside your
vehicle and do not leave the fuel pump
unattended when refueling your vehicle. WARNING: Do not remove the fuel
pump nozzle from its fully inserted
position when refueling. WARNING:
Stop refueling when
the fuel pump nozzle automatically
shuts off for the first time. Failure to
follow this will fill the expansion space
in the fuel tank and could lead to fuel
overflowing.
209
2022 Super Duty (TFE) Canada/United States of America, enUSA, Edition date: 202103, First-Printing Fuel and RefuelingAAE346555
Page 223 of 740
Note:
The diesel exhaust fluid tank has a
blue filler cap.
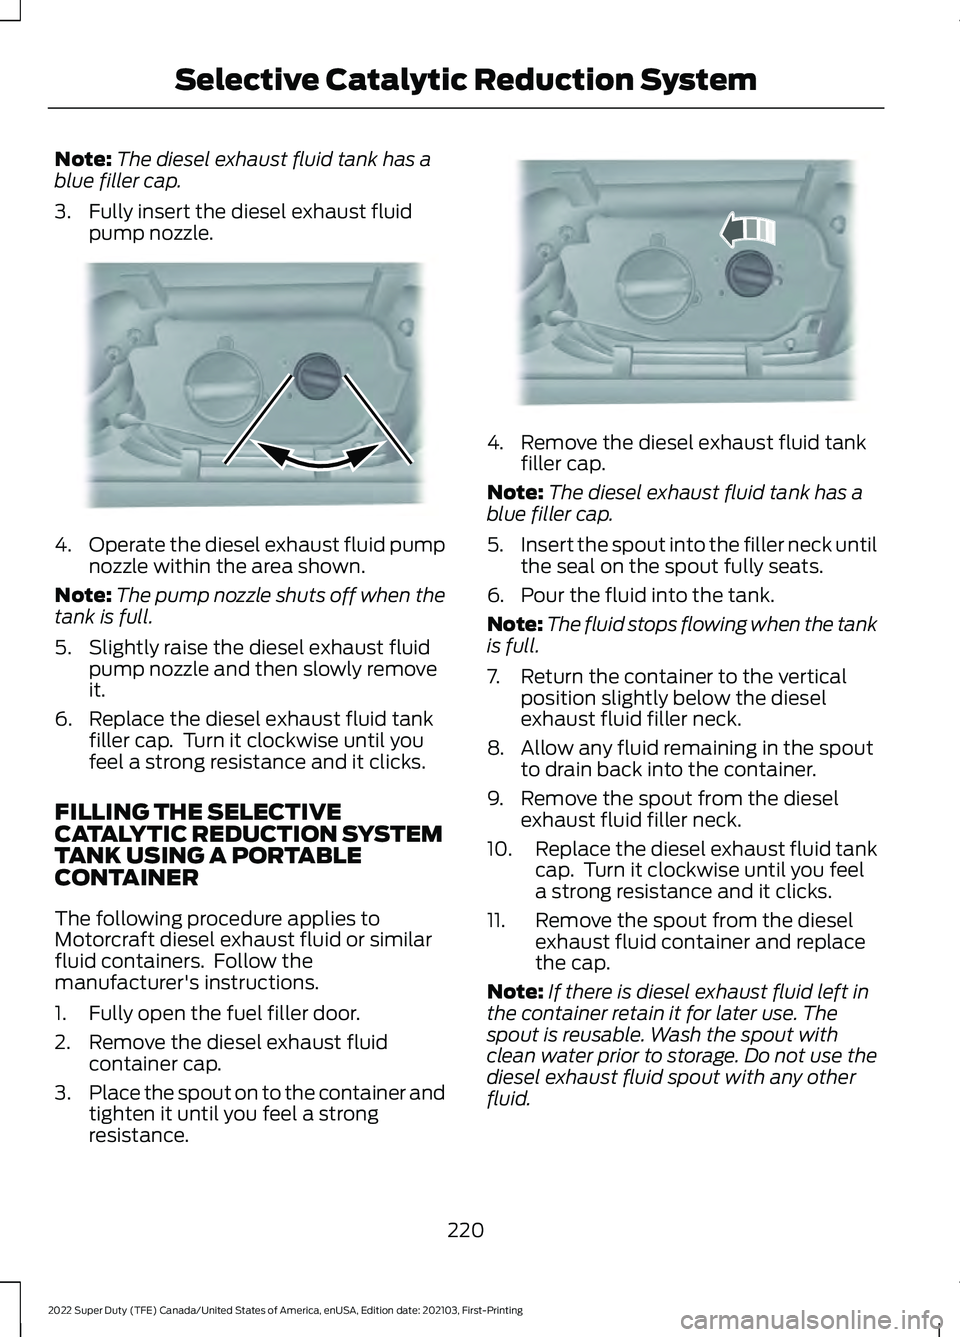
3. Fully insert the diesel exhaust fluid pump nozzle. 4.
Operate the diesel exhaust fluid pump
nozzle within the area shown.
Note: The pump nozzle shuts off when the
tank is full.
5. Slightly raise the diesel exhaust fluid pump nozzle and then slowly remove
it.
6. Replace the diesel exhaust fluid tank filler cap. Turn it clockwise until you
feel a strong resistance and it clicks.
FILLING THE SELECTIVE
CATALYTIC REDUCTION SYSTEM
TANK USING A PORTABLE
CONTAINER
The following procedure applies to
Motorcraft diesel exhaust fluid or similar
fluid containers. Follow the
manufacturer's instructions.
1. Fully open the fuel filler door.
2. Remove the diesel exhaust fluid container cap.
3. Place the spout on to the container and
tighten it until you feel a strong
resistance. 4. Remove the diesel exhaust fluid tank
filler cap.
Note: The diesel exhaust fluid tank has a
blue filler cap.
5. Insert the spout into the filler neck until
the seal on the spout fully seats.
6. Pour the fluid into the tank.
Note: The fluid stops flowing when the tank
is full.
7. Return the container to the vertical position slightly below the diesel
exhaust fluid filler neck.
8. Allow any fluid remaining in the spout to drain back into the container.
9. Remove the spout from the diesel exhaust fluid filler neck.
10. Replace the diesel exhaust fluid tank
cap. Turn it clockwise until you feel
a strong resistance and it clicks.
11. Remove the spout from the diesel exhaust fluid container and replace
the cap.
Note: If there is diesel exhaust fluid left in
the container retain it for later use. The
spout is reusable. Wash the spout with
clean water prior to storage. Do not use the
diesel exhaust fluid spout with any other
fluid.
220
2022 Super Duty (TFE) Canada/United States of America, enUSA, Edition date: 202103, First-Printing Selective Catalytic Reduction SystemE328783 E328788
Page 227 of 740

AUTOMATIC TRANSMISSION
PRECAUTIONS
WARNING: Apply the parking
brake, shift into park (P), switch the
ignition off and remove the key before
you leave your vehicle. Failure to follow
this instruction could result in personal
injury or death. WARNING:
Do not use tow/haul
when the road surface is slippery. Failure
to follow this instruction could result in
the loss of control of your vehicle. WARNING:
When your vehicle is
stationary, keep the brake pedal fully
pressed when shifting gears. Failure to
follow this instruction could result in
personal injury, death or property
damage. WARNING:
Do not apply the brake
pedal and accelerator pedal
simultaneously. Applying both pedals
simultaneously for more than a few
seconds will limit engine performance,
which may result in difficulty maintaining
speed in traffic and could lead to serious
injury.
AUTOMATIC TRANSMISSION
POSITIONS
PARK (P)
This position locks the driveline and
prevents the wheels from turning. Come
to a complete stop before putting your
vehicle into and out of park (P). REVERSE (R) WARNING:
Move the transmission
selector lever to reverse (R) only when
your vehicle is stationary and the engine
is at idle speed.
This position allows your vehicle to move
backward. Come to a complete stop
before shifting into and out of reverse (R).
NEUTRAL (N) WARNING:
In neutral (N) your
vehicle is free to roll.
This position allows your vehicle to roll
free. Hold the brake pedal down when in
this position.
Note: You can start your vehicle in this
position.
DRIVE (D)
Drive (D) is the normal driving position, and
allows automatic upshifts and downshifts
through all available gears.
MANUAL (M)
To select manual (M) mode, place the
gearshift in the manual (M) position.
This position allows you to change gears
up or down as preferred using the + or -
buttons on the shifter lever.
To return to the normal drive (D) position,
move the shifter into the drive (D) position.
SHIFTING YOUR VEHICLE INTO
GEAR
1. Fully press down on the brake pedal.
224
2022 Super Duty (TFE) Canada/United States of America, enUSA, Edition date: 202103, First-Printing Automatic Transmission
Page 228 of 740
2. Move the gearshift lever into the
desired gear.
3. When you finish driving, come to a complete stop.
4. Pull lever toward the driver and move the gearshift lever and securely latch
it in park (P).
MANUALLY SHIFTING GEARS
SHIFTING USING THE BUTTONS
ON THE SELECTOR LEVER
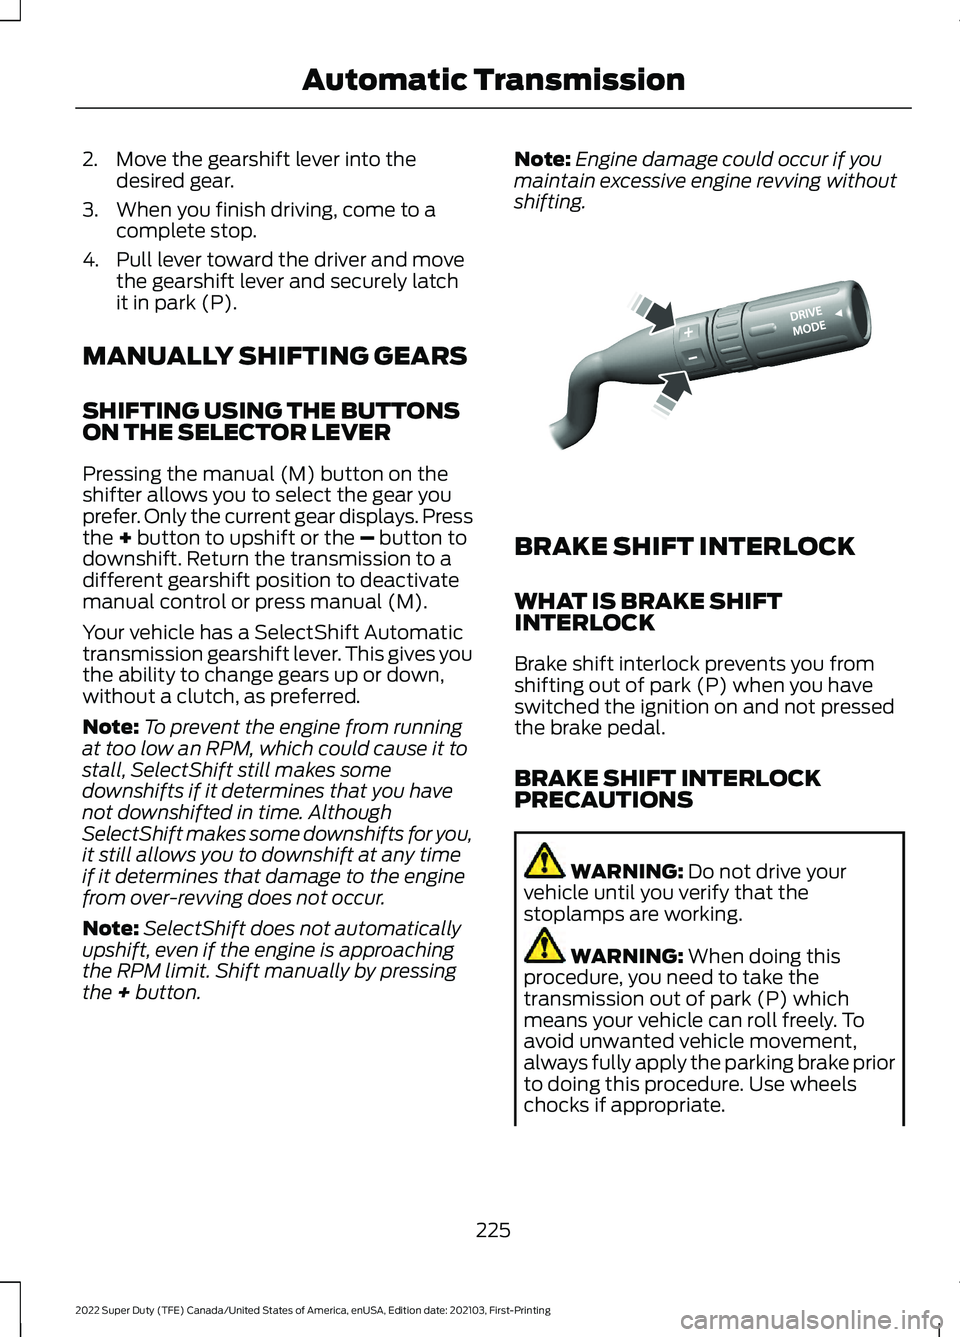
Pressing the manual (M) button on the
shifter allows you to select the gear you
prefer. Only the current gear displays. Press
the + button to upshift or the – button to
downshift. Return the transmission to a
different gearshift position to deactivate
manual control or press manual (M).
Your vehicle has a SelectShift Automatic
transmission gearshift lever. This gives you
the ability to change gears up or down,
without a clutch, as preferred.
Note: To prevent the engine from running
at too low an RPM, which could cause it to
stall, SelectShift still makes some
downshifts if it determines that you have
not downshifted in time. Although
SelectShift makes some downshifts for you,
it still allows you to downshift at any time
if it determines that damage to the engine
from over-revving does not occur.
Note: SelectShift does not automatically
upshift, even if the engine is approaching
the RPM limit. Shift manually by pressing
the
+ button. Note:
Engine damage could occur if you
maintain excessive engine revving without
shifting. BRAKE SHIFT INTERLOCK
WHAT IS BRAKE SHIFT
INTERLOCK
Brake shift interlock prevents you from
shifting out of park (P) when you have
switched the ignition on and not pressed
the brake pedal.
BRAKE SHIFT INTERLOCK
PRECAUTIONS
WARNING:
Do not drive your
vehicle until you verify that the
stoplamps are working. WARNING:
When doing this
procedure, you need to take the
transmission out of park (P) which
means your vehicle can roll freely. To
avoid unwanted vehicle movement,
always fully apply the parking brake prior
to doing this procedure. Use wheels
chocks if appropriate.
225
2022 Super Duty (TFE) Canada/United States of America, enUSA, Edition date: 202103, First-Printing Automatic TransmissionE312894
Page 229 of 740

WARNING: If the parking brake is
fully released, but the brake warning
lamp remains illuminated, the brakes
may not be working properly. Have your
vehicle checked as soon as possible.
In the event of an electrical malfunction,
it is possible that a fuse has blown or the
stoplamps are not working. See
Fuse
Precautions (page 387).
If the vehicle battery has no charge, jump
start your vehicle.
USING BRAKE SHIFT INTERLOCK
Brake-Shift Interlock
The following procedure allows you to
move the gearshift lever from park (P):
1. Apply the parking brake. Switch the ignition key to 1 - 0, then remove the
key.
2. Move the steering column to the full down and full rearward position,
toward the driver seat.
3. Remove the gearshift lever boot.
4. Place your fingers into the hole where you removed the gearshift lever boot
and pull the top half of the shroud up
and forward to separate it from the
lower half of the shroud. There is a
hinge at the forward edge of the top
shroud. Roll the top half of the shroud
upward on the hinge point, then pull
straight rearward toward the driver
seat to remove.
5. Remove the top half of the shroud.
6. Remove the three fasteners under the column that secure the lower shroud
half to the column. 7. Pull the lock lever into the fully
unlocked position and remove the
lower shroud cover by pulling the lever
handle through the slot in the cover.
8. Apply the brake. Gently lift the override
disk and move the gearshift lever into
neutral (N). 9. Start your vehicle.
Perform steps 4 through 8 in reverse order
to get the shroud back together, making
sure to engage the hinge pivots between
the upper and lower halves of the shroud.
Keep slight pressure in the forward
direction as you rotate the halves together.
226
2022 Super Duty (TFE) Canada/United States of America, enUSA, Edition date: 202103, First-Printing Automatic TransmissionE163185 E163186
Page 231 of 740
HOW DOES FOUR-WHEEL
DRIVE WORK
Using the Electronic Shift On the
Fly System (If Equipped)
This four-wheel drive system utilizes a
2-speed Electronic Shift On the Fly (ESOF)
transfer case which is also known as a
part-time system. This system offers the
driver two-wheel drive high, four-wheel
drive high, and four-wheel drive low as
available modes of operation. When you
select either four-wheel drive high or
four-wheel drive low, the system provides
mechanically locked four-wheel drive
power to both the front and rear wheels
for use in off-road or slippery conditions
such as deep snow, sand or mud. When
you select four-wheel drive low, the system
provides additional gearing for increased
torque multiplication for conditions like
deep sand, steep slopes, or pulling heavy
objects. Additionally, the system is capable
of recreational flat towing by putting the
transfer case into a neutral position. See
Recreationally Towing Your Vehicle
(page
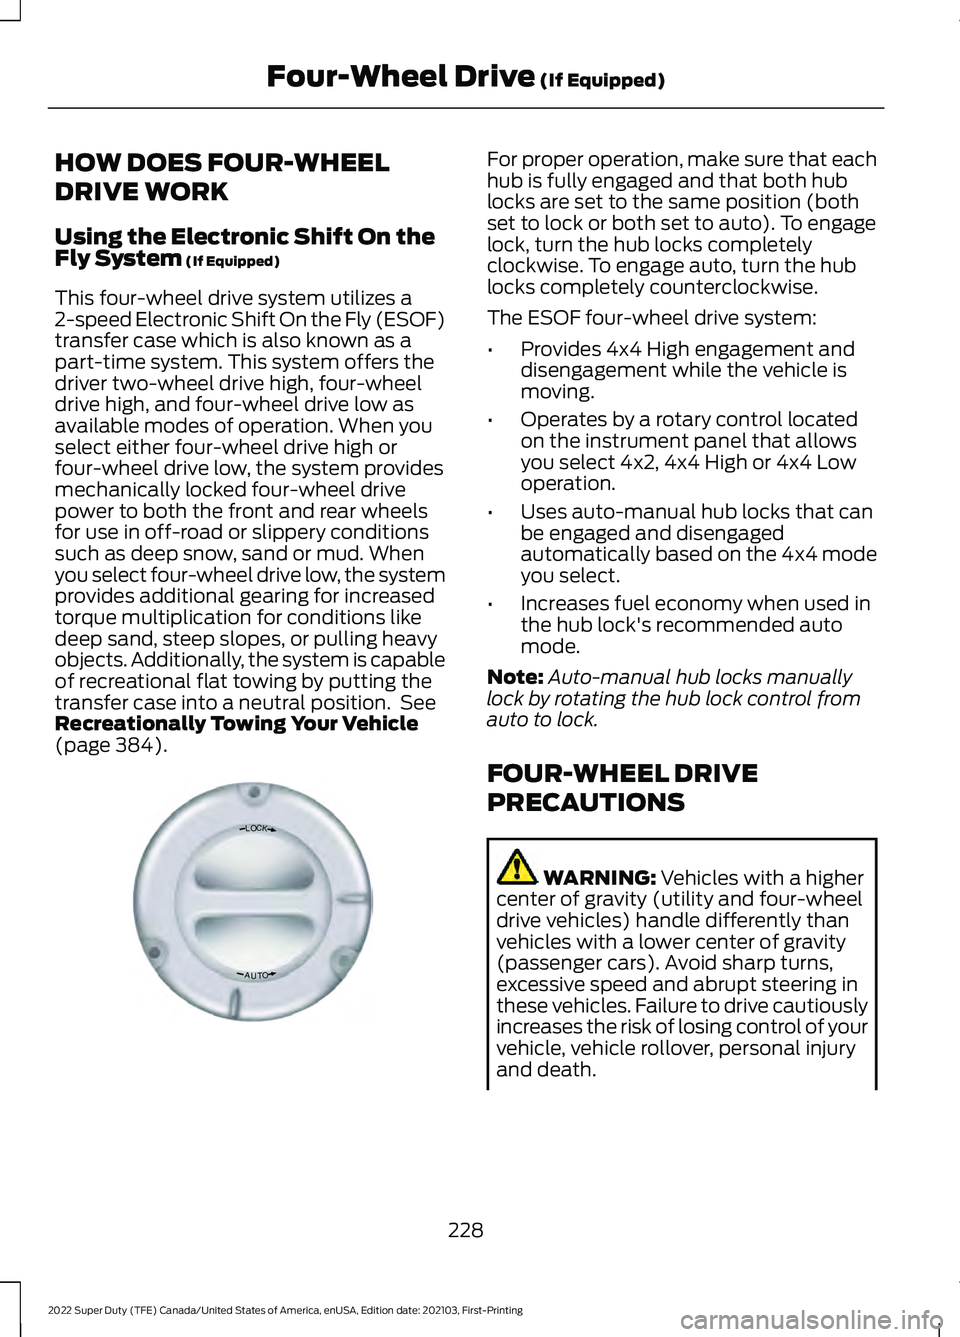
384). For proper operation, make sure that each
hub is fully engaged and that both hub
locks are set to the same position (both
set to lock or both set to auto). To engage
lock, turn the hub locks completely
clockwise. To engage auto, turn the hub
locks completely counterclockwise.
The ESOF four-wheel drive system:
•
Provides 4x4 High engagement and
disengagement while the vehicle is
moving.
• Operates by a rotary control located
on the instrument panel that allows
you select 4x2, 4x4 High or 4x4 Low
operation.
• Uses auto-manual hub locks that can
be engaged and disengaged
automatically based on the 4x4 mode
you select.
• Increases fuel economy when used in
the hub lock's recommended auto
mode.
Note: Auto-manual hub locks manually
lock by rotating the hub lock control from
auto to lock.
FOUR-WHEEL DRIVE
PRECAUTIONS WARNING:
Vehicles with a higher
center of gravity (utility and four-wheel
drive vehicles) handle differently than
vehicles with a lower center of gravity
(passenger cars). Avoid sharp turns,
excessive speed and abrupt steering in
these vehicles. Failure to drive cautiously
increases the risk of losing control of your
vehicle, vehicle rollover, personal injury
and death.
228
2022 Super Duty (TFE) Canada/United States of America, enUSA, Edition date: 202103, First-Printing Four-Wheel Drive
(If Equipped)LOC K
OTUAE339076
Page 232 of 740
WARNING: If the parking brake is
fully released, but the brake warning
lamp remains illuminated, the brakes
may not be working properly. Have your
vehicle checked as soon as possible. WARNING:
Do not become
overconfident in the ability of four-wheel
drive vehicles. Although a four-wheel
drive vehicle may accelerate better than
a two-wheel drive vehicle in low traction
situations, it won't stop any faster than
two-wheel drive vehicles. Always drive
at a safe speed.
Truck and utility vehicles can differ from
some other vehicles. Your vehicle could be
higher to allow it to travel over rough
terrain without getting stuck or damaging
underbody components. The differences
that make your vehicle so versatile also
make it handle differently than an ordinary
passenger car. Always maintain steering
wheel control, especially in rough terrain.
Since sudden changes in terrain can result
in abrupt steering wheel motion, make sure
you grip the steering wheel from the
outside. Do not grip the spokes. Drive
cautiously to avoid vehicle damage from
concealed objects such as rocks and
stumps. Drive slower in strong crosswinds
which can affect the normal steering
characteristics of your vehicle. Be
extremely careful when driving on
pavement made slippery by loose sand,
water, gravel, snow or ice. Note:
Do not use four-wheel drive high or
four-wheel drive low mode on dry, hard
surfaced roads. Doing so can produce
excessive noise, increase tire wear and can
damage drive components. Four-wheel
drive high or four-wheel drive low modes
are for consistently slippery or loose
surfaces. Use of four-wheel drive low mode
on these surfaces could produce some
noise, such as occasional clunks, but should
not damage drive components. When
transitioning from consistently loose or
slippery surfaces, be sure the four-wheel
drive systems not mechanically blocked
once on dry, hard surfaced roads in
two-wheel drive high.
Parking WARNING:
If the parking brake is
fully released, but the brake warning
lamp remains illuminated, the brakes
may not be working properly. Have your
vehicle checked as soon as possible. WARNING:
Apply the parking
brake, shift into park (P), switch the
ignition off and remove the key before
you leave your vehicle. Failure to follow
this instruction could result in personal
injury or death.
On some four-wheel drive vehicles, when
the transfer case is in the neutral (N)
position, the engine and transmission
disconnects from the rest of the driveline.
Therefore, the vehicle is free to roll even if
the automatic transmission is in park (P)
or the manual transmission is in gear. Do
not leave the vehicle unattended with the
transfer case in the neutral (N) position.
Always set the parking brake fully and turn
off the ignition when leaving the vehicle.
229
2022 Super Duty (TFE) Canada/United States of America, enUSA, Edition date: 202103, First-Printing Four-Wheel Drive
(If Equipped)