2022 CHEVROLET SILVERADO 1500 brake light
[x] Cancel search: brake lightPage 372 of 461
Chevrolet Silverado 1500 Owner Manual (GMNA-Localizing-U.S./Canada/
Mexico/Paraguay-14632303) - 2021 - CRC - 11/9/20
Vehicle Care 371
If the TPMS is not functioning properly, it
cannot detect or signal a low tire pressure
condition. See your dealer for service if the
TPMS malfunction light and DIC message
come on and stay on.
Tire Fill Alert (If Equipped)
This feature provides visual and audible
alerts outside the vehicle to help when
inflating an underinflated tire to the
recommended cold tire pressure.
When the low tire pressure warning light
comes on:1. Park the vehicle in a safe, level place.
2. Set the parking brake firmly.
3. Place the vehicle in P (Park).
4. Add air to the tire that is underinflated. The turn signal lamp will flash.
When the recommended pressure is
reached, the horn sounds once and the
turn signal lamp will stop flashing and
briefly turn solid.
Repeat these steps for all underinflated tires
that have illuminated the low tire pressure
warning light.
{Warning
Overinflating a tire could cause the tire
to rupture and you or others could be
injured. Do not exceed the maximum
pressure listed on the tire sidewall. See
Tire Sidewall Labeling 0362 and
Vehicle Load Limits 0222.
If the tire is overinflated by more than
35 kPa (5 psi), the horn will sound multiple
times and the turn signal lamp will continue
to flash for several seconds after filling
stops. To release and correct the pressure,
while the turn signal lamp is still flashing,
briefly press the center of the valve stem.
When the recommended pressure is reached,
the horn sounds once.
If the turn signal lamp does not flash within
15 seconds after starting to inflate the tire,
the tire fill alert has not been activated or is
not working.
If the hazard warning flashers are on, the
tire fill alert visual feedback will not work
properly.
The TPMS will not activate the tire fill alert
properly under the following conditions:
.There is interference from an external
device or transmitter.
.The air pressure from the inflation device
is not sufficient to inflate the tire.
.There is a malfunction in the TPMS.
.There is a malfunction in the horn or turn
signal lamps.
.The identification code of the TPMS
sensor is not registered to the system.
.The battery of the TPMS sensor is low.
If the tire fill alert does not operate due to
TPMS interference, move the vehicle about
1 m (3 ft) back or forward and try again.
If the tire fill alert feature is not working,
use a tire pressure gauge.
TPMS Sensor Matching Process
Each TPMS sensor has a unique
identification code. The identification code
needs to be matched to a new tire/wheel
position after rotating the vehicle’s tires or
replacing one or more of the TPMS sensors.
Also, the TPMS sensor matching process
should be performed after replacing a spare
tire with a road tire containing the TPMS
sensor. The malfunction light and the DIC
message should go off at the next ignition
cycle. The sensors are matched to the tire/
wheel positions, using a TPMS relearn tool,
Page 377 of 461
Chevrolet Silverado 1500 Owner Manual (GMNA-Localizing-U.S./Canada/
Mexico/Paraguay-14632303) - 2021 - CRC - 11/9/20
376 Vehicle Care
four digits of the DOT Tire Identification
Number (TIN) molded into one side of the
tire sidewall. The last four digits of the TIN
indicate the tire manufactured date. The
first two digits represent the week and the
last two digits, the year. For example, the
third week of the year 2020 would have a
4-digit DOT date of 0320. Week 01 is the
first full week (Sunday through Saturday) of
each year.
Vehicle Storage
Tires age when stored normally mounted on
a parked vehicle. Park a vehicle that will be
stored for at least a month in a cool, dry,
clean area away from direct sunlight to slow
aging. This area should be free of grease,
gasoline, or other substances that can
deteriorate rubber.
Parking for an extended period can cause
flat spots on the tires that may result in
vibrations while driving. When storing a
vehicle for at least a month, remove the
tires or raise the vehicle to reduce the
weight from the tires.
Buying New Tires
GM has developed and matched specific
tires for the vehicle. The original
equipment tires installed were designed
to meet General Motors Tire
Performance Criteria Specification (TPC
Spec) system rating. When replacement
tires are needed, GM strongly
recommends buying tires with the same
TPC Spec rating.
GM's exclusive TPC Spec system
considers over a dozen critical
specifications that impact the overall
performance of the vehicle, including
brake system performance, ride and
handling, traction control, and tire
pressure monitoring performance. GM's
TPC Spec number is molded onto the
tire's sidewall near the tire size. If the
tires have an all-season tread design,
the TPC Spec number will be followed
by MS for mud and snow. SeeTire
Sidewall Labeling 0362 for additional
information. GM recommends replacing worn tires in
complete sets of four. Uniform tread
depth on all tires will help to maintain
the performance of the vehicle. Braking
and handling performance may be
adversely affected if all the tires are not
replaced at the same time. If proper
rotation and maintenance have been
done, all four tires should wear out at
about the same time. However, if it is
necessary to replace only one axle set
of worn tires, place the new tires on
the rear axle. See
Tire Rotation0374.
{Warning
Tires could explode during improper
service. Attempting to mount or
dismount a tire could cause injury or
death. Only your dealer or authorized
tire service center should mount or
dismount the tires.
Page 380 of 461
Chevrolet Silverado 1500 Owner Manual (GMNA-Localizing-U.S./Canada/
Mexico/Paraguay-14632303) - 2021 - CRC - 11/9/20
Vehicle Care 379
Wheel Alignment and Tire
Balance
The tires and wheels were aligned and
balanced at the factory to provide the
longest tire life and best overall
performance. Adjustments to wheel
alignment and tire balancing are not
necessary on a regular basis. Consider an
alignment check if there is unusual tire wear
or the vehicle is significantly pulling to one
side or the other. Some slight pull to the
left or right, depending on the crown of the
road and/or other road surface variations
such as troughs or ruts, is normal. If the
vehicle is vibrating when driving on a
smooth road, the tires and wheels may
need to be rebalanced. See your dealer for
proper diagnosis.
Wheel Replacement
Replace any wheel that is bent, cracked,
or badly rusted or corroded. If wheel nuts
keep coming loose, the wheel, wheel bolts,
and wheel nuts should be replaced. If the
wheel leaks air, replace it. Some aluminum
wheels can be repaired. See your dealer if
any of these conditions exist.Your dealer will know the kind of wheel that
is needed.
Each new wheel should have the same
load-carrying capacity, diameter, width,
offset, and be mounted the same way as
the one it replaces.
Replace wheels, wheel bolts, wheel nuts,
or Tire Pressure Monitor System (TPMS)
sensors with new GM original equipment
parts.
{Warning
Using the wrong replacement wheels,
wheel bolts, or wheel nuts can be
dangerous. It could affect the braking and
handling of the vehicle. Tires can lose air,
and cause loss of control, causing a crash.
Always use the correct wheel, wheel
bolts, and wheel nuts for replacement.
Caution
The wrong wheel can also cause
problems with bearing life, brake cooling,
speedometer or odometer calibration,
headlamp aim, bumper height, vehicle
ground clearance, and tire or tire chain
clearance to the body and chassis.
Used Replacement Wheels
{Warning
Replacing a wheel with a used one is
dangerous. How it has been used or how
far it has been driven may be unknown.
It could fail suddenly and cause a crash.
When replacing wheels, use a new GM
original equipment wheel.
Tire Chains
{Warning
If the vehicle has 275/50R22, 275/60R20,
LT265/60R20, LT265/70R17, or LT275/65R18
size tires, do not use tire chains. There is
not enough clearance. Tire chains used on
a vehicle without the proper amount of
clearance can cause damage to the
brakes, suspension, or other vehicle parts.
The area damaged by the tire chains
could cause loss of control and a crash.
Use another type of traction device only
if its manufacturer recommends it for the
vehicle's tire size combination and road
conditions. Follow that manufacturer's
(Continued)
Page 394 of 461
Chevrolet Silverado 1500 Owner Manual (GMNA-Localizing-U.S./Canada/
Mexico/Paraguay-14632303) - 2021 - CRC - 11/9/20
Vehicle Care 393
resistance. This is located on the
passenger side, in the rear of the engine
compartment.
3. Get the vehicles close enough so the jumper cables can reach, but be sure the
vehicles are not touching each other.
If they are, it could cause an unwanted
ground connection. You would not be
able to start your vehicle, and the bad
grounding could damage the electrical
systems.
To avoid the possibility of the vehicles
rolling, set the parking brake firmly on
both vehicles involved in the jump start
procedure. Put the automatic
transmission in P (Park) before setting
the parking brake. If you have a
four-wheel-drive vehicle, be sure the
transfer case is in a drive gear, not in
N (Neutral).
Caution
If any accessories are left on or plugged
in during the jump starting procedure,
they could be damaged. The repairs
would not be covered by the vehicle
warranty. Whenever possible, turn off or
unplug all accessories on either vehicle
when jump starting. 4. Turn the ignition off on both vehicles.
Unplug unnecessary accessories plugged
into the accessory power outlets. Turn
off the radio and all the lamps that are
not needed. This will avoid sparks and
help save both batteries. And it could
save the radio!
5. Open the hood on the other vehicle and locate the positive (+) and negative (−)
terminal locations on that vehicle.
The positive (+) terminal is under a red
plastic cover at the positive battery post.
To uncover the positive (+) terminal,
open the red plastic cover.
For more information on the location of
the remote positive (+) and remote
negative (−) terminals, see Engine
Compartment Overview 0324.
{Warning
An electric fan can start up even when
the engine is not running and can injure
you. Keep hands, clothing, and tools
away from any underhood electric fan.
{Warning
Using a match near a battery can cause
battery gas to explode. People have been
hurt doing this, and some have been
blinded. Use a flashlight if you need
more light.
Battery fluid contains acid that can burn
you. Do not get it on you. If you
accidentally get it in your eyes or on
your skin, flush the place with water and
get medical help immediately.
{Warning
Fans or other moving engine parts can
injure you badly. Keep your hands away
from moving parts once the engine is
running.
6. Check that the jumper cables do not have loose or missing insulation. If they
do, you could get a shock. The vehicles
could be damaged too.
Before you connect the cables, here are
some basic things you should know.
Positive (+) will go to positive (+) or to a
remote positive (+) terminal if the
Page 398 of 461
Chevrolet Silverado 1500 Owner Manual (GMNA-Localizing-U.S./Canada/
Mexico/Paraguay-14632303) - 2021 - CRC - 11/9/20
Vehicle Care 397
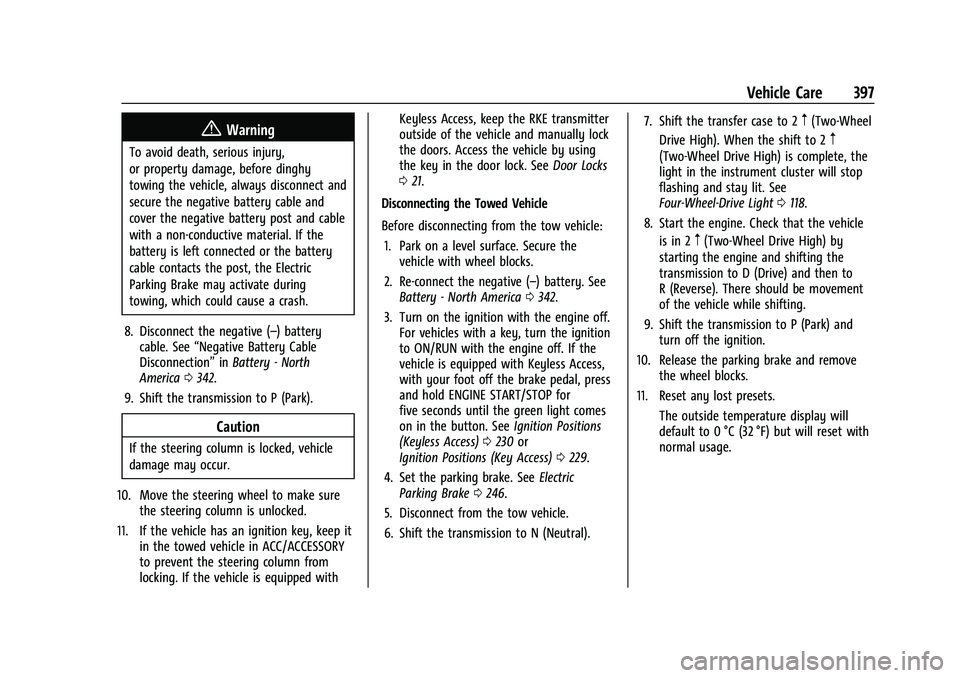
{Warning
To avoid death, serious injury,
or property damage, before dinghy
towing the vehicle, always disconnect and
secure the negative battery cable and
cover the negative battery post and cable
with a non-conductive material. If the
battery is left connected or the battery
cable contacts the post, the Electric
Parking Brake may activate during
towing, which could cause a crash.
8. Disconnect the negative (–) battery cable. See “Negative Battery Cable
Disconnection” inBattery - North
America 0342.
9. Shift the transmission to P (Park).
Caution
If the steering column is locked, vehicle
damage may occur.
10. Move the steering wheel to make sure the steering column is unlocked.
11. If the vehicle has an ignition key, keep it in the towed vehicle in ACC/ACCESSORY
to prevent the steering column from
locking. If the vehicle is equipped with Keyless Access, keep the RKE transmitter
outside of the vehicle and manually lock
the doors. Access the vehicle by using
the key in the door lock. See
Door Locks
0 21.
Disconnecting the Towed Vehicle
Before disconnecting from the tow vehicle: 1. Park on a level surface. Secure the vehicle with wheel blocks.
2. Re-connect the negative (–) battery. See Battery - North America 0342.
3. Turn on the ignition with the engine off. For vehicles with a key, turn the ignition
to ON/RUN with the engine off. If the
vehicle is equipped with Keyless Access,
with your foot off the brake pedal, press
and hold ENGINE START/STOP for
five seconds until the green light comes
on in the button. See Ignition Positions
(Keyless Access) 0230 or
Ignition Positions (Key Access) 0229.
4. Set the parking brake. See Electric
Parking Brake 0246.
5. Disconnect from the tow vehicle.
6. Shift the transmission to N (Neutral). 7. Shift the transfer case to 2
m(Two-Wheel
Drive High). When the shift to 2
m
(Two-Wheel Drive High) is complete, the
light in the instrument cluster will stop
flashing and stay lit. See
Four-Wheel-Drive Light 0118.
8. Start the engine. Check that the vehicle is in 2
m(Two-Wheel Drive High) by
starting the engine and shifting the
transmission to D (Drive) and then to
R (Reverse). There should be movement
of the vehicle while shifting.
9. Shift the transmission to P (Park) and turn off the ignition.
10. Release the parking brake and remove the wheel blocks.
11. Reset any lost presets. The outside temperature display will
default to 0 °C (32 °F) but will reset with
normal usage.
Page 417 of 461
Chevrolet Silverado 1500 Owner Manual (GMNA-Localizing-U.S./Canada/
Mexico/Paraguay-14632303) - 2021 - CRC - 11/9/20
416 Service and Maintenance
.Trained dealer technicians have the
diagnostic equipment to test the battery
and ensure that the connections and
cables are corrosion-free.
Belts
.Belts may need replacing if they squeak
or show signs of cracking or splitting.
.Trained dealer technicians have access to
tools and equipment to inspect the belts
and recommend adjustment or
replacement when necessary.
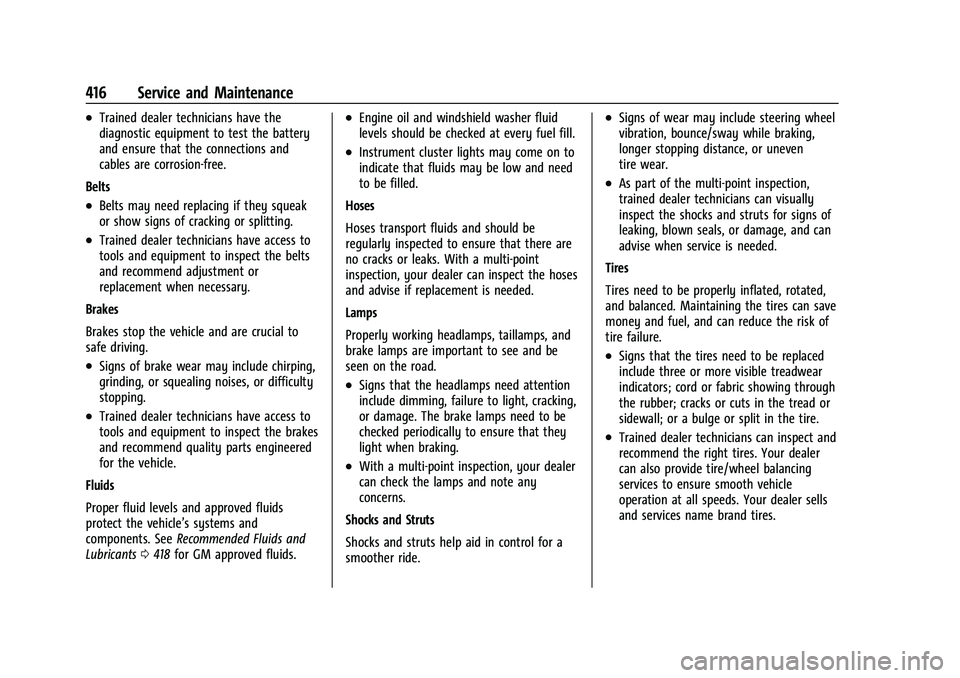
Brakes
Brakes stop the vehicle and are crucial to
safe driving.
.Signs of brake wear may include chirping,
grinding, or squealing noises, or difficulty
stopping.
.Trained dealer technicians have access to
tools and equipment to inspect the brakes
and recommend quality parts engineered
for the vehicle.
Fluids
Proper fluid levels and approved fluids
protect the vehicle’s systems and
components. See Recommended Fluids and
Lubricants 0418 for GM approved fluids.
.Engine oil and windshield washer fluid
levels should be checked at every fuel fill.
.Instrument cluster lights may come on to
indicate that fluids may be low and need
to be filled.
Hoses
Hoses transport fluids and should be
regularly inspected to ensure that there are
no cracks or leaks. With a multi-point
inspection, your dealer can inspect the hoses
and advise if replacement is needed.
Lamps
Properly working headlamps, taillamps, and
brake lamps are important to see and be
seen on the road.
.Signs that the headlamps need attention
include dimming, failure to light, cracking,
or damage. The brake lamps need to be
checked periodically to ensure that they
light when braking.
.With a multi-point inspection, your dealer
can check the lamps and note any
concerns.
Shocks and Struts
Shocks and struts help aid in control for a
smoother ride.
.Signs of wear may include steering wheel
vibration, bounce/sway while braking,
longer stopping distance, or uneven
tire wear.
.As part of the multi-point inspection,
trained dealer technicians can visually
inspect the shocks and struts for signs of
leaking, blown seals, or damage, and can
advise when service is needed.
Tires
Tires need to be properly inflated, rotated,
and balanced. Maintaining the tires can save
money and fuel, and can reduce the risk of
tire failure.
.Signs that the tires need to be replaced
include three or more visible treadwear
indicators; cord or fabric showing through
the rubber; cracks or cuts in the tread or
sidewall; or a bulge or split in the tire.
.Trained dealer technicians can inspect and
recommend the right tires. Your dealer
can also provide tire/wheel balancing
services to ensure smooth vehicle
operation at all speeds. Your dealer sells
and services name brand tires.
Page 449 of 461
Chevrolet Silverado 1500 Owner Manual (GMNA-Localizing-U.S./Canada/-
Mexico/Paraguay-14632303) - 2021 - CRC - 11/9/20
448 Index
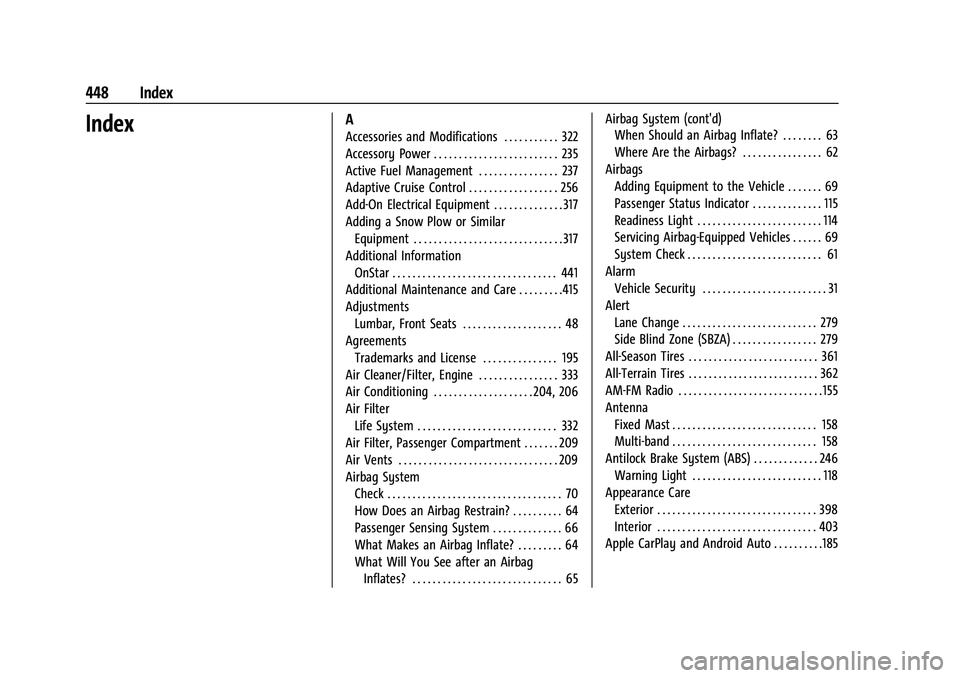
IndexA
Accessories and Modifications . . . . . . . . . . . 322
Accessory Power . . . . . . . . . . . . . . . . . . . . . . . . . 235
Active Fuel Management . . . . . . . . . . . . . . . . 237
Adaptive Cruise Control . . . . . . . . . . . . . . . . . . 256
Add-On Electrical Equipment . . . . . . . . . . . . . . 317
Adding a Snow Plow or SimilarEquipment . . . . . . . . . . . . . . . . . . . . . . . . . . . . . . 317
Additional Information OnStar . . . . . . . . . . . . . . . . . . . . . . . . . . . . . . . . . 441
Additional Maintenance and Care . . . . . . . . .415
Adjustments Lumbar, Front Seats . . . . . . . . . . . . . . . . . . . . 48
Agreements
Trademarks and License . . . . . . . . . . . . . . . 195
Air Cleaner/Filter, Engine . . . . . . . . . . . . . . . . 333
Air Conditioning . . . . . . . . . . . . . . . . . . . . 204, 206
Air Filter Life System . . . . . . . . . . . . . . . . . . . . . . . . . . . . 332
Air Filter, Passenger Compartment . . . . . . . 209
Air Vents . . . . . . . . . . . . . . . . . . . . . . . . . . . . . . . . 209
Airbag System Check . . . . . . . . . . . . . . . . . . . . . . . . . . . . . . . . . . . 70
How Does an Airbag Restrain? . . . . . . . . . . 64
Passenger Sensing System . . . . . . . . . . . . . . 66
What Makes an Airbag Inflate? . . . . . . . . . 64
What Will You See after an AirbagInflates? . . . . . . . . . . . . . . . . . . . . . . . . . . . . . . 65 Airbag System (cont'd)
When Should an Airbag Inflate? . . . . . . . . 63
Where Are the Airbags? . . . . . . . . . . . . . . . . 62
Airbags Adding Equipment to the Vehicle . . . . . . . 69
Passenger Status Indicator . . . . . . . . . . . . . . 115
Readiness Light . . . . . . . . . . . . . . . . . . . . . . . . . 114
Servicing Airbag-Equipped Vehicles . . . . . . 69
System Check . . . . . . . . . . . . . . . . . . . . . . . . . . . 61
Alarm Vehicle Security . . . . . . . . . . . . . . . . . . . . . . . . . 31
Alert
Lane Change . . . . . . . . . . . . . . . . . . . . . . . . . . . 279
Side Blind Zone (SBZA) . . . . . . . . . . . . . . . . . 279
All-Season Tires . . . . . . . . . . . . . . . . . . . . . . . . . . 361
All-Terrain Tires . . . . . . . . . . . . . . . . . . . . . . . . . . 362
AM-FM Radio . . . . . . . . . . . . . . . . . . . . . . . . . . . . . 155
Antenna Fixed Mast . . . . . . . . . . . . . . . . . . . . . . . . . . . . . 158
Multi-band . . . . . . . . . . . . . . . . . . . . . . . . . . . . . 158
Antilock Brake System (ABS) . . . . . . . . . . . . . 246
Warning Light . . . . . . . . . . . . . . . . . . . . . . . . . . 118
Appearance Care Exterior . . . . . . . . . . . . . . . . . . . . . . . . . . . . . . . . 398
Interior . . . . . . . . . . . . . . . . . . . . . . . . . . . . . . . . 403
Apple CarPlay and Android Auto . . . . . . . . . .185
Page 450 of 461
Chevrolet Silverado 1500 Owner Manual (GMNA-Localizing-U.S./Canada/-
Mexico/Paraguay-14632303) - 2021 - CRC - 11/9/20
Index 449
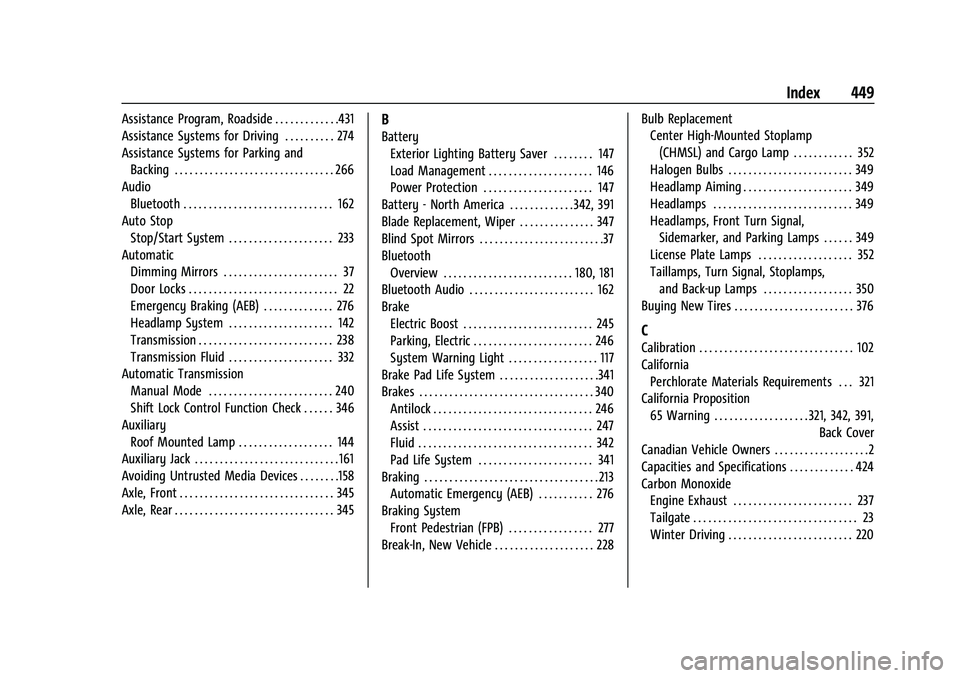
Assistance Program, Roadside . . . . . . . . . . . . .431
Assistance Systems for Driving . . . . . . . . . . 274
Assistance Systems for Parking andBacking . . . . . . . . . . . . . . . . . . . . . . . . . . . . . . . . 266
Audio Bluetooth . . . . . . . . . . . . . . . . . . . . . . . . . . . . . . 162
Auto Stop
Stop/Start System . . . . . . . . . . . . . . . . . . . . . 233
Automatic Dimming Mirrors . . . . . . . . . . . . . . . . . . . . . . . 37
Door Locks . . . . . . . . . . . . . . . . . . . . . . . . . . . . . . 22
Emergency Braking (AEB) . . . . . . . . . . . . . . 276
Headlamp System . . . . . . . . . . . . . . . . . . . . . 142
Transmission . . . . . . . . . . . . . . . . . . . . . . . . . . . 238
Transmission Fluid . . . . . . . . . . . . . . . . . . . . . 332
Automatic Transmission
Manual Mode . . . . . . . . . . . . . . . . . . . . . . . . . 240
Shift Lock Control Function Check . . . . . . 346
Auxiliary Roof Mounted Lamp . . . . . . . . . . . . . . . . . . . 144
Auxiliary Jack . . . . . . . . . . . . . . . . . . . . . . . . . . . . . 161
Avoiding Untrusted Media Devices . . . . . . . .158
Axle, Front . . . . . . . . . . . . . . . . . . . . . . . . . . . . . . . 345
Axle, Rear . . . . . . . . . . . . . . . . . . . . . . . . . . . . . . . . 345B
Battery
Exterior Lighting Battery Saver . . . . . . . . 147
Load Management . . . . . . . . . . . . . . . . . . . . . 146
Power Protection . . . . . . . . . . . . . . . . . . . . . . 147
Battery - North America . . . . . . . . . . . . .342, 391
Blade Replacement, Wiper . . . . . . . . . . . . . . . 347
Blind Spot Mirrors . . . . . . . . . . . . . . . . . . . . . . . . .37
Bluetooth Overview . . . . . . . . . . . . . . . . . . . . . . . . . . 180, 181
Bluetooth Audio . . . . . . . . . . . . . . . . . . . . . . . . . 162
Brake Electric Boost . . . . . . . . . . . . . . . . . . . . . . . . . . 245
Parking, Electric . . . . . . . . . . . . . . . . . . . . . . . . 246
System Warning Light . . . . . . . . . . . . . . . . . . 117
Brake Pad Life System . . . . . . . . . . . . . . . . . . . .341
Brakes . . . . . . . . . . . . . . . . . . . . . . . . . . . . . . . . . . . 340 Antilock . . . . . . . . . . . . . . . . . . . . . . . . . . . . . . . . 246
Assist . . . . . . . . . . . . . . . . . . . . . . . . . . . . . . . . . . 247
Fluid . . . . . . . . . . . . . . . . . . . . . . . . . . . . . . . . . . . 342
Pad Life System . . . . . . . . . . . . . . . . . . . . . . . 341
Braking . . . . . . . . . . . . . . . . . . . . . . . . . . . . . . . . . . . 213 Automatic Emergency (AEB) . . . . . . . . . . . 276
Braking System
Front Pedestrian (FPB) . . . . . . . . . . . . . . . . . 277
Break-In, New Vehicle . . . . . . . . . . . . . . . . . . . . 228 Bulb Replacement
Center High-Mounted Stoplamp
(CHMSL) and Cargo Lamp . . . . . . . . . . . . 352
Halogen Bulbs . . . . . . . . . . . . . . . . . . . . . . . . . 349
Headlamp Aiming . . . . . . . . . . . . . . . . . . . . . . 349
Headlamps . . . . . . . . . . . . . . . . . . . . . . . . . . . . 349
Headlamps, Front Turn Signal, Sidemarker, and Parking Lamps . . . . . . 349
License Plate Lamps . . . . . . . . . . . . . . . . . . . 352
Taillamps, Turn Signal, Stoplamps, and Back-up Lamps . . . . . . . . . . . . . . . . . . 350
Buying New Tires . . . . . . . . . . . . . . . . . . . . . . . . 376
C
Calibration . . . . . . . . . . . . . . . . . . . . . . . . . . . . . . . 102
California Perchlorate Materials Requirements . . . 321
California Proposition 65 Warning . . . . . . . . . . . . . . . . . . . 321, 342, 391, Back Cover
Canadian Vehicle Owners . . . . . . . . . . . . . . . . . . .2
Capacities and Specifications . . . . . . . . . . . . . 424
Carbon Monoxide
Engine Exhaust . . . . . . . . . . . . . . . . . . . . . . . . 237
Tailgate . . . . . . . . . . . . . . . . . . . . . . . . . . . . . . . . . 23
Winter Driving . . . . . . . . . . . . . . . . . . . . . . . . . 220