2022 CHEVROLET SILVERADO 1500 brake light
[x] Cancel search: brake lightPage 306 of 461
Chevrolet Silverado 1500 Owner Manual (GMNA-Localizing-U.S./Canada/
Mexico/Paraguay-14632303) - 2021 - CRC - 11/9/20
Driving and Operating 305
If either the CHECK TRAILER WIRING or
SERVICE TRAILER BRAKE SYSTEM message
displays while driving, the ITBC system may
not be fully functional or may not function
at all. When traffic conditions allow,
carefully pull the vehicle over to the side of
the road and turn the ignition off. Check the
wiring connection to the trailer and turn the
ignition back on. If either of these messages
continues, either the vehicle or trailer needs
service.
A GM dealer may be able to diagnose and
repair problems with the trailer. However,
any diagnosis and repair of the trailer is not
covered under the vehicle warranty. Contact
your trailer dealer for assistance with trailer
repairs and trailer warranty information.
Trailer Sway Control (TSC)
Vehicles with StabiliTrak/Electronic Stability
Control (ESC) have a Trailer Sway Control
(TSC) feature. Trailer sway is unintended
side-to-side motion of a trailer while towing.
If the vehicle is towing a trailer and the TSC
detects that sway is increasing, the vehicle
brakes are selectively applied at each wheel,
to help reduce excessive trailer sway.
If equipped with the Integrated Trailer BrakeControl (ITBC) system, and the trailer has an
electric brake system, StabiliTrak/ESC may
also apply the trailer brakes.
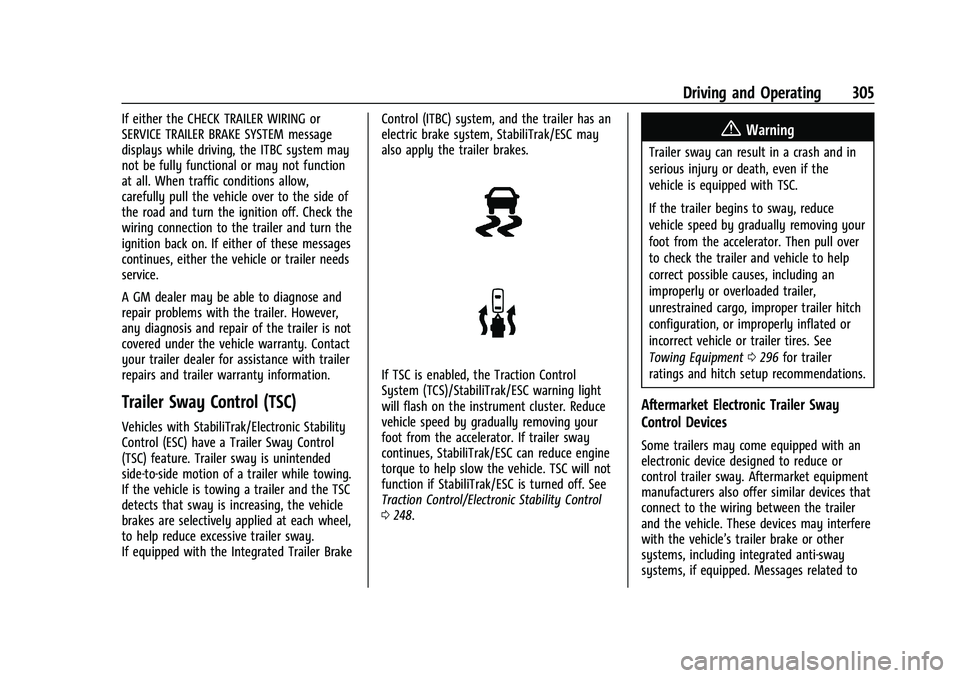
If TSC is enabled, the Traction Control
System (TCS)/StabiliTrak/ESC warning light
will flash on the instrument cluster. Reduce
vehicle speed by gradually removing your
foot from the accelerator. If trailer sway
continues, StabiliTrak/ESC can reduce engine
torque to help slow the vehicle. TSC will not
function if StabiliTrak/ESC is turned off. See
Traction Control/Electronic Stability Control
0
248.
{Warning
Trailer sway can result in a crash and in
serious injury or death, even if the
vehicle is equipped with TSC.
If the trailer begins to sway, reduce
vehicle speed by gradually removing your
foot from the accelerator. Then pull over
to check the trailer and vehicle to help
correct possible causes, including an
improperly or overloaded trailer,
unrestrained cargo, improper trailer hitch
configuration, or improperly inflated or
incorrect vehicle or trailer tires. See
Towing Equipment 0296 for trailer
ratings and hitch setup recommendations.
Aftermarket Electronic Trailer Sway
Control Devices
Some trailers may come equipped with an
electronic device designed to reduce or
control trailer sway. Aftermarket equipment
manufacturers also offer similar devices that
connect to the wiring between the trailer
and the vehicle. These devices may interfere
with the vehicle’s trailer brake or other
systems, including integrated anti-sway
systems, if equipped. Messages related to
Page 307 of 461
Chevrolet Silverado 1500 Owner Manual (GMNA-Localizing-U.S./Canada/
Mexico/Paraguay-14632303) - 2021 - CRC - 11/9/20
306 Driving and Operating
trailer connections or trailer brakes could
appear on the DIC. The effects of these
aftermarket devices may have on vehicle
handling or trailer brake performance is not
known.
{Warning
Use of aftermarket electronic trailer sway
control devices could result in reduced
trailer brake performance, loss of trailer
brakes, or other malfunctions, and result
in a crash. You or others could be
seriously injured or killed. Before using
one of these devices:
.Ask the device or trailer manufacturer
if the device has been thoroughly
tested for compatibility with the
make, model, and year of your vehicle
and any optional equipment installed
on your vehicle.
.Before driving, check the trailer brakes
are working properly, if equipped.
Drive the vehicle with the trailer
attached on a level road surface that
is free of traffic at about 32-40 km/h
(20-25 mph) and fully apply the(Continued)
Warning (Continued)
manual trailer brake apply lever. Also,
check the trailer brake lamps and
other lamps are functioning correctly.
.If the trailer brakes are not operating
properly at any time, or if a DIC
message indicates problems with the
trailer connections or trailer brakes,
carefully pull the vehicle over to the
side of the road when traffic
conditions allow.
Trailer Tires
Special Trailer (ST) tires differ from vehicle
tires. Trailer tires are designed with stiff
sidewalls to help prevent sway and to
support heavy loads. These features can
make it difficult to determine if the trailer
tire pressures are low only based on a visual
inspection.
Always check all trailer tire pressures before
each trip when the tires are cool. Low trailer
tire pressure is a leading cause of trailer tire
blow-outs. If the vehicle is equipped with a trailer tire
pressure monitoring system, see the trailer
tire pressure monitoring system description
and the trailering app.
Trailer tires deteriorate over time. The trailer
tire sidewall will show the week and year
the tire was manufactured. Many trailer tire
manufacturers recommend replacing tires
more than six years old.
Overloading is another leading cause of
trailer tire blow-outs. Never load your trailer
with more weight than the tires are
designed to support. The load rating is
located on the trailer tire sidewall.
Always know the maximum speed rating for
the trailer tires before driving. This may be
significantly lower than the vehicle tire
speed rating. The speed rating may be on
the trailer tire sidewall. If the speed rating is
not shown, the default trailer tire speed
rating is 105 km/h (65 mph).
Trailering App
Trailer Lights App
If equipped, the Trailer Lights App is on the
Home Page of the infotainment display.
Page 308 of 461
Chevrolet Silverado 1500 Owner Manual (GMNA-Localizing-U.S./Canada/
Mexico/Paraguay-14632303) - 2021 - CRC - 11/9/20
Driving and Operating 307
Touch Start to cycle the trailer lamps on and
off to determine if they are working. The
test follows this sequence:1. The running lights turn on first and remain on throughout the sequence.
2. The brake lights turn on for about two seconds.
3. The left turn signal light flashes three times.
4. The right turn signal light flashes three times.
5. The reverse lights turn on for about two seconds.
6. Steps 2–5 repeat for approximately one minute and 45 seconds, or until the
test deactivates.
Touch Stop to stop the test. The test will
automatically end after one minute and
45 seconds.
The sequence also deactivates when any of
the following occur:
.The ignition is turned off.
.The transmission is shifted out of P (Park).
.The brake pedal is pressed.
.The turn signal is activated.
.The hazard warning lights are activated.
Trailering App
If equipped, the Trailering App is on the
Home Page of the infotainment display.
If equipped this feature allows profiles for
connected trailers to be created to view
status, to store and track trailer usage
information, and to set up towing assistance
features.
The Trailering App Preview will appear when
the Trailering App is opened for the first
time from the Home Page. Touch GET
STARTED in the Trailering App to go into
the app.
When a trailer is electrically connected and
a trailer profile has not been created, there
will be an option to create a profile, use a
guest profile, or select Accessory/No trailer.
After the pop-up is displayed three times,
Don’t Remind Me will display and touching
that will turn off the trailer detection
pop-up. To turn the Trailer Detection Alert
on, select ON in the Settings tab.
When a trailer is electrically connected and
after a Trailer Profile has been created, the
trailer detection pop-up will appear with a
list of all of the custom Trailer Profiles made
on the vehicle. To load an existing Trailer
Profile, select one of the Trailer Profiles listed, or load the Guest Trailer Profile by
selecting GUEST TRAILER. Touching
Accessory/No trailer will select Accessory/No
trailer as the active Trailer Profile and will
dismiss the pop- up. Shifting the vehicle
from P (Park) will select Guest Trailer as the
active Trailer Profile and will dismiss the
pop-up.
Create a Trailer Profile
1. Touch Create Profile on the trailer detection pop-up or touch + Add Trailer
Profile in the Trailering App.
2. Create a name for the trailer.
3. Select the trailer type.
4. Select Save Profile.
A pop-up will indicate the setup is complete.
Touch DONE to complete the process or
touch TRAILER FEATURE SETUP to set up the
Tow/Haul Mode reminder, Trailer Tire
Pressure Monitoring System, if equipped,
maintenance reminders, or towing
assistance, if equipped.
Import a Trailer Profile
A trailer profile saved to an OnStar account
can be imported to the vehicle. 1. Touch + Add Trailer Profile in the Trailering App
Page 309 of 461
Chevrolet Silverado 1500 Owner Manual (GMNA-Localizing-U.S./Canada/
Mexico/Paraguay-14632303) - 2021 - CRC - 11/9/20
308 Driving and Operating
2. Touch Import Profile on the pop-up.
3. Select a trailer profile from the list.
4. Touch IMPORT.
A pop-up will indicate the import was
successful. Touch OK to return to the trailer
list and select the trailer profile. The Tow/
Haul Mode reminder, Brake Gain Setting and
Trailer Tire Pressure sensor learning,
if equipped, do not import.
Trailer Feature Setup
Tow/Haul Mode Reminder
To turn the Tow/Haul Mode Reminder
setting on, touch Yes. To turn it off,
touch No.
Trailer Tire Pressure Setup
If the Trailer Tire Pressure Monitoring
System (TTPMS) is detected, touch the Tire
Pressure Monitoring icon to set up tire
pressure monitoring. Touch Yes to set up
the sensors or touch No to return to the
previous screen.
The trailer tire pressure sensors can transmit
up to 7 m (23 feet) from the hitch receiver of
the vehicle. A trailer must be electrically connected to
the vehicle before starting the
sensor-to-vehicle learn process.
After selecting Start from the Learn Sensors
screen, use the Tool Method or the Manual
Method (described below) to learn each tire
sensor, during which the current tire number
will be highlighted.
Each sensor has a minimum of two minutes
to learn, shown by a timer. After a sensor is
learned, a checkmark appears next to the
tire, the vehicle horn will sound, the
vehicle’s brake lamps will flash, and all
working trailer lamps will flash. It then
moves to the next sensor.
To cancel the process touch Stop.
The recommended tire pressure must be
entered for the trailer tires. This allows the
vehicle to alert when the tire pressure is
high or low.
TTPMS must learn the location of the
installed tire sensors to show correct air
pressure and temperature for each tire. To
set up, use one of the following options or
see a tire or trailer dealer for service. The
learning process must be repeated when thetrailer tires are rotated or replaced. See
“Editing a Trailer Profile”
later in this section
for tire pressure sensor relearn information.
Tool Method: A TTPMS activation tool can
be purchased separately to learn the sensor
locations.
Manual Method: Without the tool, the air
pressure can be increased or decreased in
each tire for 10 seconds. Do not exceed the
maximum inflation pressure found on the
tire sidewalls. Make sure to re-adjust tire
pressure to the recommended level when
the process is complete.
Sensor Learning Steps
To complete the sensor-to-vehicle learn
process:
1. Touch Start on the Learn Sensors screen. The horn chirps twice and the Learning
Active screen appears on the
infotainment display.
2. Start with the driver side front trailer tire.
3. Activate the tool near the valve stem or adjust the air pressure of this tire until
the horn chirps and all working vehicle
and trailer lights flash.
Page 312 of 461
Chevrolet Silverado 1500 Owner Manual (GMNA-Localizing-U.S./Canada/
Mexico/Paraguay-14632303) - 2021 - CRC - 11/9/20
Driving and Operating 311
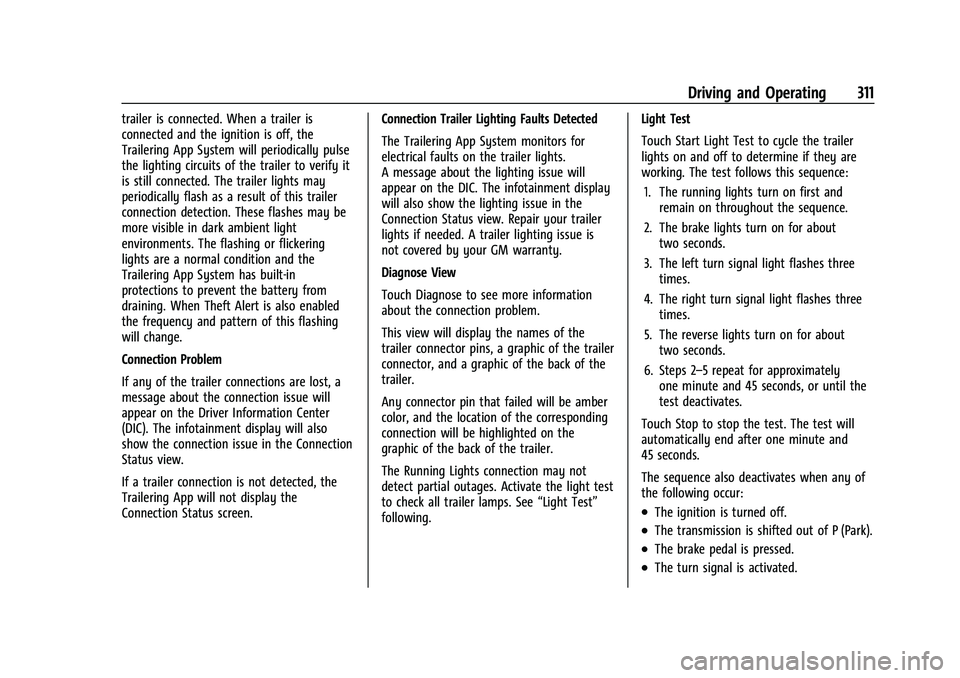
trailer is connected. When a trailer is
connected and the ignition is off, the
Trailering App System will periodically pulse
the lighting circuits of the trailer to verify it
is still connected. The trailer lights may
periodically flash as a result of this trailer
connection detection. These flashes may be
more visible in dark ambient light
environments. The flashing or flickering
lights are a normal condition and the
Trailering App System has built-in
protections to prevent the battery from
draining. When Theft Alert is also enabled
the frequency and pattern of this flashing
will change.
Connection Problem
If any of the trailer connections are lost, a
message about the connection issue will
appear on the Driver Information Center
(DIC). The infotainment display will also
show the connection issue in the Connection
Status view.
If a trailer connection is not detected, the
Trailering App will not display the
Connection Status screen.Connection Trailer Lighting Faults Detected
The Trailering App System monitors for
electrical faults on the trailer lights.
A message about the lighting issue will
appear on the DIC. The infotainment display
will also show the lighting issue in the
Connection Status view. Repair your trailer
lights if needed. A trailer lighting issue is
not covered by your GM warranty.
Diagnose View
Touch Diagnose to see more information
about the connection problem.
This view will display the names of the
trailer connector pins, a graphic of the trailer
connector, and a graphic of the back of the
trailer.
Any connector pin that failed will be amber
color, and the location of the corresponding
connection will be highlighted on the
graphic of the back of the trailer.
The Running Lights connection may not
detect partial outages. Activate the light test
to check all trailer lamps. See
“Light Test”
following. Light Test
Touch Start Light Test to cycle the trailer
lights on and off to determine if they are
working. The test follows this sequence:
1. The running lights turn on first and remain on throughout the sequence.
2. The brake lights turn on for about two seconds.
3. The left turn signal light flashes three times.
4. The right turn signal light flashes three times.
5. The reverse lights turn on for about two seconds.
6. Steps 2–5 repeat for approximately one minute and 45 seconds, or until the
test deactivates.
Touch Stop to stop the test. The test will
automatically end after one minute and
45 seconds.
The sequence also deactivates when any of
the following occur:
.The ignition is turned off.
.The transmission is shifted out of P (Park).
.The brake pedal is pressed.
.The turn signal is activated.
Page 321 of 461
Chevrolet Silverado 1500 Owner Manual (GMNA-Localizing-U.S./Canada/
Mexico/Paraguay-14632303) - 2021 - CRC - 11/9/20
320 Vehicle Care
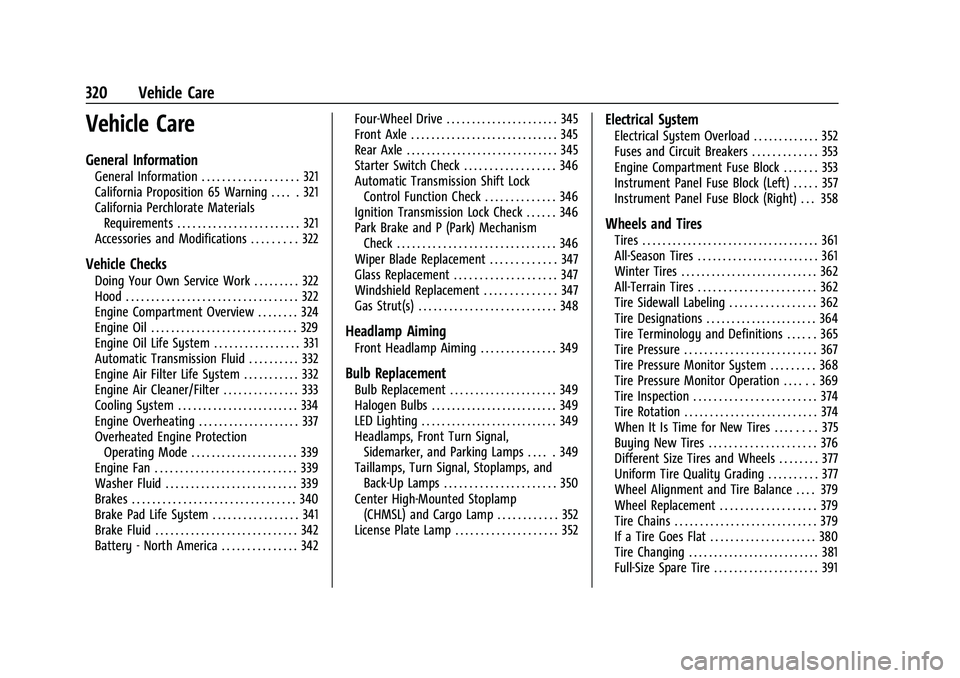
Vehicle Care
General Information
General Information . . . . . . . . . . . . . . . . . . . 321
California Proposition 65 Warning . . . . . 321
California Perchlorate MaterialsRequirements . . . . . . . . . . . . . . . . . . . . . . . . 321
Accessories and Modifications . . . . . . . . . 322
Vehicle Checks
Doing Your Own Service Work . . . . . . . . . 322
Hood . . . . . . . . . . . . . . . . . . . . . . . . . . . . . . . . . . 322
Engine Compartment Overview . . . . . . . . 324
Engine Oil . . . . . . . . . . . . . . . . . . . . . . . . . . . . . 329
Engine Oil Life System . . . . . . . . . . . . . . . . . 331
Automatic Transmission Fluid . . . . . . . . . . 332
Engine Air Filter Life System . . . . . . . . . . . 332
Engine Air Cleaner/Filter . . . . . . . . . . . . . . . 333
Cooling System . . . . . . . . . . . . . . . . . . . . . . . . 334
Engine Overheating . . . . . . . . . . . . . . . . . . . . 337
Overheated Engine Protection Operating Mode . . . . . . . . . . . . . . . . . . . . . 339
Engine Fan . . . . . . . . . . . . . . . . . . . . . . . . . . . . 339
Washer Fluid . . . . . . . . . . . . . . . . . . . . . . . . . . 339
Brakes . . . . . . . . . . . . . . . . . . . . . . . . . . . . . . . . 340
Brake Pad Life System . . . . . . . . . . . . . . . . . 341
Brake Fluid . . . . . . . . . . . . . . . . . . . . . . . . . . . . 342
Battery - North America . . . . . . . . . . . . . . . 342 Four-Wheel Drive . . . . . . . . . . . . . . . . . . . . . . 345
Front Axle . . . . . . . . . . . . . . . . . . . . . . . . . . . . . 345
Rear Axle . . . . . . . . . . . . . . . . . . . . . . . . . . . . . . 345
Starter Switch Check . . . . . . . . . . . . . . . . . . 346
Automatic Transmission Shift Lock
Control Function Check . . . . . . . . . . . . . . 346
Ignition Transmission Lock Check . . . . . . 346
Park Brake and P (Park) Mechanism Check . . . . . . . . . . . . . . . . . . . . . . . . . . . . . . . 346
Wiper Blade Replacement . . . . . . . . . . . . . 347
Glass Replacement . . . . . . . . . . . . . . . . . . . . 347
Windshield Replacement . . . . . . . . . . . . . . 347
Gas Strut(s) . . . . . . . . . . . . . . . . . . . . . . . . . . . 348
Headlamp Aiming
Front Headlamp Aiming . . . . . . . . . . . . . . . 349
Bulb Replacement
Bulb Replacement . . . . . . . . . . . . . . . . . . . . . 349
Halogen Bulbs . . . . . . . . . . . . . . . . . . . . . . . . . 349
LED Lighting . . . . . . . . . . . . . . . . . . . . . . . . . . . 349
Headlamps, Front Turn Signal, Sidemarker, and Parking Lamps . . . . . 349
Taillamps, Turn Signal, Stoplamps, and Back-Up Lamps . . . . . . . . . . . . . . . . . . . . . . 350
Center High-Mounted Stoplamp (CHMSL) and Cargo Lamp . . . . . . . . . . . . 352
License Plate Lamp . . . . . . . . . . . . . . . . . . . . 352
Electrical System
Electrical System Overload . . . . . . . . . . . . . 352
Fuses and Circuit Breakers . . . . . . . . . . . . . 353
Engine Compartment Fuse Block . . . . . . . 353
Instrument Panel Fuse Block (Left) . . . . . 357
Instrument Panel Fuse Block (Right) . . . 358
Wheels and Tires
Tires . . . . . . . . . . . . . . . . . . . . . . . . . . . . . . . . . . . 361
All-Season Tires . . . . . . . . . . . . . . . . . . . . . . . . 361
Winter Tires . . . . . . . . . . . . . . . . . . . . . . . . . . . 362
All-Terrain Tires . . . . . . . . . . . . . . . . . . . . . . . 362
Tire Sidewall Labeling . . . . . . . . . . . . . . . . . 362
Tire Designations . . . . . . . . . . . . . . . . . . . . . . 364
Tire Terminology and Definitions . . . . . . 365
Tire Pressure . . . . . . . . . . . . . . . . . . . . . . . . . . 367
Tire Pressure Monitor System . . . . . . . . . 368
Tire Pressure Monitor Operation . . . . . . 369
Tire Inspection . . . . . . . . . . . . . . . . . . . . . . . . 374
Tire Rotation . . . . . . . . . . . . . . . . . . . . . . . . . . 374
When It Is Time for New Tires . . . . . . . . 375
Buying New Tires . . . . . . . . . . . . . . . . . . . . . 376
Different Size Tires and Wheels . . . . . . . . 377
Uniform Tire Quality Grading . . . . . . . . . . 377
Wheel Alignment and Tire Balance . . . . 379
Wheel Replacement . . . . . . . . . . . . . . . . . . . 379
Tire Chains . . . . . . . . . . . . . . . . . . . . . . . . . . . . 379
If a Tire Goes Flat . . . . . . . . . . . . . . . . . . . . . 380
Tire Changing . . . . . . . . . . . . . . . . . . . . . . . . . . 381
Full-Size Spare Tire . . . . . . . . . . . . . . . . . . . . . 391
Page 343 of 461
Chevrolet Silverado 1500 Owner Manual (GMNA-Localizing-U.S./Canada/
Mexico/Paraguay-14632303) - 2021 - CRC - 11/9/20
342 Vehicle Care
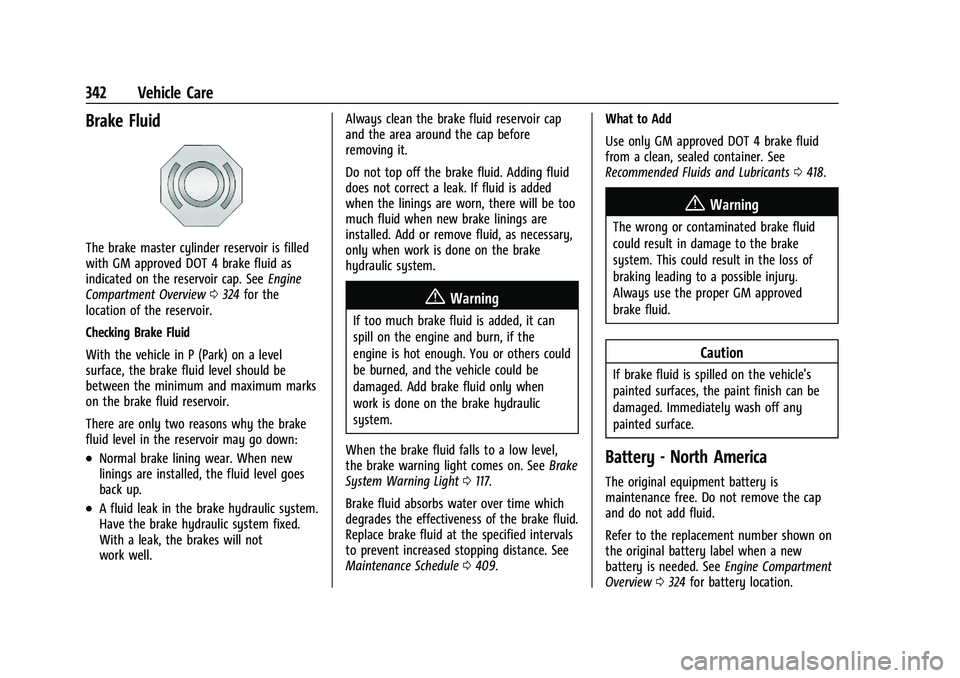
Brake Fluid
The brake master cylinder reservoir is filled
with GM approved DOT 4 brake fluid as
indicated on the reservoir cap. SeeEngine
Compartment Overview 0324 for the
location of the reservoir.
Checking Brake Fluid
With the vehicle in P (Park) on a level
surface, the brake fluid level should be
between the minimum and maximum marks
on the brake fluid reservoir.
There are only two reasons why the brake
fluid level in the reservoir may go down:
.Normal brake lining wear. When new
linings are installed, the fluid level goes
back up.
.A fluid leak in the brake hydraulic system.
Have the brake hydraulic system fixed.
With a leak, the brakes will not
work well. Always clean the brake fluid reservoir cap
and the area around the cap before
removing it.
Do not top off the brake fluid. Adding fluid
does not correct a leak. If fluid is added
when the linings are worn, there will be too
much fluid when new brake linings are
installed. Add or remove fluid, as necessary,
only when work is done on the brake
hydraulic system.
{Warning
If too much brake fluid is added, it can
spill on the engine and burn, if the
engine is hot enough. You or others could
be burned, and the vehicle could be
damaged. Add brake fluid only when
work is done on the brake hydraulic
system.
When the brake fluid falls to a low level,
the brake warning light comes on. See Brake
System Warning Light 0117.
Brake fluid absorbs water over time which
degrades the effectiveness of the brake fluid.
Replace brake fluid at the specified intervals
to prevent increased stopping distance. See
Maintenance Schedule 0409. What to Add
Use only GM approved DOT 4 brake fluid
from a clean, sealed container. See
Recommended Fluids and Lubricants
0418.
{Warning
The wrong or contaminated brake fluid
could result in damage to the brake
system. This could result in the loss of
braking leading to a possible injury.
Always use the proper GM approved
brake fluid.
Caution
If brake fluid is spilled on the vehicle's
painted surfaces, the paint finish can be
damaged. Immediately wash off any
painted surface.
Battery - North America
The original equipment battery is
maintenance free. Do not remove the cap
and do not add fluid.
Refer to the replacement number shown on
the original battery label when a new
battery is needed. See Engine Compartment
Overview 0324 for battery location.
Page 361 of 461
Chevrolet Silverado 1500 Owner Manual (GMNA-Localizing-U.S./Canada/
Mexico/Paraguay-14632303) - 2021 - CRC - 11/9/20
360 Vehicle Care
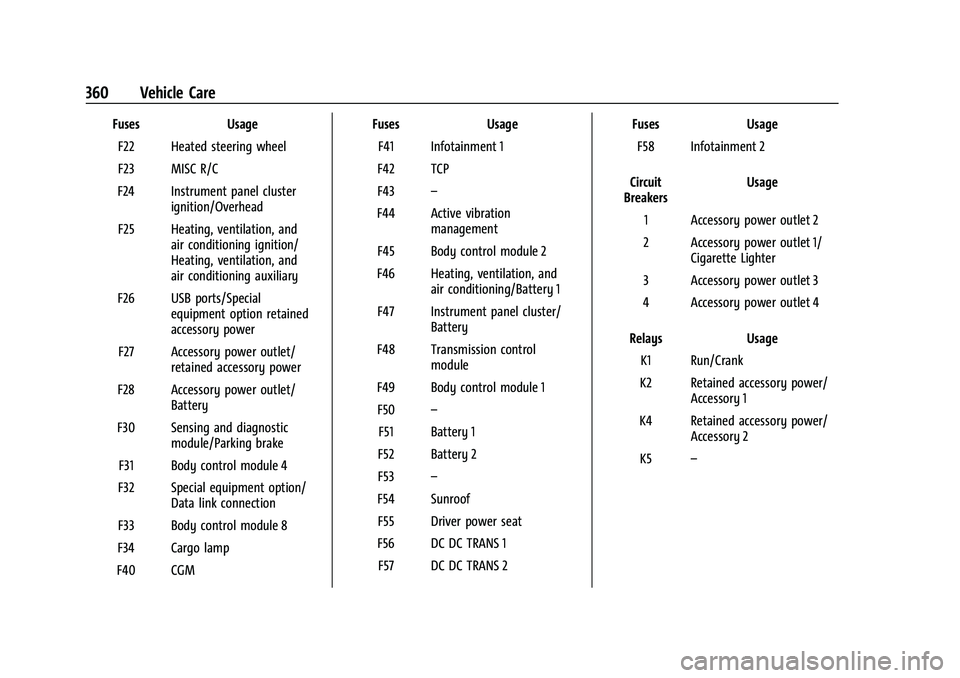
FusesUsage
F22 Heated steering wheel
F23 MISC R/C
F24 Instrument panel cluster ignition/Overhead
F25 Heating, ventilation, and air conditioning ignition/
Heating, ventilation, and
air conditioning auxiliary
F26 USB ports/Special equipment option retained
accessory power
F27 Accessory power outlet/ retained accessory power
F28 Accessory power outlet/ Battery
F30 Sensing and diagnostic module/Parking brake
F31 Body control module 4
F32 Special equipment option/ Data link connection
F33 Body control module 8
F34 Cargo lamp
F40 CGM Fuses
Usage
F41 Infotainment 1
F42 TCP
F43 –
F44 Active vibration management
F45 Body control module 2
F46 Heating, ventilation, and air conditioning/Battery 1
F47 Instrument panel cluster/ Battery
F48 Transmission control module
F49 Body control module 1 F50 –
F51 Battery 1
F52 Battery 2
F53 –
F54 Sunroof F55 Driver power seat
F56 DC DC TRANS 1 F57 DC DC TRANS 2 Fuses
Usage
F58 Infotainment 2
Circuit
Breakers Usage
1 Accessory power outlet 2
2 Accessory power outlet 1/ Cigarette Lighter
3 Accessory power outlet 3
4 Accessory power outlet 4
Relays Usage
K1 Run/Crank
K2 Retained accessory power/ Accessory 1
K4 Retained accessory power/ Accessory 2
K5 –