2022 CHEVROLET SILVERADO 1500 brake light
[x] Cancel search: brake lightPage 256 of 461
Chevrolet Silverado 1500 Owner Manual (GMNA-Localizing-U.S./Canada/
Mexico/Paraguay-14632303) - 2021 - CRC - 11/9/20
Driving and Operating 255
Setting Cruise Control
If
5is on when not in use, SET−or +RES
could get pressed and go into cruise when
not desired. Keep
5off when cruise is not
being used.
1. Press
5to turn the cruise system on.
2. Get up to the desired speed.
3. Press and release SET−.
4. Remove your foot from the accelerator.
The cruise control indicator on the
instrument cluster turns green after cruise
control has been set to the desired speed.
See Instrument Cluster 0106.
Resuming a Set Speed
If the cruise control is set at a desired speed
and then the brakes are applied or
*is
pressed, the cruise control is disengaged
without erasing the set speed from memory.
Once the vehicle reaches about 40 km/h
(25 mph) or more, press RES+ up briefly. The
vehicle returns to the previously set speed.
Increasing Speed While Using Cruise Control
Do one of the following:
.Press and hold +RES up until the desired
speed is reached, then release it.
.To increase vehicle speed in small
increments, press +RES up briefly. For
each press, the vehicle goes about 1 km/h
(1 mph) faster.
The speedometer reading can be displayed
in either English or metric units. See
Instrument Cluster 0106. The increment
value used depends on the units displayed.
Reducing Speed While Using Cruise Control
Do one of the following:
.Press and hold SET– down until the
desired lower speed is reached, then
release it.
.To slow down in small increments, press
SET– down briefly. For each press, the
vehicle goes about 1 km/h (1 mph) slower.
The speedometer reading can be displayed
in either English or metric units. See
Instrument Cluster 0106. The increment
value used depends on the units displayed.
Passing Another Vehicle While Using Cruise
Control
Use the accelerator pedal to increase the
vehicle speed. When you take your foot off
the pedal, the vehicle will slow down to the
previously set cruise speed. While pressing
the accelerator pedal or shortly following the release to override cruise control, briefly
pressing SET–
will result in cruise control set
to the current vehicle speed.
Using Cruise Control on Hills
How well the cruise control works on hills
depends on the vehicle speed, the load, and
the steepness of the hills. When going up
steep hills, pressing the accelerator pedal
may be necessary to maintain vehicle speed.
While going downhill, cruise braking helps
maintain driver selected speed.
Cruise Grade Braking is enabled when the
vehicle is started and cruise control is active.
It is not enabled in Range Selection Mode.
It assists in maintaining driver selected
speed when driving on downhill grades by
using the engine and transmission to slow
the vehicle.
For other forms of descent control, see Hill
Descent Control (HDC) 0249, Automatic
Transmission 0238, and Tow/Haul Mode
0 241.
Ending Cruise Control
There are four ways to end cruise control:
.Step lightly on the brake pedal.
.Press*.
Page 262 of 461
Chevrolet Silverado 1500 Owner Manual (GMNA-Localizing-U.S./Canada/
Mexico/Paraguay-14632303) - 2021 - CRC - 11/9/20
Driving and Operating 261
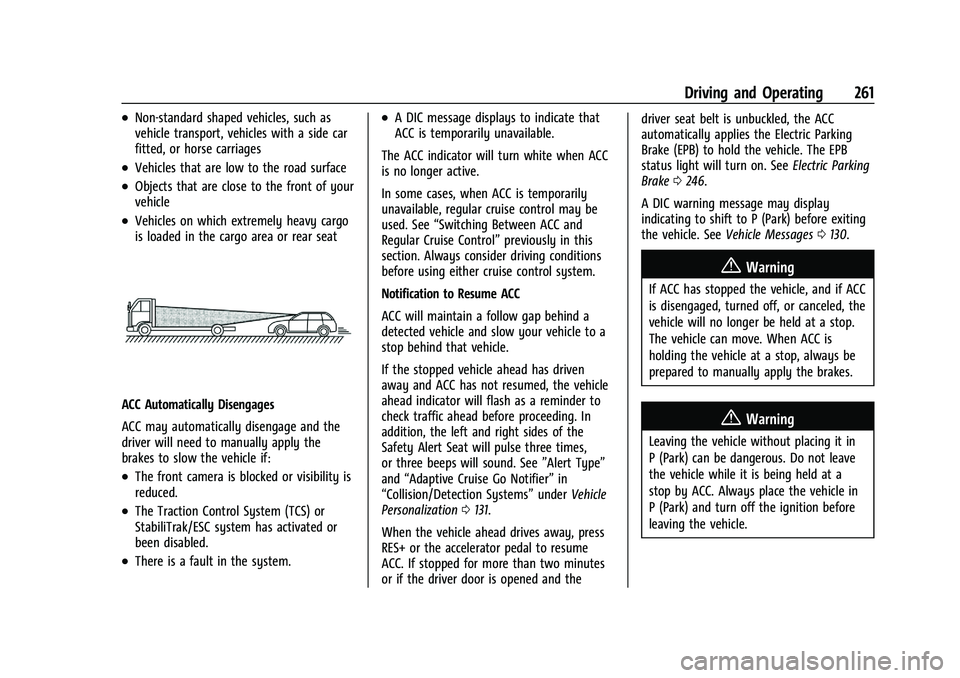
.Non-standard shaped vehicles, such as
vehicle transport, vehicles with a side car
fitted, or horse carriages
.Vehicles that are low to the road surface
.Objects that are close to the front of your
vehicle
.Vehicles on which extremely heavy cargo
is loaded in the cargo area or rear seat
ACC Automatically Disengages
ACC may automatically disengage and the
driver will need to manually apply the
brakes to slow the vehicle if:
.The front camera is blocked or visibility is
reduced.
.The Traction Control System (TCS) or
StabiliTrak/ESC system has activated or
been disabled.
.There is a fault in the system.
.A DIC message displays to indicate that
ACC is temporarily unavailable.
The ACC indicator will turn white when ACC
is no longer active.
In some cases, when ACC is temporarily
unavailable, regular cruise control may be
used. See “Switching Between ACC and
Regular Cruise Control” previously in this
section. Always consider driving conditions
before using either cruise control system.
Notification to Resume ACC
ACC will maintain a follow gap behind a
detected vehicle and slow your vehicle to a
stop behind that vehicle.
If the stopped vehicle ahead has driven
away and ACC has not resumed, the vehicle
ahead indicator will flash as a reminder to
check traffic ahead before proceeding. In
addition, the left and right sides of the
Safety Alert Seat will pulse three times,
or three beeps will sound. See ”Alert Type”
and “Adaptive Cruise Go Notifier” in
“Collision/Detection Systems” underVehicle
Personalization 0131.
When the vehicle ahead drives away, press
RES+ or the accelerator pedal to resume
ACC. If stopped for more than two minutes
or if the driver door is opened and the driver seat belt is unbuckled, the ACC
automatically applies the Electric Parking
Brake (EPB) to hold the vehicle. The EPB
status light will turn on. See
Electric Parking
Brake 0246.
A DIC warning message may display
indicating to shift to P (Park) before exiting
the vehicle. See Vehicle Messages 0130.
{Warning
If ACC has stopped the vehicle, and if ACC
is disengaged, turned off, or canceled, the
vehicle will no longer be held at a stop.
The vehicle can move. When ACC is
holding the vehicle at a stop, always be
prepared to manually apply the brakes.
{Warning
Leaving the vehicle without placing it in
P (Park) can be dangerous. Do not leave
the vehicle while it is being held at a
stop by ACC. Always place the vehicle in
P (Park) and turn off the ignition before
leaving the vehicle.
Page 264 of 461
Chevrolet Silverado 1500 Owner Manual (GMNA-Localizing-U.S./Canada/
Mexico/Paraguay-14632303) - 2021 - CRC - 11/9/20
Driving and Operating 263
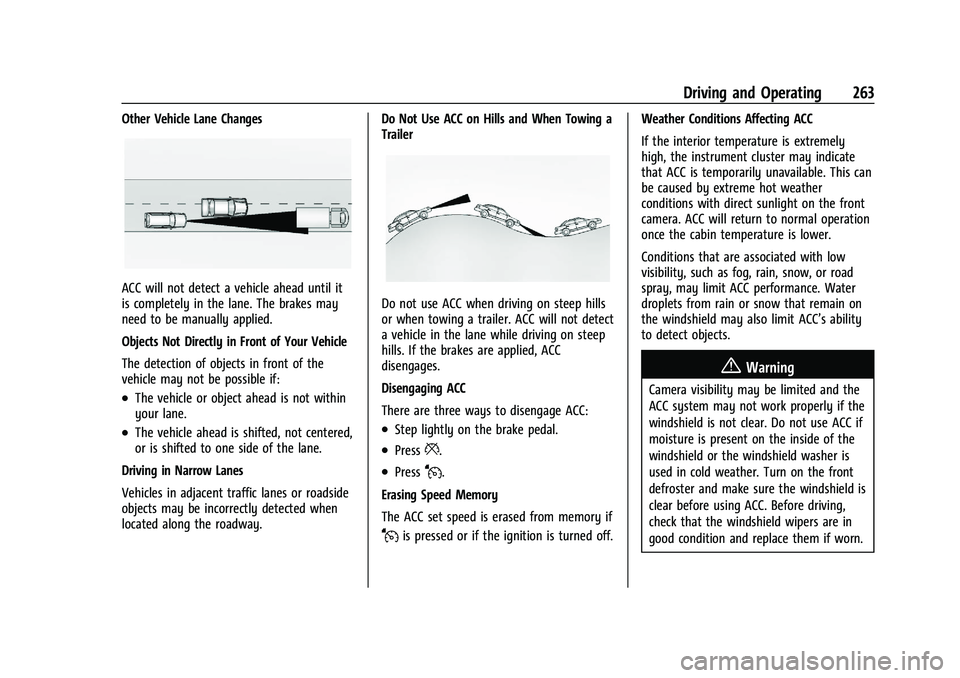
Other Vehicle Lane Changes
ACC will not detect a vehicle ahead until it
is completely in the lane. The brakes may
need to be manually applied.
Objects Not Directly in Front of Your Vehicle
The detection of objects in front of the
vehicle may not be possible if:
.The vehicle or object ahead is not within
your lane.
.The vehicle ahead is shifted, not centered,
or is shifted to one side of the lane.
Driving in Narrow Lanes
Vehicles in adjacent traffic lanes or roadside
objects may be incorrectly detected when
located along the roadway. Do Not Use ACC on Hills and When Towing a
Trailer
Do not use ACC when driving on steep hills
or when towing a trailer. ACC will not detect
a vehicle in the lane while driving on steep
hills. If the brakes are applied, ACC
disengages.
Disengaging ACC
There are three ways to disengage ACC:
.Step lightly on the brake pedal.
.Press*.
.PressJ.
Erasing Speed Memory
The ACC set speed is erased from memory if
Jis pressed or if the ignition is turned off. Weather Conditions Affecting ACC
If the interior temperature is extremely
high, the instrument cluster may indicate
that ACC is temporarily unavailable. This can
be caused by extreme hot weather
conditions with direct sunlight on the front
camera. ACC will return to normal operation
once the cabin temperature is lower.
Conditions that are associated with low
visibility, such as fog, rain, snow, or road
spray, may limit ACC performance. Water
droplets from rain or snow that remain on
the windshield may also limit ACC’s ability
to detect objects.
{Warning
Camera visibility may be limited and the
ACC system may not work properly if the
windshield is not clear. Do not use ACC if
moisture is present on the inside of the
windshield or the windshield washer is
used in cold weather. Turn on the front
defroster and make sure the windshield is
clear before using ACC. Before driving,
check that the windshield wipers are in
good condition and replace them if worn.
Page 275 of 461
Chevrolet Silverado 1500 Owner Manual (GMNA-Localizing-U.S./Canada/
Mexico/Paraguay-14632303) - 2021 - CRC - 11/9/20
274 Driving and Operating
right or three Safety Alert Seat pulses occur
on the left or right side, depending on the
direction of the detected vehicle.
Use caution while backing up when towing
a trailer, as the RCTA detection zones that
extend out from the back of the vehicle do
not move further back when a trailer is
towed.
RCTA is disabled when the trailer connection
status is displayed.
RCTA can be turned off. See“Collision/
Detection Systems” underVehicle
Personalization 0131.
Turning the Features On or Off
PressXon the center stack to turn on or
off the Front and Rear Park Assist. The
indicator light next to the button comes on
when the features are on and turns off
when the features have been disabled. Front and Rear Park Assist can be turned
Off, On, or On with Towbar. See
“Park
Assist” underVehicle Personalization 0131.
If Park Assist is turned off through vehicle
personalization, the Park Assist button will
be disabled. To turn Park Assist on again,
select On in vehicle personalization. The On
with Towbar setting allows Park Assist to
work properly with a trailer hitch. Some
larger trailer hitches may not be compatible.
Turn off Park Assist when towing a trailer.
To turn the RPA symbols on or off, see
“Rear Camera Park Assist Symbols” under
Vehicle Personalization 0131.
Assistance Systems for Driving
If equipped, when driving the vehicle in a
forward gear, Forward Collision Alert (FCA),
Lane Departure Warning (LDW), Lane Keep
Assist (LKA), Side Blind Zone Alert (SBZA),
Lane Change Alert (LCA), Automatic
Emergency Braking (AEB), and/or the Front
Pedestrian Braking (FPB) System can help to
avoid a crash or reduce crash damage.
Forward Collision Alert (FCA)
System
If equipped, the FCA system may help to
avoid or reduce the harm caused by
front-end crashes. When approaching a
vehicle ahead too quickly, FCA provides a
red flashing alert on the windshield and
rapidly beeps or pulses the driver seat. FCA
also lights an amber visual alert if following
another vehicle much too closely.
FCA detects vehicles within a distance of
approximately 60 m (197 ft) and operates at
speeds above 8 km/h (5 mph).
{Warning
FCA is a warning system and does not
apply the brakes. When approaching a
slower-moving or stopped vehicle ahead
too rapidly, or when following a vehicle
too closely, FCA may not provide a
warning with enough time to help avoid
a crash. It also may not provide any
warning at all. FCA does not warn of
pedestrians, animals, signs, guardrails,
bridges, construction barrels, or other
(Continued)
Page 280 of 461
Chevrolet Silverado 1500 Owner Manual (GMNA-Localizing-U.S./Canada/
Mexico/Paraguay-14632303) - 2021 - CRC - 11/9/20
Driving and Operating 279
Alert occurs, the brake system may prepare
for driver braking to occur more rapidly
which can cause a brief, mild deceleration.
Continue to apply the brake pedal as
needed. Cruise control may be disengaged
when the Front Pedestrian Alert occurs.
Automatic Braking
If FPB detects it is about to crash into a
pedestrian directly ahead, and the brakes
have not been applied, FPB may
automatically brake moderately or brake
hard. This can help to avoid some very low
speed pedestrian crashes or reduce
pedestrian injury. FPB can automatically
brake to detected pedestrians between
8 km/h (5 mph) and 80 km/h (50 mph).
Automatic braking levels may be reduced
under certain conditions, such as higher
speeds.
If this happens, Automatic Braking may
engage the Electric Parking Brake (EPB) to
hold the vehicle at a stop. Release the EPB.
A firm press of the accelerator pedal will
also release Automatic Braking and the EPB.
{Warning
FPB may alert or automatically brake the
vehicle suddenly in situations where it is
unexpected and undesired. It could falsely
alert or brake for objects similar in shape
or size to pedestrians, including shadows.
This is normal operation and the vehicle
does not need service. To override
Automatic Braking, firmly press the
accelerator pedal, if it is safe to do so.
Automatic Braking can be disabled through
vehicle personalization. See “Front Pedestrian
Detection” in“Collision/Detection Systems”
under Vehicle Personalization 0131.
{Warning
Using the Front Pedestrian Braking
system while towing a trailer could cause
you to lose control of the vehicle and
crash. Turn the system to Alert or Off
when towing a trailer.
Cleaning the System
If FPB does not seem to operate properly,
cleaning the outside of the windshield in
front of the rearview mirror may correct the
issue.
Side Blind Zone Alert (SBZA)
If equipped, the SBZA system is a
lane-changing aid that assists drivers with
avoiding crashes that occur with moving
vehicles in the side blind zone, or blind spot
areas. When the vehicle is in a forward gear,
the left or right side mirror display will light
up if a moving vehicle is detected in that
blind zone. If the turn signal is activated and
a vehicle is also detected on the same side,
the display will flash as an extra warning
not to change lanes. Since this system is
part of the Lane Change Alert (LCA) system,
read the entire LCA section before using this
feature.
Lane Change Alert (LCA)
If equipped, the LCA system is a
lane-changing aid that assists drivers with
avoiding lane change crashes that occur with
moving vehicles in the side blind zone (or
spot) areas or with vehicles rapidly
approaching these areas from behind. The
Page 302 of 461
Chevrolet Silverado 1500 Owner Manual (GMNA-Localizing-U.S./Canada/
Mexico/Paraguay-14632303) - 2021 - CRC - 11/9/20
Driving and Operating 301
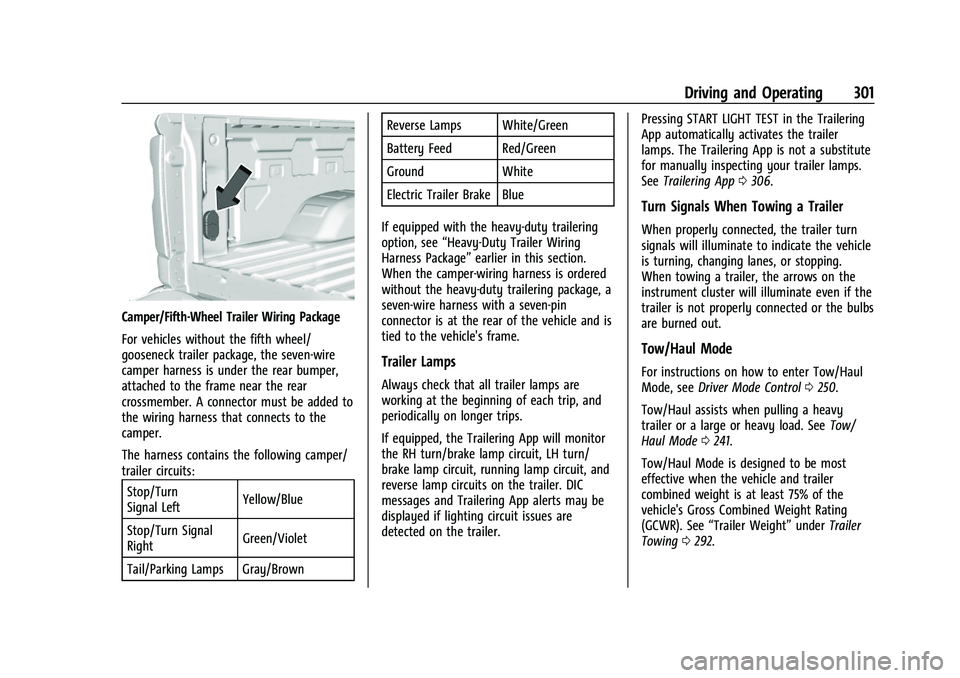
Camper/Fifth-Wheel Trailer Wiring Package
For vehicles without the fifth wheel/
gooseneck trailer package, the seven-wire
camper harness is under the rear bumper,
attached to the frame near the rear
crossmember. A connector must be added to
the wiring harness that connects to the
camper.
The harness contains the following camper/
trailer circuits:Stop/Turn
Signal Left Yellow/Blue
Stop/Turn Signal
Right Green/Violet
Tail/Parking Lamps Gray/Brown Reverse Lamps White/Green
Battery Feed Red/Green
Ground White
Electric Trailer Brake Blue
If equipped with the heavy-duty trailering
option, see “Heavy-Duty Trailer Wiring
Harness Package” earlier in this section.
When the camper-wiring harness is ordered
without the heavy-duty trailering package, a
seven-wire harness with a seven-pin
connector is at the rear of the vehicle and is
tied to the vehicle's frame.
Trailer Lamps
Always check that all trailer lamps are
working at the beginning of each trip, and
periodically on longer trips.
If equipped, the Trailering App will monitor
the RH turn/brake lamp circuit, LH turn/
brake lamp circuit, running lamp circuit, and
reverse lamp circuits on the trailer. DIC
messages and Trailering App alerts may be
displayed if lighting circuit issues are
detected on the trailer. Pressing START LIGHT TEST in the Trailering
App automatically activates the trailer
lamps. The Trailering App is not a substitute
for manually inspecting your trailer lamps.
See
Trailering App 0306.
Turn Signals When Towing a Trailer
When properly connected, the trailer turn
signals will illuminate to indicate the vehicle
is turning, changing lanes, or stopping.
When towing a trailer, the arrows on the
instrument cluster will illuminate even if the
trailer is not properly connected or the bulbs
are burned out.
Tow/Haul Mode
For instructions on how to enter Tow/Haul
Mode, see Driver Mode Control 0250.
Tow/Haul assists when pulling a heavy
trailer or a large or heavy load. See Tow/
Haul Mode 0241.
Tow/Haul Mode is designed to be most
effective when the vehicle and trailer
combined weight is at least 75% of the
vehicle's Gross Combined Weight Rating
(GCWR). See “Trailer Weight” underTrailer
Towing 0292.
Page 303 of 461
Chevrolet Silverado 1500 Owner Manual (GMNA-Localizing-U.S./Canada/
Mexico/Paraguay-14632303) - 2021 - CRC - 11/9/20
302 Driving and Operating
Tow/Haul Mode is most useful when towing
a heavy trailer or carrying a large or
heavy load:
.Through rolling terrain.
.In stop-and-go traffic.
.In busy parking lots.
Operating the vehicle in Tow/Haul Mode
when lightly loaded or not towing will not
cause damage; however, it is not
recommended and may result in unpleasant
engine and transmission driving
characteristics, heavy or light steering
efforts, and reduced fuel economy.
Integrated Trailer Brake Control System
The vehicle may have an Integrated Trailer
Brake Control (ITBC) system for use with
electric trailer brakes or most electric over
hydraulic trailer brake systems. These
instructions apply to both types of electric
trailer brakes.
This symbol is on the Trailer Brake Control
Panel on vehicles with an ITBC system. The
power output to the trailer brakes is
proportional to the amount of vehicle
braking. This available power output to the
trailer brakes can be adjusted to a wide
range of trailering situations.
The ITBC system is integrated with the
vehicle’s brake, antilock brake, and
StabiliTrak/Electronic Stability Control (ESC)
systems. In trailering conditions that cause
the vehicle’s antilock brake or StabiliTrak/
ESC systems to activate, power sent to the
trailer's brakes will be automatically
adjusted to minimize trailer wheel lock-up.
This does not imply that the trailer has
StabiliTrak/ESC.
If the vehicle’s brake, antilock brake,
or StabiliTrak/ESC systems are not
functioning properly, the ITBC system may
not function fully or at all. Make sure all of
these systems are fully operational to allow
the ITBC system to function properly.
The ITBC system is powered through the
vehicle's electrical system. Turning the
ignition off will also turn off the ITBC
system. The ITBC system is fully functional
only when the ignition is in on.{Warning
Connecting a trailer that has an air brake
system may result in reduced or
complete loss of trailer braking, including
increased stopping distance or trailer
instability which could result in serious
injury, death, or property damage. Only
use the ITBC system with electric or
electric over hydraulic trailer brake
systems.
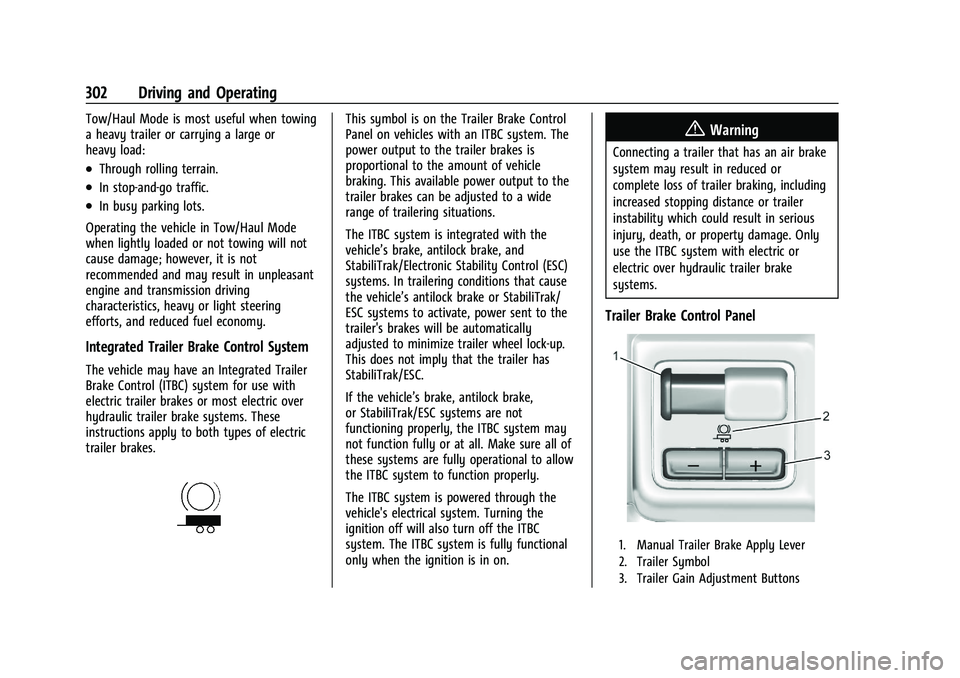
Trailer Brake Control Panel
1. Manual Trailer Brake Apply Lever
2. Trailer Symbol
3. Trailer Gain Adjustment Buttons
Page 304 of 461
Chevrolet Silverado 1500 Owner Manual (GMNA-Localizing-U.S./Canada/
Mexico/Paraguay-14632303) - 2021 - CRC - 11/9/20
Driving and Operating 303
The trailer symbol on the control panel will
light amber when a trailer with electric
brakes is connected.
The ITBC control panel is on the center
stack. SeeInstrument Panel Overview 04.
The control panel allows adjustment to the
amount of output, referred to as Trailer
Gain, available to the trailer brakes and
allows manual application of the trailer
brakes. Use the ITBC control panel and the
DIC trailer brake display page to adjust and
display power output to the trailer brakes.
Trailer Brake DIC Display Page
The ITBC display page indicates:
.Trailer Gain setting
.Output to the trailer brakes
.Trailer connection
.System operational status
To display:
.Scroll through the DIC menu pages
.Press a Trailer Gain (+) or (−) button
.Activate the Manual Trailer Brake Apply
Lever
TRAILER GAIN: Press a Trailer Gain button to
recall the current Trailer Gain setting. Each
press and release of the gain buttons will
then change the Trailer Gain setting. Press the Trailer Gain (+) or (-) to adjust. Press and
hold to continuously adjust the Trailer Gain.
To turn the output to the trailer off, adjust
the Trailer Gain setting to 0.0. This setting
can be adjusted from 0.0 to 10.0 with a
trailer connected or disconnected.
TRAILER OUTPUT: This displays anytime a
trailer with electric brakes is connected.
Output to the trailer brakes is based on the
amount of vehicle braking present and
relative to the Trailer Gain setting. Output is
displayed from 0 to 100% for each gain
setting.
The Trailer Output will indicate
“- - - - - -”on
the Trailer Brake Display Page whenever the
following occur:
.No trailer is connected.
.A trailer without electric brakes is
connected. No DIC message displays.
.A trailer with electric brakes has become
disconnected. A CHECK TRAILER WIRING
message displays on the DIC.
.There is a fault present in the wiring to
the trailer brakes. A CHECK TRAILER
WIRING message displays on the DIC.
.The ITBC system is not working due to a
fault. A SERVICE TRAILER BRAKE SYSTEM
message displays in the DIC.
Manual Trailer Brake Apply Lever
Slide this lever right to apply the trailer’s
electric brakes independent of the vehicle’s
brakes. Use this lever to adjust the Trailer
Gain to achieve proper power output to the
trailer brakes. Under certain circumstances,
this lever can also be used to apply
additional trailer braking. The trailer and
vehicle brake lamps will come on when
either the vehicle brakes or trailer brakes are
applied and properly connected.
Trailer Gain Adjustment Procedure
Trailer Gain should be set for a specific
trailering condition and it must be
readjusted anytime vehicle loading, trailer
loading, or road surface conditions change.
{Warning
Trailer brakes that are over-gained or
under-gained may not stop the vehicle
and the trailer as intended and can result
in a crash. Always follow the instructions
to set the Trailer Gain for the proper
trailer stopping performance.