2022 CHEVROLET MALIBU wheel
[x] Cancel search: wheelPage 286 of 351
Chevrolet Malibu Owner Manual (GMNA-Localizing-U.S./Canada-
14584249) - 2021 - CRC - 11/9/20
Vehicle Care 285
Tire Changing
Removing the Spare Tire and Tools
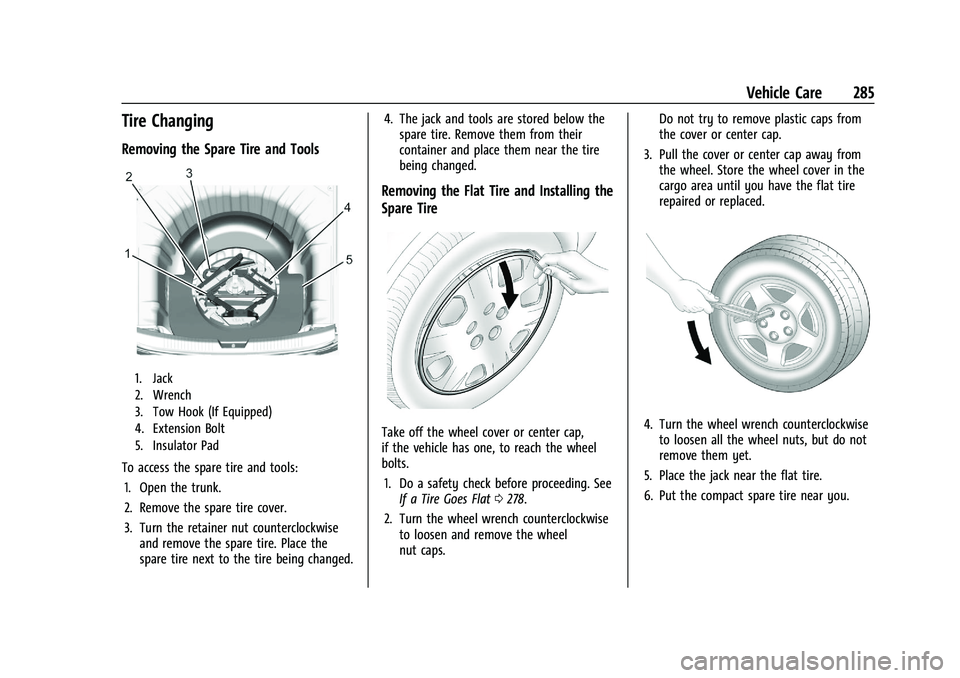
1. Jack
2. Wrench
3. Tow Hook (If Equipped)
4. Extension Bolt
5. Insulator Pad
To access the spare tire and tools:1. Open the trunk.
2. Remove the spare tire cover.
3. Turn the retainer nut counterclockwise and remove the spare tire. Place the
spare tire next to the tire being changed. 4. The jack and tools are stored below the
spare tire. Remove them from their
container and place them near the tire
being changed.
Removing the Flat Tire and Installing the
Spare Tire
Take off the wheel cover or center cap,
if the vehicle has one, to reach the wheel
bolts.
1. Do a safety check before proceeding. See If a Tire Goes Flat 0278.
2. Turn the wheel wrench counterclockwise to loosen and remove the wheel
nut caps. Do not try to remove plastic caps from
the cover or center cap.
3. Pull the cover or center cap away from the wheel. Store the wheel cover in the
cargo area until you have the flat tire
repaired or replaced.4. Turn the wheel wrench counterclockwiseto loosen all the wheel nuts, but do not
remove them yet.
5. Place the jack near the flat tire.
6. Put the compact spare tire near you.
Page 288 of 351
Chevrolet Malibu Owner Manual (GMNA-Localizing-U.S./Canada-
14584249) - 2021 - CRC - 11/9/20
Vehicle Care 287
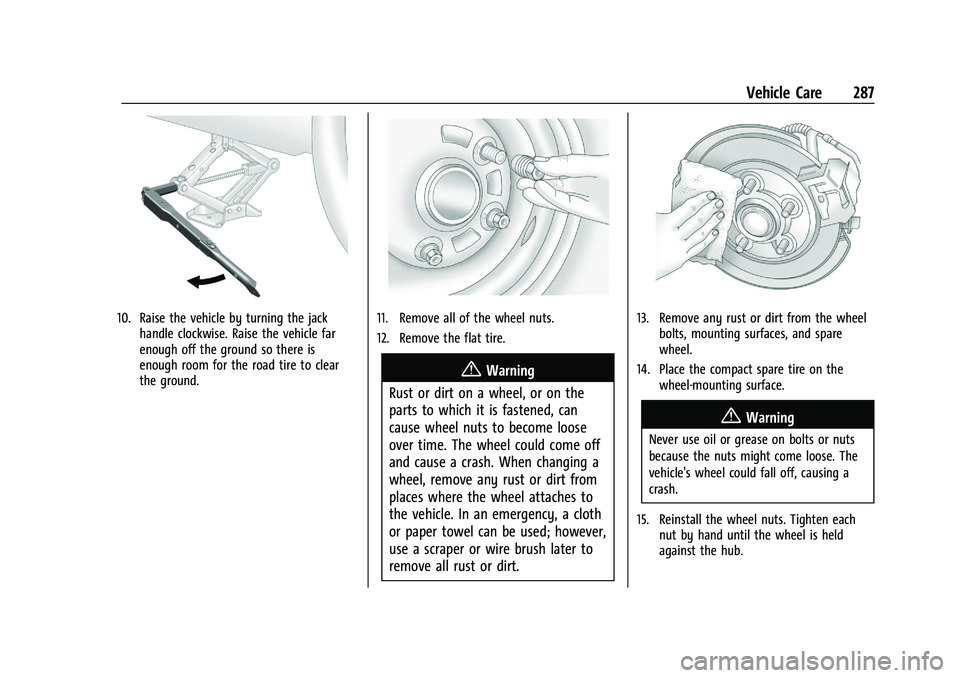
10. Raise the vehicle by turning the jackhandle clockwise. Raise the vehicle far
enough off the ground so there is
enough room for the road tire to clear
the ground.11. Remove all of the wheel nuts.
12. Remove the flat tire.
{Warning
Rust or dirt on a wheel, or on the
parts to which it is fastened, can
cause wheel nuts to become loose
over time. The wheel could come off
and cause a crash. When changing a
wheel, remove any rust or dirt from
places where the wheel attaches to
the vehicle. In an emergency, a cloth
or paper towel can be used; however,
use a scraper or wire brush later to
remove all rust or dirt.
13. Remove any rust or dirt from the wheel bolts, mounting surfaces, and spare
wheel.
14. Place the compact spare tire on the wheel-mounting surface.
{Warning
Never use oil or grease on bolts or nuts
because the nuts might come loose. The
vehicle's wheel could fall off, causing a
crash.
15. Reinstall the wheel nuts. Tighten each nut by hand until the wheel is held
against the hub.
Page 289 of 351
Chevrolet Malibu Owner Manual (GMNA-Localizing-U.S./Canada-
14584249) - 2021 - CRC - 11/9/20
288 Vehicle Care
16. Lower the vehicle by turning the jackhandle counterclockwise.
{Warning
Wheel nuts that are improperly or
incorrectly tightened can cause the
wheels to become loose or come off. The
wheel nuts should be tightened with a
torque wrench to the proper torque
specification after replacing. Follow the
torque specification supplied by the
aftermarket manufacturer when using
accessory locking wheel nuts. See
Capacities and Specifications 0317 for
original equipment wheel nut torque
specifications.
Caution
Improperly tightened wheel nuts can lead
to brake pulsation and rotor damage. To
avoid expensive brake repairs, evenly
tighten the wheel nuts in the proper
sequence and to the proper torque
specification. See Capacities and
Specifications 0317 for the wheel nut
torque specification.
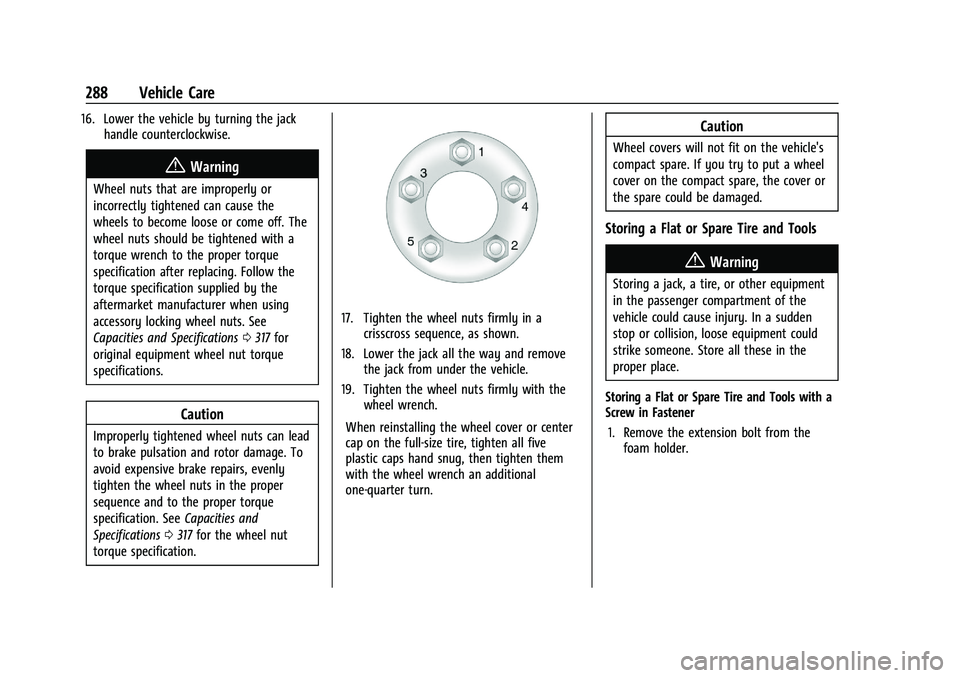
17. Tighten the wheel nuts firmly in a crisscross sequence, as shown.
18. Lower the jack all the way and remove the jack from under the vehicle.
19. Tighten the wheel nuts firmly with the wheel wrench.
When reinstalling the wheel cover or center
cap on the full-size tire, tighten all five
plastic caps hand snug, then tighten them
with the wheel wrench an additional
one-quarter turn.
Caution
Wheel covers will not fit on the vehicle's
compact spare. If you try to put a wheel
cover on the compact spare, the cover or
the spare could be damaged.
Storing a Flat or Spare Tire and Tools
{Warning
Storing a jack, a tire, or other equipment
in the passenger compartment of the
vehicle could cause injury. In a sudden
stop or collision, loose equipment could
strike someone. Store all these in the
proper place.
Storing a Flat or Spare Tire and Tools with a
Screw in Fastener 1. Remove the extension bolt from the foam holder.
Page 290 of 351
Chevrolet Malibu Owner Manual (GMNA-Localizing-U.S./Canada-
14584249) - 2021 - CRC - 11/9/20
Vehicle Care 289
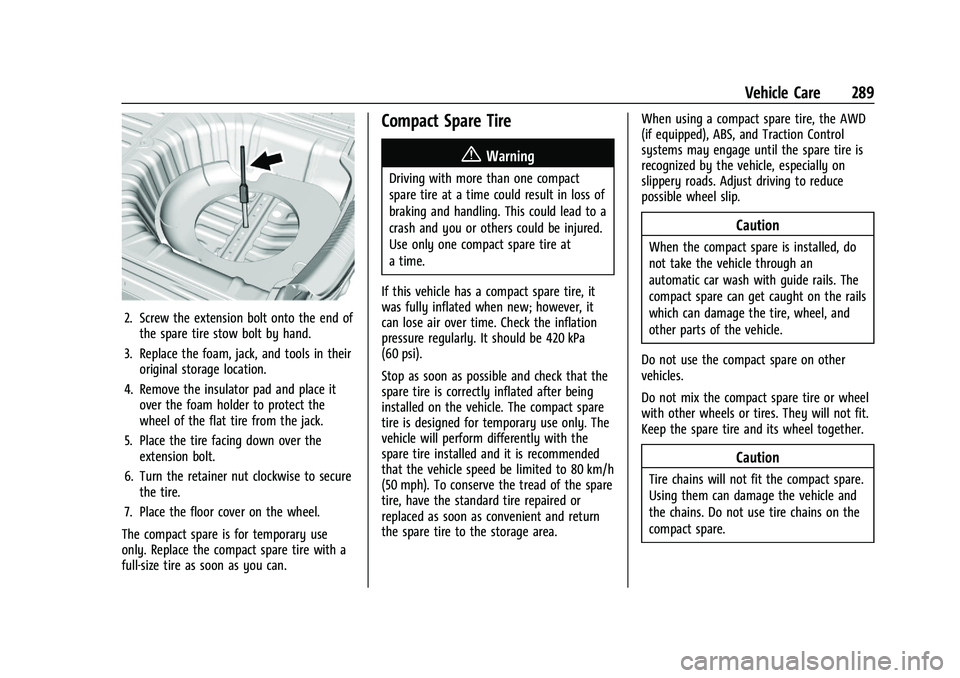
2. Screw the extension bolt onto the end ofthe spare tire stow bolt by hand.
3. Replace the foam, jack, and tools in their original storage location.
4. Remove the insulator pad and place it over the foam holder to protect the
wheel of the flat tire from the jack.
5. Place the tire facing down over the extension bolt.
6. Turn the retainer nut clockwise to secure the tire.
7. Place the floor cover on the wheel.
The compact spare is for temporary use
only. Replace the compact spare tire with a
full-size tire as soon as you can.
Compact Spare Tire
{Warning
Driving with more than one compact
spare tire at a time could result in loss of
braking and handling. This could lead to a
crash and you or others could be injured.
Use only one compact spare tire at
a time.
If this vehicle has a compact spare tire, it
was fully inflated when new; however, it
can lose air over time. Check the inflation
pressure regularly. It should be 420 kPa
(60 psi).
Stop as soon as possible and check that the
spare tire is correctly inflated after being
installed on the vehicle. The compact spare
tire is designed for temporary use only. The
vehicle will perform differently with the
spare tire installed and it is recommended
that the vehicle speed be limited to 80 km/h
(50 mph). To conserve the tread of the spare
tire, have the standard tire repaired or
replaced as soon as convenient and return
the spare tire to the storage area. When using a compact spare tire, the AWD
(if equipped), ABS, and Traction Control
systems may engage until the spare tire is
recognized by the vehicle, especially on
slippery roads. Adjust driving to reduce
possible wheel slip.
Caution
When the compact spare is installed, do
not take the vehicle through an
automatic car wash with guide rails. The
compact spare can get caught on the rails
which can damage the tire, wheel, and
other parts of the vehicle.
Do not use the compact spare on other
vehicles.
Do not mix the compact spare tire or wheel
with other wheels or tires. They will not fit.
Keep the spare tire and its wheel together.
Caution
Tire chains will not fit the compact spare.
Using them can damage the vehicle and
the chains. Do not use tire chains on the
compact spare.
Page 293 of 351
Chevrolet Malibu Owner Manual (GMNA-Localizing-U.S./Canada-
14584249) - 2021 - CRC - 11/9/20
292 Vehicle Care
9. Start the vehicle with the good batteryand run the engine at idle speed for at
least four minutes.
10. Try to start the vehicle that had the dead battery. If it will not start after a
few tries, it probably needs service.
Caution
If the jumper cables are connected or
removed in the wrong order, electrical
shorting may occur and damage the
vehicle. The repairs would not be covered
by the vehicle warranty. Always connect
and remove the jumper cables in the
correct order, making sure that the cables
do not touch each other or other metal.
Jumper Cable Removal
Reverse the sequence exactly when
removing the jumper cables.
After starting the disabled vehicle and
removing the jumper cables, allow it to idle
for several minutes.
Towing the Vehicle
Caution
Incorrectly towing a disabled vehicle may
cause damage. The damage would not be
covered by the vehicle warranty. Do not
lash or hook to suspension components.
Use the proper straps around the tires to
secure the vehicle. Do not drag a locked
wheel/tire. Use tire skates or dollies
under any locked wheel/tire while
loading the vehicle. Do not use a sling
type lift to tow the vehicle. This could
damage the vehicle.
Caution
Improper use of the tow eye can damage
the vehicle. If equipped, use the tow eye
to load a disabled vehicle onto a flatbed
tow truck from a flat road surface, or to
move the vehicle a short distance. Use
caution and low speeds. The transmission
must be in (N) Neutral when moving the
vehicle. GM recommends a flatbed tow truck to
transport a disabled vehicle. Use ramps to
help reduce approach angles, if necessary.
A towed vehicle should have its drive wheels
off the ground. Contact Roadside Assistance
or a professional towing service if the
disabled vehicle must be towed.
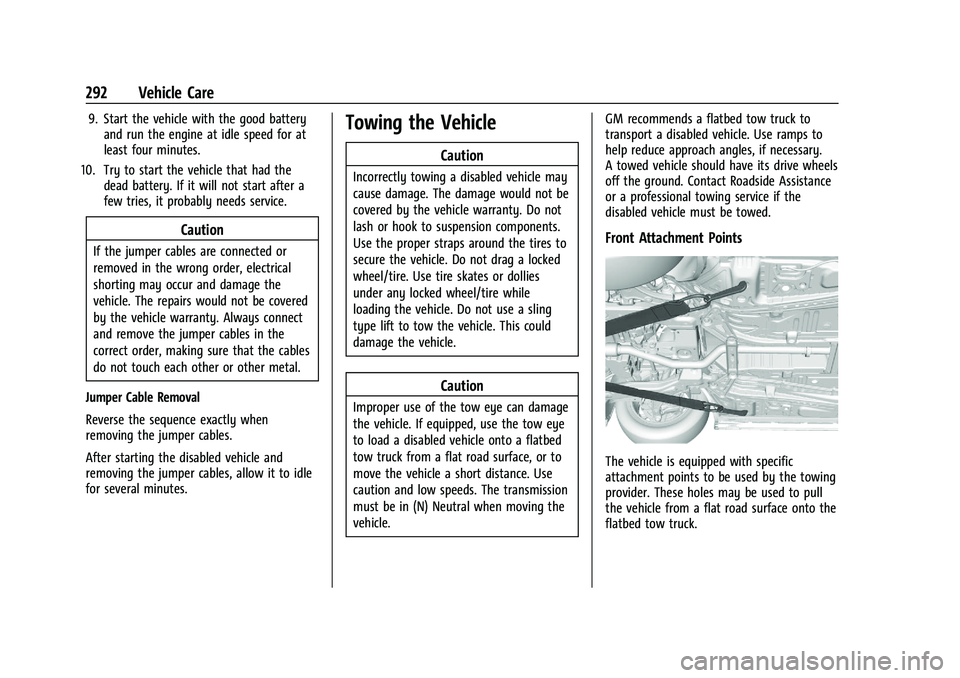
Front Attachment Points
The vehicle is equipped with specific
attachment points to be used by the towing
provider. These holes may be used to pull
the vehicle from a flat road surface onto the
flatbed tow truck.
Page 294 of 351
Chevrolet Malibu Owner Manual (GMNA-Localizing-U.S./Canada-
14584249) - 2021 - CRC - 11/9/20
Vehicle Care 293
Recreational Vehicle Towing
Recreational vehicle towing means towing
the vehicle behind another vehicle–such as
behind a motor home. The two most
common types of recreational vehicle
towing are known as dinghy towing and
dolly towing. Dinghy towing is towing the
vehicle with all four wheels on the ground.
Dolly towing is towing the vehicle with two
wheels on the ground and two wheels up
on a device known as a dolly.
Here are some important things to consider
before recreational vehicle towing:
.Before towing the vehicle, become
familiar with the local laws that apply to
recreational vehicle towing. These laws
may vary by region.
.What is the towing capacity of the
towing vehicle? Be sure to read the tow
vehicle manufacturer's recommendations.
.How far will the vehicle be towed? Some
vehicles have restrictions on how far and
how long they can tow.
.Does the vehicle have the proper towing
equipment? See your dealer or trailering
professional for additional advice and
equipment recommendations.
.Is the vehicle ready to be towed? Just as
preparing the vehicle for a long trip,
make sure the vehicle is prepared to be
towed.
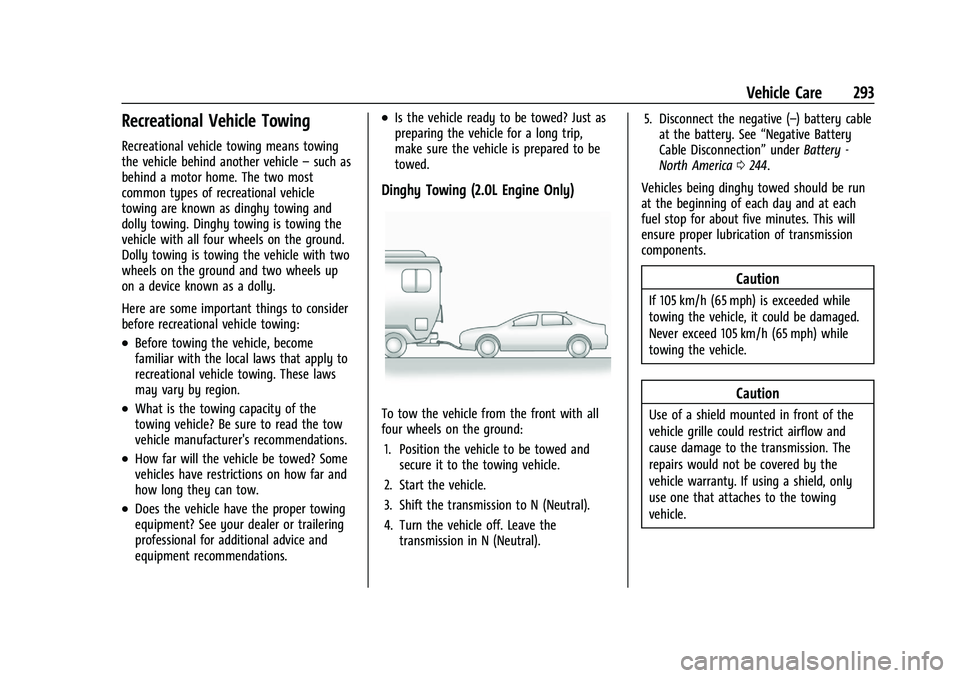
Dinghy Towing (2.0L Engine Only)
To tow the vehicle from the front with all
four wheels on the ground:
1. Position the vehicle to be towed and secure it to the towing vehicle.
2. Start the vehicle.
3. Shift the transmission to N (Neutral).
4. Turn the vehicle off. Leave the transmission in N (Neutral). 5. Disconnect the negative (–) battery cable
at the battery. See “Negative Battery
Cable Disconnection” underBattery -
North America 0244.
Vehicles being dinghy towed should be run
at the beginning of each day and at each
fuel stop for about five minutes. This will
ensure proper lubrication of transmission
components.
Caution
If 105 km/h (65 mph) is exceeded while
towing the vehicle, it could be damaged.
Never exceed 105 km/h (65 mph) while
towing the vehicle.
Caution
Use of a shield mounted in front of the
vehicle grille could restrict airflow and
cause damage to the transmission. The
repairs would not be covered by the
vehicle warranty. If using a shield, only
use one that attaches to the towing
vehicle.
Page 295 of 351
Chevrolet Malibu Owner Manual (GMNA-Localizing-U.S./Canada-
14584249) - 2021 - CRC - 11/9/20
294 Vehicle Care
Caution
Do not tow a vehicle with the front drive
wheels on the ground if one of the front
tires is a compact spare tire. Towing with
two different tire sizes on the front of
the vehicle can cause severe damage to
the transmission.
Dinghy Towing (All Except 2.0L Engine)
Caution
If the vehicle is towed with all four
wheels on the ground, the drive unit
could be damaged. Repairs would not be
(Continued)
Caution (Continued)
covered by the vehicle warranty. Do not
tow the vehicle with all four wheels on
the ground.
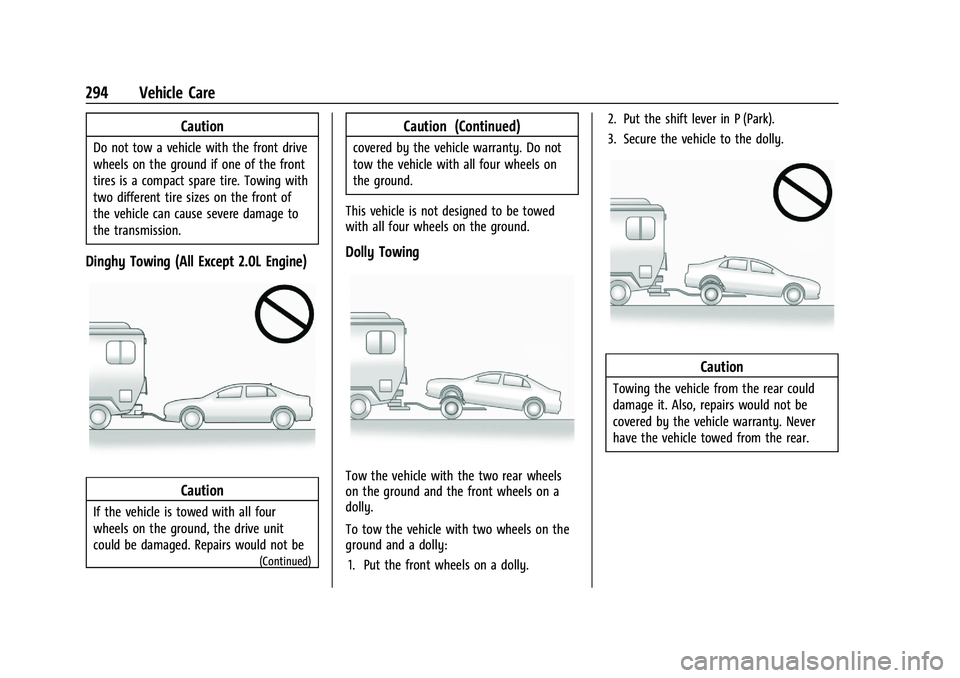
This vehicle is not designed to be towed
with all four wheels on the ground.
Dolly Towing
Tow the vehicle with the two rear wheels
on the ground and the front wheels on a
dolly.
To tow the vehicle with two wheels on the
ground and a dolly: 1. Put the front wheels on a dolly. 2. Put the shift lever in P (Park).
3. Secure the vehicle to the dolly.
Caution
Towing the vehicle from the rear could
damage it. Also, repairs would not be
covered by the vehicle warranty. Never
have the vehicle towed from the rear.
Page 298 of 351
Chevrolet Malibu Owner Manual (GMNA-Localizing-U.S./Canada-
14584249) - 2021 - CRC - 11/9/20
Vehicle Care 297
Caution
Using wax on low gloss black finish
stripes can increase the gloss level and
create a non-uniform finish. Clean low
gloss stripes with soap and water only.
Air Intakes
Clear debris from the air intakes, between
the hood and windshield when washing the
vehicle.
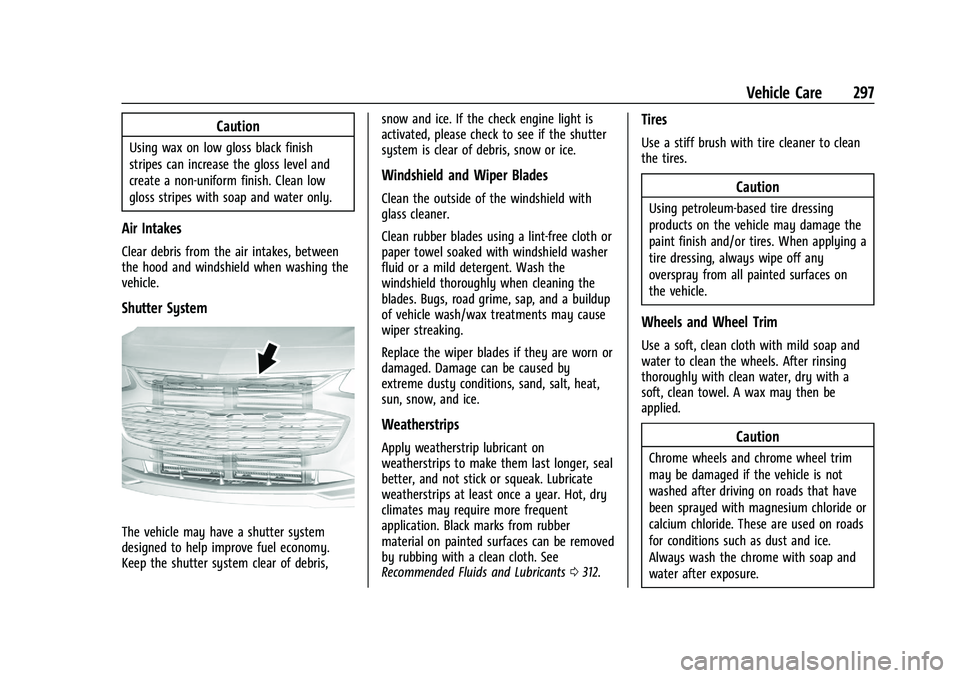
Shutter System
The vehicle may have a shutter system
designed to help improve fuel economy.
Keep the shutter system clear of debris,snow and ice. If the check engine light is
activated, please check to see if the shutter
system is clear of debris, snow or ice.
Windshield and Wiper Blades
Clean the outside of the windshield with
glass cleaner.
Clean rubber blades using a lint-free cloth or
paper towel soaked with windshield washer
fluid or a mild detergent. Wash the
windshield thoroughly when cleaning the
blades. Bugs, road grime, sap, and a buildup
of vehicle wash/wax treatments may cause
wiper streaking.
Replace the wiper blades if they are worn or
damaged. Damage can be caused by
extreme dusty conditions, sand, salt, heat,
sun, snow, and ice.
Weatherstrips
Apply weatherstrip lubricant on
weatherstrips to make them last longer, seal
better, and not stick or squeak. Lubricate
weatherstrips at least once a year. Hot, dry
climates may require more frequent
application. Black marks from rubber
material on painted surfaces can be removed
by rubbing with a clean cloth. See
Recommended Fluids and Lubricants
0312.
Tires
Use a stiff brush with tire cleaner to clean
the tires.
Caution
Using petroleum-based tire dressing
products on the vehicle may damage the
paint finish and/or tires. When applying a
tire dressing, always wipe off any
overspray from all painted surfaces on
the vehicle.
Wheels and Wheel Trim
Use a soft, clean cloth with mild soap and
water to clean the wheels. After rinsing
thoroughly with clean water, dry with a
soft, clean towel. A wax may then be
applied.
Caution
Chrome wheels and chrome wheel trim
may be damaged if the vehicle is not
washed after driving on roads that have
been sprayed with magnesium chloride or
calcium chloride. These are used on roads
for conditions such as dust and ice.
Always wash the chrome with soap and
water after exposure.