2022 CHEVROLET CORVETTE window
[x] Cancel search: windowPage 38 of 338

Chevrolet Corvette Owner Manual (GMNA-Localizing-U.S./Canada/Mexico-
15342622) - 2022 - CRC - 5/4/21
Keys, Doors, and Windows 37
may display. Press and releaseKand then
quickly press and hold
Mon the remote
key, or press and hold
Mon the driver
door switch to open the top, or pull and
hold
Mon the driver door switch to close
the top until this message clears.
Partial Top Cycling
If the convertible top operation is stopped
before completion, the top will temporarily
hold its position. Over time, the tonneau
may drift to a near closed position.
Opening the Tonneau Cover —Engine Access
{Warning
When opening or closing the tonneau
cover, people can be injured by the
moving parts of the tonneau cover.
Maintain visual contact with the tonneau
cover when it is in motion and keep
hands and objects away from the moving
parts.
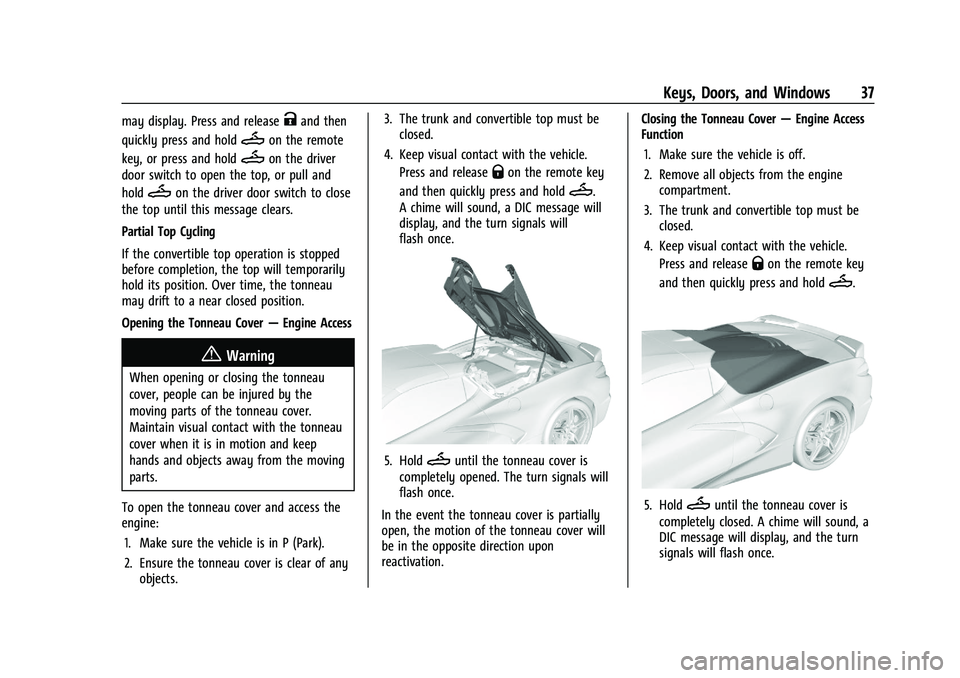
To open the tonneau cover and access the
engine: 1. Make sure the vehicle is in P (Park).
2. Ensure the tonneau cover is clear of any objects. 3. The trunk and convertible top must be
closed.
4. Keep visual contact with the vehicle. Press and release
Qon the remote key
and then quickly press and hold
M.
A chime will sound, a DIC message will
display, and the turn signals will
flash once.
5. HoldMuntil the tonneau cover is
completely opened. The turn signals will
flash once.
In the event the tonneau cover is partially
open, the motion of the tonneau cover will
be in the opposite direction upon
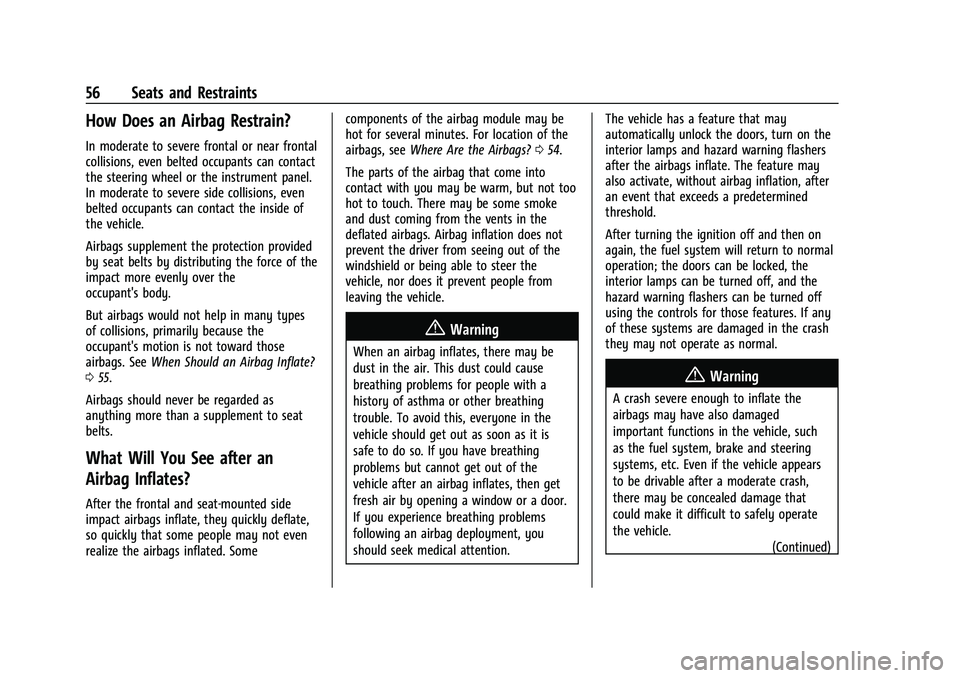
reactivation. Closing the Tonneau Cover
—Engine Access
Function
1. Make sure the vehicle is off.
2. Remove all objects from the engine compartment.
3. The trunk and convertible top must be closed.
4. Keep visual contact with the vehicle. Press and release
Qon the remote key
and then quickly press and hold
M.
5. HoldMuntil the tonneau cover is
completely closed. A chime will sound, a
DIC message will display, and the turn
signals will flash once.
Page 39 of 338

Chevrolet Corvette Owner Manual (GMNA-Localizing-U.S./Canada/Mexico-
15342622) - 2022 - CRC - 5/4/21
38 Keys, Doors, and Windows
Troubleshooting the Tonneau Cover—Engine
Access
Check the following if the tonneau cover is
not operating properly:
.The remote key must be used.
.The ignition must be off.
.The convertible top must be fully closed.
.The remote key may need to be closer to
the vehicle.
.Press and releaseQand then quickly
press and hold
Magain.
Page 55 of 338

Chevrolet Corvette Owner Manual (GMNA-Localizing-U.S./Canada/Mexico-
15342622) - 2022 - CRC - 5/4/21
54 Seats and Restraints
Warning (Continued)
most effective when you are sitting well
back and upright in the seat with both
feet on the floor.
Occupants should not lean on or sleep
against the door or side windows in
seating positions with seat-mounted
airbags.
{Warning
Children who are up against, or very
close to, any airbag when it inflates can
be seriously injured or killed. Always
secure children properly in the vehicle. To
read how, seeOlder Children 062 or
Infants and Young Children 063.
There is an airbag readiness light on the
instrument cluster which shows the airbag
symbol. The system checks the airbag electrical
system for malfunctions. The light tells you
if there is an electrical problem. See
Airbag
Readiness Light 085.
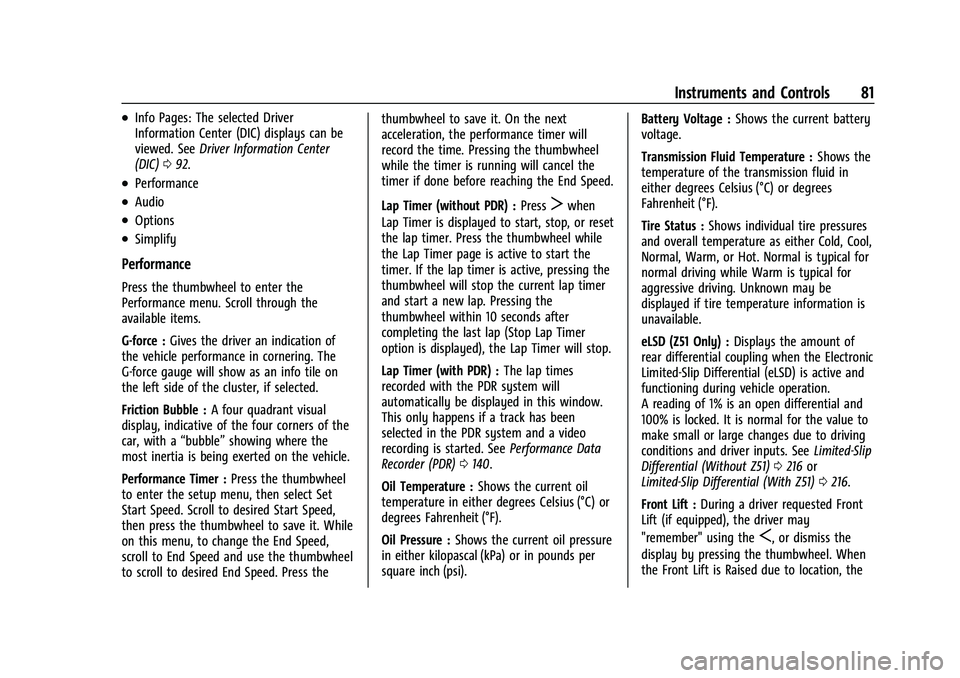
Where Are the Airbags?
The driver frontal airbag is in the center of
the steering wheel.
The front outboard passenger frontal airbag
is in the passenger side instrument panel.
Driver Side Shown, Passenger Side Similar
Page 57 of 338

Chevrolet Corvette Owner Manual (GMNA-Localizing-U.S./Canada/Mexico-
15342622) - 2022 - CRC - 5/4/21
56 Seats and Restraints
How Does an Airbag Restrain?
In moderate to severe frontal or near frontal
collisions, even belted occupants can contact
the steering wheel or the instrument panel.
In moderate to severe side collisions, even
belted occupants can contact the inside of
the vehicle.
Airbags supplement the protection provided
by seat belts by distributing the force of the
impact more evenly over the
occupant's body.
But airbags would not help in many types
of collisions, primarily because the
occupant's motion is not toward those
airbags. SeeWhen Should an Airbag Inflate?
0 55.
Airbags should never be regarded as
anything more than a supplement to seat
belts.
What Will You See after an
Airbag Inflates?
After the frontal and seat-mounted side
impact airbags inflate, they quickly deflate,
so quickly that some people may not even
realize the airbags inflated. Some components of the airbag module may be
hot for several minutes. For location of the
airbags, see
Where Are the Airbags? 054.
The parts of the airbag that come into
contact with you may be warm, but not too
hot to touch. There may be some smoke
and dust coming from the vents in the
deflated airbags. Airbag inflation does not
prevent the driver from seeing out of the
windshield or being able to steer the
vehicle, nor does it prevent people from
leaving the vehicle.
{Warning
When an airbag inflates, there may be
dust in the air. This dust could cause
breathing problems for people with a
history of asthma or other breathing
trouble. To avoid this, everyone in the
vehicle should get out as soon as it is
safe to do so. If you have breathing
problems but cannot get out of the
vehicle after an airbag inflates, then get
fresh air by opening a window or a door.
If you experience breathing problems
following an airbag deployment, you
should seek medical attention. The vehicle has a feature that may
automatically unlock the doors, turn on the
interior lamps and hazard warning flashers
after the airbags inflate. The feature may
also activate, without airbag inflation, after
an event that exceeds a predetermined
threshold.
After turning the ignition off and then on
again, the fuel system will return to normal
operation; the doors can be locked, the
interior lamps can be turned off, and the
hazard warning flashers can be turned off
using the controls for those features. If any
of these systems are damaged in the crash
they may not operate as normal.
{Warning
A crash severe enough to inflate the
airbags may have also damaged
important functions in the vehicle, such
as the fuel system, brake and steering
systems, etc. Even if the vehicle appears
to be drivable after a moderate crash,
there may be concealed damage that
could make it difficult to safely operate
the vehicle.
(Continued)
Page 76 of 338

Chevrolet Corvette Owner Manual (GMNA-Localizing-U.S./Canada/Mexico-
15342622) - 2022 - CRC - 5/4/21
Instruments and Controls 75
INT :Move the lever up to INT for
intermittent wipes, then turn the
Nband
up for more frequent wipes or down for less
frequent wipes.
OFF : Use to turn the wipers off.
1X : For a single wipe, briefly move the
wiper lever down. For several wipes, hold
the wiper lever down.
f: Pull the windshield wiper lever
toward you to spray washer fluid and
activate the wipers. The wipers will continue
until the lever is released or the maximum
wash time is reached. When the lever is
released, additional wipes may occur
depending on how long the windshield
washer had been activated. See Washer
Fluid 0246 for information on filling the
windshield washer fluid reservoir.
Clear snow and ice from the wiper blades
and windshield before using them. If frozen
to the windshield, carefully loosen or thaw
them. Damaged blades should be replaced.
See Wiper Blade Replacement 0250.
Heavy snow or ice can overload the wiper
motor.
{Warning
In freezing weather, do not use the
washer until the windshield is warmed.
Otherwise the washer fluid can form ice
on the windshield, blocking your vision.
{Warning
Before driving the vehicle, always clear
snow and ice from the hood, windshield,
washer nozzles, roof, and rear of the
vehicle, including all lamps and windows.
Reduced visibility from snow and ice
buildup could lead to a crash.
Wiper Parking
If the ignition is turned off while the wipers
are on LO, HI, or INT, they will
immediately stop.
If the windshield wiper lever is then moved
to OFF before the driver door is opened or
within 10 minutes, the wipers will restart
and move to the base of the windshield.
If the ignition is turned off while the wipers
are performing wipes due to windshield
washing, the wipers continue to run until
they reach the base of the windshield.
Compass
The vehicle may have a compass display on
the center stack. The compass receives its
heading and other information from the
Global Positioning System (GPS) antenna,
Electronic Stability Control, and vehicle
speed information.
The compass system is designed to operate
for a certain number of miles or degrees of
turn before needing a signal from the GPS
satellites. When the compass display shows
CAL, drive the vehicle for a short distance in
an open area where it can receive a GPS
signal. The compass system will
automatically determine when a GPS signal
is restored and provide a heading again.
Clock
Set the time and date using the
infotainment system. See "Time / Date"
under Settings 0151.
Page 82 of 338

Chevrolet Corvette Owner Manual (GMNA-Localizing-U.S./Canada/Mexico-
15342622) - 2022 - CRC - 5/4/21
Instruments and Controls 81
.Info Pages: The selected Driver
Information Center (DIC) displays can be
viewed. SeeDriver Information Center
(DIC) 092.
.Performance
.Audio
.Options
.Simplify
Performance
Press the thumbwheel to enter the
Performance menu. Scroll through the
available items.
G-force : Gives the driver an indication of
the vehicle performance in cornering. The
G-force gauge will show as an info tile on
the left side of the cluster, if selected.
Friction Bubble : A four quadrant visual
display, indicative of the four corners of the
car, with a “bubble”showing where the
most inertia is being exerted on the vehicle.
Performance Timer : Press the thumbwheel
to enter the setup menu, then select Set
Start Speed. Scroll to desired Start Speed,
then press the thumbwheel to save it. While
on this menu, to change the End Speed,
scroll to End Speed and use the thumbwheel
to scroll to desired End Speed. Press the thumbwheel to save it. On the next
acceleration, the performance timer will
record the time. Pressing the thumbwheel
while the timer is running will cancel the
timer if done before reaching the End Speed.
Lap Timer (without PDR) :
Press
Twhen
Lap Timer is displayed to start, stop, or reset
the lap timer. Press the thumbwheel while
the Lap Timer page is active to start the
timer. If the lap timer is active, pressing the
thumbwheel will stop the current lap timer
and start a new lap. Pressing the
thumbwheel within 10 seconds after
completing the last lap (Stop Lap Timer
option is displayed), the Lap Timer will stop.
Lap Timer (with PDR) : The lap times
recorded with the PDR system will
automatically be displayed in this window.
This only happens if a track has been
selected in the PDR system and a video
recording is started. See Performance Data
Recorder (PDR) 0140.
Oil Temperature : Shows the current oil
temperature in either degrees Celsius (°C) or
degrees Fahrenheit (°F).
Oil Pressure : Shows the current oil pressure
in either kilopascal (kPa) or in pounds per
square inch (psi). Battery Voltage :
Shows the current battery
voltage.
Transmission Fluid Temperature : Shows the
temperature of the transmission fluid in
either degrees Celsius (°C) or degrees
Fahrenheit (°F).
Tire Status : Shows individual tire pressures
and overall temperature as either Cold, Cool,
Normal, Warm, or Hot. Normal is typical for
normal driving while Warm is typical for
aggressive driving. Unknown may be
displayed if tire temperature information is
unavailable.
eLSD (Z51 Only) : Displays the amount of
rear differential coupling when the Electronic
Limited-Slip Differential (eLSD) is active and
functioning during vehicle operation.
A reading of 1% is an open differential and
100% is locked. It is normal for the value to
make small or large changes due to driving
conditions and driver inputs. See Limited-Slip
Differential (Without Z51) 0216 or
Limited-Slip Differential (With Z51) 0216.
Front Lift : During a driver requested Front
Lift (if equipped), the driver may
"remember" using the
S, or dismiss the
display by pressing the thumbwheel. When
the Front Lift is Raised due to location, the
Page 99 of 338

Chevrolet Corvette Owner Manual (GMNA-Localizing-U.S./Canada/Mexico-
15342622) - 2022 - CRC - 5/4/21
98 Instruments and Controls
.Vehicle Security
.Brakes
.Steering
.Ride Control Systems
.Driver Assistance Systems
.Cruise Control
.Front Lift System
.Lighting and Bulb Replacement
.Wiper/Washer Systems
.Doors and Windows
.Seat Belts
.Airbag Systems
.Engine and Transmission
.Tire Pressure
.Battery
Engine Power Messages
REDUCED ACCELERATION DRIVE
WITH CARE
This message displays when the vehicle's
propulsion power is reduced. A reduction in
propulsion power can affect the vehicle's
ability to accelerate. If this message is on,
but there is no observed reduction in
performance, proceed to your destination.
Under certain conditions the performance
may be reduced the next time the vehicle isdriven. The vehicle may be driven while this
message is on, but maximum acceleration
and speed may be reduced. Anytime this
message stays on, or displays repeatedly,
the vehicle should be taken to your dealer
for service as soon as possible.
Under certain operating conditions,
propulsion will be disabled. Try restarting
after the ignition has been off for
two minutes.
Vehicle Speed Messages
SPEED LIMITED TO XXX KM/H (MPH)
This message shows that the vehicle speed
has been limited to the speed displayed. The
limited speed is a protection for various
propulsion and vehicle systems, such as
lubrication, thermal, brakes, suspension,
Teen Driver if equipped, or tires.
Vehicle Personalization
The following are all possible vehicle
personalization features. Depending on the
vehicle, some may not be available.
For System, Apps, and Personal features and
functions, see
Settings0151. To access the vehicle personalization menu:
1. Touch the Settings icon on the Home Page of the infotainment display.
2. Touch Vehicle to display a list of available options.
3. Touch to select the desired feature setting.
4. Touch
9orRto turn a feature off or on.
5. Touch
zto go to the top level of the
Settings menu.
The menu may contain the following:
Buckle to Drive
This feature can prevent shifting out of Park
when the driver, and if applicable the front
passenger, seat belt is not buckled. See
Buckle To Drive 046.
Touch Off or On.
Driver Mode Customization
Touch and the following may display:
.Z-Mode
.My Mode
.Visualization
Page 100 of 338

Chevrolet Corvette Owner Manual (GMNA-Localizing-U.S./Canada/Mexico-
15342622) - 2022 - CRC - 5/4/21
Instruments and Controls 99
Z-Mode
Touch and the following may display:
.Steering
.Suspension
.Engine/Gear Change
.Brake Feel
.Engine Sound
.PTM
For information on the range of settings, see
“Driver Mode Customization” inDriver Mode
Control 0206.
My Mode
Touch and the following may display:
.Steering
.Suspension
.Brake Feel
.Engine Sound
For information on the range of settings, see
“Driver Mode Customization” inDriver Mode
Control 0206.
Visualization
This setting shows handling and
performance settings on the infotainment
display when changing drive modes.
Touch Off or On.
Climate and Air Quality
Touch and the following may display:
.Auto Fan Speed
.Auto Cooled Seats
.Auto Heated Seats
.Auto Defog
.Auto Rear Defog
Auto Fan Speed
This setting specifies the amount of airflow
when the climate control fan setting is
Auto Fan.
Touch Low, Medium, or High.
Auto Cooled Seats
When enabled, this feature will
automatically activate the ventilated seats
at the level required by the interior
temperature. See Heated and Ventilated
Front Seats 044.
Touch Off or On.
Auto Heated Seats
This setting automatically turns on and
regulates the heated seats when the cabin
temperature is cool. The auto heated seats can be turned off by using the heated seat
buttons on the center stack. See
Heated and
Ventilated Front Seats 044.
If equipped with Auto Heated Steering
Wheel, this feature will turn on when the
Auto Heated Seats turn on.
Touch Off or On.
Auto Defog
This setting, when set to On, will
automatically react to temperature and
humidity conditions that may cause fogging.
Touch Off or On.
Auto Rear Defog
This setting automatically turns the rear
window defogger on when it is cold outside.
Touch Off or On.
Collision / Detection Systems
Touch and the following may display:
.Park Assist
.Side Blind Zone Alert
.Rear Cross Traffic Alert
Park Assist
This allows the feature to be turned on or
off. See Park Assist 0222.