Page 217 of 464

Cadillac CT4 Owner Manual (GMNA-Localizing-U.S./Canada-15283641) -
2022 - CRC - 10/12/21
216 DRIVING AND OPERATING
Brake Cooling (V-Series Blackwing)
Prior to any track event, high speed
driving event, or competitive driving,
complete the following:1. Ensure all the brake cooling parts are correctly secured and installed.
2. Inspect and replace any deflectors that have damage.
3. Inspect for blockage in the front brake cooling duct prior to every
event.
If improved brake cooling is desired,
install the ball joint protector front
shields, remove both upper and lower
rear rotor shields, and install the rear
lower control arm cooling deflectors,
per the instructions included with the
brake cooling kit. These parts are for
track use only. After track events
reinstall original front and rear rotor
shields, and remove rear lower control
arm cooling deflectors.
Right Side Front Shown, Left Side Front Similar
1. Front Lower Control Arm Deflector
2. Front Brake Cooling Duct Brake Pad Wear Sensors
If equipped, the brake pad wear
sensors need to be removed from the
brake calipers prior to any track or
racing event. The original sensors can
be reinstalled if significant brake pad
wear is not observed. Refer to
Brake
Pad Life System (If Equipped) 0346.
If the sensors are not reinstalled after
the track event, install brake pad wear
sensor plugs. See your dealer.
The V-Series Blackwing is equipped
with brake pad wear sensors which are
track capable and should not be
disabled for track and racing.
A message will display in the Driver
Information Center (DIC) when the
brake pads show excessive wear.
Brake Fluid
Replace existing brake fluid with a
qualified DOT 4 high performance
brake fluid from a sealed container.
Brake fluid with a dry boiling point
>310 °C (590 °F) is qualified. If high
performance brake fluid is used,
replace it with GM approved brake
fluid before driving on public roads.
If high performance brake fluid is in
the vehicle and the age of the brake
Page 218 of 464

Cadillac CT4 Owner Manual (GMNA-Localizing-U.S./Canada-15283641) -
2022 - CRC - 10/12/21
DRIVING AND OPERATING 217
fluid is over a month old or unknown,
replace the brake fluid before track
events and competitive driving. Do
not use silicone or DOT 5 brake fluids.
Disconnect the battery before bleeding
the system, replacing the pads, or any
other work. The battery must be
disconnected to prevent the brake
master cylinder from pressurizing the
hydraulic system during its automated
self diagnostic tests that may occur
when a door is opened or the remote
key is present.
Check the fluid level before each
competitive driving event.
Brake System Flushing & Bleeding
The J55 brake system requires specific
processes for bleeding and fluid
flushing. These can be found in the
service manual.
Properly bleeding the brake system is
required for proper operation of the
hydraulic brake system.
Brake Leak Detection
The hydraulic braking system has
advanced diagnostic capability to help
detect hydraulic leaks, trapped air,and other performance issues. These
diagnostics are active when the
hydraulic system is powered. In order
to avoid inadvertently setting a leak
Diagnostic Trouble Code (DTC),
disconnect the battery before
servicing the brake system.
If the vehicle sets a DTC related to a
brake system leak, the Brake System
Warning Light will come on and
vehicle speed may be limited to
100 kph (62 mph). Any time a leak
DTC is set, the vehicle should be
inspected carefully for evidence of a
leak and should be repaired
immediately. See your dealer.
Brake Fade Warning Assist
The Brake Fade Warning Assist
system monitors the performance of
the brake system. If the system
detects brake fade, or if the brake
fluid is near the boiling point, the
driver will be alerted.
The Brake Fade Warning Assist
system is designed for use with the
factory-installed brake pads or GM
approved replacement pads. If the
brake pads on the vehicle need to be
replaced, use GM approved brakepads. If this is not done, the brake
fade warning system may not function
properly.
Stage 1 :
The DIC displays a “Reduce
Braking to Avoid Overheating”
message, a chime sounds and brake
pedal effort and travel is increased.
When the message displays, the driver
should back up braking points and
reduce brake usage in order to reduce
brake temperature. This will allow for
continued lapping with no speed
limitations.
Stage 2 : The DIC displays a Brakes
Overheated Service Now message, a
chime sounds, and brake pedal effort
and travel is further increased. This
code indicates that the brake fluid
temperature is excessive and is about
to boil. The system limits vehicle
speed to 100 km/h (62 mph). The
driver should immediately start a cool
down lap if on the track. If this
message displays, the vehicle needs to
be serviced. The brake system needs
to cool down, and the brake fluid
must be immediately flushed with
DOT 4 for street use, or to a qualified
Page 219 of 464

Cadillac CT4 Owner Manual (GMNA-Localizing-U.S./Canada-15283641) -
2022 - CRC - 10/12/21
218 DRIVING AND OPERATING
DOT 4 race fluid for track use. Boiled
brake fluid is compromised and must
be replaced.
Brake Burnishing
For vehicles equipped with front
Brembo brake systems:
Performance/racing brake pads are
required prior to racing or closed track
driving. Vehicles with option code JE2
have performance brake pads. This
procedure should not be performed on
other models as damage may result.
New brake pads must be burnished
before racing or other competitive
driving.
Caution
Performing the brake burnish
procedure on a base brake system
can result in brake damage.
Caution
The new vehicle break-in period
should be completed before
performing the brake burnish(Continued)
Caution (Continued)
procedure, otherwise damage may
occur to the powertrain/engine. See
New Vehicle Break-In0231.
Caution
Brake fade will occur during this
track burnish procedure and can
cause brake pedal travel and force
to increase. This could extend
stopping distance until the brakes
are fully burnished.
When this procedure is performed as
instructed, it will not damage the
brakes. The brake pads will smoke and
produce an odor. The braking force
and pedal travel may increase. After
the procedure, the brake pads may
appear white at the rotor contact.
Perform this procedure only on dry
pavement, in a safe manner, and in
compliance with all local and state
ordinances/laws regarding motor
vehicle operation. Street High Performance Brake
Burnishing Procedure
This section is for the V-Series
Blackwing with J57 carbon ceramic
brake rotors only.
This procedure should only be run on
a track or other non-public area, and
only on dry pavement.
Caution
Brake fade will occur during this
track burnish procedure and can
cause brake pedal travel and force
to increase. This could extend
stopping distance until the brakes
are fully burnished.
1. From a stop, accelerate as rapidly as possible without activating
traction control to a speed of
100 km/h (60 mph).
2. Using the G-Force Gauge in the HUD display, use enough pedal
force to completely stop the vehicle
in four to five seconds. (~0.7g Decel
level to stop the vehicle in a
straight line). If ABS activates,
braking is too hard.
Page 220 of 464

Cadillac CT4 Owner Manual (GMNA-Localizing-U.S./Canada-15283641) -
2022 - CRC - 10/12/21
DRIVING AND OPERATING 219
3. Repeat the first two steps 20consecutive times, this should take
about five minutes.
4. After completing the 20 stops, cool the brakes by driving for 8 km
(5 mi) at 100 km/h (60 mph).
Alternative Closed Course Brake
Burnishing Procedure
This brake burnish procedure should
only be run on vehicles with a factory
equipped brake system.
This procedure should only be run on
a track and only on dry pavement.
Brake pedal fade will occur during this
track burnish procedure and can
cause brake pedal travel and force to
increase. This could extend stopping
distance until the brakes are fully
burnished. 1. Start track lapping at lower speeds and lower braking efforts for
three minutes of driving. Allow for
increased braking distances due to
reduced brake output.
2. After Step 1, increase speed and braking effort for the next six
minutes of lapping, gradually
ending up at 90% effort. Continue to allow for increased braking
distance due to reduced brake
output.
3. Cool the brakes by lapping with minimal light braking for six
minutes.
As with all high performance brake
systems, some amount of brake squeal
is normal.
Suspension
Track Prep —Camber Set
To achieve the maximum camber
setting for track use, follow this
procedure prior to the final track
alignment.
1. Remove the Upper Radiator Baffle and both front shock tower braces.
2. Remove the strut rebound stop.
Page 221 of 464
Cadillac CT4 Owner Manual (GMNA-Localizing-U.S./Canada-15283641) -
2022 - CRC - 10/12/21
220 DRIVING AND OPERATING
3. Using a punch, tap out the struttop mount alignment pins. Use
compressed air or other method to
ensure no debris remains between
the top mount and upper
spring seat.
4. Loosen the final strut top mountfastener. Do not completely remove
this fastener.
5. Reposition the suspension/strutassembly so that the strut top
mount is located as close to the
center of the vehicle as possible
(inboard).6. With the suspension located as farinboard as possible, retighten the
loose fastener and torque it to
22 Y (194 lb in).
Page 222 of 464

Cadillac CT4 Owner Manual (GMNA-Localizing-U.S./Canada-15283641) -
2022 - CRC - 10/12/21
DRIVING AND OPERATING 221
7. With the car on the ground,reinstall the strut rebound stop and
torque it to 25 Y(212 lb in).
8. With the car on the ground, reinstall the Upper Radiator Baffle
and both front shock tower braces.
Torque the fasteners as follows:
A. Front tower brace mounting
bolts to 22 Y(194 lb in).
B. Front strut top mount nuts to 22Y (194 lb in).
9. Complete setting the track alignment per the following track
alignment specifications.
Wheel Alignment
Wheel alignment suggested specs for
track use:
Road Course (V-Series)
.Front: -2.0 deg camber, 0.2 deg
total toe
.Rear: -1.7 deg camber, 0.2 deg
total toe
Road Course (V-Series Blackwing)
.Front: -2.4 deg camber, 0.1 deg
total toe
.Rear: -1.8 deg camber, 0.1 deg
total toe
Tire Inflation Pressure
Guidelines
Tire inflation pressures affect vehicle
handling and tire life, and should be
adjusted for various types of tracks/
courses.
Inspect the tires prior to every track/
course session. Track/course driving
will reduce the tire tread life.
To maximize tire life, drive 800 km
(500 mi) prior to racetrack driving or
complete the minimum track running
that will increase the tire pressures by
35 kPa (5 psi). After this, immediately
let the tires cool to cold pressures.
Tire Inflation Pressure High Speed
See Tire Pressure for High-Speed
Operation 0371.
Tire Inflation Pressure for Track
Driving
For driving on a race course, if your
vehicle is equipped with 255/35ZR18
(94Y) and 275/35ZR18 (99Y) tires, set
cold (stationary) tire pressures to
30 psi. During track sessions, set the pressures at 35 to 38 psi for hot tire
pressures. If pressures exceed 38 psi,
bleed pressures down to 35 to 38 psi.
Return the tires to the recommended
cold tire inflation pressure when track
driving has ended.
Driving and Operating
{Warning
Operating the vehicle at high speeds
can be dangerous. Improper tire
inflation pressure can put
additional strain on the tires and
can cause a sudden failure. Make
sure the tires are in excellent
condition, and use the correct cold
tire inflation pressure for the
vehicle load and track/course.
{Warning
Tracks/courses put high loads on
tires operating at high speed, which
can lead to tire failure if not
inflated properly. Always limit
vehicle cargo to the driver plus one
passenger with no additional cargo.
Page 223 of 464

Cadillac CT4 Owner Manual (GMNA-Localizing-U.S./Canada-15283641) -
2022 - CRC - 10/12/21
222 DRIVING AND OPERATING
{Warning
Track/course loads wear tires both
on the tread and internal to the
tire. When driven in track/course
conditions, even if tread is not worn
down to the treadwear indicator,
tires must be replaced after the
equivalent of two tanks of fuel or
approximately 160 km (100 mi).
Custom Launch Control
(If Equipped)
Custom Launch Control allows the
following parameters for Launch
Control to be modified:
.Launch RPM
.Slip Target (5%–15%)
.Surface Type
To adjust the Launch RPM, all of
these conditions must be met:
.The vehicle must be in Track Mode.
See “Track Mode ”under Driver Mode
Control 0258.
.Performance Traction Management
(PTM) Mode must be enabled. See
Driver Mode Control 0258.
.The steering wheel must be straight.
.The driver door must be closed.
.The transmission must be in D
(Drive) or forward gear.
.The parking brake must not be
engaged.
For more information on Competitive
Driving Mode, see Competitive Driving
Mode 0264.
1. Using the Driver Information
Center (DIC) buttons on the right
side of the steering wheel, navigate
to the Launch Control menu. See
Driver Information Center (DIC)
(Base Level) 0109 or
Driver Information Center (DIC)
(Uplevel) 0112.
2. Press SEL to select Custom.
3. Scroll down to Launch RPM.
4. Adjust the desired RPM: 1200–2400 for automatic
transmissions and 2400–4000 RPM
for manual transmissions.
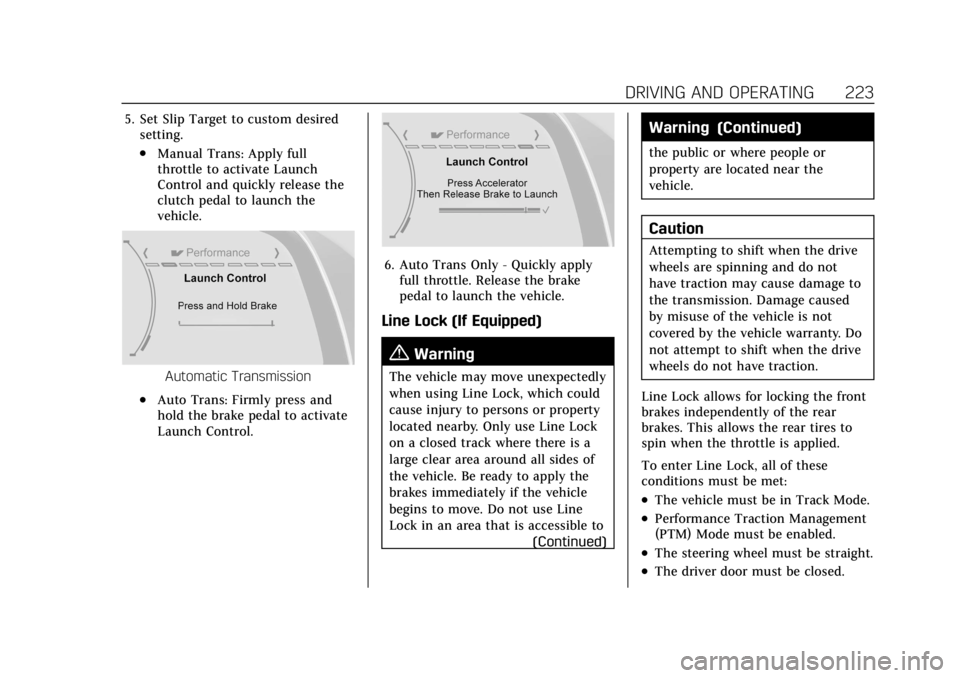
Manual Transmission
Page 224 of 464

Cadillac CT4 Owner Manual (GMNA-Localizing-U.S./Canada-15283641) -
2022 - CRC - 10/12/21
DRIVING AND OPERATING 223
5. Set Slip Target to custom desiredsetting.
.Manual Trans: Apply full
throttle to activate Launch
Control and quickly release the
clutch pedal to launch the
vehicle.
Automatic Transmission
.Auto Trans: Firmly press and
hold the brake pedal to activate
Launch Control.
6. Auto Trans Only - Quickly applyfull throttle. Release the brake
pedal to launch the vehicle.
Line Lock (If Equipped)
{Warning
The vehicle may move unexpectedly
when using Line Lock, which could
cause injury to persons or property
located nearby. Only use Line Lock
on a closed track where there is a
large clear area around all sides of
the vehicle. Be ready to apply the
brakes immediately if the vehicle
begins to move. Do not use Line
Lock in an area that is accessible to
(Continued)
Warning (Continued)
the public or where people or
property are located near the
vehicle.
Caution
Attempting to shift when the drive
wheels are spinning and do not
have traction may cause damage to
the transmission. Damage caused
by misuse of the vehicle is not
covered by the vehicle warranty. Do
not attempt to shift when the drive
wheels do not have traction.
Line Lock allows for locking the front
brakes independently of the rear
brakes. This allows the rear tires to
spin when the throttle is applied.
To enter Line Lock, all of these
conditions must be met:
.The vehicle must be in Track Mode.
.Performance Traction Management
(PTM) Mode must be enabled.
.The steering wheel must be straight.
.The driver door must be closed.