2021 VOLVO V90 CROSS COUNTRY remote start
[x] Cancel search: remote startPage 401 of 683
STARTING AND DRIVING
}}
399
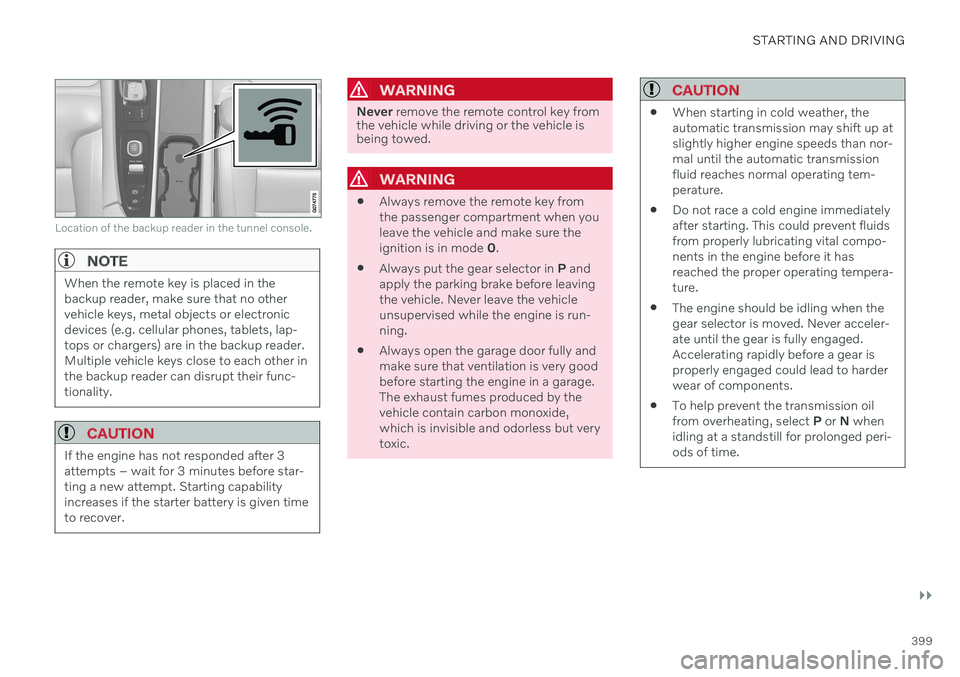
Location of the backup reader in the tunnel console.
NOTE
When the remote key is placed in the backup reader, make sure that no othervehicle keys, metal objects or electronicdevices (e.g. cellular phones, tablets, lap-tops or chargers) are in the backup reader.Multiple vehicle keys close to each other inthe backup reader can disrupt their func-tionality.
CAUTION
If the engine has not responded after 3 attempts – wait for 3 minutes before star-ting a new attempt. Starting capabilityincreases if the starter battery is given timeto recover.
WARNING
Never remove the remote control key from
the vehicle while driving or the vehicle is being towed.
WARNING
Always remove the remote key from the passenger compartment when youleave the vehicle and make sure theignition is in mode
0.
Always put the gear selector in
P and
apply the parking brake before leavingthe vehicle. Never leave the vehicleunsupervised while the engine is run-ning.
Always open the garage door fully andmake sure that ventilation is very goodbefore starting the engine in a garage.The exhaust fumes produced by thevehicle contain carbon monoxide,which is invisible and odorless but verytoxic.
CAUTION
When starting in cold weather, the automatic transmission may shift up atslightly higher engine speeds than nor-mal until the automatic transmissionfluid reaches normal operating tem-perature.
Do not race a cold engine immediatelyafter starting. This could prevent fluidsfrom properly lubricating vital compo-nents in the engine before it hasreached the proper operating tempera-ture.
The engine should be idling when thegear selector is moved. Never acceler-ate until the gear is fully engaged.Accelerating rapidly before a gear isproperly engaged could lead to harderwear of components.
To help prevent the transmission oilfrom overheating, select
P or N when
idling at a standstill for prolonged peri-ods of time.
Page 404 of 683
||
STARTING AND DRIVING
402
Related information
Starting the vehicle (p. 398)
Adjusting the steering wheel (p. 203)
Jump starting using another battery (p. 444)
Selecting ignition mode (p. 402)
Selecting ignition mode
The vehicle's ignition can be put in various modes (levels) to make different functionsavailable.
Selecting an ignition mode
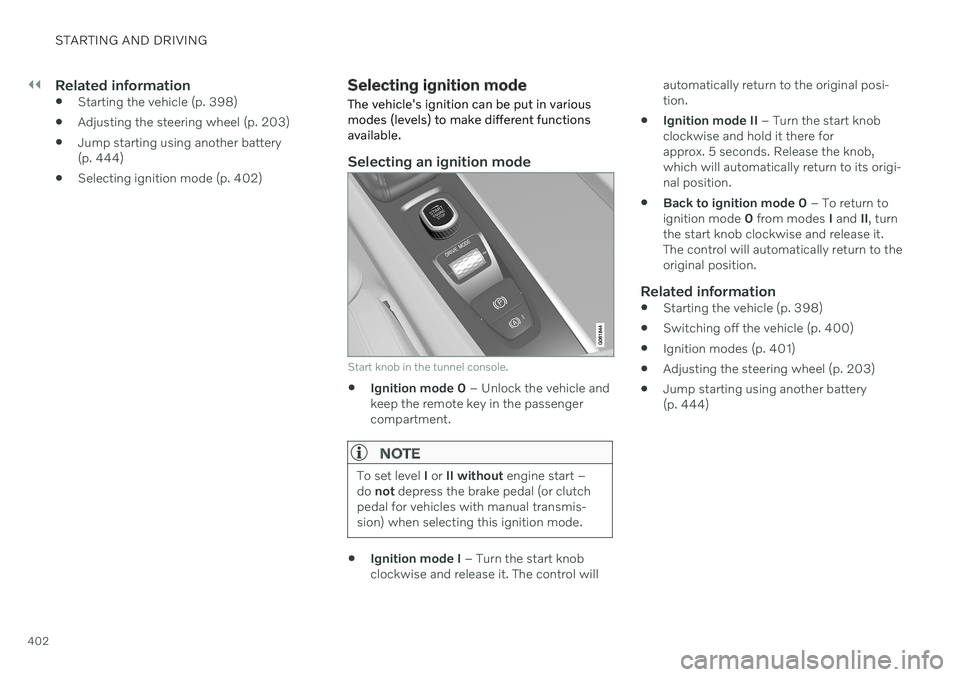
Start knob in the tunnel console.
Ignition mode 0
– Unlock the vehicle and
keep the remote key in the passenger compartment.
NOTE
To set level I or II without engine start –
do not depress the brake pedal (or clutch
pedal for vehicles with manual transmis- sion) when selecting this ignition mode.
Ignition mode I
– Turn the start knob
clockwise and release it. The control will automatically return to the original posi- tion.
Ignition mode II
– Turn the start knob
clockwise and hold it there forapprox. 5 seconds. Release the knob,which will automatically return to its origi-nal position.
Back to ignition mode 0
– To return to
ignition mode 0 from modes I and II, turn
the start knob clockwise and release it.The control will automatically return to theoriginal position.
Related information
Starting the vehicle (p. 398)
Switching off the vehicle (p. 400)
Ignition modes (p. 401)
Adjusting the steering wheel (p. 203)
Jump starting using another battery(p. 444)
Page 422 of 683
||
STARTING AND DRIVING
* Option/accessory.
420
Comfort
Comfort is the vehicle's default mode. This
setting offers driving comfort, light steering and soft suspension. In
Comfort mode, no tachometer will be dis-
played in the instrument panel 10
.
Eco
Adapt the vehicle for more fuel-efficient and eco-friendly driving with Eco mode.
In this mode, the Start/Stop function is acti- vated and certain climate settings arereduced. When driving in
Eco mode, an ECO gauge
indicating how economical the driving is will be displayed in the instrument panel.
Off Road
Helps maximize the vehicle's ability to tra- verse difficult terrain or poor roads.
Steering is light and all-wheel drive and thelow-speed function with assistance for driving downhill (HDC 11
) are activated. The Start/Stop
function is deactivated. This mode can only be activated at low speeds. The permitted speed range will beshown in the speedometer. If this speed is exceeded,
Off Road mode will be deactivated
and another drive mode activated. In
Off Road mode, a compass will be dis-
played between the speedometer and the tachometer in the instrument panel.
NOTE
This drive mode is not designed to be used for normal street driving.
Dynamic
Dynamic mode is designed to help pro-
vide sportier driving characteristics and a faster acceleration response.
Gear shifting will be faster and more distinctand the transmission will prioritize gears witha higher traction force. Steering response is faster and suspension is stiffer 12
to help reduce body roll when corner-
ing. The Start/Stop function is deactivated.
Dynamic mode is also available in a Polestar
Engineered* version.
Individual
Customizes drive mode to personal prefer- ences. Select one of the drive modes as a basis andadjust the settings to achieve your preferreddriving characteristics. These settings will bestored in the active driver profile and will beavailable every time the vehicle is unlockedwith that remote key. Individual drive mode is only available if it has been activated in the center display.
9
All Wheel Drive
10 Only applies to vehicles with 8-inch instrument panels.
11 Hill Descent Control
12 Vehicles with Four-C.
Page 440 of 683
STARTING AND DRIVING
* Option/accessory.
438
Opening/closing the fuel filler door
The vehicle must be unlocked before the fuel filler door can be opened 20
.
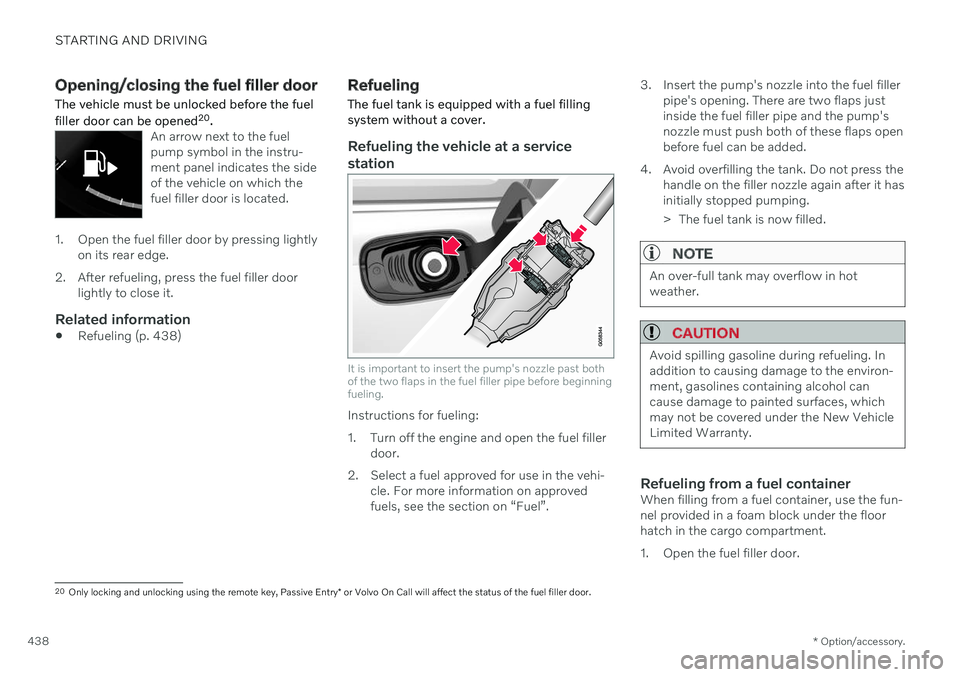
An arrow next to the fuel pump symbol in the instru-ment panel indicates the sideof the vehicle on which thefuel filler door is located.
1. Open the fuel filler door by pressing lightly
on its rear edge.
2. After refueling, press the fuel filler door lightly to close it.
Related information
Refueling (p. 438)
Refueling
The fuel tank is equipped with a fuel filling system without a cover.
Refueling the vehicle at a service station
It is important to insert the pump's nozzle past both of the two flaps in the fuel filler pipe before beginningfueling.
Instructions for fueling:
1. Turn off the engine and open the fuel filler door.
2. Select a fuel approved for use in the vehi- cle. For more information on approved fuels, see the section on “Fuel”. 3. Insert the pump's nozzle into the fuel filler
pipe's opening. There are two flaps justinside the fuel filler pipe and the pump'snozzle must push both of these flaps openbefore fuel can be added.
4. Avoid overfilling the tank. Do not press the handle on the filler nozzle again after it hasinitially stopped pumping.
> The fuel tank is now filled.
NOTE
An over-full tank may overflow in hot weather.
CAUTION
Avoid spilling gasoline during refueling. In addition to causing damage to the environ-ment, gasolines containing alcohol cancause damage to painted surfaces, whichmay not be covered under the New VehicleLimited Warranty.
Refueling from a fuel containerWhen filling from a fuel container, use the fun- nel provided in a foam block under the floorhatch in the cargo compartment.
1. Open the fuel filler door.
20Only locking and unlocking using the remote key, Passive Entry * or Volvo On Call will affect the status of the fuel filler door.
Page 453 of 683
STARTING AND DRIVING
}}
451
WARNING
Ignition mode
II must be active – all
airbags are deactivated in ignition mode I.
Always have the remote key in thevehicle when it is towed.
WARNING
The brake and steering servos do not work when the engine is off – it takesabout 5 times more pressure on the brakepedal and steering requires much moreeffort than normal.
1. Turn on the hazard warning flashers.
2. Attach the towline to the towing eyelet.
3. Put the vehicle in ignition mode II – with-
out pressing the brake pedal, turn the start knob clockwise and hold it there for about4 seconds. Release the knob, which willautomatically return to its original position.
4. Move the gear selector to neutral (N) and release the parking brake. If the battery charge level is too low, it may not be possible to release the parkingbrake. Connect an auxiliary battery to thevehicle if the battery is discharged.
> The towing vehicle can now start driv-ing. 5. Keep the towline taut when the towing
vehicle slows down by applying light pres- sure to the brake pedal. This will helpavoid jarring movements.
6. Be prepared to apply the brakes to stop the vehicle.
Jump startingDo not tow the vehicle to start the engine. Usean auxiliary battery if the start battery's chargelevel is so low that the engine cannot bestarted.
CAUTION
Attempting to tow with the engine running could result in damage to the three-waycatalytic converter.
Related information
Attaching and removing the towing eyelet (p. 451)
Hazard warning flashers (p. 165)
Recovery (p. 453)
Jump starting using another battery(p. 444)
Selecting ignition mode (p. 402)
Transmission (p. 412)
Attaching and removing the towing eyelet
Use the towing eyelet when towing. Screw the towing eyelet securely into place in thethreaded outlet behind the cover on the right-hand side of the front and rear bumpers.
NOTE
If the vehicle is equipped with a towbar, there is no rear attachment for the towingeye.
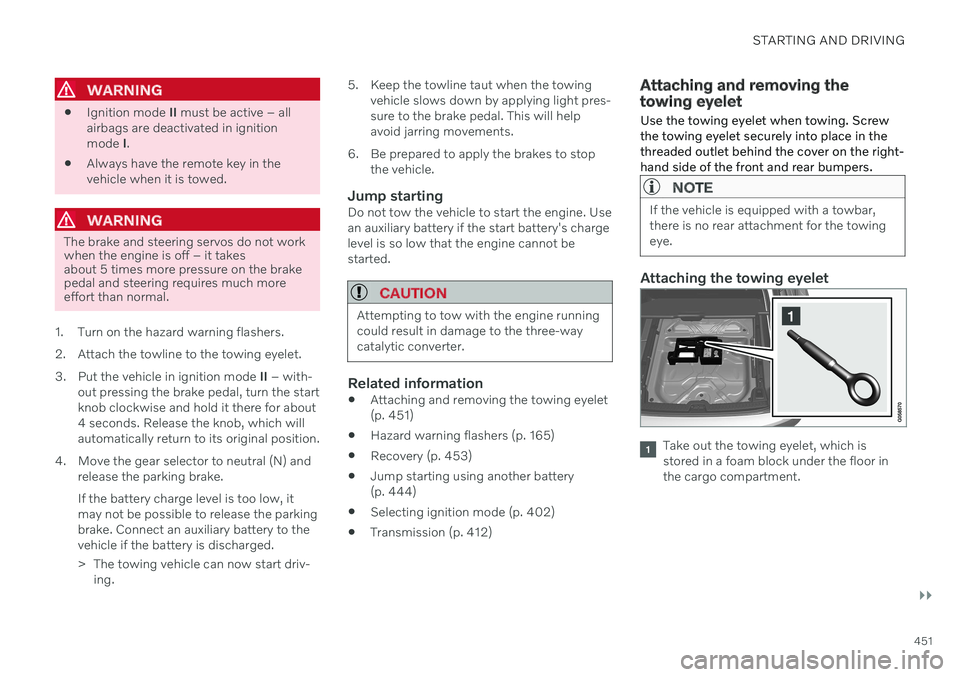
Attaching the towing eyelet
Take out the towing eyelet, which is stored in a foam block under the floor inthe cargo compartment.
Page 456 of 683
||
STARTING AND DRIVING
* Option/accessory.
454
WARNING
No person or object should be behind the tow truck when the vehicle is lifted ontothe bed of the truck.
CAUTION
The towing eyelet is only intended for tow- ing on roads, and must not be used to pull
vehicles from ditches or any similar pur-pose involving severe strain. Call a towtruck for professional assistance.
CAUTION
Note that the vehicle must always be towed with the wheels rolling forward.
Related information
Attaching and removing the towing eyelet (p. 451)
HomeLink ®
*25
HomeLink ®
26
is a programmable remote con-
trol, integrated in the vehicle electrical sys- tem, that can control up to three differentdevices (e.g. garage door opener, alarm sys-tem, outdoor and indoor lighting) and therebyreplace the remote controls for these.
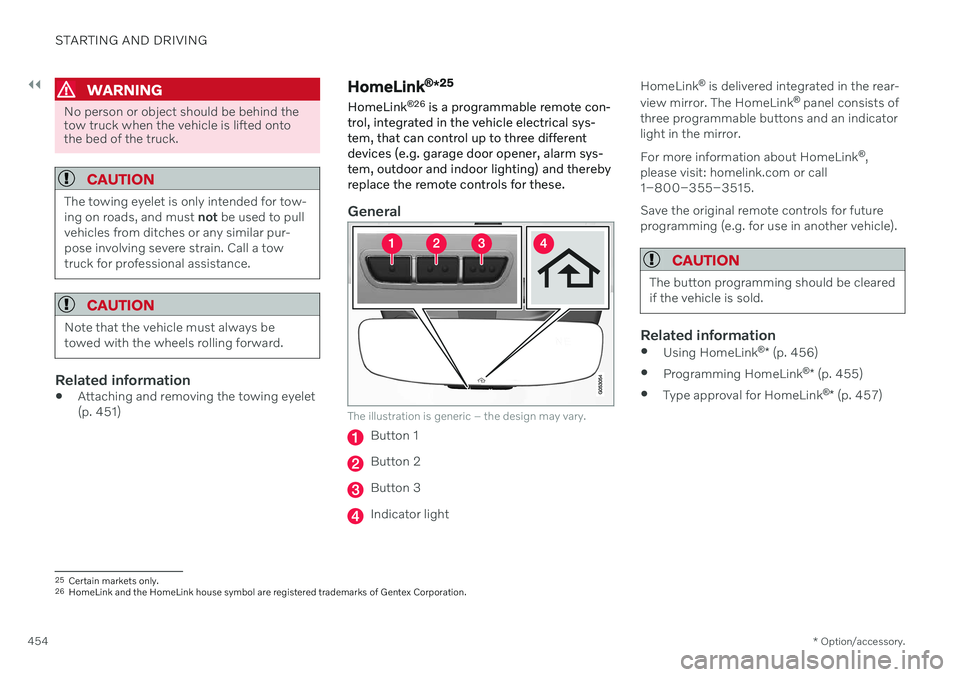
General
The illustration is generic – the design may vary.
Button 1
Button 2
Button 3
Indicator light HomeLink
®
is delivered integrated in the rear-
view mirror. The HomeLink ®
panel consists of
three programmable buttons and an indicator light in the mirror. For more information about HomeLink ®
,
please visit: homelink.com or call 1–800–355–3515. Save the original remote controls for future programming (e.g. for use in another vehicle).
CAUTION
The button programming should be cleared if the vehicle is sold.
Related information
Using HomeLink ®
* (p. 456)
Programming HomeLink ®
* (p. 455)
Type approval for HomeLink ®
* (p. 457)
25
Certain markets only.
26 HomeLink and the HomeLink house symbol are registered trademarks of Gentex Corporation.
Page 457 of 683
STARTING AND DRIVING
}}
* Option/accessory.455
Programming HomeLink ®
*27
Follow these instructions to program HomeLink ®
, reset all programming, or pro-
gram individual buttons.
NOTE
In some vehicles, the ignition must be on or in the "accessory position" before HomeLink ®
can be programmed or used. It
can be a good idea to put new batteries in the remote control being replaced by HomeLink ®
for faster programming and
better radio signal transmission. TheHomeLink ®
buttons should be reset before
programming.
WARNING
While HomeLink ®
is being programmed,
the garage door or gate being programmed may be activated. Make sure that no one isnear the door or gate during programming.When programming a garage door opener,it is advised to park outside of the garage. 1. Point the remote control at the
HomeLink ®
button to be programmed and
hold it about 2-8 cm (1-3 inches) from the button. Do not obstruct the HomeLink ®
indicator light. Note: Some remote controls are more
effective at programming HomeLink ®
from
a distance of about 15-20 cm (6-12 inches). Keep this in mind if you experi-ence any programming difficulties.
2. Press and hold both the remote control button and the HomeLink ®
button to be
programmed. 3. Do not release the buttons until the indica-
tor light has stopped flashing slowly(about once a second) and either flashesquickly (about 10 times a second) orglows steadily. >If the indicator light glows steadily: Indication that programming is com-plete. Press the programmed buttontwice to activate. If the indicator light flashes quickly: The device being programmed with HomeLink ®
may have a security func-
tion that requires an extra step. Try pressing the programmed button twiceto see whether the programmingworks. Otherwise, continue with thefollowing steps.
27 Certain markets only.
Page 458 of 683
||
STARTING AND DRIVING
* Option/accessory.
456
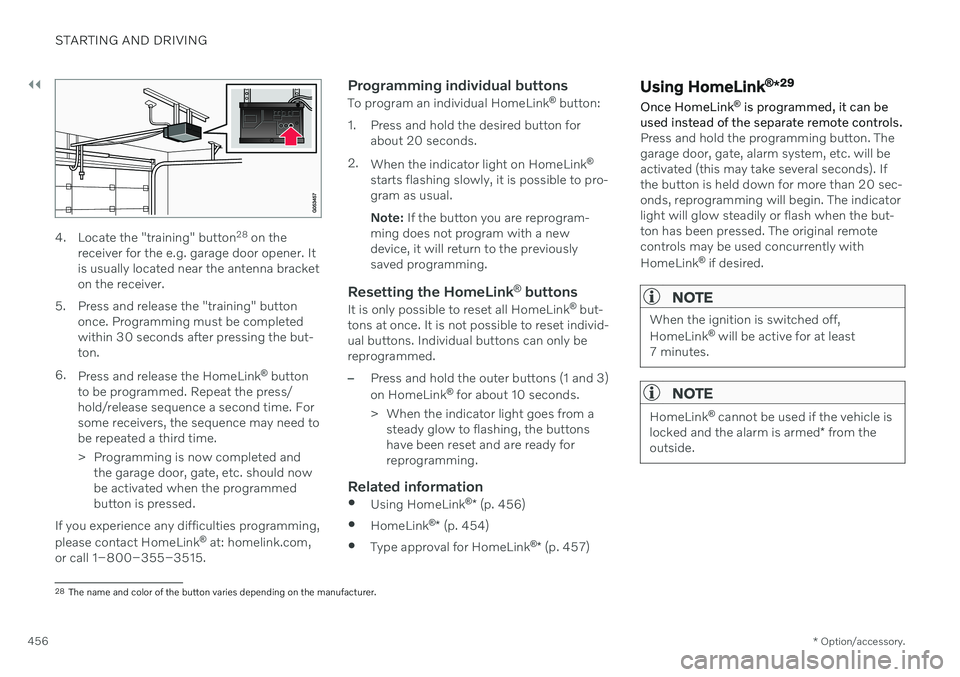
4. Locate the "training" button 28
on the
receiver for the e.g. garage door opener. It is usually located near the antenna bracketon the receiver.
5. Press and release the "training" button once. Programming must be completedwithin 30 seconds after pressing the but-ton.
6. Press and release the HomeLink ®
button
to be programmed. Repeat the press/hold/release sequence a second time. Forsome receivers, the sequence may need tobe repeated a third time.
> Programming is now completed and the garage door, gate, etc. should now be activated when the programmedbutton is pressed.
If you experience any difficulties programming, please contact HomeLink ®
at: homelink.com,
or call 1–800–355–3515.
Programming individual buttons
To program an individual HomeLink ®
button:
1. Press and hold the desired button for about 20 seconds.
2. When the indicator light on HomeLink ®
starts flashing slowly, it is possible to pro- gram as usual. Note: If the button you are reprogram-
ming does not program with a new device, it will return to the previouslysaved programming.
Resetting the HomeLink ®
buttons
It is only possible to reset all HomeLink ®
but-
tons at once. It is not possible to reset individ-ual buttons. Individual buttons can only bereprogrammed.
–Press and hold the outer buttons (1 and 3) on HomeLink ®
for about 10 seconds.
> When the indicator light goes from a steady glow to flashing, the buttons have been reset and are ready forreprogramming.
Related information
Using HomeLink ®
* (p. 456)
HomeLink ®
* (p. 454)
Type approval for HomeLink ®
* (p. 457)
Using HomeLink ®
*29
Once HomeLink ®
is programmed, it can be
used instead of the separate remote controls.
Press and hold the programming button. The garage door, gate, alarm system, etc. will beactivated (this may take several seconds). Ifthe button is held down for more than 20 sec-onds, reprogramming will begin. The indicatorlight will glow steadily or flash when the but-ton has been pressed. The original remotecontrols may be used concurrently with HomeLink ®
if desired.
NOTE
When the ignition is switched off, HomeLink ®
will be active for at least
7 minutes.
NOTE
HomeLink ®
cannot be used if the vehicle is
locked and the alarm is armed * from the
outside.
28 The name and color of the button varies depending on the manufacturer.