2021 VOLVO V90 CROSS COUNTRY engine
[x] Cancel search: enginePage 460 of 683
STARTING AND DRIVING
* Option/accessory.
458
Compass *
An integrated compass 32
in the upper right
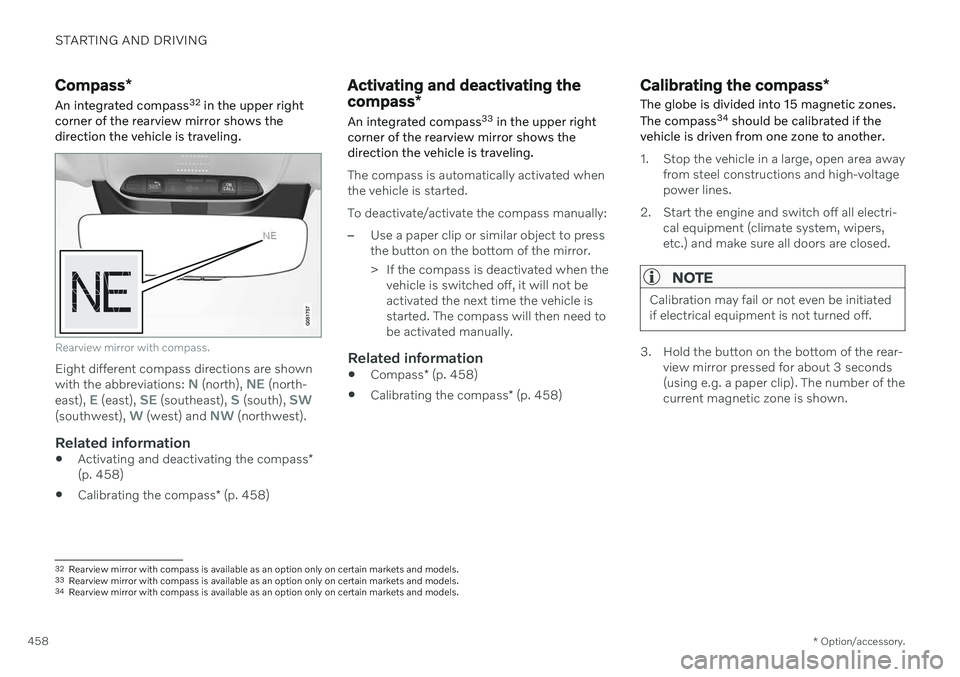
corner of the rearview mirror shows the direction the vehicle is traveling.
Rearview mirror with compass.
Eight different compass directions are shown with the abbreviations: N (north), NE (north-
east), E (east), SE (southeast), S (south), SW(southwest), W (west) and NW (northwest).
Related information
Activating and deactivating the compass
*
(p. 458)
Calibrating the compass
* (p. 458)
Activating and deactivating the compass *
An integrated compass 33
in the upper right
corner of the rearview mirror shows the direction the vehicle is traveling.
The compass is automatically activated when the vehicle is started. To deactivate/activate the compass manually:
–Use a paper clip or similar object to press the button on the bottom of the mirror.
> If the compass is deactivated when the vehicle is switched off, it will not be activated the next time the vehicle isstarted. The compass will then need tobe activated manually.
Related information
Compass
* (p. 458)
Calibrating the compass
* (p. 458)
Calibrating the compass *
The globe is divided into 15 magnetic zones. The compass 34
should be calibrated if the
vehicle is driven from one zone to another.
1. Stop the vehicle in a large, open area away from steel constructions and high-voltage power lines.
2. Start the engine and switch off all electri- cal equipment (climate system, wipers,etc.) and make sure all doors are closed.
NOTE
Calibration may fail or not even be initiated if electrical equipment is not turned off.
3. Hold the button on the bottom of the rear-view mirror pressed for about 3 seconds (using e.g. a paper clip). The number of thecurrent magnetic zone is shown.
32Rearview mirror with compass is available as an option only on certain markets and models.
33 Rearview mirror with compass is available as an option only on certain markets and models.
34 Rearview mirror with compass is available as an option only on certain markets and models.
Page 492 of 683

AUDIO, MEDIA AND INTERNET
* Option/accessory.
490
Playing media via the USB port
External audio sources, such as an iPod ® or
MP3 player, can be connected to the audio system via the vehicle's USB port.
Devices with rechargeable batteries can be charged when they are connected via the USBport and the ignition is in mode I, II or the
engine is running. The content on the external source can be read faster if it only contains data of a compat-ible format. Video files can also be played viathe USB port. Some MP3 players have their own file system that the vehicle has support for.
Related information
Connecting a device via the USB port(p. 490)
Playing media (p. 484)
Video (p. 488)
Ignition modes (p. 401)
Technical specifications for USB devices(p. 491)
Apple ®
CarPlay ®
* (p. 492)
Android Auto
* (p. 496)
Connecting a device via the USB port
External audio sources, such as an iPod ®
or
MP3 player, can be connected to the audio system via any of the vehicle's USB ports.
If the vehicle has two USB ports, the phone must be connected to the port with the white frame to use Apple CarPlay * or Android Auto *.
USB ports (type A) in the tunnel console. Route the cable forward to help avoid pinching when the coveris closed.
V90CC Volvo Ocean Race also has USB ports (type A) for charging 7
on the rear of the tunnel
console and in the cargo area.
USB ports (type C) on rear of tunnel console for charging phones, tablets, etc. 8
.
Related information
Playing media (p. 484)
Playing media via the USB port (p. 490)
Media player (p. 483)
Technical specifications for USB devices (p. 491)
Technical specifications for USB devices(p. 491)
Apple ®
CarPlay ®
* (p. 492)
Android Auto
* (p. 496)
7
It is not possible to playback media in the car's audio or media system via these ports. Charging may be restricted during certain use.
8 It is not possible to playback media in the car's audio or media system via this input.
Page 556 of 683

||
WHEELS AND TIRES
554
Related information
Spare wheel (p. 552)
Tool kit (p. 550)
Changing a wheel (p. 548)
Snow tires
Snow tires are designed for winter driving conditions.
Volvo recommends snow tires with specific dimensions. The tire dimensions vary depend-ing on engine type. When driving with snowtires, the correct type of tires must be moun-ted on all four wheels.
Tips for changing snow tiresWhen switching between regular tires andsnow tires, mark the tires according to whichside they were mounted on, e.g. L for left and
R for right.
Contact a Volvo retailer for assistance deter-mining the most suitable rims and tires.
Studded tiresStudded tires should be broken in by driving500–1000 km (300–600 miles) slowly andgently to help the studs settle properly in thetires. This gives the tire, and especially thestuds, a longer service life.
NOTE
Legal requirements concerning the use of studded tires may vary. Always follow locallaws and regulations.
Tread depthRoad conditions with ice, slush and low tem- peratures place considerably higher demands on tires than summer conditions. Volvo there-fore recommends not driving on snow tiresthat have a tread depth of less than 4 mm(0.15 inch).
Related information
Changing a wheel (p. 548)
Winter driving (p. 436)
Tread wear indicator (p. 537)
Volvo Cars support site (p. 21)
Page 558 of 683
WHEELS AND TIRES
556
Tire sealing system16
The temporary tire sealing system can be used to seal a puncture in a tire or to checkand adjust the pressure in the tire. Models equipped with a spare wheel 17
do not
have the tire sealing system.
WARNING
California Proposition 65 Operating, servicing and maintaining a pas- senger vehicle can expose you to chemi-cals including engine exhaust, carbon mon-oxide, phthalates, and lead, which areknown to the State of California to causecancer and birth defects or other reproduc-tive harm. To minimize exposure, avoidbreathing exhaust, do not idle the engineexcept as necessary, service your vehicle ina well ventilated area and wear gloves orwash your hands frequently when servicingyour vehicle. For more information go towww.P65Warnings.ca.gov/passenger-vehicle.
The tire sealing system consists of a compres- sor and a bottle containing sealing compound.The sealing functions as a temporary repair.
NOTE
The sealing compound effectively seals tires with punctures in the tread but maynot be able to fully seal tires with punctu-res in the sidewall. Do not use the tire seal-ing system on tires with large tears, cracksor similar damage.
NOTE
The compressor is intended for temporary tire sealing and is approved by Volvo.
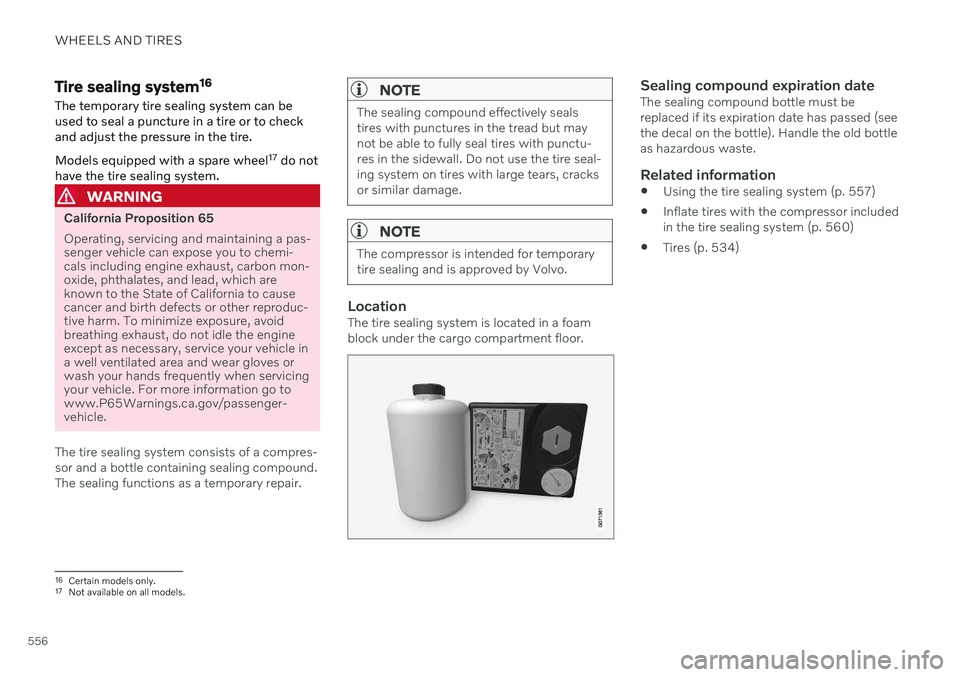
LocationThe tire sealing system is located in a foam block under the cargo compartment floor.
Sealing compound expiration dateThe sealing compound bottle must be replaced if its expiration date has passed (seethe decal on the bottle). Handle the old bottleas hazardous waste.
Related information
Using the tire sealing system (p. 557)
Inflate tires with the compressor includedin the tire sealing system (p. 560)
Tires (p. 534)
16
Certain models only.
17 Not available on all models.
Page 560 of 683
||
WHEELS AND TIRES
558
the upper and lower eyelids. Get medi- cal attention if symptoms occur.
Inhalation: Move the exposed personto fresh air. If irritation persists, getmedical attention.
Ingestion: Do NOT induce vomitingunless directed to do so by medicalpersonnel. Get medical attention.
Disposal: Dispose of this material andits container at a hazardous or specialwaste collection point.
WARNING
Do not remove the bottle or the hose while the tire sealing system is being used.
1. Preparations Turn on the vehicle's hazard warning flashers if the tire sealing system is to beused in an area with traffic. If the puncture was caused by a nail or similar object, do not remove it. It will helpseal the hole. 2. Peel off the speed limit sticker from the
side of the compressor. Affix the decal to aclearly visible location on the windshieldto remind the driver not to exceed thisspeed limit. Do not drive faster than80 km/h (50 mph) while using a tire thathas been temporarily repaired with the tiresealing system.
3. Make sure the switch is in the 0 (Off)
position and take out the electric cableand the hose.
4. Unscrew the orange cover on the com- pressor and unscrew the cap on the seal-ing compound bottle.
5. Screw the bottle onto the bottle holder as far as possible. The bottle and the bottle holder are equip- ped with catches to help prevent the seal-ing compound from leaking. Once the bot-tle is screwed into place into the bottleholder, it cannot be unscrewed. The bottle can only be removed by a workshop 19
.
WARNING
Do not unscrew the bottle. It is equipped with a catch to prevent leakage. 6. Unscrew the tire's valve cap and screw
the hose's valve connector as far as possi- ble onto the valve. Be sure the air release valve on the com- pressor's hose is completely closed.
7. Begin tire sealing procedure Connect the electrical cable to the nearest 12 V outlet and start the vehicle.
NOTE
Make sure that none of the vehicle's other 12 V sockets are used while the compres-sor is running.
WARNING
Never leave children unattended in the vehicle while the engine is running.
WARNING
Inhaling exhaust fumes could lead to seri- ous injury. Never leave the engine runningin an enclosed space or a space withoutsufficient ventilation.
19
An authorized Volvo workshop is recommended.
Page 562 of 683
||
WHEELS AND TIRES
56016. Check the inflation pressure on the air
pressure gauge.
If the pressure is under 1.3 bar (19 psi), the tire is not sufficiently sealed. Thevehicle should not be driven. Call road-side assistance to have the vehicletowed.
If the inflation pressure is higher than1.3 bar (19 psi), the tire must be inflatedto the inflation pressure specified onthe tire pressure decal on the driver'sside door pillar (1 bar = 100 kPa =14.5 psi). If the inflation pressure is toohigh, use the air release valve to releaseair.
WARNING
Check inflation pressure regularly.
Volvo recommends driving to the nearest authorized Volvo workshop to have the tirereplaced/repaired. Inform the workshop thatthe tire contains sealing compound. The sealing compound bottle and the hose must be replaced after use. Volvo recom-mends contacting an authorized Volvo work-shop for replacement.
WARNING
After using the tire sealing system, the vehicle should not be driven farther thanapproximately 200 km (120 miles).
NOTE
The compressor is an electric device. Fol- low local regulations for disposal.
Related information
Recommended tire pressure (p. 543)
Tire sealing system (p. 556)
Inflate tires with the compressor included in the tire sealing system (p. 560)
Contacting Volvo (p. 26)
Inflate tires with the compressor included in the tire sealing system
The vehicle's original tires can be inflated using the compressor in the tire sealing sys-tem.
1. The compressor must be switched off. Make sure that the switch is in the 0 (Off)
position and take out the electrical cable and the hose.
2. Unscrew the tire's valve cap and screw the hose's valve connector as far as possi-ble onto the valve. Be sure the air release valve on the com- pressor's hose is completely closed.
3. Connect the electrical cable to the nearest 12 V outlet and start the vehicle.
WARNING
Inhaling exhaust fumes could lead to seri- ous injury. Never leave the engine runningin an enclosed space or a space withoutsufficient ventilation.
WARNING
Never leave children unattended in the vehicle while the engine is running.
Page 569 of 683
LOADING, STORAGE AND PASSENGER COMPARTMENT
567
Using the electrical outlets
The 12 V outlet can be used for devices intended for this such as MP3 players, cool-ers and cellular phones.
The ignition must be in at least mode I for the
outlets to supply current. The outlets will then be active as long as there is sufficient chargein the start battery. If the engine is turned off and the vehicle is locked, the outlets will be deactivated. If theengine is turned off and the vehicle remainsunlocked, the sockets will remain active for upto 7 minutes.
NOTE
Bear in mind that using the electrical out- lets when the engine is off could cause thestarter battery to have too low of a chargelevel, which could limit other functionality. Accessories connected to the electrical outlets can be activated even when thevehicle electrical system is off or if precon-ditioning is used. For this reason, discon-nect plugs when they are not in use to pre-vent the starter battery from becoming dis-charged.
WARNING
Do not use accessories with large or heavy plugs – they could damage theoutlet or come loose while you are driv-ing.
Do not use accessories that couldcause disruptions to e.g. the vehicle'sradio receiver or electrical system.
Position the accessory so that there isno risk of it injuring the driver or pas-sengers in the event of heavy brakingor a collision.
Pay attention to connected accessoriesas they can generate heat that couldburn passengers or the interior.
Using 12 V outlets1. Remove the stopper (tunnel console) or
fold down the cover (trunk/cargo com-partment) over the socket and plug in thedevice.
2. Unplug the device and put the stopper back in (tunnel console) or fold up thecover (trunk/cargo compartment) whenthe socket is not in use or left unattended.
CAUTION
The maximum power is 120 W (10 A) per outlet.
Related information
Electrical outlets (p. 566)
Passenger compartment interior (p. 564)
Page 570 of 683
LOADING, STORAGE AND PASSENGER COMPARTMENT
* Option/accessory.
568
Using the glove compartment
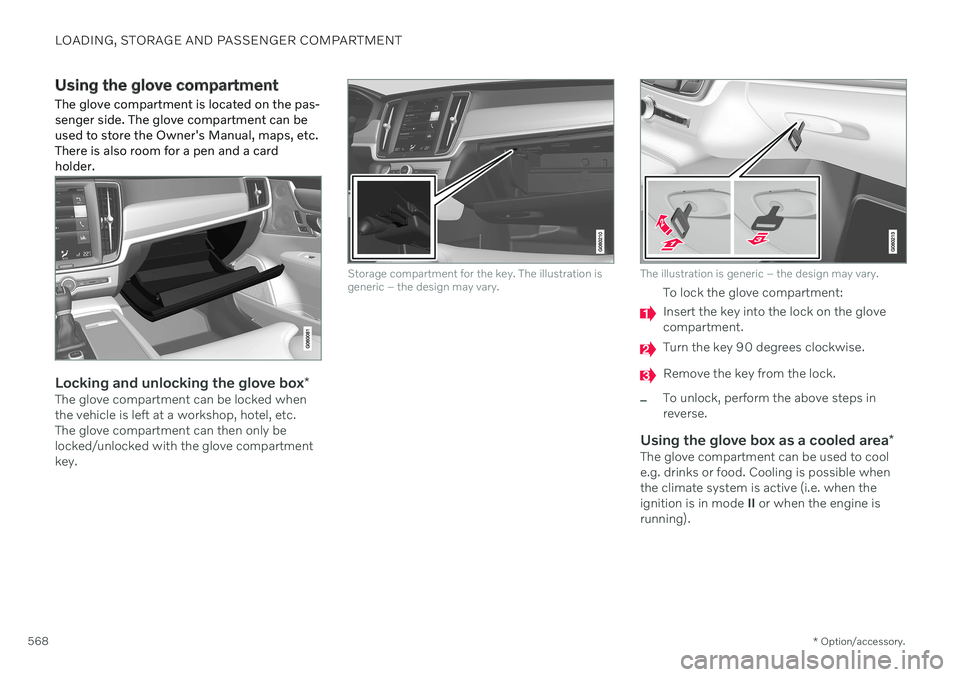
The glove compartment is located on the pas- senger side. The glove compartment can beused to store the Owner's Manual, maps, etc.There is also room for a pen and a cardholder.
Locking and unlocking the glove box *The glove compartment can be locked when the vehicle is left at a workshop, hotel, etc.The glove compartment can then only belocked/unlocked with the glove compartmentkey.
Storage compartment for the key. The illustration is generic – the design may vary.The illustration is generic – the design may vary.
To lock the glove compartment:
Insert the key into the lock on the glove compartment.
Turn the key 90 degrees clockwise.
Remove the key from the lock.
–To unlock, perform the above steps in reverse.
Using the glove box as a cooled area*The glove compartment can be used to cool e.g. drinks or food. Cooling is possible when the climate system is active (i.e. when the ignition is in mode II or when the engine is
running).