2021 TOYOTA RAV4 PHEV key
[x] Cancel search: keyPage 228 of 666

2264-2. Opening, closing and locking the doors
• The electronic key is too close to the
window or outside door handle, near the ground, or in a high place when
the doors are lo cked or unlocked.
• The electronic key is on the instru- ment panel, luggage co ver or floor, or
in the door pockets or glove box when
the hybrid system is started or power switch modes are changed.
●Do not leave the electronic key on top of the instrument panel or near the
door pockets when exiting the vehicle.
Depending on the radio wave recep - tion conditions, it m ay be detected by
the antenna outside the cabin and the
door will become lockable from the outside, possibly trapping the elec -
tronic key inside the vehicle.
●As long as the electronic key is within
the effective range , the doors may be
locked or unlocke d by anyone. How- ever, only the door s detecting the
electronic key can be used to lock or
unlock the vehicle.
●Even if the electronic key is not inside
the vehicle, it may be possible to start the hybrid system if the electronic key
is near the window.
●The doors may unlock if a large
amount of water splashes on the door
handle, such as in t he rain or in a car wash when the electronic key is within
the effective range . (The doors will
automatically be locked after approxi - mately 30 seconds if the doors are not
opened and closed.)
●If the wireless remote control is used
to lock the doors when the electronic
key is near the vehi cle, there is a pos- sibility that the door may not be
unlocked by the entry function. (Use
the wireless remote control to unlock
the doors.)
●Touching the door lock sensor while
wearing gloves may delay or prevent lock operation. Remove the gloves
and touch the lo ck sensor again.
●When the lock operation is performed
using the lock sens or, recognition sig-
nals will be shown up to two consecu -
tive times. After this, no recognition
signals will be given.
●If the door handle becomes wet while
the electronic key is within the effec - tive range, the door may lock and
unlock repeatedly. In that case, follow
the following correction procedures to wash the vehicle:
• Place the electronic key in a location 2
m (6 ft.) or more away from the vehi - cle. (Take care to ensure that the key
is not stolen.)
• Set the electronic key to battery-sav - ing mode to disable the smart entry &
start system. ( →P.225)
●If the electronic key is inside the vehi-
cle and a door handle becomes wet
during a car wash, a message may be shown on the multi-information dis -
play and a buzzer will sound outside
the vehicle. To turn off the alarm, lock all the doors.
●The lock sensor m ay not work prop- erly if it comes int o contact with ice,
snow, mud, etc. Clean the lock sensor
and attempt to operate it again, or use the lock sensor on the lower part of
the door handle.
●A sudden approach to the effective
range or door handle may prevent the
doors from being unlocked. In this case, return the door handle to the
original position and check that the
doors unlock before pulling the door handle again.
●If there is another electronic key in the detection area, it may take slightly lon -
ger to unlock the doors after the door
handle is gripped.
■When the vehicle is not driven for extended periods
●To prevent theft of the vehicle, do not
leave the electronic key within 2 m (6 ft.) of the vehicle.
●The smart entry & start system can be deactivated in advance. ( →P.633)
●Battery-saving mode can reduce the power consumption of electronic keys.
( →P.225)
Page 229 of 666

227
4
4-2. Opening, closing and locking the doors
Before driving
■To operate the system properly
Make sure to carry the electronic key when operating the system. For vehicles
with entry function, do not get the elec-
tronic key too close to the vehicle when operating the system from the outside of
the vehicle.
Depending on the position and holding condition of the electronic key, the key
may not be detected correctly and the
system may not opera te properly. (The alarm may go off accidentally, or the
door lock prevention may not operate.)
■If the smart entry & start system
does not operate properly
●Locking and unlocking the doors: Use
the mechanical key. ( →P.604)
●Starting the hybrid system: →P.317
■Customization
Settings (e.g. smart entry & start sys - tem) can be changed.
(Customizable features: →P.633)
If the smart entry & start system has been deactivated in a customized set -
ting, refer to the exp lanations for the fol-
lowing operations.
●Locking and unlocking the doors:
Use the wireless remote control or mechanical key. ( →P.205, 604)
●Starting the hybrid system and chang- ing power switch modes: →P.605
●Stopping the hybrid system: →P.319
Page 275 of 666

273
4
4-3. Adjusting the seats
Before driving
*: If equipped
■Recording procedure
1 Check that the shift lever is in P.
2 Turn the power switch to ON.
3 Adjust the driver’s seat to the
desired positions.
4 While pressing the “SET” but-
ton, or within 3 seconds after the
“SET” button is pressed, press
button “1” or “2” until the buzzer
sounds.
If the selected butt on has already been preset, the previously recorded position
WARNING
●Do not allow chil dren to enter the
luggage compartment.
●Do not operate the rear seat if it is
occupied.
●Be careful not to get feet or hands
caught in the moving parts or joints
of the seats dur ing operation.
●Do not allow children to operate the
seat.
■After returning the rear seatback
to the upright position
●Make sure that the seatback is securely locked in position by lightly
pushing it back and forth.
If the seatback is not securely locked, the red marking will be visi -
ble. Make sure that the red marking
is not visible.
●Check that the sea t belts are not
twisted or caught in the seatback.
Driving position mem-
ory*
This feature automatically
adjusts the driver’s seat to suit
your preferences.
Your preferred driving position
(the position of the driver’s
seat) can be recorded and
recalled by pr essing a button.
Two different driving positions
can be recorded into memory.
Each electronic key can be
registered to recall your pre -
ferred driving position.
Recording/recalling a driv -
ing position
Page 276 of 666

2744-3. Adjusting the seats
will be overwritten.
■Recall procedure
1 Check that the shift lever is in P.
2 Turn the power switch to ON.
3 Press one of the buttons for the
driving position you want to
recall until the buzzer sounds.
■To stop the position recall opera -
tion part-way through
Perform any of the following:
●Press the “SET” button.
●Press button “1” or “2”.
●Operate any of the seat adjustment switches.
■Seat positions that can be memo -
rized ( →P.270)
The adjusted positions other than the position adjusted by lumbar support
switch can be recorded.
■Operating the driving position
memory after turning the power switch to OFF
Recorded seat positions can be acti -
vated up to 180 s econds after the driver’s door is o pened and another 60
seconds after it is closed again.
■In order to correctly use the driving
position memory function
If a seat position is already in the fur-
thest possible position and the seat is
operated in the same direction, the recorded position may be slightly differ -
ent when it is recalled.
■When recalling the driving position
Take care when recalling the driving position so that the head restraint does
not touch the ceiling.
■If the 12-volt battery is discon -
nected
The memorized posi tions are erased.
■Registering procedure
Record your drivin g position to but-
ton “1” or “2” before performing the
following:
Carry only the key you want to reg -
ister, and then cl ose the driver’s
door.
If 2 or more keys are in the vehicle,
the driving posi tion cannot be
WARNING
■Seat adjustment caution
Take care during se at adjustment so
that the seat does not strike the rear passenger or squeeze your body
against the steering wheel.
Registering/recall/canceling
an electronic key to driving
position (memory recall
function)
Page 277 of 666

275
4
4-3. Adjusting the seats
Before driving
recorded properly.
1 Check that the shift lever is in P.
2 Turn the power switch to ON.
3 Recall the driving position that
you want to record.
4 While pressing the recalled but-
ton, press and hold the door
lock switch (either lock or
unlock) until the buzzer sounds.
If the button could not be registered, the
buzzer sounds continuously for approx -
imately 3 seconds.
■Recall procedure
Make sure that the doors are
locked before recalling the driving
position. Carry the electronic key
that has been registered to the driv -
ing position, and then unlock and
open the driver’s door using the
smart entry & start system or wire -
less remote control.
The driving position will move to the
recorded position.
If the driving position is in a position
that has already been recorded, the
seat will not move.
■Cancelation procedure
Carry only the key you want to can -
cel and then close the driver’s door.
If 2 or more keys are in the vehicle,
the driving positi on cannot be can-
celed properly.
1 Check that the shift lever is in P.
2 Turn the power switch to ON.
3 While pressing the “SET” but-
ton, press and hold the door
lock switch (either lock or
unlock) until the buzzer sounds
twice.
If the button could n ot be canceled, the buzzer sounds continuously for approx -
imately 3 seconds.
■Recalling the driving position using the memory recall function
●Different driving positions can be reg - istered for each ele ctronic key. There-
fore, the driving position that is
recalled may be different depending on the key being carried.
●If a door other than the driver’s door is unlocked with the sm art entry & start
system, the driving position cannot be
recalled. In this case, press the driving position button which has been set.
■Customization
Settings (e.g. the unlock door settings of
the memory recall function) can be cus -
tomized. (Customizable features: → P.636)
Page 294 of 666

2924-5. Opening, closing the windows and moon roof
direction, and hold it there for
approximately 4 seconds or more.
6 Pull and hold the power window switch in the one-touch closing
direction again. After the side win -
dow is completely closed, continue holding the switch for a further 1 sec -
ond or more.
If you release the switch while the side window is moving, start again from the
beginning.
If the side window reverses and cannot be fully closed or opened, have the vehi -
cle inspected by any authorized Toyota
retailer or Toyota authorized repairer, or any reliable repairer.
■Door lock linked power window
operation
●The power windows can be opened
and closed using the mechanical key.*
( →P.605)
●The power windows can be opened
and closed using the wireless remote
control.* ( →P.205)
●Vehicles with alarm: The alarm may
be triggered if the alarm is set and the
power window is c losed using the door lock linked power window opera -
tion function. ( →P.78)*: These settings must be customized at
any authorized Toy ota retailer or
Toyota authorized repairer, or any reli -
able repairer.
■Power window open reminder func -
tion
The buzzer sounds and a message is
shown on the multi-in formation display
when the power switch is turned to OFF and the driver’s doo r is opened with the
power windows open.
■Customization
Settings (e.g. linked door lock operation)
can be changed. (Customizable fea - tures: →P.636)
WARNING
Observe the following precautions.
Failing to do so may result in death or
serious injury.
■Closing the power windows
●The driver is responsible for all the power window operations, including
the operation for the passengers. In
order to prevent accidental opera -
tion, especially by a child, do not let a child operate the power windows.
It is possible for children and other
passengers to have body parts caught in the power window. Also,
when riding with a child, it is recom -
mended to use the window lock switch. ( →P.293)
●Check to make sure that all passen- gers do not have any part of their
body in a position where it could be
caught when a po wer window is being operated.
●When using the wi reless remote control or mechanical key and oper -
ating the power windows, operate
the power window after checking to make sure that there is no possibil -
ity of any passenger having any of
their body parts caught in the side window. Also, do not let a child
operate the power window by the
wireless remote control or mechani - cal key. It is po ssible for children
and other passengers to get caught
in the power window.
Page 295 of 666

293
4
4-5. Opening, closing the windows and moon roof
Before driving
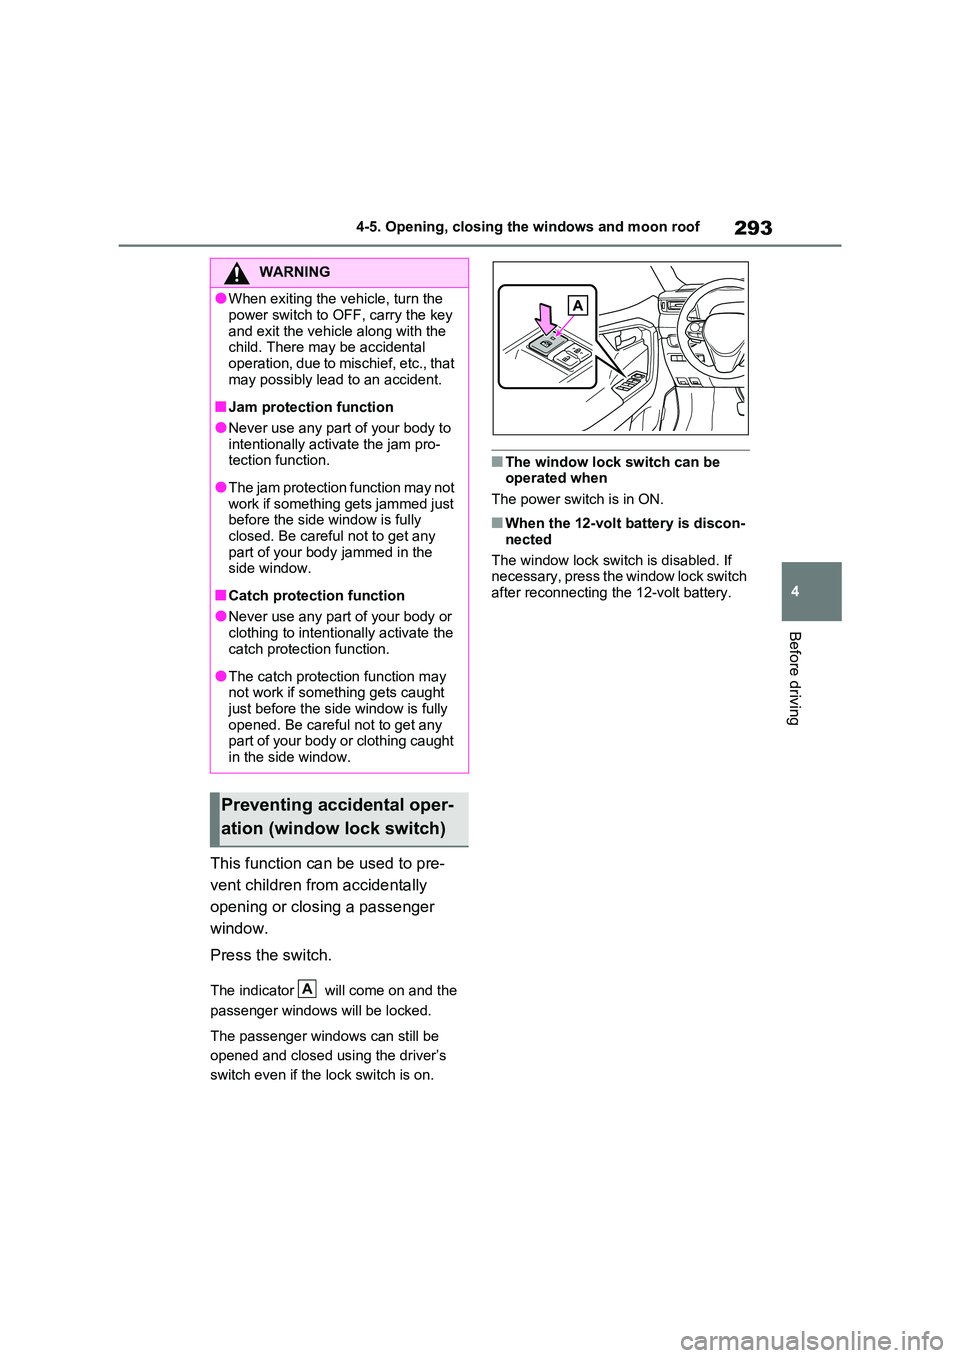
This function can be used to pre -
vent children from accidentally
opening or closing a passenger
window.
Press the switch.
The indicator will come on and the
passenger windows will be locked.
The passenger windows can still be
opened and closed us ing the driver’s
switch even if the lock switch is on.
■The window lock switch can be operated when
The power switch is in ON.
■When the 12-volt battery is discon -
nected
The window lock switch is disabled. If
necessary, press the window lock switch
after reconnecting the 12-volt battery.
WARNING
●When exiting the v ehicle, turn the
power switch to OFF, carry the key
and exit the vehicle along with the child. There may be accidental
operation, due to mischief, etc., that
may possibly lead to an accident.
■Jam protection function
●Never use any part of your body to
intentionally activ ate the jam pro- tection function.
●The jam protection function may not work if something gets jammed just
before the side window is fully
closed. Be careful not to get any part of your body jammed in the
side window.
■Catch protection function
●Never use any part of your body or
clothing to intentionally activate the catch protection function.
●The catch protection function may not work if something gets caught
just before the side window is fully
opened. Be careful not to get any part of your body or clothing caught
in the side window.
Preventing accidental oper -
ation (window lock switch)
A
Page 297 of 666

295
4
4-5. Opening, closing the windows and moon roof
Before driving
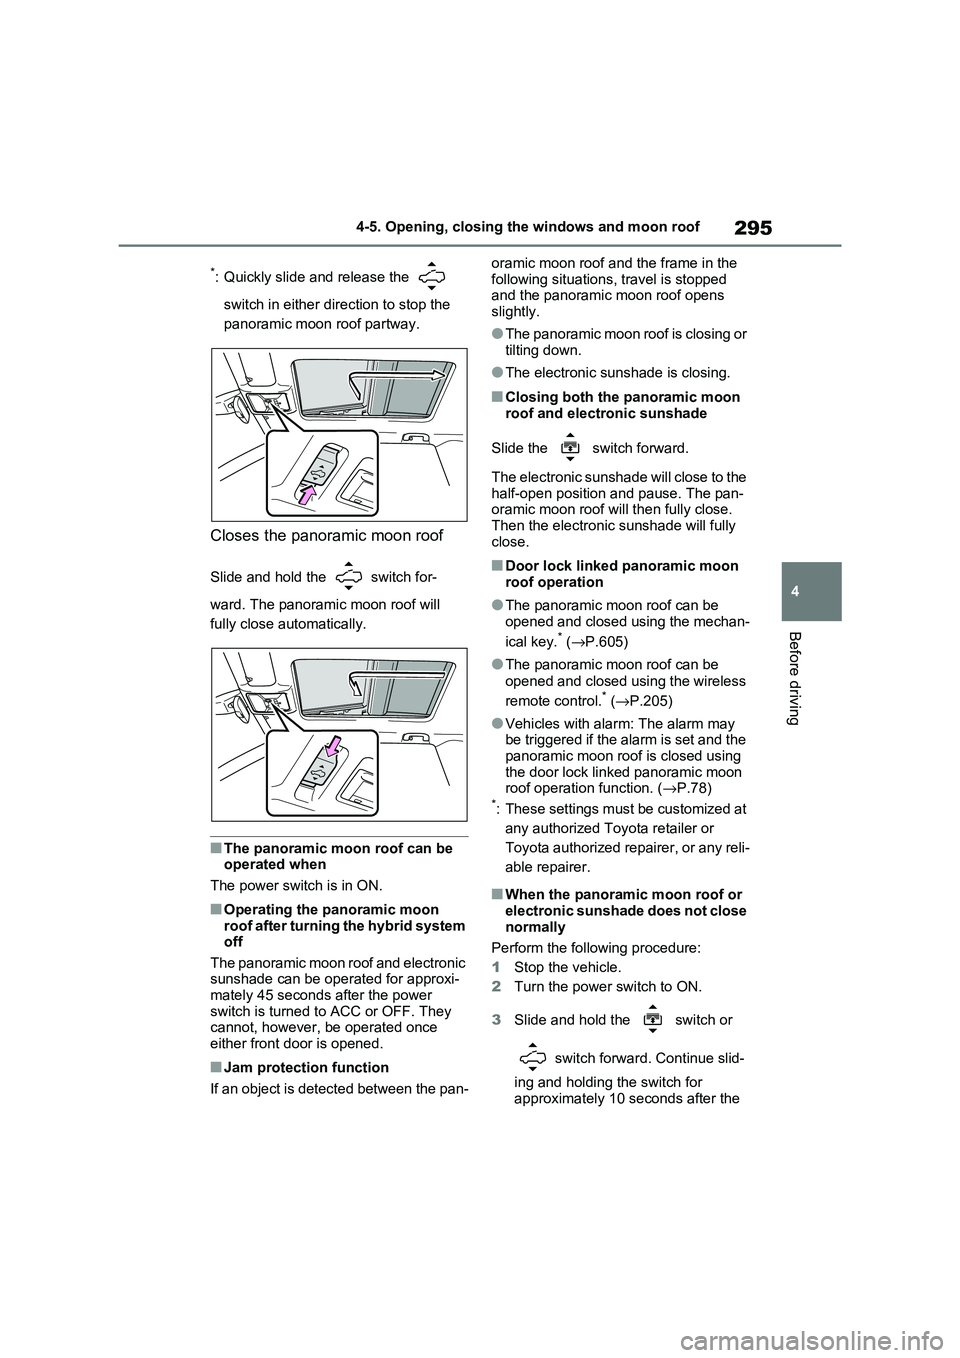
*: Quickly slide and release the
switch in either dir ection to stop the
panoramic moon roof partway.
Closes the panoramic moon roof
Slide and hold the switch for -
ward. The panoramic moon roof will
fully close automatically.
■The panoramic moon roof can be operated when
The power switch is in ON.
■Operating the panoramic moon
r o o f a f t e r t u r n i n g t h e h y b r i d s y s t e m off
The panoramic moon roof and electronic
sunshade can be oper ated for approxi- mately 45 seconds after the power
switch is turned to ACC or OFF. They
cannot, however, be operated once either front door is opened.
■Jam protection function
If an object is detected between the pan -
oramic moon roof an d the frame in the
following situations, travel is stopped and the panoramic moon roof opens
slightly.
●The panoramic moon roof is closing or
tilting down.
●The electronic sunshade is closing.
■Closing both the panoramic moon
roof and electronic sunshade
Slide the switch forward.
The electronic sunshade will close to the
half-open position and pause. The pan -
oramic moon roof will then fully close. Then the electronic sunshade will fully
close.
■Door lock linked panoramic moon
roof operation
●The panoramic moon roof can be
opened and closed using the mechan -
ical key.* ( →P.605)
●The panoramic moon roof can be
opened and closed using the wireless
remote control.* ( →P.205)
●Vehicles with alarm: The alarm may
be triggered if the alarm is set and the panoramic moon roof is closed using
the door lock lin ked panoramic moon
roof operation function. ( →P.78)*: These settings must be customized at
any authorized Toyota retailer or
Toyota authorized repairer, or any reli -
able repairer.
■When the panoramic moon roof or electronic sunshade does not close
normally
Perform the following procedure:
1 Stop the vehicle.
2 Turn the power switch to ON.
3 Slide and hold the switch or
switch forward. Continue slid -
ing and holding t he switch for
approximately 10 seconds after the