2021 TOYOTA PROACE EV Electric
[x] Cancel search: ElectricPage 212 of 360

212
Installation tips
► If you have to fit the chains during a journey, stop the vehicle on a flat surface on the side of the road.► Apply the parking brake and position any wheel chocks under the wheels to prevent movement of your vehicle.► Fit the chains following the instructions provided by the manufacturer.► Move off gently and drive for a few moments, without exceeding 50 km/h (31 mph).► Stop your vehicle and check that the snow chains are correctly tightened.
NOTIC E
It is strongly recommended that before you leave, you practise fitting the snow chains on a level and dry surface.
WARNI NG
Avoid driving with snow chains on roads that have been cleared of snow to avoid damaging your vehicle's tyres and the road surface. If your vehicle is fitted with alloy wheels, check that no part of the chain or its fixings is in contact with the wheel rim.
Towing device
Load distribution► Distribute the load in the trailer so that the heaviest items are as close as possible to the axle and the nose weight approaches the maximum permitted without exceeding it.Air density decreases with altitude, thus reducing engine performance. The maximum towed load must be reduced by 10 % for every 1,000 metres (3,280 ft) of altitude.
NOTIC E
Use towing devices and their unmodified harnesses approved by TOYOTA. It is recommended that the installation be performed by any authorized Toyota retailer or Toyota authorized repairer, or any reliable repairer.If the towing device is not fitted by any authorized Toyota retailer or Toyota authorized repairer, or any reliable repairer, it must still be fitted in accordance with the vehicle manufacturer's instructions.Certain driving assistance or manoeuvring assistance functions are automatically disabled if an approved towbar is used.
WARNI NG
Observe the maximum authorised towable weight, indicated on your vehicle's registration certificate, the manufacturer's label as well as in the Technical data section of this guide.Complying with the maximum authorised nose weight (towball) also includes the use of accessories (bicycle carriers, tow boxes, etc.).
WARNI NG
Observe the legislation in force in the country in which you are driving.
NOTIC E
Electric motorAn electric vehicle may be fitted with a towing device.It is therefore possible to tow a trailer or caravan.Contact any authorized Toyota retailer or Toyota authorized repairer, or any reliable repairer for more information and to obtain a suitable towing device.
Page 214 of 360
214
Roof racks
NOTIC E
Max. authorised load weight:– Compact: 140 kg,– Medium and Long: 170 kg.
To fit a roof rack, use the fixing points provided for this purpose:
► Place the roof rack on the roof aligned with the fixing points and secure each one to the roof in turn.► Ensure that the roof rack is correctly fitted (by shaking it).
Bonnet
WARNI NG
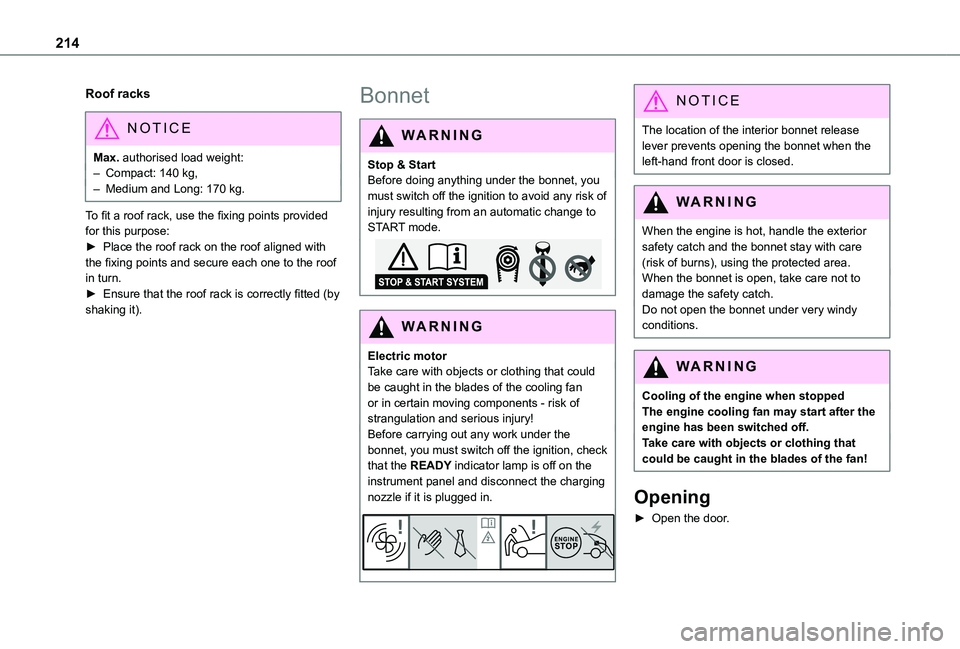
Stop & StartBefore doing anything under the bonnet, you must switch off the ignition to avoid any risk of injury resulting from an automatic change to START mode.
WARNI NG
Electric motorTake care with objects or clothing that could be caught in the blades of the cooling fan or in certain moving components - risk of strangulation and serious injury!Before carrying out any work under the
bonnet, you must switch off the ignition, check that the READY indicator lamp is off on the instrument panel and disconnect the charging nozzle if it is plugged in.
NOTIC E
The location of the interior bonnet release lever prevents opening the bonnet when the left-hand front door is closed.
WARNI NG
When the engine is hot, handle the exterior
safety catch and the bonnet stay with care (risk of burns), using the protected area.When the bonnet is open, take care not to damage the safety catch.Do not open the bonnet under very windy conditions.
WARNI NG
Cooling of the engine when stoppedThe engine cooling fan may start after the engine has been switched off.Take care with objects or clothing that could be caught in the blades of the fan!
Opening
► Open the door.
Page 215 of 360

215
Practical information
7
► Pull the release lever 1, located at the bottom of the door frame, towards you.► Tilt the safety catch 2 upwards, then raise the bonnet.► Unclip the stay 3 from its housing and place it in the support slot to hold the bonnet open.
Closing
► Hold the bonnet and pull out the stay from the support slot.► Clip the stay in its housing.► Lower the bonnet and release it near the end of its travel.► Pull on the bonnet to check that it is locked
correctly.
WARNI NG
Because of the presence of electrical equipment under the bonnet, it is recommended that exposure to water (rain, washing, etc.) be limited.
* Depending on engine.
Engine compartment
The engine shown here is an example for illustrative purposes only.The locations of the following components may vary:– Air filter.– Engine oil dipstick.– Engine oil filler cap.– Priming pump.
Diesel engine
1.Screenwash fluid reservoir
2.Engine coolant reservoir
3.Brake fluid reservoir
4.Battery
5.Remote earth point (-)
6.Fusebox
7.Air filter
8.Engine oil filler cap
9.Engine oil dipstick
10.Priming pump*
11 .Power steering fluid reservoir
WARNI NG
Diesel fuel systemThis system is under very high pressure.All work must be carried out only by any authorized Toyota retailer or Toyota authorized repairer, or any reliable repairer.
Electric motor
1.Screenwash fluid reservoir
2.Engine coolant reservoir (level only)
3.Brake fluid reservoir
4.Battery/Fuses
5.Remote earth point (-)
6.Fusebox
7.400 V electrical circuit
8.Emergency circuit-breaker for emergency services and maintenance technicians
9.Power steering fluid reservoir
For more information on the Charging system (Electric), refer to the corresponding section.
Page 216 of 360
216
Checking levels
Check all of the following levels regularly in accordance with the manufacturer's service schedule. Top them up if required, unless otherwise indicated.If a level drops significantly, have the corresponding system checked by any authorized Toyota retailer or Toyota authorized repairer, or any reliable repairer.
WARNI NG
The fluids must comply with the manufacturer's requirements and with the vehicle's engine.
WARNI NG
Take care when working under the bonnet, as certain areas of the engine may be extremely hot (risk of burns) and the cooling fan could start at any time (even with the ignition off).
Used products
WARNI NG
Avoid prolonged contact of used oil or fluids with the skin.Most of these fluids are harmful to health and very corrosive.
ECO
Do not discard used oil or fluids into sewers or onto the ground.Empty used oil into the containers reserved for this purpose at any authorized Toyota retailer or Toyota authorized repairer, or any reliable repairer.
Engine oil
The level is checked, with the engine having been switched off for at least 30 minutes and on level ground, either using the oil level indicator in the instrument panel when the ignition is switched on (for vehicles equipped with an electric gauge), or using the dipstick.It is normal to top up the oil level between two services (or oil changes). It is recommended that you check the level, and top up if necessary, every 5,000 km (3,000 miles).
WARNI NG
In order to maintain the reliability of the engine and emissions control system, never use additives in the engine oil.
Checking using the dipstick
For the location of the dipstick, please refer to the illustration of the corresponding engine compartment.
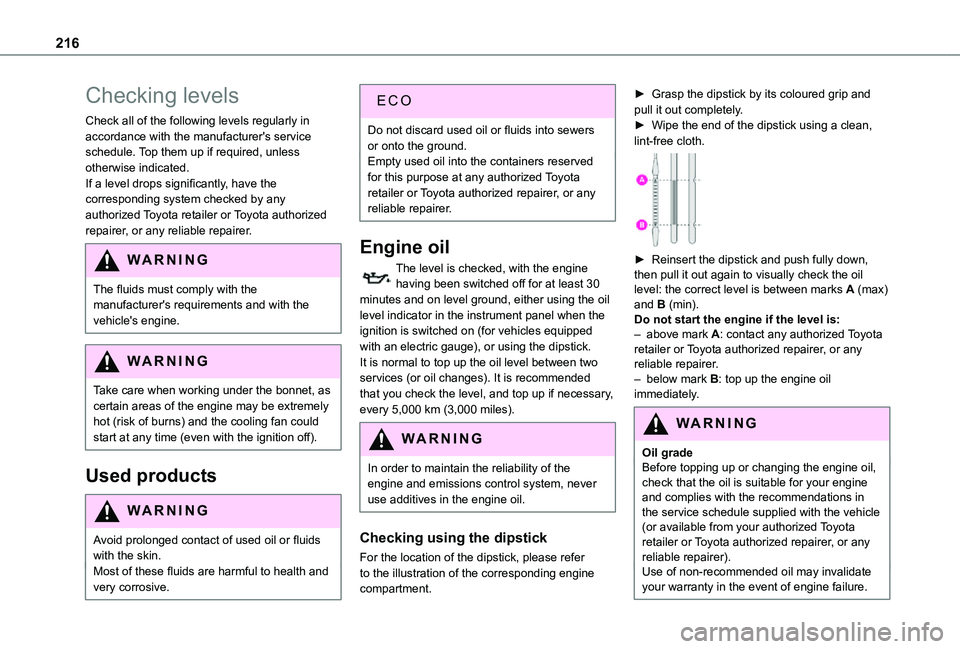
► Grasp the dipstick by its coloured grip and pull it out completely.► Wipe the end of the dipstick using a clean, lint-free cloth.
► Reinsert the dipstick and push fully down, then pull it out again to visually check the oil level: the correct level is between marks A (max) and B (min). Do not start the engine if the level is:– above mark A: contact any authorized Toyota retailer or Toyota authorized repairer, or any reliable repairer.– below mark B: top up the engine oil immediately.
WARNI NG
Oil gradeBefore topping up or changing the engine oil, check that the oil is suitable for your engine and complies with the recommendations in the service schedule supplied with the vehicle (or available from your authorized Toyota retailer or Toyota authorized repairer, or any reliable repairer).Use of non-recommended oil may invalidate your warranty in the event of engine failure.
Page 217 of 360
217
Practical information
7
Topping up the engine oil level
For the location of the engine oil filler cap, please refer to the corresponding engine compartment illustration.► Add oil in small quantities, avoiding any spills on engine components (risk of fire).► Wait a few minutes before checking the level again using the dipstick.► Top up the level if necessary.► After checking the level, carefully screw the oil filler cap back on and replace the dipstick in its tube.
NOTIC E
The oil level indication displayed on the instrument panel when the ignition is switched on is not valid for 30 minutes following an addition of oil.
Brake fluid
The level of this fluid should be close to the "MAX" mark. If not, check the brake pad wear.To know how often the brake fluid should be replaced, refer to the manufacturer's servicing schedule.
WARNI NG
If topping up, clean the cap before replacing it. Use only DOT4 brake fluid from a sealed canister.
Power steering fluid
The level of this fluid should be close to the "MAX" mark. Check it, with the vehicle parked on level ground and with the engine cold, by reading the level on the filler neck.
Engine coolant
(Diesel)
It is normal to top up this fluid between two services.The check and top-up must only be done with the engine cold.A level of coolant that is too low risks causing major damage to the engine; the coolant level must be close to the "MAX" mark without ever
going above it.If the level is close to or below the "MIN" mark, it is essential to top it up.When the engine is hot, the temperature of the coolant is regulated by the fan.As the cooling system is pressurised, wait at least one hour after switching off the engine before carrying out any work.In order to avoid the risk of scalding if you need to top up in an emergency, wrap a cloth around
the cap and unscrew the cap by two turns to allow the pressure to drop.Once the pressure has dropped, remove the cap and top up to the required level.
(Electric)
WARNI NG
Do not top up the coolant.
If the level is close to or below the "MIN" mark, it is essential to contact any authorized Toyota retailer or Toyota authorized repairer, or any reliable repairer.
Screenwash fluid
Top up to the required level when necessary.
Fluid specification
The fluid must be topped up with a ready-to-use mixture.In winter (temperatures below zero), a liquid
containing an agent to prevent freezing must be used which is appropriate for the prevailing conditions, in order to protect the elements of the system (pump, tank, ducts, jets, etc.).
Page 219 of 360
219
Practical information
7
Air filter
Depending on the environment and the use of the vehicle (e.g. dusty atmosphere, city driving), change it twice as often, if necessary.
Oil filter
Change the oil filter each time the engine oil is changed.
Particle filter (Diesel)
The start of clogging of the particle filter is indicated by the temporary lighting of this warning lamp, accompanied by an alert message.As soon as the traffic conditions permit, regenerate the filter by driving at a speed of at least 60 km/h (37 mph) until the warning lamp goes off.
NOTIC E
If the warning lamp stays on, this indicates a low Diesel additive level.For more information on Checking levels, refer to the corresponding section.
NOTIC E
Following prolonged operation of the vehicle at very low speed or at idle, you may, in exceptional circumstances, notice the emission of water vapour at the exhaust while accelerating. This has no impact on the vehicle’s behaviour or the environment.
NOTIC E
New vehicleDuring the first few particle filter regeneration operations, you may notice a "burning" smell. This is perfectly normal.
Manual gearbox
The gearbox does not require any maintenance (no oil change).
Automatic gearbox
The gearbox does not require any maintenance (no oil change).
Drive selector (Electric)
The drive selector does not require any maintenance.
Manual parking brake
If you notice excessive brake lever travel or decreased effectiveness, the parking
brake must be adjusted, even between two services.This system must be checked by any authorized Toyota retailer or Toyota authorized repairer, or any reliable repairer.
Electric parking brake
This system does not require any routine servicing. However, in the event of a problem, do not hesitate to have the system checked by a TOYOTA dealer or a qualified workshop.
NOTIC E
For more information on the Electric parking brake, refer to the corresponding section.
Brake pads
Brake wear depends on the style of driving, particularly in the case of vehicles used in town, over short distances. It may be necessary to have the condition of the brakes checked, even between vehicle services.Unless there is a leak in the circuit, a drop in the brake fluid level indicates that the brake pads are worn.
Page 224 of 360
224
With a manual gearbox and
electric parking brake /
To release them
► With the engine running and while depressing the brake pedal, move the gear selector to the neutral position.► While depressing the brake pedal, switch off the ignition.► Release the brake pedal, then switch on the ignition again.► While depressing the brake pedal, press the control lever to release the parking brake.► Release the brake pedal, then switch off the ignition.
Reverting to normal operation
► While depressing the brake pedal, restart the engine.
With an automatic gearbox
and electric parking brake /
To release them
► With the engine running and while depressing the brake pedal, set the gear selector to N.► While depressing the brake pedal, switch off the ignition.
► Release the brake pedal, then switch on the ignition again.► While depressing the brake pedal, press the control lever to release the parking brake.► Release the brake pedal, then switch off the ignition.
Reverting to normal operation
► While depressing the brake pedal, restart the engine.
With drive selector (Electric)
and electric parking brake /
Release procedure
► With the vehicle stationary and the engine running, depress the brake pedal and select mode N.Within 5 seconds:► Depress and hold the brake pedal, then observe this order: switch off the ignition and
move the push selector forwards or backwards.► Release the brake pedal, then switch on the ignition again.► Place your foot on the brake and press the electric parking brake control to release it.► Release the brake pedal, then switch off the ignition.
WARNI NG
A message is displayed on the instrument panel to confirm the unlocking of the wheels for 15 minutes.In Wash mode, a message may appear on the instrument panel to indicate that the audio system cannot be updated.
Reverting to normal operation
► While depressing the brake pedal, restart the engine.
NOTIC E
Smart Entry & StartYou must not depress the brake pedal while switching the ignition on again, then switching it off. If you do, the engine will start, requiring you to restart the procedure.
Page 225 of 360

225
Practical information
7
Advice on care and
maintenance
General recommendations
Observe the following recommendations to avoid damaging the vehicle.
Exterior
WARNI NG
Never use a high-pressure jet wash in the engine compartment - risk of damaging the electrical components!Do not wash the vehicle in bright sunshine or extremely cold conditions.
NOTIC E
When washing the vehicle in an automatic roller-brush car wash, be sure to lock the doors and, depending on version, move the electronic key away and deactivate the “hands-free” function (Hands-Free Access).When using a pressure washer, hold the lance at least 30 cm from the vehicle (particularly when cleaning areas containing chipped paint, sensors or seals).Promptly clean up any stains containing chemicals liable to damage the vehicle's paint (including tree resin, bird droppings, insect secretions, pollen and tar).If justified by the environment, clean the vehicle frequently to remove salty deposits (in coastal areas), soot (in industrial areas) and mud (in wet or cold areas). These substances can be highly corrosive.Contact any authorized Toyota retailer or Toyota authorized repairer, or any reliable repairer for advice on removing stubborn
stains requiring special products (such as tar or insect removers).Preferably, have paint touch-ups performed by any authorized Toyota retailer or Toyota authorized repairer, or any reliable repairer.
Interior
WARNI NG
When washing the vehicle, never use a water hose or high-pressure jet to clean the interior.Liquids carried in cups or other open containers can spill, presenting a risk of damage to the instruments and controls and the controls located on the centre console. Be
vigilant!
Bodywork
High-gloss paint
WARNI NG
Do not use abrasive products or solvents, petrol or oil to clean the bodywork.Never use an abrasive sponge to clean stubborn stains. Risk of scratching the paintwork!Do not apply polish in strong sunshine, or to plastic or rubber parts.