2021 TOYOTA PROACE CITY VERSO light
[x] Cancel search: lightPage 66 of 272
66
Lighting control lever
Main lighting
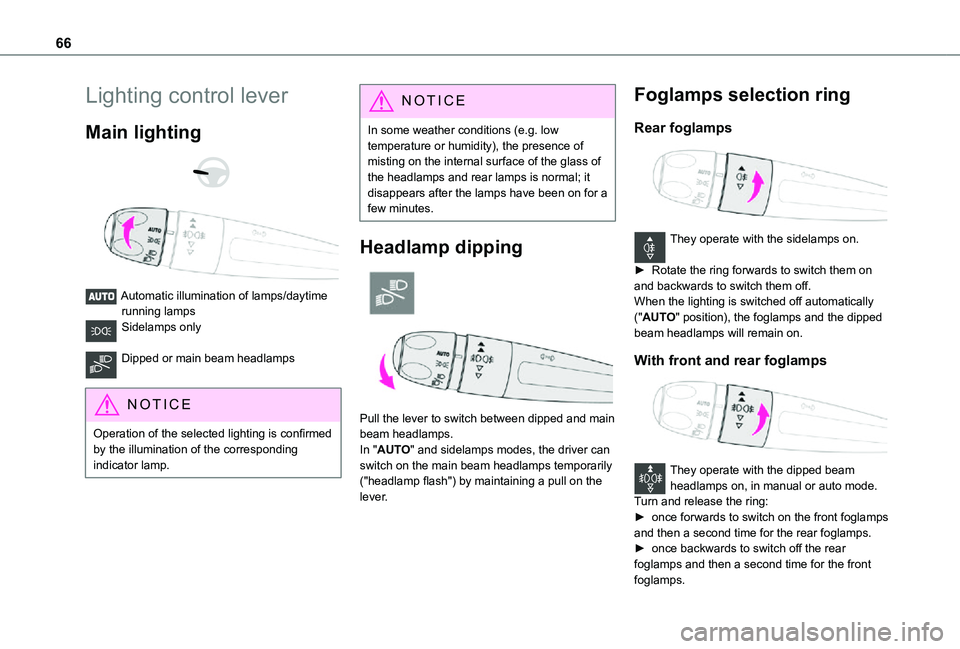
Automatic illumination of lamps/daytime running lampsSidelamps only
Dipped or main beam headlamps
NOTIC E
Operation of the selected lighting is confirmed by the illumination of the corresponding indicator lamp.
NOTIC E
In some weather conditions (e.g. low temperature or humidity), the presence of misting on the internal surface of the glass of the headlamps and rear lamps is normal; it disappears after the lamps have been on for a few minutes.
Headlamp dipping
Pull the lever to switch between dipped and main beam headlamps.
In "AUTO" and sidelamps modes, the driver can switch on the main beam headlamps temporarily ("headlamp flash") by maintaining a pull on the lever.
Foglamps selection ring
Rear foglamps
They operate with the sidelamps on.
► Rotate the ring forwards to switch them on and backwards to switch them off.When the lighting is switched off automatically ("AUTO" position), the foglamps and the dipped beam headlamps will remain on.
With front and rear foglamps
They operate with the dipped beam headlamps on, in manual or auto mode.Turn and release the ring:► once forwards to switch on the front foglamps and then a second time for the rear foglamps.► once backwards to switch off the rear foglamps and then a second time for the front foglamps.
Page 67 of 272
67
Lighting and visibility
4
If the lighting is switched off automatically ("AUTO" position) or the dipped beam headlamps are switched off manually, the foglamps and sidelamps will remain on.► Turn the ring backwards to switch the foglamps off; the sidelamps will then switch off.
NOTIC E
When the lighting is left onAn audible signal when a front door is opened warns the driver that the vehicle's exterior lighting is on, with the ignition off and in manual lighting mode.In this case, switching off the lighting stops the audible signal.The lighting goes off when you switch off the ignition, but you can always switch it on again using the lighting control lever.
NOTIC E
Travelling abroad
If using your vehicle in a country that drives on the other side of the road, the headlamps must be adjusted to avoid dazzling on-coming drivers.Contact a TOYOTA dealer or a qualified workshop.
WARNI NG
In good or rainy weather, by both day and night, use of the front foglamps and the rear foglamps are prohibited. In these situations, the power of their beams may dazzle other drivers. They should only be used in fog or falling snow.In these weather conditions, it is your responsibility to switch on the foglamps and dipped headlamps manually as the sunshine sensor may detect sufficient light.Switch off the front and rear foglamps when they are no longer necessary.
WARNI NG
Never look too closely at the luminous beam of LED headlamps: risk of serious eye injury.
Direction indicators
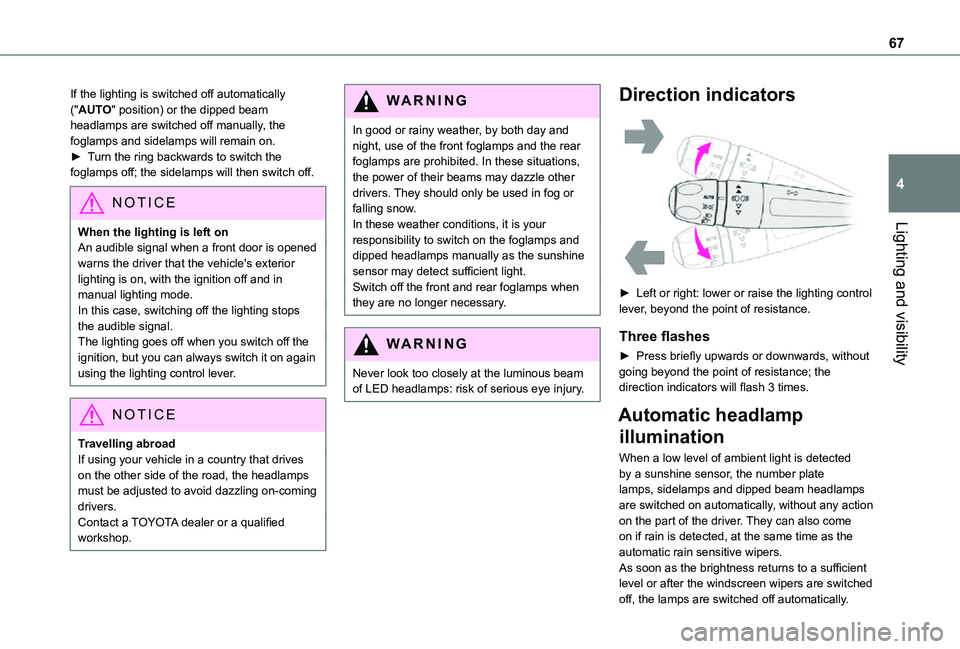
► Left or right: lower or raise the lighting control lever, beyond the point of resistance.
Three flashes
► Press briefly upwards or downwards, without going beyond the point of resistance; the direction indicators will flash 3 times.
Automatic headlamp
illumination
When a low level of ambient light is detected by a sunshine sensor, the number plate lamps, sidelamps and dipped beam headlamps are switched on automatically, without any action on the part of the driver. They can also come on if rain is detected, at the same time as the automatic rain sensitive wipers.As soon as the brightness returns to a sufficient level or after the windscreen wipers are switched off, the lamps are switched off automatically.
Page 68 of 272
68
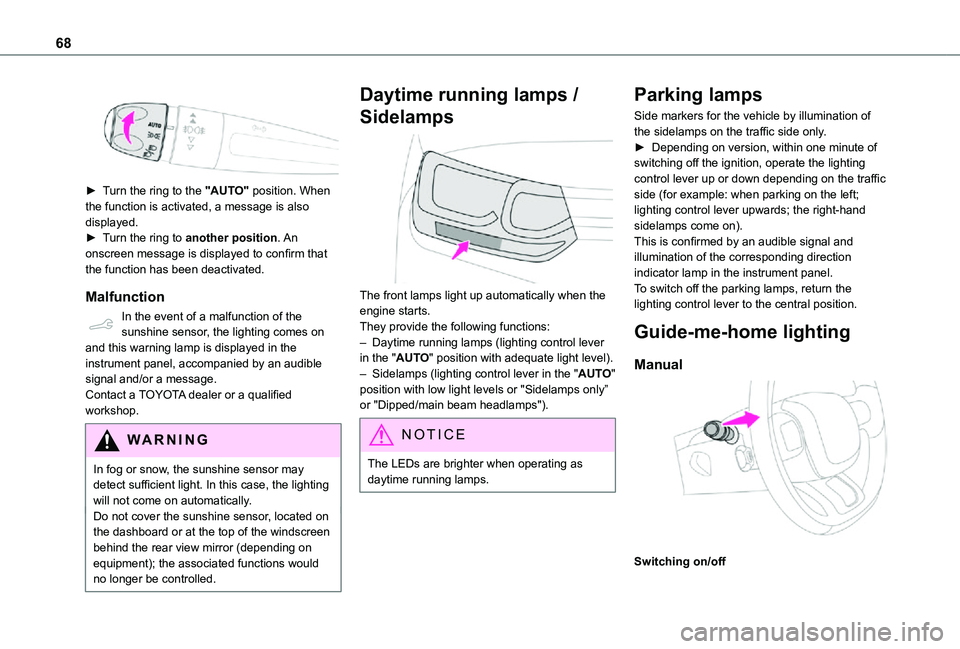
► Turn the ring to the "AUTO" position. When the function is activated, a message is also displayed.► Turn the ring to another position. An
onscreen message is displayed to confirm that the function has been deactivated.
Malfunction
In the event of a malfunction of the sunshine sensor, the lighting comes on and this warning lamp is displayed in the instrument panel, accompanied by an audible signal and/or a message.Contact a TOYOTA dealer or a qualified workshop.
WARNI NG
In fog or snow, the sunshine sensor may detect sufficient light. In this case, the lighting will not come on automatically.Do not cover the sunshine sensor, located on the dashboard or at the top of the windscreen behind the rear view mirror (depending on equipment); the associated functions would no longer be controlled.
Daytime running lamps /
Sidelamps
The front lamps light up automatically when the engine starts.They provide the following functions:– Daytime running lamps (lighting control lever in the "AUTO" position with adequate light level).– Sidelamps (lighting control lever in the "AUTO" position with low light levels or "Sidelamps only” or "Dipped/main beam headlamps").
NOTIC E
The LEDs are brighter when operating as daytime running lamps.
Parking lamps
Side markers for the vehicle by illumination of the sidelamps on the traffic side only.► Depending on version, within one minute of switching off the ignition, operate the lighting control lever up or down depending on the traffic side (for example: when parking on the left; lighting control lever upwards; the right-hand sidelamps come on).This is confirmed by an audible signal and illumination of the corresponding direction indicator lamp in the instrument panel.To switch off the parking lamps, return the lighting control lever to the central position.
Guide-me-home lighting
Manual
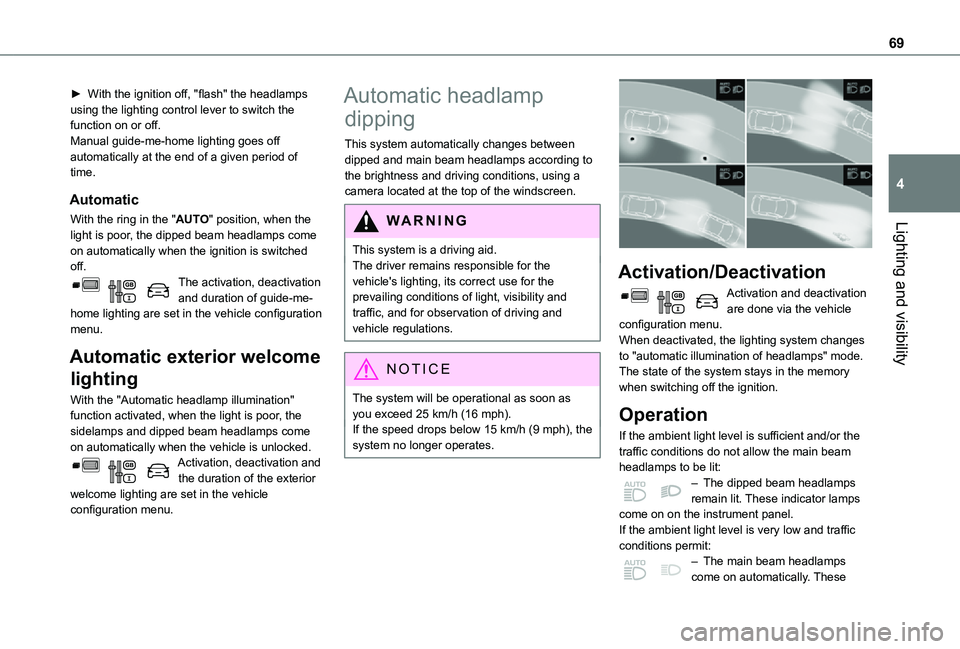
Switching on/off
Page 69 of 272
69
Lighting and visibility
4
► With the ignition off, "flash" the headlamps using the lighting control lever to switch the function on or off.Manual guide-me-home lighting goes off automatically at the end of a given period of time.
Automatic
With the ring in the "AUTO" position, when the light is poor, the dipped beam headlamps come on automatically when the ignition is switched off.The activation, deactivation and duration of guide-me-home lighting are set in the vehicle configuration menu.
Automatic exterior welcome
lighting
With the "Automatic headlamp illumination" function activated, when the light is poor, the sidelamps and dipped beam headlamps come
on automatically when the vehicle is unlocked.Activation, deactivation and the duration of the exterior welcome lighting are set in the vehicle configuration menu.
Automatic headlamp
dipping
This system automatically changes between dipped and main beam headlamps according to the brightness and driving conditions, using a camera located at the top of the windscreen.
WARNI NG
This system is a driving aid.The driver remains responsible for the vehicle's lighting, its correct use for the prevailing conditions of light, visibility and traffic, and for observation of driving and vehicle regulations.
NOTIC E
The system will be operational as soon as you exceed 25 km/h (16 mph).If the speed drops below 15 km/h (9 mph), the system no longer operates.
Activation/Deactivation
Activation and deactivation are done via the vehicle configuration menu.When deactivated, the lighting system changes to "automatic illumination of headlamps" mode.The state of the system stays in the memory when switching off the ignition.
Operation
If the ambient light level is sufficient and/or the traffic conditions do not allow the main beam headlamps to be lit:– The dipped beam headlamps remain lit. These indicator lamps come on on the instrument panel.If the ambient light level is very low and traffic conditions permit:– The main beam headlamps come on automatically. These
Page 70 of 272
70
indicator lamps come on on the instrument panel.The function is deactivated if the fog lamps are switched on or the system detects dense fog.When the fog lamps are switched off or the vehicle leaves the area of dense fog, the function is automatically reactivated.This indicator lamp goes out when the function is deactivated.
Pause
If the situation requires a change of headlamp beam, the driver can take over at any time.► A "headlamp flash" pauses the function and the system changes to "automatic illumination of headlamps" mode:– if the "AUTO" and "Dipped beam" indicator lamps were on, the system changes to main beam,– if the "AUTO" and "Main beam" indicator lamps were on, the system changes to dipped beam.To reactivate the system, flash the headlamps
again.
NOTIC E
The system may suffer interference or not work correctly:– under conditions of poor visibility (snow, heavy rain, etc.),
– if the windscreen in front of the camera is dirty, misted or obscured (for example, by a sticker, etc.),– if the vehicle is facing highly reflective signs.When the system detects thick fog, it temporarily deactivates the function.The system is not able to detect:– road users that do not have their own lighting, such as pedestrians,– vehicles whose lighting is obscured (for example: vehicles running behind a safety barrier on a motorway),– vehicles at the top or bottom of a steep slope, on winding roads, on crossroads.
WARNI NG
Clean the windscreen regularly, particularly the area in front of the camera.The internal surface of the windscreen can also become misted around the camera. In humid and cold weather, demist the windscreen regularly.Do not allow snow to accumulate on the bonnet or roof of the vehicle as this could obstruct the detection camera.
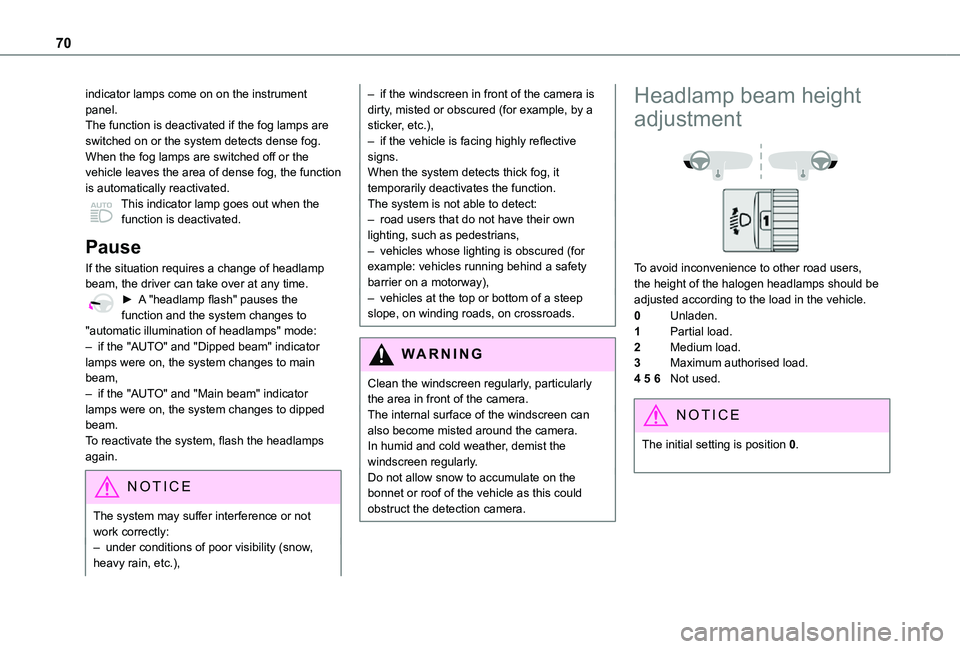
Headlamp beam height
adjustment
To avoid inconvenience to other road users, the height of the halogen headlamps should be adjusted according to the load in the vehicle.
0Unladen.
1Partial load.
2Medium load.
3Maximum authorised load.
4 5 6Not used.
NOTIC E
The initial setting is position 0.
Page 71 of 272
71
Lighting and visibility
4
Wiper control lever
Programming
Your vehicle may also include some functions that can be activated/deactivated:– automatic windscreen wipers,– rear wiping on engaging reverse gear.
NOTIC E
In wintry conditions, remove snow, ice or frost present on the windscreen, around the wiper arms and blades and the windscreen seal, before operating the wipers.
WARNI NG
Do not operate the wipers on a dry windscreen. Under extremely hot or cold conditions, ensure that the wiper blades are not stuck to the windscreen before operating the wipers.
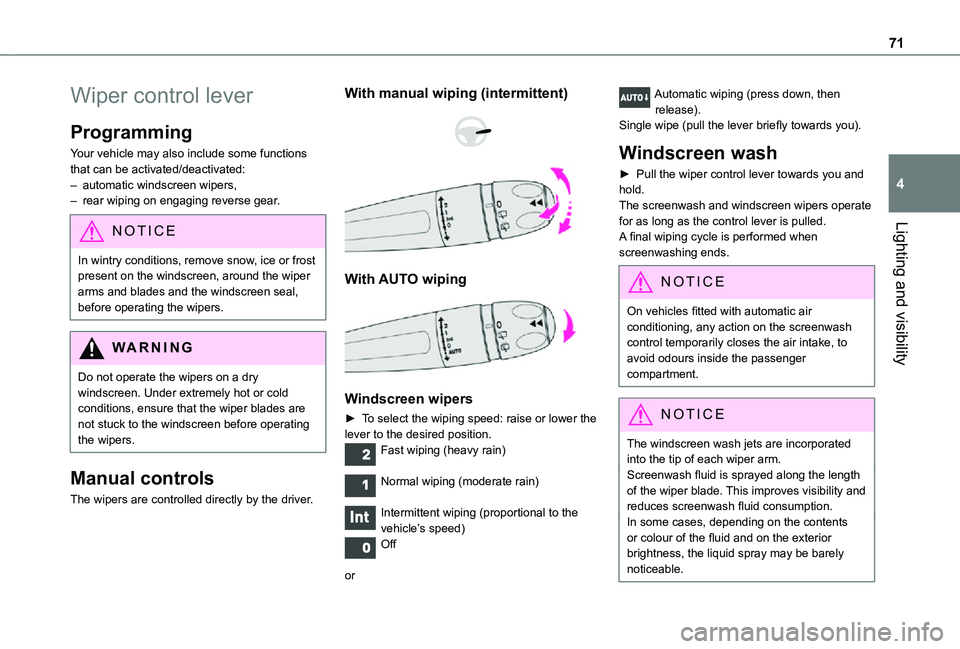
Manual controls
The wipers are controlled directly by the driver.
With manual wiping (intermittent)
With AUTO wiping
Windscreen wipers
► To select the wiping speed: raise or lower the lever to the desired position.Fast wiping (heavy rain)
Normal wiping (moderate rain)
Intermittent wiping (proportional to the vehicle’s speed)Off
or
Automatic wiping (press down, then release).Single wipe (pull the lever briefly towards you).
Windscreen wash
► Pull the wiper control lever towards you and hold.The screenwash and windscreen wipers operate for as long as the control lever is pulled.A final wiping cycle is performed when screenwashing ends.
NOTIC E
On vehicles fitted with automatic air conditioning, any action on the screenwash control temporarily closes the air intake, to avoid odours inside the passenger compartment.
NOTIC E
The windscreen wash jets are incorporated into the tip of each wiper arm.Screenwash fluid is sprayed along the length of the wiper blade. This improves visibility and reduces screenwash fluid consumption.In some cases, depending on the contents or colour of the fluid and on the exterior
brightness, the liquid spray may be barely noticeable.
Page 73 of 272
73
Lighting and visibility
4
Changing a wiper blade
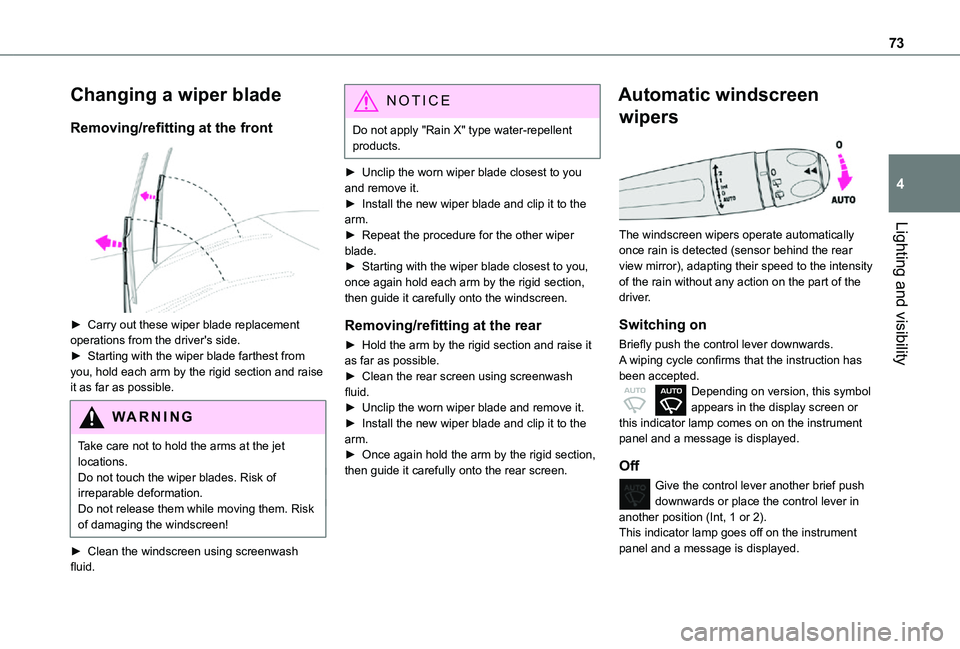
Removing/refitting at the front
► Carry out these wiper blade replacement operations from the driver's side.► Starting with the wiper blade farthest from you, hold each arm by the rigid section and raise it as far as possible.
WARNI NG
Take care not to hold the arms at the jet locations.Do not touch the wiper blades. Risk of irreparable deformation.Do not release them while moving them. Risk of damaging the windscreen!
► Clean the windscreen using screenwash fluid.
NOTIC E
Do not apply "Rain X" type water-repellent products.
► Unclip the worn wiper blade closest to you and remove it.► Install the new wiper blade and clip it to the arm.► Repeat the procedure for the other wiper blade.► Starting with the wiper blade closest to you, once again hold each arm by the rigid section, then guide it carefully onto the windscreen.
Removing/refitting at the rear
► Hold the arm by the rigid section and raise it as far as possible.► Clean the rear screen using screenwash fluid.► Unclip the worn wiper blade and remove it.► Install the new wiper blade and clip it to the arm.
► Once again hold the arm by the rigid section, then guide it carefully onto the rear screen.
Automatic windscreen
wipers
The windscreen wipers operate automatically
once rain is detected (sensor behind the rear view mirror), adapting their speed to the intensity of the rain without any action on the part of the driver.
Switching on
Briefly push the control lever downwards.A wiping cycle confirms that the instruction has been accepted.Depending on version, this symbol appears in the display screen or this indicator lamp comes on on the instrument panel and a message is displayed.
Off
Give the control lever another brief push downwards or place the control lever in another position (Int, 1 or 2).This indicator lamp goes off on the instrument panel and a message is displayed.
Page 76 of 272
76
Emergency or assistance
call (type 1)
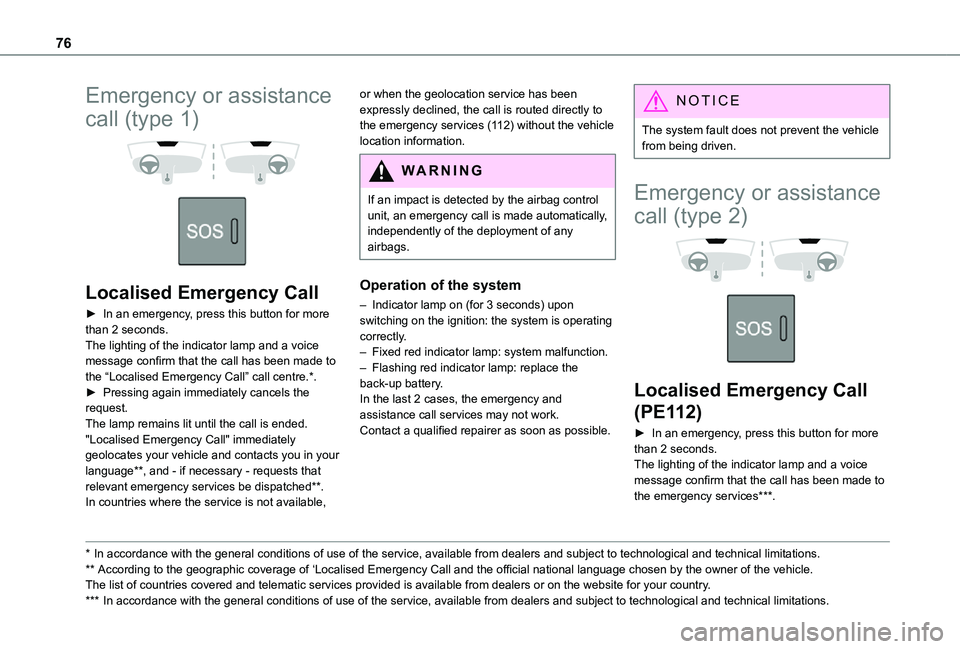
Localised Emergency Call
► In an emergency, press this button for more than 2 seconds.The lighting of the indicator lamp and a voice message confirm that the call has been made to the “Localised Emergency Call” call centre.*.► Pressing again immediately cancels the request.The lamp remains lit until the call is ended."Localised Emergency Call" immediately geolocates your vehicle and contacts you in your language**, and - if necessary - requests that relevant emergency services be dispatched**. In countries where the service is not available,
* In accordance with the general conditions of use of the service, available from dealers an\
d subject to technological and technical limitations.
** According to the geographic coverage of ‘Localised Emergency Call and the official national language chosen by the owner of the vehicle.The list of countries covered and telematic services provided is availab\
le from dealers or on the website for your country.
*** In accordance with the general conditions of use of the service, available from dealers\
and subject to technological and technical limitations.
or when the geolocation service has been expressly declined, the call is routed directly to the emergency services (112) without the vehicle location information.
WARNI NG
If an impact is detected by the airbag control unit, an emergency call is made automatically, independently of the deployment of any
airbags.
Operation of the system
– Indicator lamp on (for 3 seconds) upon switching on the ignition: the system is operating correctly.– Fixed red indicator lamp: system malfunction.– Flashing red indicator lamp: replace the back-up battery.In the last 2 cases, the emergency and assistance call services may not work.Contact a qualified repairer as soon as possible.
NOTIC E
The system fault does not prevent the vehicle from being driven.
Emergency or assistance
call (type 2)
Localised Emergency Call
(PE112)
► In an emergency, press this button for more than 2 seconds.The lighting of the indicator lamp and a voice message confirm that the call has been made to the emergency services***.