2021 TOYOTA PROACE CITY VERSO coolant level
[x] Cancel search: coolant levelPage 10 of 272
10
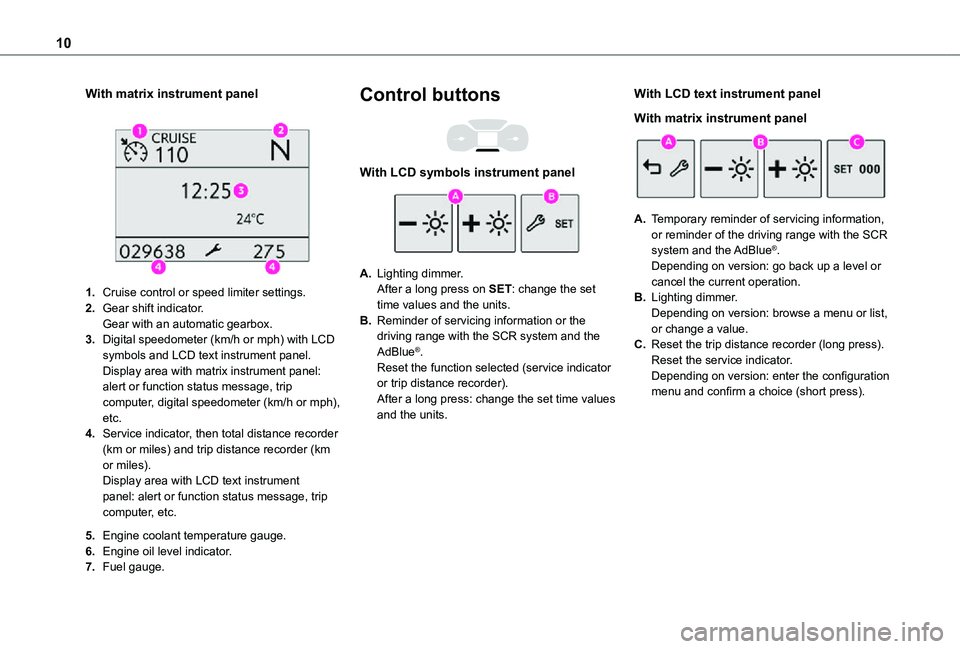
With matrix instrument panel
1.Cruise control or speed limiter settings.
2.Gear shift indicator.Gear with an automatic gearbox.
3.Digital speedometer (km/h or mph) with LCD symbols and LCD text instrument panel.Display area with matrix instrument panel: alert or function status message, trip computer, digital speedometer (km/h or mph), etc.
4.Service indicator, then total distance recorder (km or miles) and trip distance recorder (km or miles).Display area with LCD text instrument panel: alert or function status message, trip computer, etc.
5.Engine coolant temperature gauge.
6.Engine oil level indicator.
7.Fuel gauge.
Control buttons
With LCD symbols instrument panel
A.Lighting dimmer.After a long press on SET: change the set time values and the units.
B.Reminder of servicing information or the driving range with the SCR system and the AdBlue®.Reset the function selected (service indicator or trip distance recorder).After a long press: change the set time values and the units.
With LCD text instrument panel
With matrix instrument panel
A.Temporary reminder of servicing information, or reminder of the driving range with the SCR
system and the AdBlue®.Depending on version: go back up a level or cancel the current operation.
B.Lighting dimmer.Depending on version: browse a menu or list, or change a value.
C.Reset the trip distance recorder (long press).Reset the service indicator.Depending on version: enter the configuration menu and confirm a choice (short press).
Page 12 of 272
12
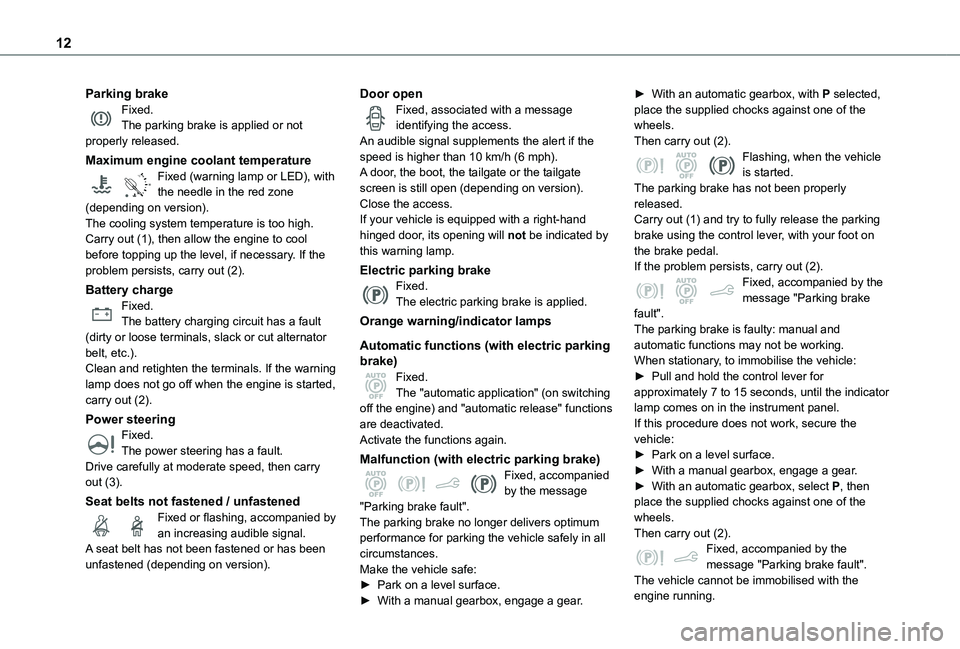
Parking brakeFixed.The parking brake is applied or not properly released.
Maximum engine coolant temperature
90°CFixed (warning lamp or LED), with the needle in the red zone (depending on version).The cooling system temperature is too high.Carry out (1), then allow the engine to cool before topping up the level, if necessary. If the problem persists, carry out (2).
Battery chargeFixed.The battery charging circuit has a fault (dirty or loose terminals, slack or cut alternator belt, etc.).Clean and retighten the terminals. If the warning lamp does not go off when the engine is started, carry out (2).
Power steeringFixed.
The power steering has a fault.Drive carefully at moderate speed, then carry out (3).
Seat belts not fastened / unfastenedFixed or flashing, accompanied by an increasing audible signal.A seat belt has not been fastened or has been unfastened (depending on version).
Door openFixed, associated with a message identifying the access.An audible signal supplements the alert if the speed is higher than 10 km/h (6 mph).A door, the boot, the tailgate or the tailgate screen is still open (depending on version).Close the access.If your vehicle is equipped with a right-hand hinged door, its opening will not be indicated by this warning lamp.
Electric parking brakeFixed.The electric parking brake is applied.
Orange warning/indicator lamps
Automatic functions (with electric parking brake)Fixed.The "automatic application" (on switching off the engine) and "automatic release" functions are deactivated.Activate the functions again.
Malfunction (with electric parking brake)Fixed, accompanied by the message "Parking brake fault".The parking brake no longer delivers optimum performance for parking the vehicle safely in all circumstances.Make the vehicle safe:► Park on a level surface.
► With a manual gearbox, engage a gear.
► With an automatic gearbox, with P selected, place the supplied chocks against one of the wheels.Then carry out (2).Flashing, when the vehicle is started.The parking brake has not been properly released.Carry out (1) and try to fully release the parking brake using the control lever, with your foot on the brake pedal.If the problem persists, carry out (2).Fixed, accompanied by the message "Parking brake fault".The parking brake is faulty: manual and automatic functions may not be working.When stationary, to immobilise the vehicle:► Pull and hold the control lever for approximately 7 to 15 seconds, until the indicator lamp comes on in the instrument panel.If this procedure does not work, secure the vehicle:
► Park on a level surface.► With a manual gearbox, engage a gear.► With an automatic gearbox, select P, then place the supplied chocks against one of the wheels.Then carry out (2).Fixed, accompanied by the message "Parking brake fault".The vehicle cannot be immobilised with the
engine running.
Page 18 of 272
18
Trip distance recorder
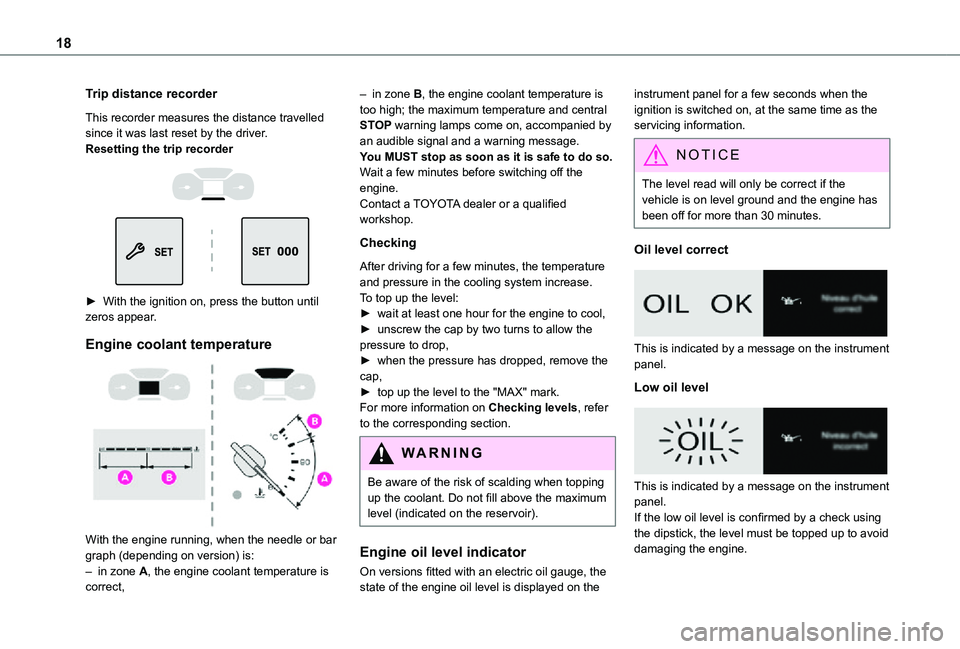
This recorder measures the distance travelled since it was last reset by the driver.Resetting the trip recorder
► With the ignition on, press the button until zeros appear.
Engine coolant temperature
With the engine running, when the needle or bar graph (depending on version) is:– in zone A, the engine coolant temperature is correct,
– in zone B, the engine coolant temperature is too high; the maximum temperature and central STOP warning lamps come on, accompanied by an audible signal and a warning message.You MUST stop as soon as it is safe to do so.Wait a few minutes before switching off the engine.Contact a TOYOTA dealer or a qualified workshop.
Checking
After driving for a few minutes, the temperature and pressure in the cooling system increase.To top up the level:► wait at least one hour for the engine to cool,► unscrew the cap by two turns to allow the pressure to drop,► when the pressure has dropped, remove the cap,► top up the level to the "MAX" mark.For more information on Checking levels, refer to the corresponding section.
WARNI NG
Be aware of the risk of scalding when topping up the coolant. Do not fill above the maximum level (indicated on the reservoir).
Engine oil level indicator
On versions fitted with an electric oil gauge, the state of the engine oil level is displayed on the
instrument panel for a few seconds when the ignition is switched on, at the same time as the servicing information.
NOTIC E
The level read will only be correct if the vehicle is on level ground and the engine has been off for more than 30 minutes.
Oil level correct
This is indicated by a message on the instrument panel.
Low oil level
This is indicated by a message on the instrument panel.If the low oil level is confirmed by a check using the dipstick, the level must be topped up to avoid
damaging the engine.
Page 161 of 272
161
Practical information
7
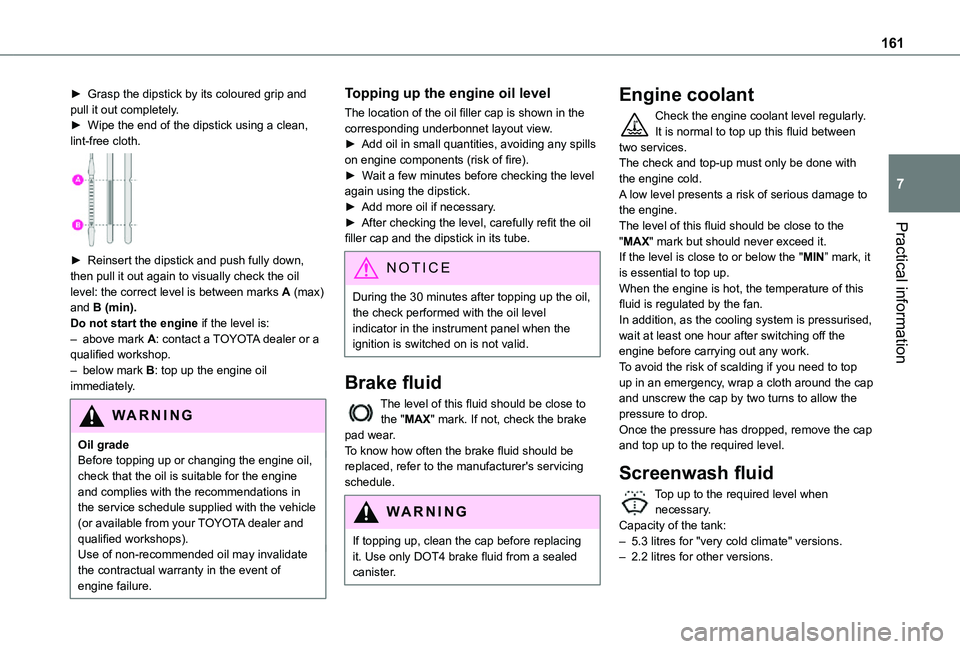
► Grasp the dipstick by its coloured grip and pull it out completely.► Wipe the end of the dipstick using a clean, lint-free cloth.
► Reinsert the dipstick and push fully down, then pull it out again to visually check the oil level: the correct level is between marks A (max) and B (min).Do not start the engine if the level is:– above mark A: contact a TOYOTA dealer or a qualified workshop.– below mark B: top up the engine oil immediately.
WARNI NG
Oil gradeBefore topping up or changing the engine oil, check that the oil is suitable for the engine and complies with the recommendations in the service schedule supplied with the vehicle (or available from your TOYOTA dealer and qualified workshops).Use of non-recommended oil may invalidate the contractual warranty in the event of engine failure.
Topping up the engine oil level
The location of the oil filler cap is shown in the corresponding underbonnet layout view.► Add oil in small quantities, avoiding any spills on engine components (risk of fire).► Wait a few minutes before checking the level again using the dipstick.► Add more oil if necessary.► After checking the level, carefully refit the oil filler cap and the dipstick in its tube.
NOTIC E
During the 30 minutes after topping up the oil, the check performed with the oil level indicator in the instrument panel when the ignition is switched on is not valid.
Brake fluid
The level of this fluid should be close to the "MAX" mark. If not, check the brake pad wear.To know how often the brake fluid should be replaced, refer to the manufacturer's servicing schedule.
WARNI NG
If topping up, clean the cap before replacing
it. Use only DOT4 brake fluid from a sealed canister.
Engine coolant
Check the engine coolant level regularly.It is normal to top up this fluid between two services.The check and top-up must only be done with the engine cold.A low level presents a risk of serious damage to the engine.The level of this fluid should be close to the "MAX" mark but should never exceed it.If the level is close to or below the "MIN” mark, it is essential to top up.When the engine is hot, the temperature of this fluid is regulated by the fan.In addition, as the cooling system is pressurised, wait at least one hour after switching off the engine before carrying out any work.To avoid the risk of scalding if you need to top up in an emergency, wrap a cloth around the cap and unscrew the cap by two turns to allow the pressure to drop.Once the pressure has dropped, remove the cap
and top up to the required level.
Screenwash fluid
Top up to the required level when necessary.Capacity of the tank:– 5.3 litres for "very cold climate" versions.– 2.2 litres for other versions.
Page 253 of 272
253
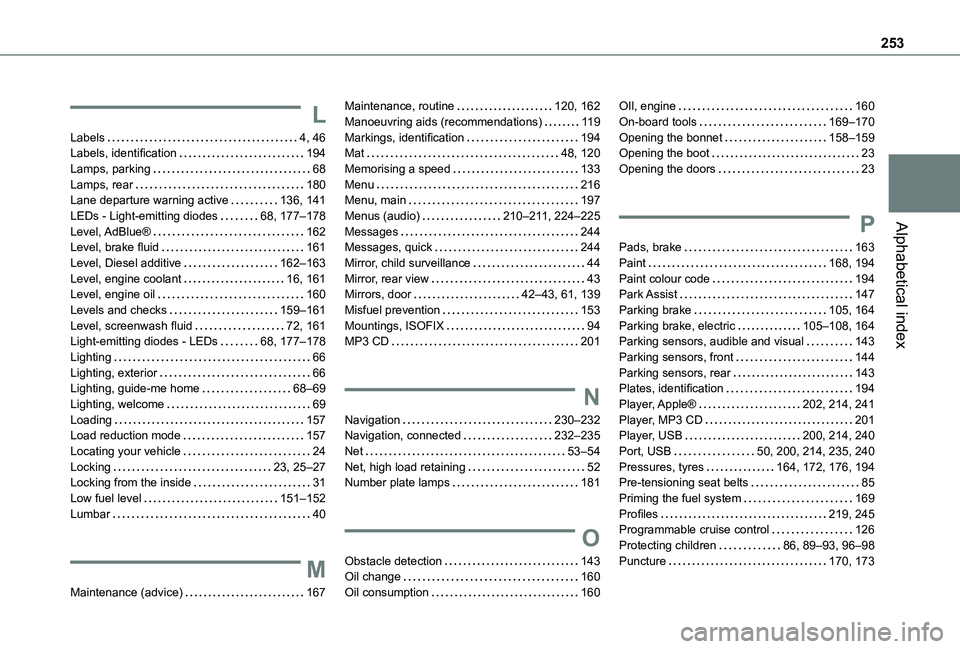
Alphabetical index
L
Labels 4, 46Labels, identification 194Lamps, parking 68Lamps, rear 180Lane departure warning active 136, 141LEDs - Light-emitting diodes 68, 177–178Level, AdBlue® 162Level, brake fluid 161Level, Diesel additive 162–163Level, engine coolant 16, 161Level, engine oil 160Levels and checks 159–161Level, screenwash fluid 72, 161Light-emitting diodes - LEDs 68, 177–178Lighting 66Lighting, exterior 66Lighting, guide-me home 68–69Lighting, welcome 69Loading 157Load reduction mode 157
Locating your vehicle 24Locking 23, 25–27Locking from the inside 31Low fuel level 151–152Lumbar 40
M
Maintenance (advice) 167
Maintenance, routine 120, 162Manoeuvring aids (recommendations) 11 9Markings, identification 194Mat 48, 120Memorising a speed 133Menu 216Menu, main 197Menus (audio) 210–2 11, 224–225Messages 244Messages, quick 244Mirror, child surveillance 44Mirror, rear view 43Mirrors, door 42–43, 61, 139Misfuel prevention 153Mountings, ISOFIX 94MP3 CD 201
N
Navigation 230–232Navigation, connected 232–235
Net 53–54Net, high load retaining 52Number plate lamps 181
O
Obstacle detection 143Oil change 160Oil consumption 160
OIl, engine 160On-board tools 169–170Opening the bonnet 158–159Opening the boot 23Opening the doors 23
P
Pads, brake 163Paint 168, 194Paint colour code 194Park Assist 147Parking brake 105, 164Parking brake, electric 105–108, 164Parking sensors, audible and visual 143Parking sensors, front 144Parking sensors, rear 143Plates, identification 194Player, Apple® 202, 214, 241Player, MP3 CD 201Player, USB 200, 214, 240
Port, USB 50, 200, 214, 235, 240Pressures, tyres 164, 172, 176, 194Pre-tensioning seat belts 85Priming the fuel system 169Profiles 219, 245Programmable cruise control 126Protecting children 86, 89–93, 96–98Puncture 170, 173