2021 TOYOTA PROACE CITY VERSO buttons
[x] Cancel search: buttonsPage 60 of 272
60
Front demisting
- defrosting
Heating
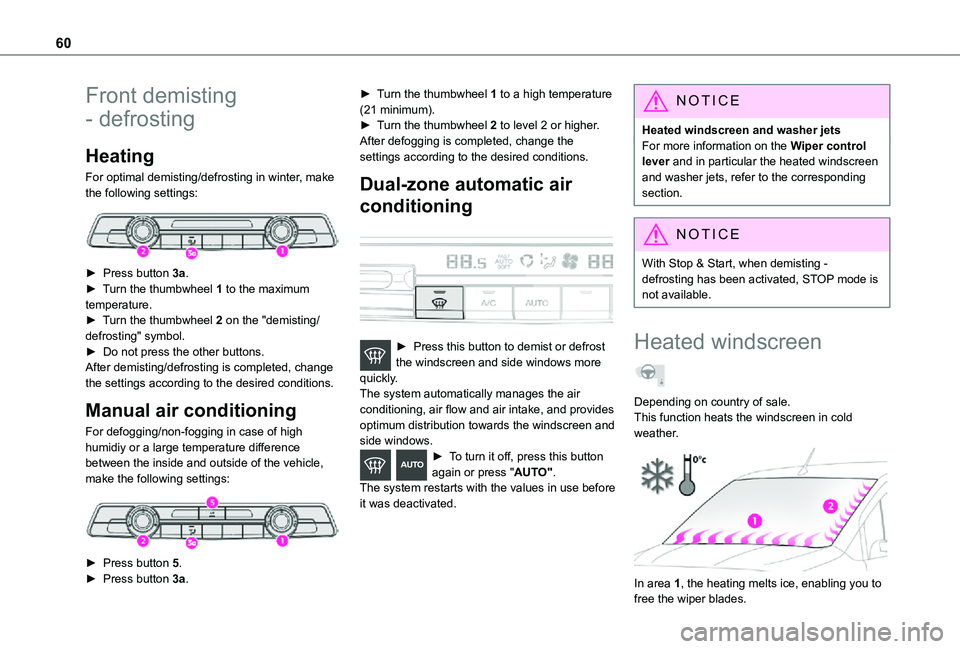
For optimal demisting/defrosting in winter, make the following settings:
► Press button 3a.► Turn the thumbwheel 1 to the maximum temperature.► Turn the thumbwheel 2 on the "demisting/defrosting" symbol.► Do not press the other buttons.After demisting/defrosting is completed, change the settings according to the desired conditions.
Manual air conditioning
For defogging/non-fogging in case of high humidiy or a large temperature difference between the inside and outside of the vehicle, make the following settings:
► Press button 5.► Press button 3a.
► Turn the thumbwheel 1 to a high temperature (21 minimum).► Turn the thumbwheel 2 to level 2 or higher.After defogging is completed, change the settings according to the desired conditions.
Dual-zone automatic air
conditioning
► Press this button to demist or defrost the windscreen and side windows more quickly.The system automatically manages the air conditioning, air flow and air intake, and provides optimum distribution towards the windscreen and side windows.► To turn it off, press this button again or press "AUTO".The system restarts with the values in use before it was deactivated.
NOTIC E
Heated windscreen and washer jetsFor more information on the Wiper control lever and in particular the heated windscreen and washer jets, refer to the corresponding section.
NOTIC E
With Stop & Start, when demisting - defrosting has been activated, STOP mode is not available.
Heated windscreen
Depending on country of sale.This function heats the windscreen in cold weather.
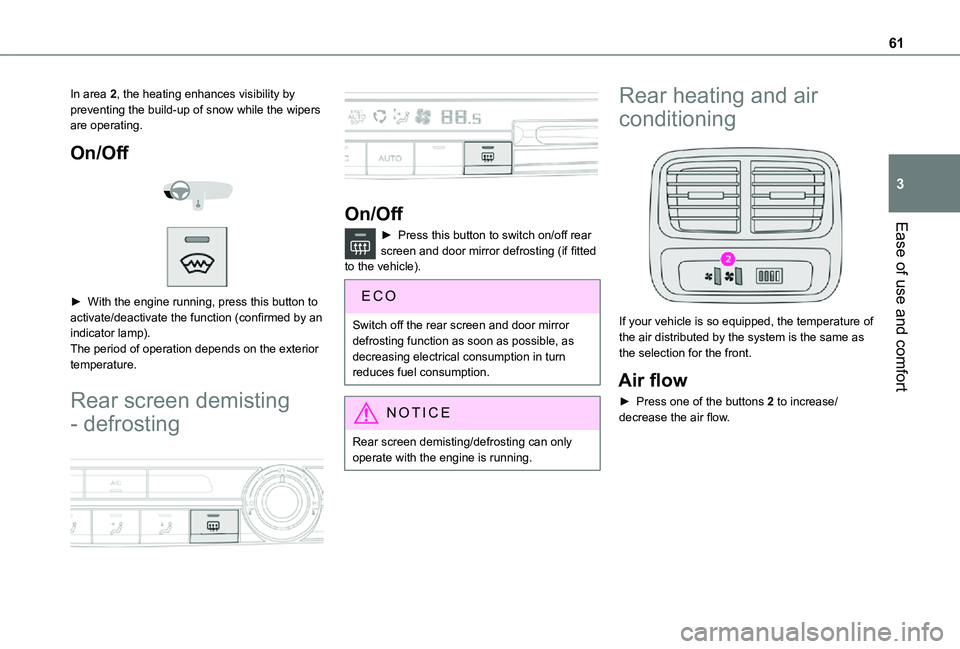
In area 1, the heating melts ice, enabling you to free the wiper blades.
Page 61 of 272
61
Ease of use and comfort
3
In area 2, the heating enhances visibility by preventing the build-up of snow while the wipers are operating.
On/Off
► With the engine running, press this button to activate/deactivate the function (confirmed by an indicator lamp).The period of operation depends on the exterior temperature.
Rear screen demisting
- defrosting
On/Off
► Press this button to switch on/off rear screen and door mirror defrosting (if fitted to the vehicle).
Switch off the rear screen and door mirror defrosting function as soon as possible, as decreasing electrical consumption in turn reduces fuel consumption.
NOTIC E
Rear screen demisting/defrosting can only operate with the engine is running.
Rear heating and air
conditioning
If your vehicle is so equipped, the temperature of the air distributed by the system is the same as the selection for the front.
Air flow
► Press one of the buttons 2 to increase/decrease the air flow.
Page 118 of 272
11 8
NOTIC E
For more information on Navigation, refer to the section Audio equipment and telematics.
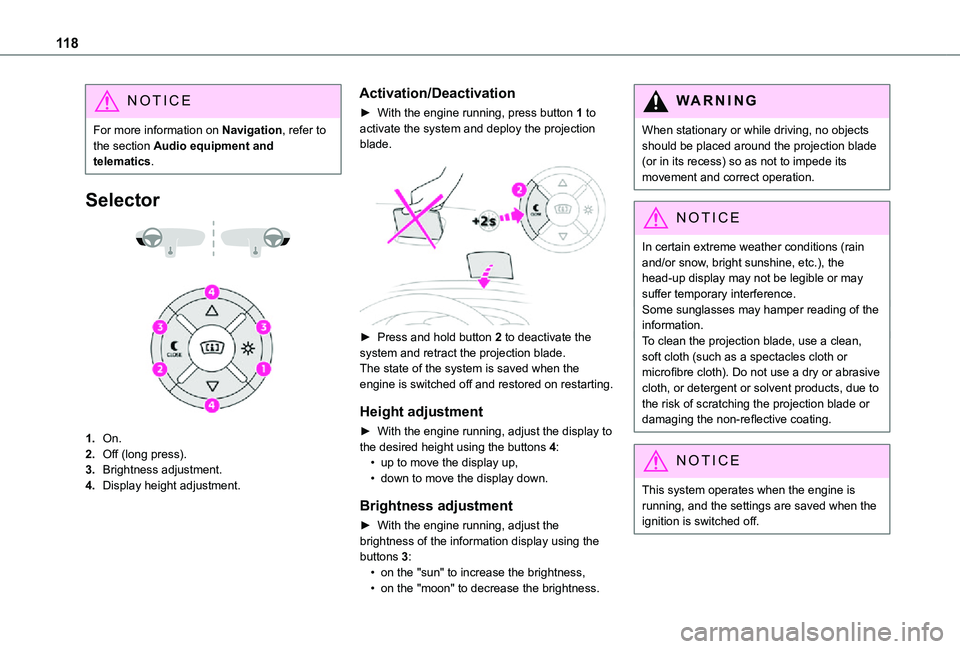
Selector
1.On.
2.Off (long press).
3.Brightness adjustment.
4.Display height adjustment.
Activation/Deactivation
► With the engine running, press button 1 to activate the system and deploy the projection blade.
► Press and hold button 2 to deactivate the system and retract the projection blade.The state of the system is saved when the engine is switched off and restored on restarting.
Height adjustment
► With the engine running, adjust the display to
the desired height using the buttons 4:• up to move the display up,• down to move the display down.
Brightness adjustment
► With the engine running, adjust the brightness of the information display using the buttons 3:• on the "sun" to increase the brightness,• on the "moon" to decrease the brightness.
W ARNI NG
When stationary or while driving, no objects should be placed around the projection blade (or in its recess) so as not to impede its movement and correct operation.
NOTIC E
In certain extreme weather conditions (rain and/or snow, bright sunshine, etc.), the head-up display may not be legible or may suffer temporary interference.Some sunglasses may hamper reading of the information.To clean the projection blade, use a clean, soft cloth (such as a spectacles cloth or microfibre cloth). Do not use a dry or abrasive cloth, or detergent or solvent products, due to the risk of scratching the projection blade or damaging the non-reflective coating.
NOTIC E
This system operates when the engine is running, and the settings are saved when the ignition is switched off.
Page 126 of 272
126
Once the speed of the vehicle returns to the programmed setting, the speed limiter functions again: the display of the speed setting becomes fixed again.
Switching off
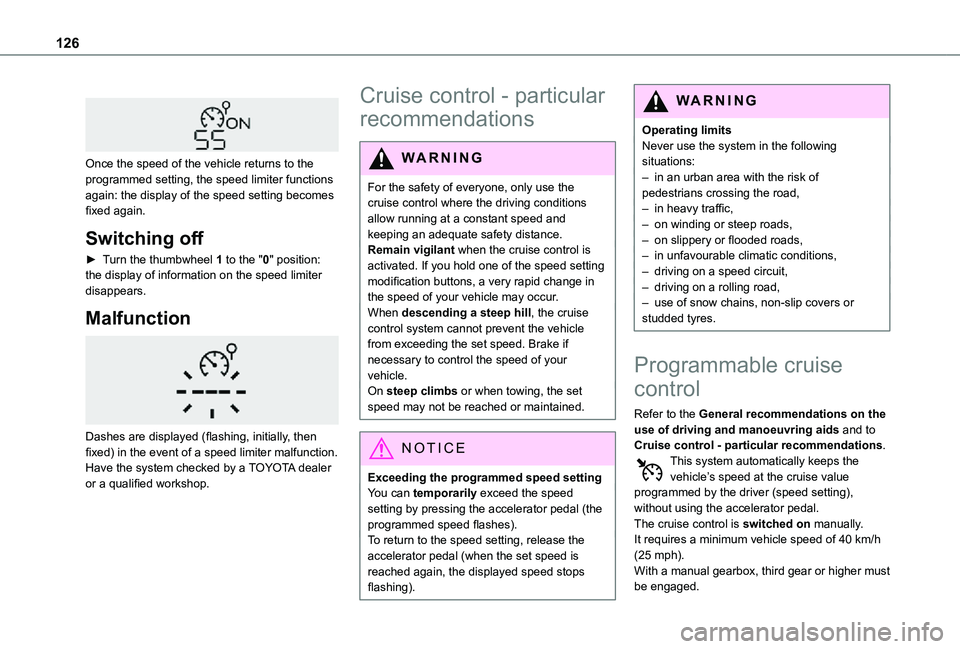
► Turn the thumbwheel 1 to the "0" position: the display of information on the speed limiter disappears.
Malfunction
Dashes are displayed (flashing, initially, then fixed) in the event of a speed limiter malfunction.Have the system checked by a TOYOTA dealer or a qualified workshop.
Cruise control - particular
recommendations
WARNI NG
For the safety of everyone, only use the cruise control where the driving conditions allow running at a constant speed and keeping an adequate safety distance.
Remain vigilant when the cruise control is activated. If you hold one of the speed setting modification buttons, a very rapid change in the speed of your vehicle may occur.When descending a steep hill, the cruise control system cannot prevent the vehicle from exceeding the set speed. Brake if necessary to control the speed of your vehicle.On steep climbs or when towing, the set speed may not be reached or maintained.
NOTIC E
Exceeding the programmed speed settingYou can temporarily exceed the speed setting by pressing the accelerator pedal (the programmed speed flashes).To return to the speed setting, release the accelerator pedal (when the set speed is reached again, the displayed speed stops flashing).
WARNI NG
Operating limitsNever use the system in the following situations:– in an urban area with the risk of pedestrians crossing the road,– in heavy traffic,– on winding or steep roads,– on slippery or flooded roads,– in unfavourable climatic conditions,– driving on a speed circuit,– driving on a rolling road,– use of snow chains, non-slip covers or studded tyres.
Programmable cruise
control
Refer to the General recommendations on the use of driving and manoeuvring aids and to
Cruise control - particular recommendations.This system automatically keeps the vehicle’s speed at the cruise value programmed by the driver (speed setting), without using the accelerator pedal.The cruise control is switched on manually.It requires a minimum vehicle speed of 40 km/h (25 mph).With a manual gearbox, third gear or higher must be engaged.
Page 130 of 272
130
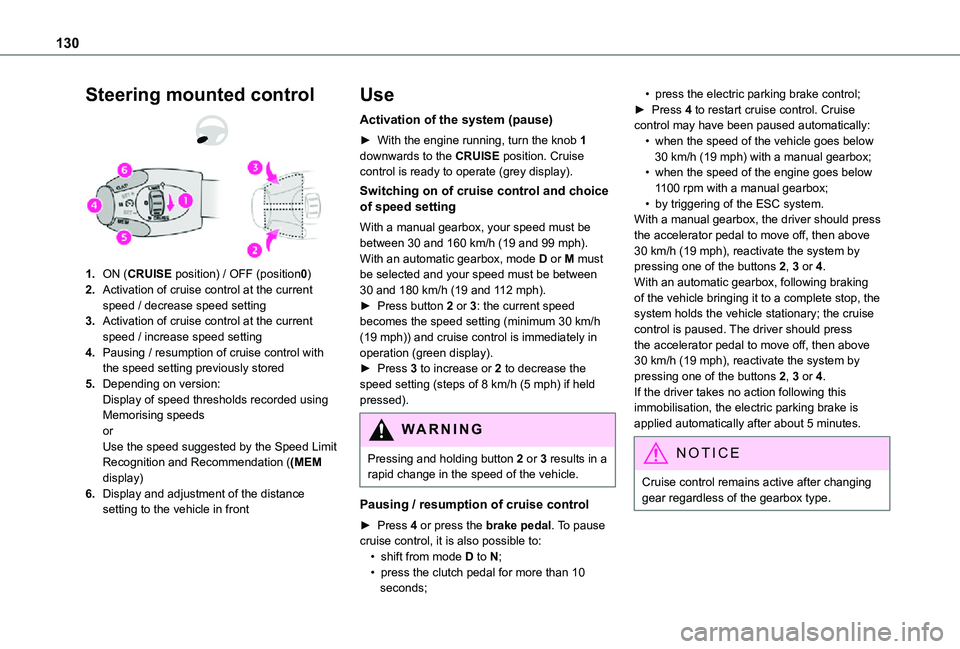
Steering mounted control
1.ON (CRUISE position) / OFF (position0)
2.Activation of cruise control at the current speed / decrease speed setting
3.Activation of cruise control at the current speed / increase speed setting
4.Pausing / resumption of cruise control with the speed setting previously stored
5.Depending on version:Display of speed thresholds recorded using Memorising speedsorUse the speed suggested by the Speed Limit Recognition and Recommendation ((MEM display)
6.Display and adjustment of the distance setting to the vehicle in front
Use
Activation of the system (pause)
► With the engine running, turn the knob 1 downwards to the CRUISE position. Cruise control is ready to operate (grey display).
Switching on of cruise control and choice of speed setting
With a manual gearbox, your speed must be between 30 and 160 km/h (19 and 99 mph).With an automatic gearbox, mode D or M must be selected and your speed must be between 30 and 180 km/h (19 and 112 mph).► Press button 2 or 3: the current speed becomes the speed setting (minimum 30 km/h (19 mph)) and cruise control is immediately in operation (green display).► Press 3 to increase or 2 to decrease the speed setting (steps of 8 km/h (5 mph) if held pressed).
WARNI NG
Pressing and holding button 2 or 3 results in a rapid change in the speed of the vehicle.
Pausing / resumption of cruise control
► Press 4 or press the brake pedal. To pause cruise control, it is also possible to:• shift from mode D to N;• press the clutch pedal for more than 10 seconds;
• press the electric parking brake control;► Press 4 to restart cruise control. Cruise control may have been paused automatically:• when the speed of the vehicle goes below 30 km/h (19 mph) with a manual gearbox;• when the speed of the engine goes below 1100 rpm with a manual gearbox;• by triggering of the ESC system.With a manual gearbox, the driver should press the accelerator pedal to move off, then above 30 km/h (19 mph), reactivate the system by pressing one of the buttons 2, 3 or 4.With an automatic gearbox, following braking of the vehicle bringing it to a complete stop, the system holds the vehicle stationary; the cruise control is paused. The driver should press the accelerator pedal to move off, then above 30 km/h (19 mph), reactivate the system by pressing one of the buttons 2, 3 or 4.If the driver takes no action following this immobilisation, the electric parking brake is applied automatically after about 5 minutes.
N OTIC E
Cruise control remains active after changing gear regardless of the gearbox type.
Page 195 of 272
195
Bluetooth® audio system
10
Bluetooth® audio system
NOTIC E
The different functions and settings described vary according to the version and configuration of your vehicle.
WARNI NG
As a safety measure and because it requires sustained attention by the driver, the pairing
of a Bluetooth mobile telephone with the Bluetooth hands-free system of your audio system must be done with the vehicle stationary and the ignition on.
WARNI NG
Your audio system is coded in such a way that it will only operate in your vehicle.All work on the system must be carried out exclusively by a dealer or qualified workshop, to avoid any risk of electrocution, fire or mechanical faults.
NOTIC E
To avoid discharging the battery, the audio system may switch off after a few minutes if the engine is not running.
First steps
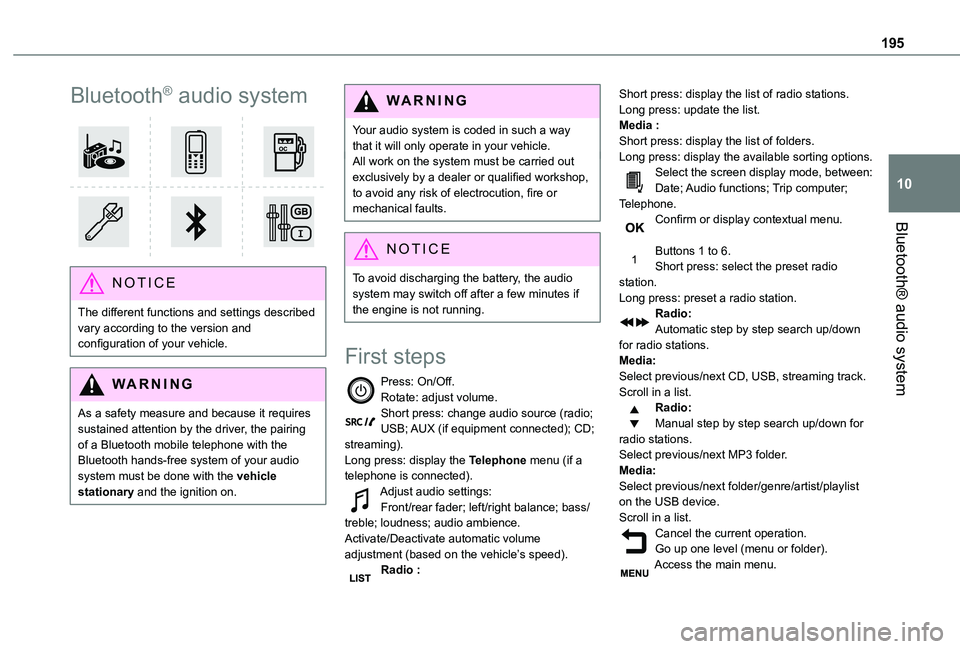
Press: On/Off.Rotate: adjust volume.Short press: change audio source (radio; USB; AUX (if equipment connected); CD; streaming).Long press: display the Telephone menu (if a telephone is connected).Adjust audio settings:Front/rear fader; left/right balance; bass/treble; loudness; audio ambience.Activate/Deactivate automatic volume adjustment (based on the vehicle’s speed).Radio :
Short press: display the list of radio stations.Long press: update the list.Media :Short press: display the list of folders.Long press: display the available sorting options.Select the screen display mode, between:Date; Audio functions; Trip computer; Telephone.Confirm or display contextual menu.
Buttons 1 to 6.Short press: select the preset radio station.Long press: preset a radio station.Radio:Automatic step by step search up/down for radio stations.Media:Select previous/next CD, USB, streaming track.Scroll in a list.Radio:Manual step by step search up/down for radio stations.
Select previous/next MP3 folder.Media:Select previous/next folder/genre/artist/playlist on the USB device.Scroll in a list.Cancel the current operation.Go up one level (menu or folder).Access the main menu.
Page 196 of 272
196
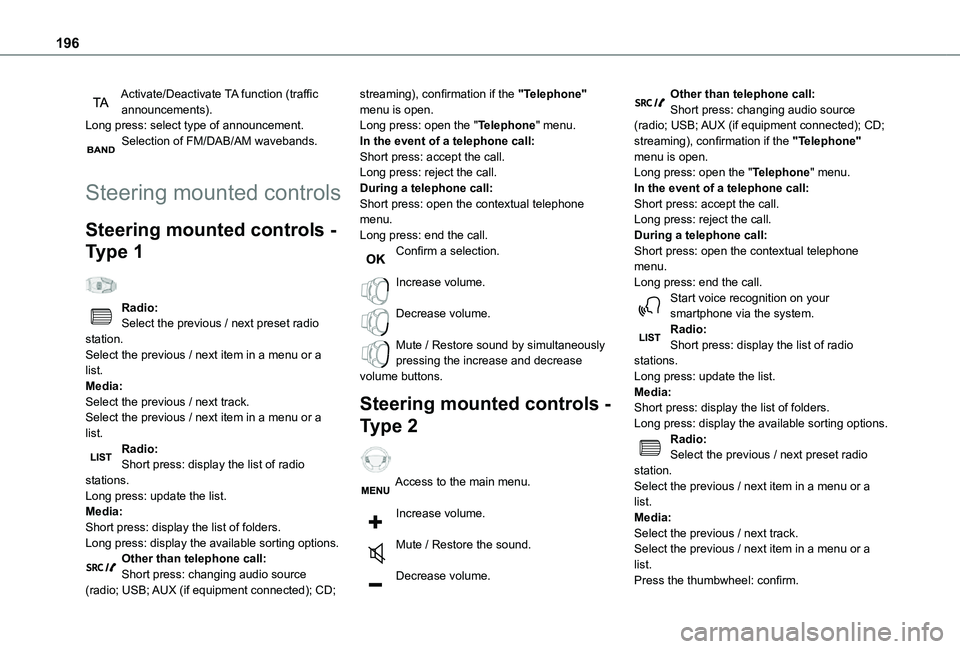
Activate/Deactivate TA function (traffic announcements).Long press: select type of announcement.Selection of FM/DAB/AM wavebands.
Steering mounted controls
Steering mounted controls -
Type 1
Radio:Select the previous / next preset radio station.Select the previous / next item in a menu or a list.Media:Select the previous / next track.Select the previous / next item in a menu or a list.
Radio:Short press: display the list of radio stations.Long press: update the list.Media:Short press: display the list of folders.Long press: display the available sorting options.Other than telephone call:Short press: changing audio source (radio; USB; AUX (if equipment connected); CD;
streaming), confirmation if the "Telephone" menu is open.Long press: open the "Telephone" menu.In the event of a telephone call:Short press: accept the call.Long press: reject the call.During a telephone call:Short press: open the contextual telephone menu.Long press: end the call.Confirm a selection.
Increase volume.
Decrease volume.
Mute / Restore sound by simultaneously pressing the increase and decrease volume buttons.
Steering mounted controls -
Type 2
Access to the main menu.
Increase volume.
Mute / Restore the sound.
Decrease volume.
Other than telephone call:Short press: changing audio source (radio; USB; AUX (if equipment connected); CD; streaming), confirmation if the "Telephone" menu is open.Long press: open the "Telephone" menu.In the event of a telephone call:Short press: accept the call.Long press: reject the call.During a telephone call:Short press: open the contextual telephone menu.Long press: end the call.Start voice recognition on your smartphone via the system.Radio:Short press: display the list of radio stations.Long press: update the list.Media:Short press: display the list of folders.Long press: display the available sorting options.Radio:
Select the previous / next preset radio station.Select the previous / next item in a menu or a list.Media:Select the previous / next track.Select the previous / next item in a menu or a list.Press the thumbwheel: confirm.
Page 197 of 272
197
Bluetooth® audio system
10
Menus
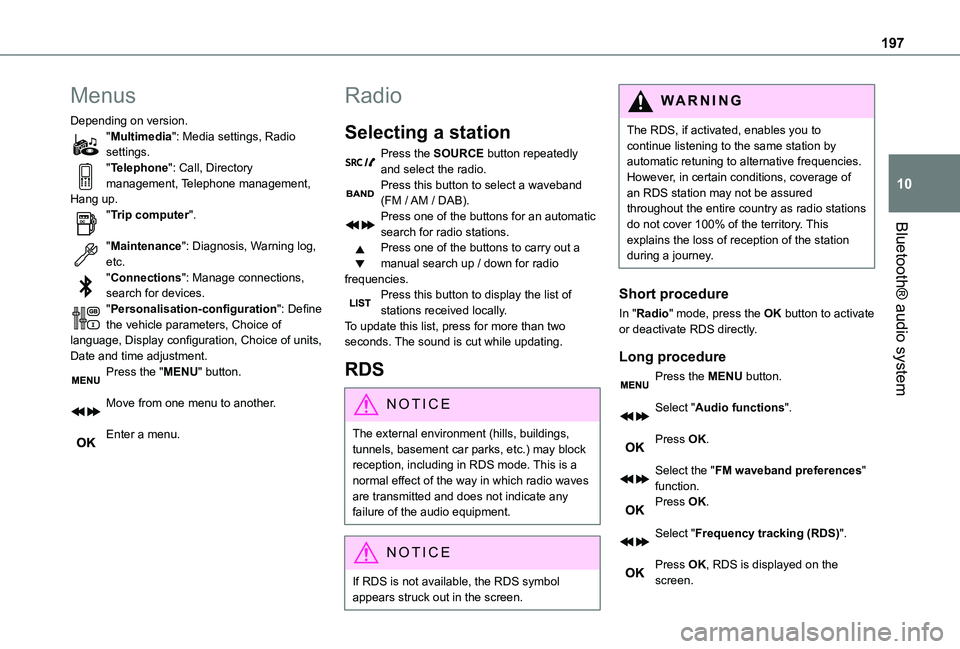
Depending on version."Multimedia": Media settings, Radio settings."Telephone": Call, Directory management, Telephone management, Hang up."Trip computer".
"Maintenance": Diagnosis, Warning log, etc."Connections": Manage connections, search for devices."Personalisation-configuration": Define the vehicle parameters, Choice of language, Display configuration, Choice of units, Date and time adjustment.Press the "MENU" button.
Move from one menu to another.
Enter a menu.
Radio
Selecting a station
Press the SOURCE button repeatedly and select the radio.Press this button to select a waveband (FM / AM / DAB).Press one of the buttons for an automatic search for radio stations.Press one of the buttons to carry out a manual search up / down for radio frequencies.Press this button to display the list of stations received locally.To update this list, press for more than two seconds. The sound is cut while updating.
RDS
NOTIC E
The external environment (hills, buildings, tunnels, basement car parks, etc.) may block reception, including in RDS mode. This is a normal effect of the way in which radio waves are transmitted and does not indicate any failure of the audio equipment.
NOTIC E
If RDS is not available, the RDS symbol appears struck out in the screen.
WARNI NG
The RDS, if activated, enables you to continue listening to the same station by automatic retuning to alternative frequencies. However, in certain conditions, coverage of an RDS station may not be assured throughout the entire country as radio stations do not cover 100% of the territory. This explains the loss of reception of the station during a journey.
Short procedure
In "Radio" mode, press the OK button to activate or deactivate RDS directly.
Long procedure
Press the MENU button.
Select "Audio functions".
Press OK.
Select the "FM waveband preferences" function.Press OK.
Select "Frequency tracking (RDS)".
Press OK, RDS is displayed on the screen.