2021 TOYOTA PROACE CITY mirror
[x] Cancel search: mirrorPage 148 of 272
148
WARNI NG
Obstacles may appear further away than they actually are.During parking manoeuvres and lane changes, it is important to check the sides of the vehicle using the mirrors.The rear parking sensors also supplement the information on the vehicle's surroundings.
Activation / Deactivation
The system starts when the ignition is switched on.
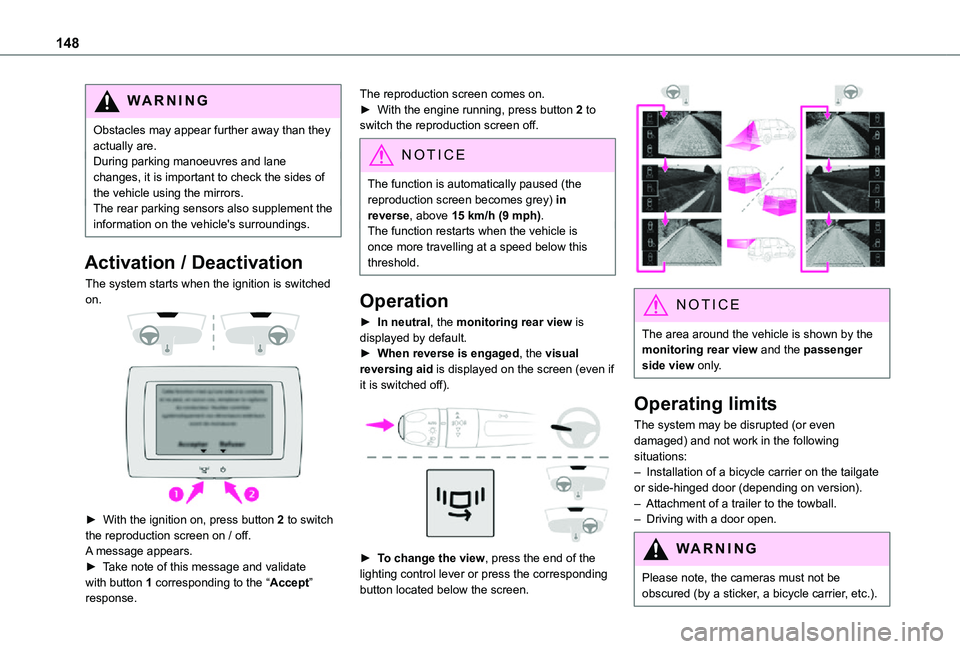
► With the ignition on, press button 2 to switch the reproduction screen on / off.
A message appears.► Take note of this message and validate with button 1 corresponding to the “Accept” response.
The reproduction screen comes on.► With the engine running, press button 2 to switch the reproduction screen off.
NOTIC E
The function is automatically paused (the reproduction screen becomes grey) in reverse, above 15 km/h (9 mph).The function restarts when the vehicle is
once more travelling at a speed below this threshold.
Operation
► In neutral, the monitoring rear view is displayed by default.► When reverse is engaged, the visual reversing aid is displayed on the screen (even if it is switched off).
► To change the view, press the end of the lighting control lever or press the corresponding button located below the screen.
NOTIC E
The area around the vehicle is shown by the monitoring rear view and the passenger side view only.
Operating limits
The system may be disrupted (or even damaged) and not work in the following situations:– Installation of a bicycle carrier on the tailgate or side-hinged door (depending on version).– Attachment of a trailer to the towball.– Driving with a door open.
WARNI NG
Please note, the cameras must not be obscured (by a sticker, a bicycle carrier, etc.).
Page 182 of 272
182
NOTIC E
For more information on installing a towbar or TAXI type equipment, contact a TOYOTA dealer.
Dashboard fuses
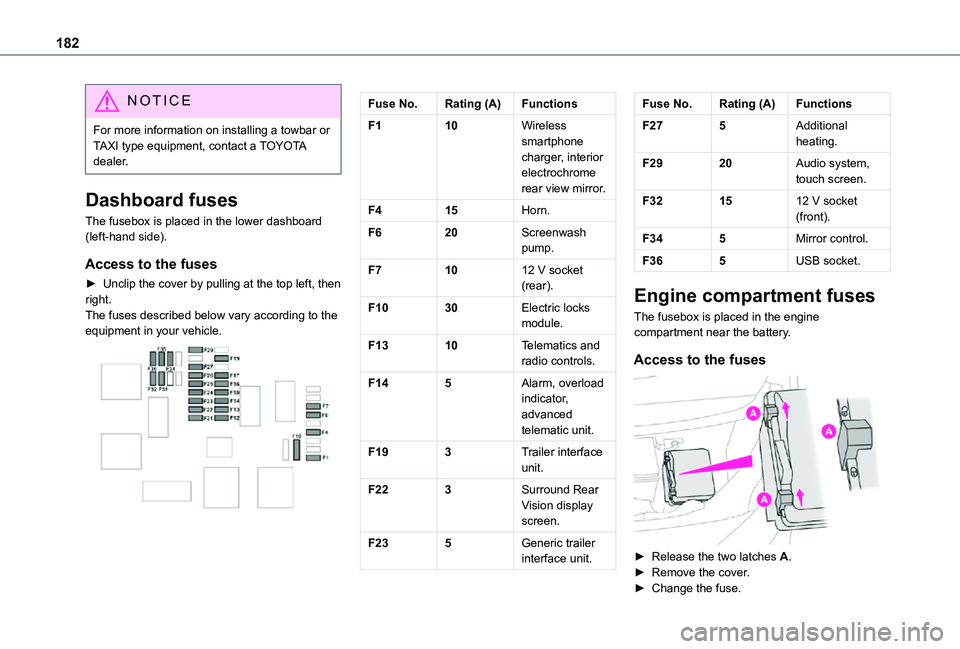
The fusebox is placed in the lower dashboard (left-hand side).
Access to the fuses
► Unclip the cover by pulling at the top left, then right.The fuses described below vary according to the equipment in your vehicle.
Fuse No.Rating (A)Functions
F110Wireless smartphone charger, interior electrochrome rear view mirror.
F415Horn.
F620Screenwash pump.
F71012 V socket (rear).
F1030Electric locks module.
F1310Telematics and radio controls.
F145Alarm, overload indicator, advanced telematic unit.
F193Trailer interface unit.
F223Surround Rear Vision display screen.
F235Generic trailer interface unit.
Fuse No.Rating (A)Functions
F275Additional heating.
F2920Audio system, touch screen.
F321512 V socket (front).
F345Mirror control.
F365USB socket.
Engine compartment fuses
The fusebox is placed in the engine compartment near the battery.
Access to the fuses
► Release the two latches A.► Remove the cover.► Change the fuse.
Page 189 of 272
189
Technical data
9
Dimensions (mm)
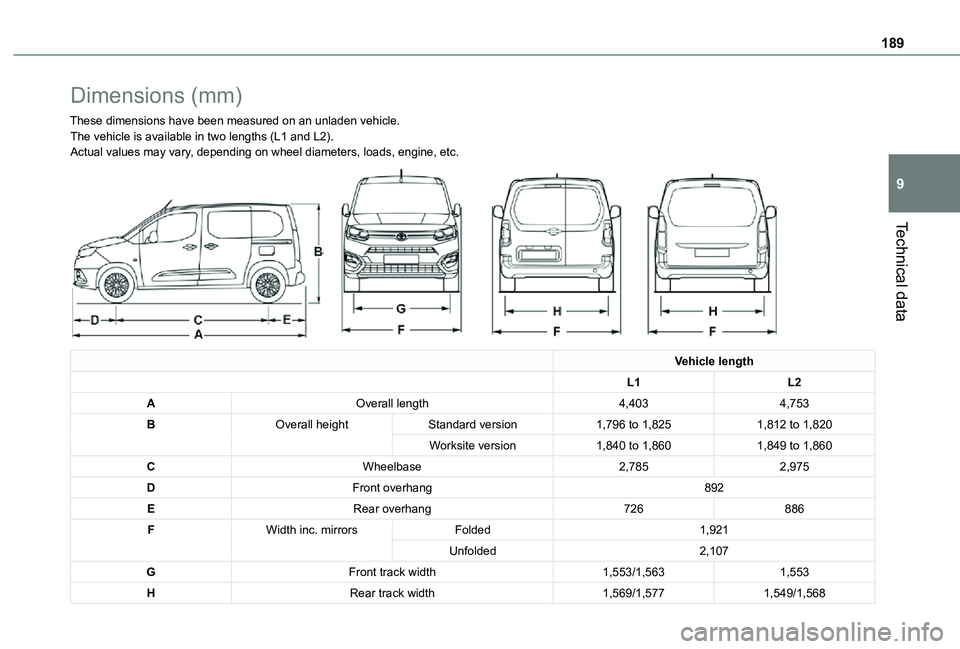
These dimensions have been measured on an unladen vehicle.The vehicle is available in two lengths (L1 and L2).Actual values may vary, depending on wheel diameters, loads, engine, etc.
Vehicle length
L1L2
AOverall length4,4034,753
BOverall heightStandard version1,796 to 1,8251,812 to 1,820
Worksite version1,840 to 1,8601,849 to 1,860
CWheelbase2,7852,975
DFront overhang892
ERear overhang726886
FWidth inc. mirrorsFolded1,921
Unfolded2,107
GFront track width1,553/1,5631,553
HRear track width1,569/1,5771,549/1,568
Page 210 of 272
210
TOYOTA Connect Radio
Multimedia audio system -
Applications - Bluetooth®
telephone
NOTIC E
The functions and settings described vary
according to the vehicle version and configuration.
WARNI NG
For safety reasons and because they require sustained attention by the driver, the following operations must be carried out with the vehicle stationary and the ignition on:– Pairing the smartphone with the system in Bluetooth mode.– Using the smartphone.– Connection to the CarPlay®, MirrorLinkTM or Android Auto applications (certain applications interrupt their display while the vehicle is moving).– Changing the system settings and configuration.
NOTIC E
The system is protected in such a way that it will only operate in the vehicle.The Energy Economy Mode message is displayed when the system is about to enter the corresponding mode.
First steps
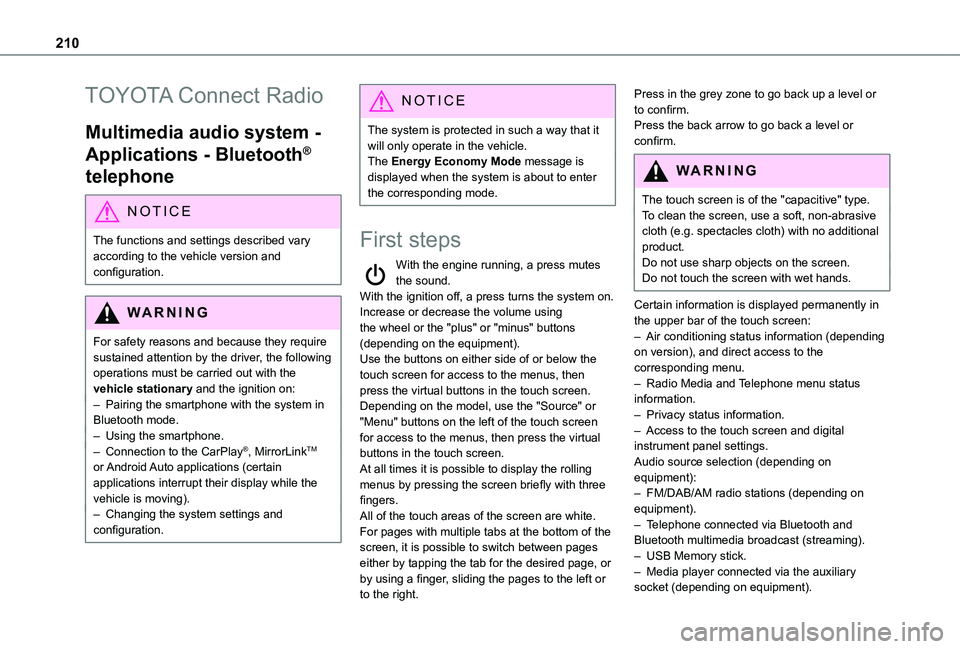
With the engine running, a press mutes the sound.With the ignition off, a press turns the system on.Increase or decrease the volume using the wheel or the "plus" or "minus" buttons (depending on the equipment).Use the buttons on either side of or below the touch screen for access to the menus, then press the virtual buttons in the touch screen.Depending on the model, use the "Source" or "Menu" buttons on the left of the touch screen for access to the menus, then press the virtual
buttons in the touch screen.At all times it is possible to display the rolling menus by pressing the screen briefly with three fingers.All of the touch areas of the screen are white.For pages with multiple tabs at the bottom of the screen, it is possible to switch between pages either by tapping the tab for the desired page, or by using a finger, sliding the pages to the left or to the right.
Press in the grey zone to go back up a level or to confirm.Press the back arrow to go back a level or confirm.
WARNI NG
The touch screen is of the "capacitive" type.To clean the screen, use a soft, non-abrasive cloth (e.g. spectacles cloth) with no additional
product.Do not use sharp objects on the screen.Do not touch the screen with wet hands.
Certain information is displayed permanently in the upper bar of the touch screen:– Air conditioning status information (depending on version), and direct access to the corresponding menu.– Radio Media and Telephone menu status information.– Privacy status information.– Access to the touch screen and digital instrument panel settings.Audio source selection (depending on equipment):– FM/DAB/AM radio stations (depending on equipment).– Telephone connected via Bluetooth and Bluetooth multimedia broadcast (streaming).– USB Memory stick.– Media player connected via the auxiliary socket (depending on equipment).
Page 212 of 272
212
Short press: confirm a selection; if nothing selected, access to presets.Radio: display the list of stations.Media: display the list of tracks.Radio (press and hold): update the list of stations received.
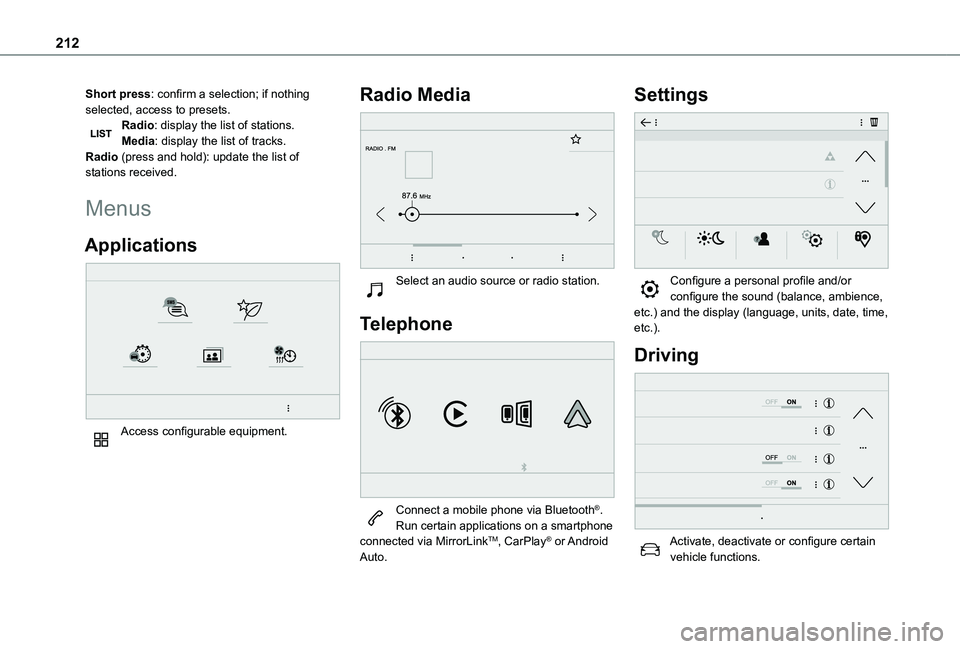
Menus
Applications
Access configurable equipment.
Radio Media
Select an audio source or radio station.
Telephone
Connect a mobile phone via Bluetooth®.Run certain applications on a smartphone connected via MirrorLinkTM, CarPlay® or Android Auto.
Settings
Configure a personal profile and/or configure the sound (balance, ambience, etc.) and the display (language, units, date, time, etc.).
Driving
Activate, deactivate or configure certain vehicle functions.
Page 213 of 272
213
TOYOTA Connect Radio
11
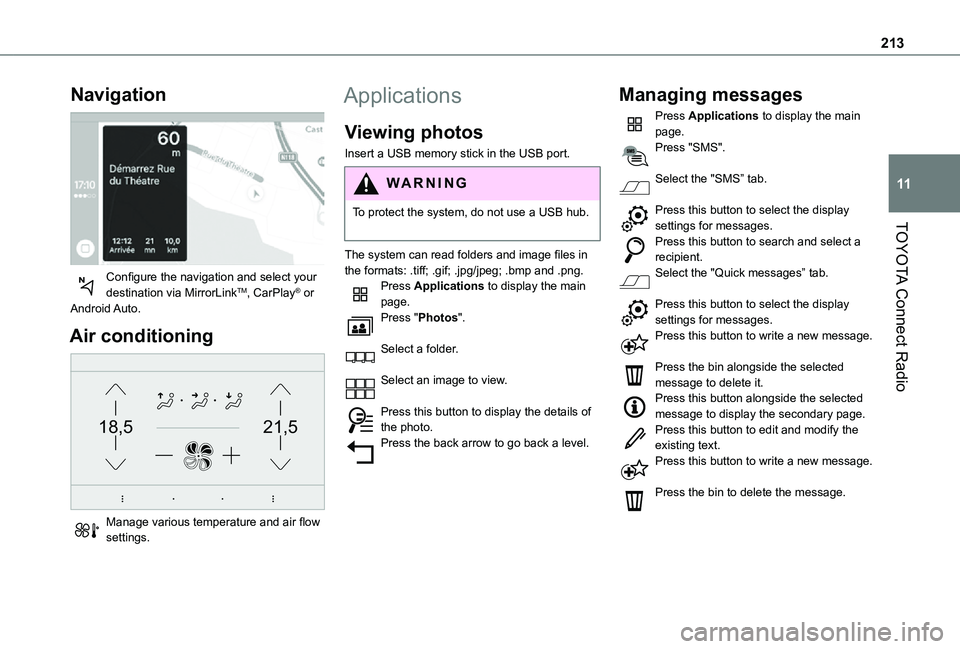
Navigation
Configure the navigation and select your destination via MirrorLinkTM, CarPlay® or Android Auto.
Air conditioning
21,518,5
Manage various temperature and air flow settings.
Applications
Viewing photos
Insert a USB memory stick in the USB port.
WARNI NG
To protect the system, do not use a USB hub.
The system can read folders and image files in the formats: .tiff; .gif; .jpg/jpeg; .bmp and .png.Press Applications to display the main page.Press "Photos".
Select a folder.
Select an image to view.
Press this button to display the details of the photo.Press the back arrow to go back a level.
Managing messages
Press Applications to display the main page.Press "SMS".
Select the "SMS” tab.
Press this button to select the display settings for messages.Press this button to search and select a recipient.Select the "Quick messages” tab.
Press this button to select the display settings for messages.Press this button to write a new message.
Press the bin alongside the selected message to delete it.Press this button alongside the selected message to display the secondary page.Press this button to edit and modify the
existing text.Press this button to write a new message.
Press the bin to delete the message.
Page 217 of 272
217
TOYOTA Connect Radio
11
Information and advice
The system supports USB mass storage devices, BlackBerry® devices or Apple® players via the USB ports. The adapter cable is not supplied.Devices are managed using the audio system controls.Other devices, not recognised on connection, must be connected to the auxiliary socket using a jack cable (not supplied) or via Bluetooth streaming, if compatible.
WARNI NG
To protect the system, do not use a USB hub.
The audio system will only play audio files with ".wav", ".wma", ".aac", ".ogg" and ".mp3" file extensions, at bit rates between 32 Kbps and 320 Kbps.It also supports VBR (Variable Bit Rate) mode.No other file types (".mp4", etc.) can be read.All ".wma" files must be standard WMA 9 files.The supported sampling rates are 11, 22, 44 and 48 KHz.To avoid reading and display problems, we recommend choosing file names less than 20 characters long that do not contain any special characters (e.g. “ ? . ; ù).Use only USB memory sticks in FAT32 format (File Allocation Table).
NOTIC E
We recommend using the original USB cable for the portable device.
Telephone
USB sockets
Depending on equipment, for more information on the USB sockets compatible with the CarPlay®, MirrorLinkTM or Android Auto applications, refer to the "Ease of use and comfort" section.
NOTIC E
The synchronisation of a smartphone allows users to display applications adapted to the CarPlay®, MirrorLinkTM or Android Auto technology of the smartphone on the vehicle screen. For the CarPlay® technology, the CarPlay® function must be activated on the smartphone beforehand.For the communication process between the smartphone and the system to work, it is essential in all cases that the smartphone is unlocked.As the principles and standards are constantly changing, it is recommended that you keep the smartphone's operating
system up-to-date, as well as the date and time of the smartphone and of the system.For the list of eligible smartphones, go to the Brand's national website.
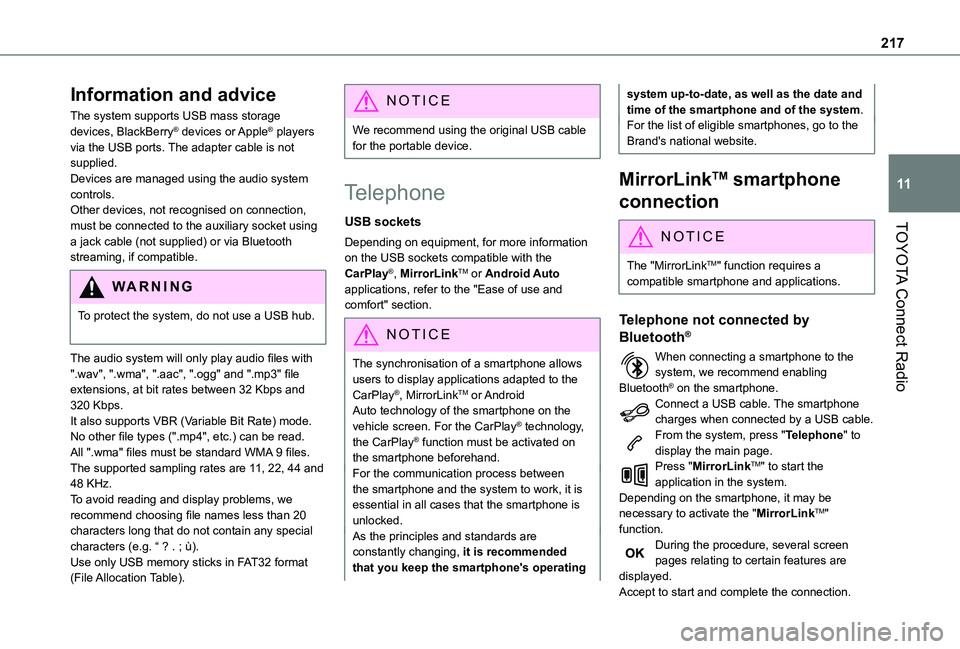
MirrorLinkTM smartphone
connection
NOTIC E
The "MirrorLinkTM" function requires a compatible smartphone and applications.
Telephone not connected by
Bluetooth®
When connecting a smartphone to the system, we recommend enabling Bluetooth® on the smartphone.Connect a USB cable. The smartphone charges when connected by a USB cable.From the system, press "Telephone" to display the main page.Press "MirrorLinkTM" to start the application in the system.Depending on the smartphone, it may be necessary to activate the "MirrorLinkTM" function.During the procedure, several screen pages relating to certain features are displayed.Accept to start and complete the connection.
Page 218 of 272
218
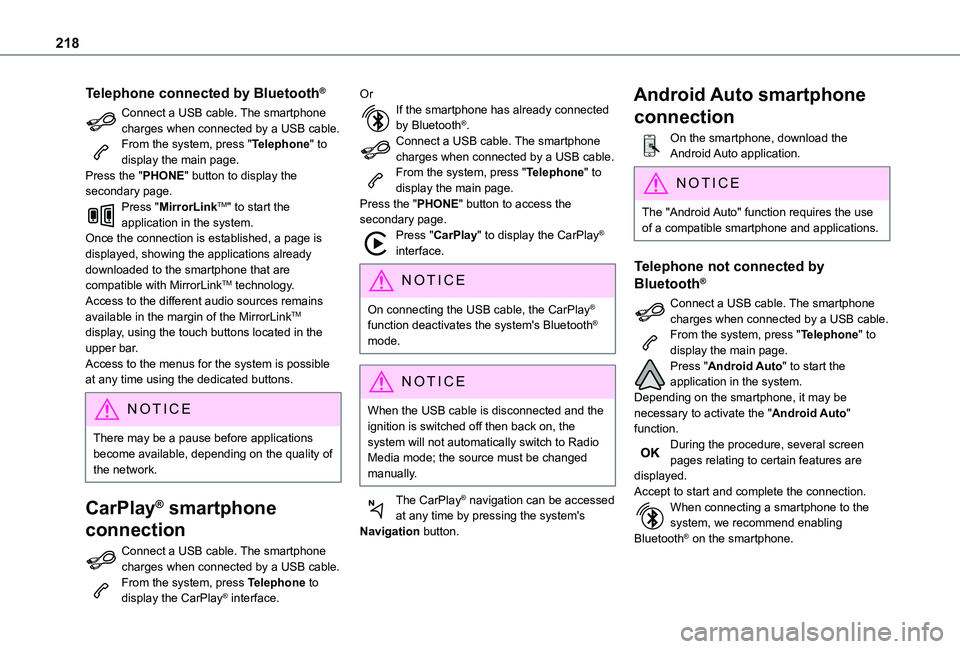
Telephone connected by Bluetooth®
Connect a USB cable. The smartphone charges when connected by a USB cable.From the system, press "Telephone" to display the main page.Press the "PHONE" button to display the secondary page.Press "MirrorLinkTM" to start the application in the system.Once the connection is established, a page is displayed, showing the applications already downloaded to the smartphone that are compatible with MirrorLinkTM technology.Access to the different audio sources remains available in the margin of the MirrorLinkTM display, using the touch buttons located in the upper bar.Access to the menus for the system is possible at any time using the dedicated buttons.
NOTIC E
There may be a pause before applications become available, depending on the quality of the network.
CarPlay® smartphone
connection
Connect a USB cable. The smartphone charges when connected by a USB cable.From the system, press Telephone to display the CarPlay® interface.
OrIf the smartphone has already connected by Bluetooth®.Connect a USB cable. The smartphone charges when connected by a USB cable.From the system, press "Telephone" to display the main page.Press the "PHONE" button to access the secondary page.Press "CarPlay" to display the CarPlay® interface.
NOTIC E
On connecting the USB cable, the CarPlay® function deactivates the system's Bluetooth® mode.
NOTIC E
When the USB cable is disconnected and the ignition is switched off then back on, the system will not automatically switch to Radio Media mode; the source must be changed manually.
The CarPlay® navigation can be accessed at any time by pressing the system's Navigation button.
Android Auto smartphone
connection
On the smartphone, download the Android Auto application.
NOTIC E
The "Android Auto" function requires the use of a compatible smartphone and applications.
Telephone not connected by
Bluetooth®
Connect a USB cable. The smartphone charges when connected by a USB cable.From the system, press "Telephone" to display the main page.Press "Android Auto" to start the application in the system.Depending on the smartphone, it may be necessary to activate the "Android Auto" function.During the procedure, several screen pages relating to certain features are displayed.Accept to start and complete the connection.When connecting a smartphone to the system, we recommend enabling Bluetooth® on the smartphone.