2021 TOYOTA PROACE CITY tow
[x] Cancel search: towPage 63 of 272
63
Ease of use and comfort
3
Deactivating the system
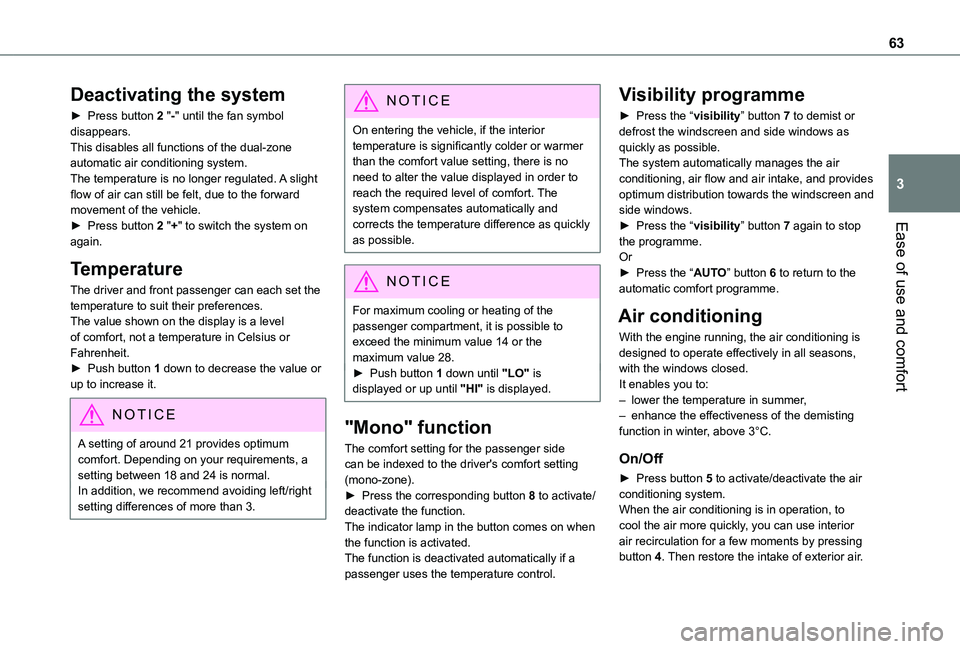
► Press button 2 "-" until the fan symbol disappears.This disables all functions of the dual-zone automatic air conditioning system.The temperature is no longer regulated. A slight flow of air can still be felt, due to the forward movement of the vehicle.► Press button 2 "+" to switch the system on again.
Temperature
The driver and front passenger can each set the temperature to suit their preferences.The value shown on the display is a level of comfort, not a temperature in Celsius or Fahrenheit.► Push button 1 down to decrease the value or up to increase it.
NOTIC E
A setting of around 21 provides optimum
comfort. Depending on your requirements, a setting between 18 and 24 is normal.In addition, we recommend avoiding left/right setting differences of more than 3.
NOTIC E
On entering the vehicle, if the interior temperature is significantly colder or warmer than the comfort value setting, there is no need to alter the value displayed in order to reach the required level of comfort. The system compensates automatically and corrects the temperature difference as quickly as possible.
NOTIC E
For maximum cooling or heating of the passenger compartment, it is possible to exceed the minimum value 14 or the maximum value 28.► Push button 1 down until "LO" is displayed or up until "HI" is displayed.
"Mono" function
The comfort setting for the passenger side can be indexed to the driver's comfort setting (mono-zone).► Press the corresponding button 8 to activate/deactivate the function.The indicator lamp in the button comes on when the function is activated.The function is deactivated automatically if a passenger uses the temperature control.
Visibility programme
► Press the “visibility” button 7 to demist or defrost the windscreen and side windows as quickly as possible. The system automatically manages the air conditioning, air flow and air intake, and provides optimum distribution towards the windscreen and side windows.► Press the “visibility” button 7 again to stop the programme.Or► Press the “AUTO” button 6 to return to the automatic comfort programme.
Air conditioning
With the engine running, the air conditioning is designed to operate effectively in all seasons, with the windows closed.It enables you to:– lower the temperature in summer,– enhance the effectiveness of the demisting function in winter, above 3°C.
On/Off
► Press button 5 to activate/deactivate the air conditioning system.When the air conditioning is in operation, to cool the air more quickly, you can use interior air recirculation for a few moments by pressing button 4. Then restore the intake of exterior air.
Page 64 of 272
64
NOTIC E
The air conditioning does not operate when the air flow adjustment is set to off.
WARNI NG
Switching the system off could result in discomfort (humidity, misting).
Air distribution
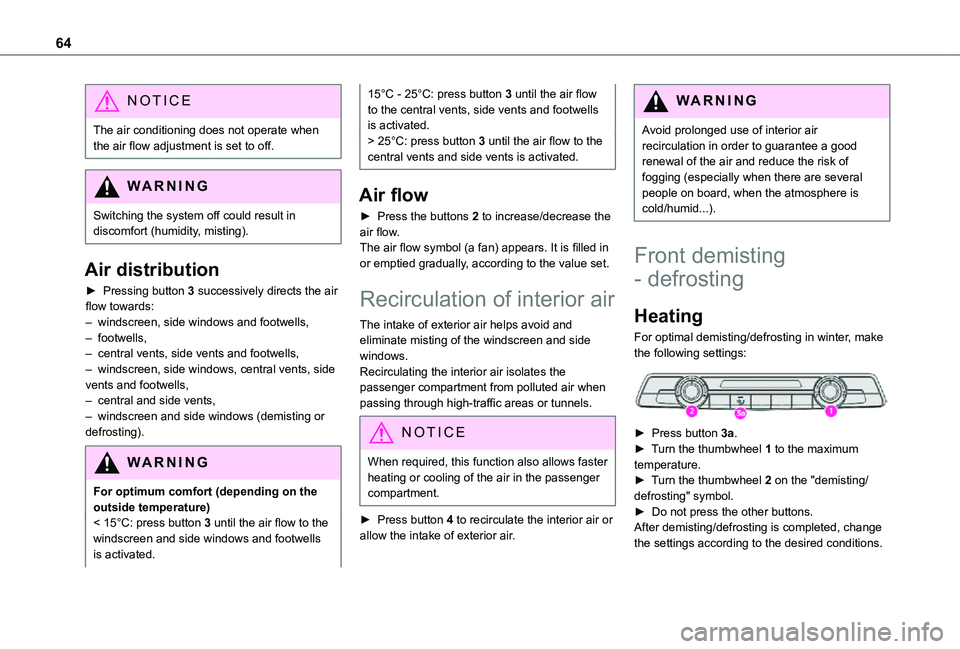
► Pressing button 3 successively directs the air flow towards:– windscreen, side windows and footwells, – footwells,– central vents, side vents and footwells,– windscreen, side windows, central vents, side vents and footwells,– central and side vents, – windscreen and side windows (demisting or defrosting).
WARNI NG
For optimum comfort (depending on the outside temperature)< 15°C: press button 3 until the air flow to the windscreen and side windows and footwells is activated.
15°C - 25°C: press button 3 until the air flow to the central vents, side vents and footwells is activated.> 25°C: press button 3 until the air flow to the central vents and side vents is activated.
Air flow
► Press the buttons 2 to increase/decrease the air flow.The air flow symbol (a fan) appears. It is filled in or emptied gradually, according to the value set.
Recirculation of interior air
The intake of exterior air helps avoid and eliminate misting of the windscreen and side windows.Recirculating the interior air isolates the passenger compartment from polluted air when passing through high-traffic areas or tunnels.
NOTIC E
When required, this function also allows faster heating or cooling of the air in the passenger compartment.
► Press button 4 to recirculate the interior air or allow the intake of exterior air.
WARNI NG
Avoid prolonged use of interior air recirculation in order to guarantee a good renewal of the air and reduce the risk of fogging (especially when there are several people on board, when the atmosphere is cold/humid...).
Front demisting
- defrosting
Heating
For optimal demisting/defrosting in winter, make the following settings:
► Press button 3a.► Turn the thumbwheel 1 to the maximum temperature.► Turn the thumbwheel 2 on the "demisting/defrosting" symbol.► Do not press the other buttons.After demisting/defrosting is completed, change the settings according to the desired conditions.
Page 65 of 272
65
Ease of use and comfort
3
Manual air conditioning
For defogging/non-fogging in case of high humidiy or a large temperature difference between the inside and outside of the vehicle, make the following settings:
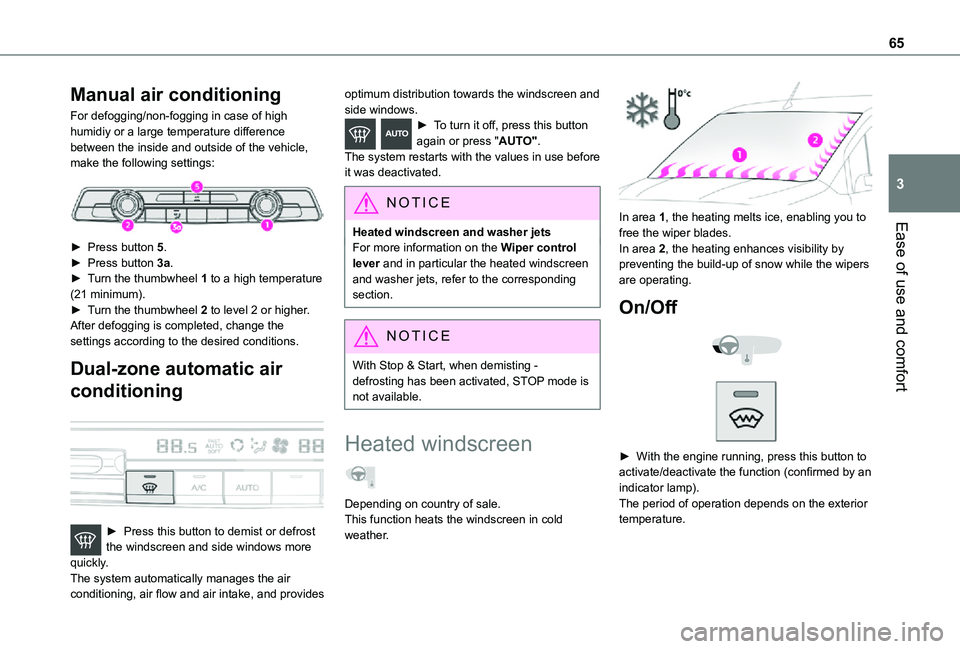
► Press button 5.► Press button 3a.► Turn the thumbwheel 1 to a high temperature (21 minimum).► Turn the thumbwheel 2 to level 2 or higher.After defogging is completed, change the settings according to the desired conditions.
Dual-zone automatic air
conditioning
► Press this button to demist or defrost the windscreen and side windows more quickly.The system automatically manages the air conditioning, air flow and air intake, and provides
optimum distribution towards the windscreen and side windows.► To turn it off, press this button again or press "AUTO".The system restarts with the values in use before it was deactivated.
NOTIC E
Heated windscreen and washer jetsFor more information on the Wiper control lever and in particular the heated windscreen and washer jets, refer to the corresponding section.
NOTIC E
With Stop & Start, when demisting - defrosting has been activated, STOP mode is not available.
Heated windscreen
Depending on country of sale.This function heats the windscreen in cold weather.
In area 1, the heating melts ice, enabling you to free the wiper blades.
In area 2, the heating enhances visibility by preventing the build-up of snow while the wipers are operating.
On/Off
► With the engine running, press this button to activate/deactivate the function (confirmed by an indicator lamp).The period of operation depends on the exterior temperature.
Page 75 of 272
75
Lighting and visibility
4
Wiper control lever
Programming
Your vehicle may also include some functions that can be activated/deactivated:– automatic windscreen wipers,– rear wiping on engaging reverse gear.
NOTIC E
In wintry conditions, remove snow, ice or frost present on the windscreen, around the wiper arms and blades and the windscreen seal, before operating the wipers.
WARNI NG
Do not operate the wipers on a dry windscreen. Under extremely hot or cold conditions, ensure that the wiper blades are not stuck to the windscreen before operating the wipers.
Manual controls
The wipers are controlled directly by the driver.
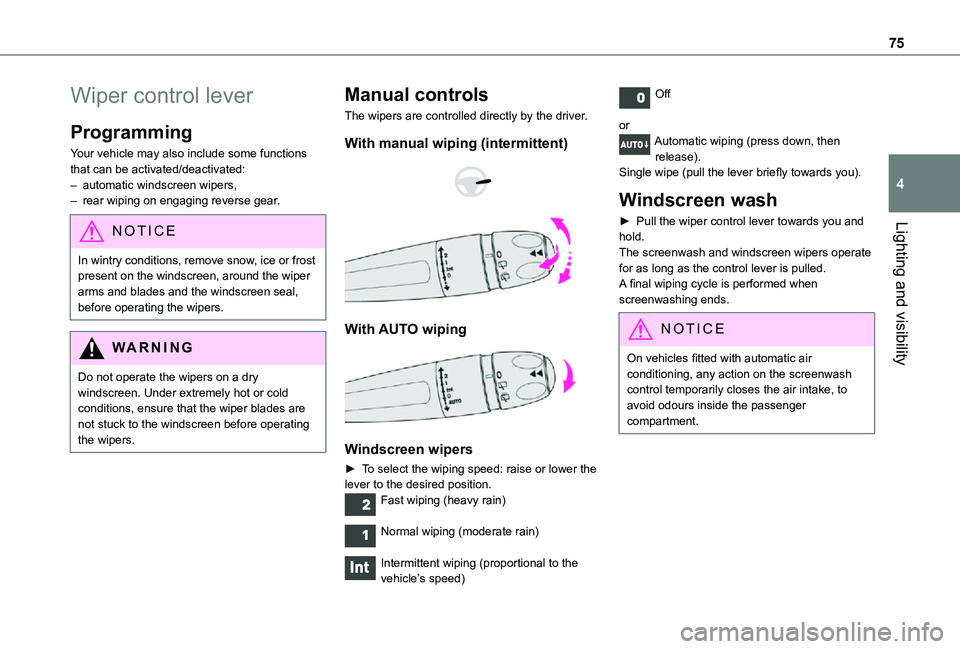
With manual wiping (intermittent)
With AUTO wiping
Windscreen wipers
► To select the wiping speed: raise or lower the lever to the desired position.Fast wiping (heavy rain)
Normal wiping (moderate rain)
Intermittent wiping (proportional to the vehicle’s speed)
Off
orAutomatic wiping (press down, then release).Single wipe (pull the lever briefly towards you).
Windscreen wash
► Pull the wiper control lever towards you and hold.The screenwash and windscreen wipers operate for as long as the control lever is pulled.A final wiping cycle is performed when screenwashing ends.
NOTIC E
On vehicles fitted with automatic air conditioning, any action on the screenwash control temporarily closes the air intake, to avoid odours inside the passenger compartment.
Page 84 of 272
84
Turn the thumbwheel to this position.
The indicator lamp in the button or thumbwheel goes off.
Malfunction
In the event of a system malfunction, this warning lamp comes on, accompanied by an onscreen message and audible signal.Contact a TOYOTA dealer or a qualified workshop to have the systems checked.
WARNI NG
ASR / DSCThese systems enhance safety during normal driving, but should not encourage the driver to take extra risks or drive at high speed.It is in conditions of reduced grip (rain, snow, ice) that the risk of loss of grip increases. It is therefore important for your safety to keep these systems activated in all conditions, and particularly in difficult conditions.
Correct operation of these systems depends on compliance with the manufacturer's recommendations relating to the wheels (tyres and rims), braking and electronic components, as well as the assembly and repair procedures used by TOYOTA dealers.The use of snow tyres is recommended, to ensure that these systems remain effective in winter conditions. All four wheels must be fitted with tyres approved for the vehicle.
Trailer stability assist (TSA)
When towing, this system reduces the risk of the vehicle or trailer snaking.
Operation
The system is activated automatically when the ignition is switched on.The electronic stability control system (ESC) must not have any faults.At speeds between 60 and 160 km/h (37 and 99 mph), if the system detects oscillating trailer movements (snaking), it acts on the brakes to stabilise the trailer and, if necessary, reduces engine power to slow the vehicle.This warning lamp flashes on the instrument panel and the brake lamps light up to draw attention to this corrective action.For information on weights and towed loads, refer to the Engine Technical Data and Towed Loads section or your vehicle’s registration certificateTo ensure safe driving with a Towing device,
refer to the corresponding section.
Malfunction
If a fault occurs, this warning lamp comes on in the instrument panel, accompanied by a message and an audible signal.If you wish to continue towing a trailer, reduce your speed and drive carefully!Contact a TOYOTA dealer or a qualified workshop to have the system checked.
WARNI NG
The trailer stability assist system offers enhanced safety in normal driving, provided that the recommendations on towing a trailer are observed. It should not encourage the driver to take risks, such as towing a trailer in adverse operating conditions (overloading, failure to observe the trailer nose weight, worn or under-inflated tyres, faulty braking system, etc.), or to drive at excessive speeds.In certain cases, the system may not detect trailer snaking, particularly with a light trailer.When driving on slippery or poor surfaces, the system may not be able to prevent sudden trailer snaking.
Page 90 of 272
90
Airbags
System designed to contribute towards improving the safety of the occupants (with the exception of the centre seat in row 2) in the event of violent collisions.The airbags supplement the action of the force-limiting seat belts.If a collision occurs, the electronic detectors record and analyse the front and side impacts sustained in the impact detection zones:– in the event of a serious impact, the airbags are deployed instantly and contribute towards better protection of the occupants (with the exception of the centre seat in row 2); immediately after the impact, the airbags deflate rapidly so that they do not hinder visibility or the exit of the occupants,– in the case of a minor or rear impact or in certain rollover conditions, the airbags may not be deployed; the seat belt alone contributes towards ensuring your protection in these situations.
WARNI NG
The airbags do not operate when the ignition is switched off.This equipment will only deploy once. If a second impact occurs (during the same or a subsequent accident), the airbag will not be deployed again.
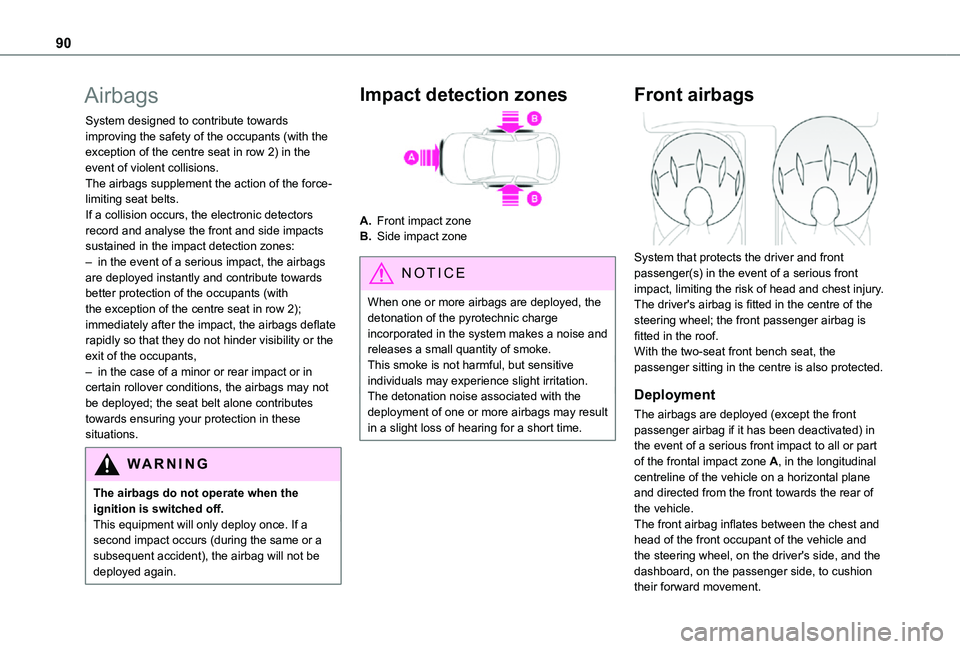
Impact detection zones
A.Front impact zone
B.Side impact zone
NOTIC E
When one or more airbags are deployed, the detonation of the pyrotechnic charge incorporated in the system makes a noise and releases a small quantity of smoke.This smoke is not harmful, but sensitive individuals may experience slight irritation.The detonation noise associated with the deployment of one or more airbags may result in a slight loss of hearing for a short time.
Front airbags
System that protects the driver and front passenger(s) in the event of a serious front impact, limiting the risk of head and chest injury.The driver's airbag is fitted in the centre of the steering wheel; the front passenger airbag is fitted in the roof.With the two-seat front bench seat, the passenger sitting in the centre is also protected.
Deployment
The airbags are deployed (except the front passenger airbag if it has been deactivated) in the event of a serious front impact to all or part of the frontal impact zone A, in the longitudinal centreline of the vehicle on a horizontal plane and directed from the front towards the rear of the vehicle.The front airbag inflates between the chest and head of the front occupant of the vehicle and
the steering wheel, on the driver's side, and the dashboard, on the passenger side, to cushion their forward movement.
Page 91 of 272
91
Safety
5
WARNI NG
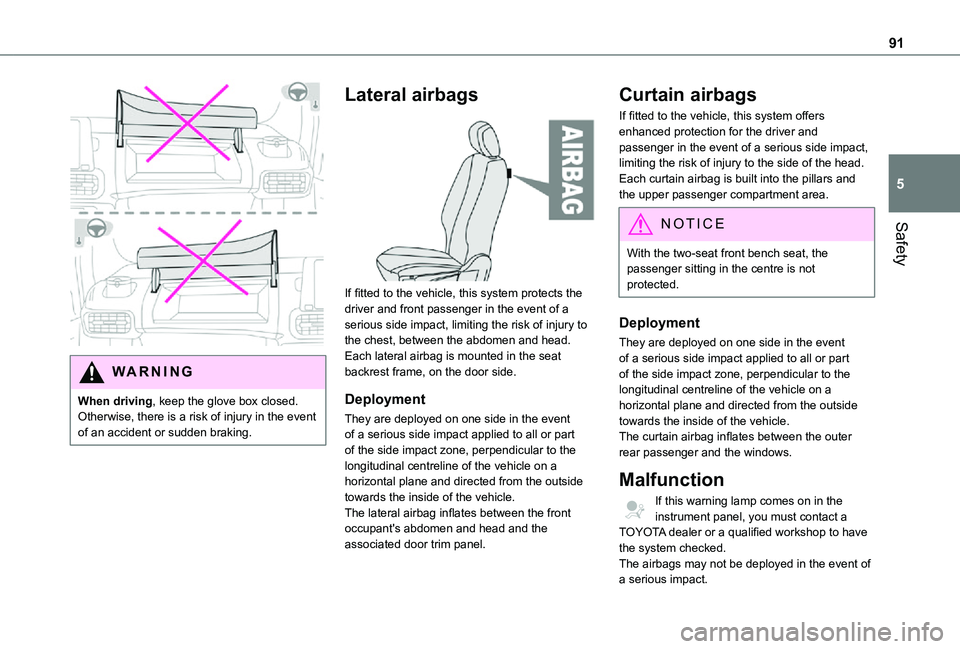
When driving, keep the glove box closed. Otherwise, there is a risk of injury in the event of an accident or sudden braking.
Lateral airbags
If fitted to the vehicle, this system protects the driver and front passenger in the event of a serious side impact, limiting the risk of injury to the chest, between the abdomen and head.Each lateral airbag is mounted in the seat backrest frame, on the door side.
Deployment
They are deployed on one side in the event of a serious side impact applied to all or part
of the side impact zone, perpendicular to the longitudinal centreline of the vehicle on a horizontal plane and directed from the outside towards the inside of the vehicle.The lateral airbag inflates between the front occupant's abdomen and head and the associated door trim panel.
Curtain airbags
If fitted to the vehicle, this system offers enhanced protection for the driver and passenger in the event of a serious side impact, limiting the risk of injury to the side of the head.Each curtain airbag is built into the pillars and the upper passenger compartment area.
NOTIC E
With the two-seat front bench seat, the passenger sitting in the centre is not protected.
Deployment
They are deployed on one side in the event of a serious side impact applied to all or part of the side impact zone, perpendicular to the longitudinal centreline of the vehicle on a horizontal plane and directed from the outside towards the inside of the vehicle.The curtain airbag inflates between the outer rear passenger and the windows.
Malfunction
If this warning lamp comes on in the instrument panel, you must contact a TOYOTA dealer or a qualified workshop to have the system checked.The airbags may not be deployed in the event of a serious impact.
Page 93 of 272
93
Safety
5
WARNI NG
Curtain airbagsDo not fix or attach anything to the roof, as this could cause head injuries when the curtain airbag is deployed.Do not remove the grab handles installed on the roof, as they play a part in securing the curtain airbags.
Child seats
NOTIC E
The regulations on carrying children are specific to each country. Refer to the legislation in force in your country.
For maximum safety, please observe the following recommendations:– In accordance with European regulations, all children under the age of 12 or less than 150 cm (4 ft 11”) tall must travel in approved child seats suited to their weight, on seats fitted with a seat belt or ISOFIX mountings.– Statistically, the safest seats in your vehicle for carrying children are the rear seats.– Children weighing less than 9 kg (20 lb) must travel in the "rear facing" position, whether in the front or rear of the vehicle.
NOTIC E
It is recommended that children travel on the rear seats of the vehicle:– ‘rear facing’ up to the age of 3,– ‘forward facing’ over the age of 3.
WARNI NG
Make sure that the seat belt is correctly positioned and tightened.For child seats with a support leg, ensure that the support leg is in firm and steady contact with the floor.
WARNI NG
Remove and stow the head restraint before installing a child seat with backrest on a passenger seat. Refit the head restraint once the child seat has been removed.
Advice
WARNI NG
An incorrectly installed child seat compromises the child's safety in the event of an accident.Ensure that there is no seat belt or seat belt buckle under the child seat, as this could destabilise it.
Remember to fasten the seat belts or the harness of child seats, keeping the slack relative to the child's body to a minimum, even for short journeys.When installing a child seat using the seat belt, ensure that the seat belt is tightened correctly on the child seat and that it secures the child seat firmly on the seat of the vehicle. If the passenger seat is adjustable, move it forwards if necessary.Remove the head restraint before installing a child seat with a backrest on a passenger seat.Ensure that the head restraint is stored or attached securely to prevent it from being thrown around the vehicle in the event of sharp braking. Refit the head restraint once the child seat has been removed.